manuals.online logo
Brands
  1. Home
  2. •
  3. Brands
  4. •
  5. Acer
  6. •
  7. Mouse
  8. •
  9. Acer AMR030 User manual

Acer AMR030 User manual

PORSCHE DESIGN
|
ACER MOUSE RS
Quick Start Guide
|
Kurzanleitung
|
Guide de démarrage rapide
Guida rapida all'avvio
|
Guía de inicio rápido
|
Краткое руководство
  
|
Guía de inicio rápido
|
快速入門指南
快速入门指南
|
Panduan Ringkas
|

Guia de Início Rápido
|
Guia de Início Rápido
|
Короткий посібник користувача
1
English
Package Contents
• Bluetooth & Wireless mouse x 1
• Quick start guide x 1
• Warranty booklet x 1
• Battery x 2
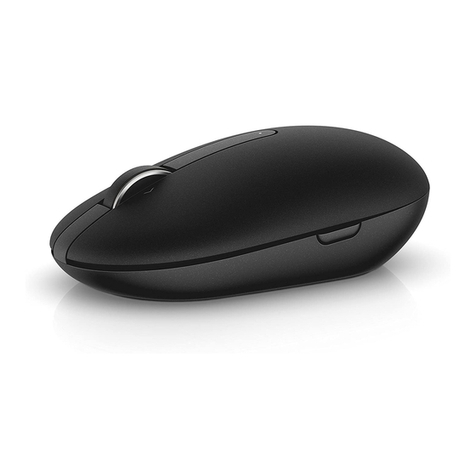
Device Overview
1. Le button
2. Scroll wheel (3D)
3. Right button
4. Nano USB receiver
5. LED indicator
6. Optical sensor
7. Bluetooth button (mode switch)
8. USB receiver holder
9. Battery compartments
Turn the mouse on
1. Open the battery compartment cover at the back of the mouse.
2. Install 2 AAA batteries into the battery compartments.
3. Replace the cover.
4. The mouse is automatically ON.
WARNING
Make sure that the positive and negative ends are positioned correctly as labeled on the battery compartment.
Connect your mouse
• Using the Nano USB receiver
Plug the Nano USB receiver into your computer’s USB Type-A port. Now you are ready to use
the mouse.
NOTE
It’s Plug & Play connectivity, no drivers required. Make sure the distance between your computer and
mouse is within 10 meters.
• Pairing your mouse with Bluetooth
1. Press and hold the Bluetooth button at the back of your mouse for 2 seconds to switch to
Bluetooth mode and start the initial pairing process. Press and hold the Bluetooth button for
5 seconds will start the pairing process again (or pairing with new device).
2. The LED starts to ash blue indicating that the mouse is in Bluetooth mode and ready to pair.
3. Start the Bluetooth pairing wizard on your computer and follow the instructions.
NOTE
- Once your mouse is paired successfully, you do not need to pair it again when using the mouse next time.
- If the pairing is unsuccessfully, your mouse will enter Sleep mode aer ashing blue about 3 minutes.
Please repeat step 1-3 above to restart the pairing process.
1 2 3
4
5
6
7
8
9
2
English
Mode switch
Press the Bluetooth button for 2 seconds to toggle your mouse between Wireless and
Bluetooth mode. LED ashes blue for 3 seconds indicating that the mouse is in Bluetooth
mode. LED ashes red for 3 seconds indicating mouse is in Wireless mode.
DPI switch
You can cycle through the DPI options by repeatedly pressing Bluetooth button for 1 second.
There are three available options for selection: 800/1600/3200.
Low battery notication
When the battery level is low, the ashing red will stay on if the mouse is in use. Aer stopping
using the mouse, the LED ashes red for 10 seconds and then o.
NOTE
The mouse will maintain a low current consumption when entering Sleep mode. It is recommended to
remove batteries if the mouse will not be used for an extended period.
Specications
• Model: AMR030
• Operation System: Windows® 7 or later
(Windows® 8 or later / Mac OS X or later
arerequired for BT feature)
• Bluetooth: 5.0 or later
• Connection Type: RF & BT
• Interface: USB Type-A port (Dongle)
• DPI: 800/1600/3200
• Weight: 92g ± 5g (with AAA battery x2)
• Dimensions (L x W x H):
114.3 x 60 x 27.36 mm
Caution
• Do not disassemble the device or operate the device under abnormal conditions.
• Do not submerge the device in water.
• If the device could not be functional, or there was thermal abnormal situation, please re-plug
in the USB.
• If you still encounter problems aer going through the corrective measures, please contact
your dealer or an authorized service center for assistance.
• For more information, please visit our website at www.acer.com.
Environment
Temperature:
• Operating: 5 °C to 40 °C
• Non-operating: -10 °C to 70 °C
Humidity (non-condensing):
• Operating: 10% to 60%
• Non-operating: 10% to 60%
Manufacturer address
Acer Inc.
8F, 88, Sec. 1, Xintai 5th Rd. Xizhi, New Taipei City 221, Taiwan
NOTE
All images and information in this document are for reference only and are subject to change without
notice. For the latest specication, please visit our ocial website: www.acer.com.
3
Deutsch
Lieferumfang
• Bluetooth & Drahtlose Maus x 1
• Kurzanleitung x 1
• Garantiehe x 1
• Batterien x 2
Geräte Übersicht
1. Linke Taste
2. Bildlaufrad (3D)
3. Rechte Taste
4. Nano USB-Empfänger
5. LED-Anzeige
6. Optischer Sensor
7. Bluetooth Taste (Modusschalter)
8. USB-Empfängerhalter
9. Batteriefächer
Maus einschalten
1. Önen Sie die Batteriefachabdeckung an der Rückseite der Maus.
2. Legen Sie 2 AAA Batterien in die Batteriefächer ein.
3. Bringen Sie die Abdeckung wieder an.
4. Die Maus wird automatisch EIN geschaltet.
WARNHINWEIS
Achten Sie auf die richtige Ausrichtung der Pole wie im Batteriefach angegeben.
Maus verbinden
• Verwendung des Nano USB-Empfängers
Schließen Sie den Nano USB-Empfänger an den USB Typ-A Anschluss Ihres Computers an.
Jetzt können Sie die Maus nutzen.
HINWEIS
Es ist Plug and Play Konnektivität, keine Treiber erforderlich. Stellen Sie sicher, dass derAbstand zwischen
Ihrem Computer und der Maus innerhalb von 10 Metern liegt.
• Maus mit Bluetooth koppeln
1. Halten Sie die Bluetooth Taste auf der Rückseite Ihrer Maus 2 Sekunden lang gedrückt, um
in den Bluetooth Modus zu wechseln und den erstmaligen Kopplungsvorgang zu starten.
Halten Sie die Bluetooth Taste 5 Sekunden lang gedrückt, um den Kopplungsvorgang erneut
zu starten (oder für die Kopplung mit einem neuen Gerät).
2. Die LED beginnt blau zu blinken und zeigt damit an, dass sich die Maus im Bluetooth Modus
bendet und für die Kopplung bereit ist.
3. Starten Sie den Bluetooth Kopplungsassistenten auf Ihrem Computer und folgen Sie den
Anweisungen.
1 2 3
4
5
6
7
8
9
4
Deutsch
HINWEIS
- Wenn Ihre Maus erfolgreich gekoppelt ist, brauchen Sie sie bei der nächsten Verwendung der Maus nicht
erneut zu koppeln.
- Wenn die Kopplung nicht erfolgreich ist, wechselt Ihre Maus nach etwa 3 Minuten blauem Blinken in den
Schlafmodus. Bitte wiederholen Sie Schritt 1-3 oben, um den Kopplungsvorgang erneut zu starten.
Modusschalter
Drücken Sie die Bluetooth Taste 2 Sekunden lang, um die Maus zwischen dem drahtlosen und
dem Bluetooth Modus umzuschalten. Die LED blinkt 3 Sekunden lang blau und zeigt damit an,
dass sich die Maus im Bluetooth Modus bendet. Die LED blinkt 3 Sekunden lang rot und zeigt
damit an, dass sich die Maus im drahtlosen Modus bendet.
DPI-Schalter
Sie können die DPI Optionen durchlaufen, indem Sie die Bluetooth Taste wiederholt 1 Sekunde
lang drücken. Es stehen drei Optionen zur Auswahl: 800/1600/3200.
Benachrichtigung bei schwachem Akku
Wenn der Akkustand niedrig ist, blinkt die LED rot, wenn die Maus verwendet wird. Wenn Sie
die Maus nicht mehr benutzen, blinkt die LED 10 Sekunden lang rot und erlischt dann.
HINWEIS
Die Maus verbraucht auch im Schlafmodus etwas Strom. Es wird empfohlen, die Batterien zu entfernen,
wenn die Maus über einen längeren Zeitraum nicht benutzt wird.
Technische Daten
• Modell: AMR030
• Betriebssystem: Windows® 7 oder höher
(Windows® 8 oder höher / Mac OS X oder
höher sind für BT Funktion erforderlich)
• Bluetooth: 5.0 oder höher
• Verbindungstyp: RF & BT
• Schnittstelle: USB Typ-A Anschluss (Dongle)
• DPI: 800/1600/3200
• Gewicht: 92g ± 5g (mit AAA Batterie x2)
• Abmessungen (L x B x H):
114,3 x 60 x 27,36 mm
Vorsicht
• Nehmen Sie das Gerät nicht auseinander und betreiben Sie es nicht unter ungeeigneten
Bedingungen.
• Tauchen Sie das Gerät nicht in Wasser ein.
• Wenn das Gerät nicht funktionsfähig ist oder eine thermische Störung aurat, stecken Sie
bitte den USB-Stecker wieder ein.
• Sollten Sie nach dem Durchführen der Korrekturmaßnahmen weiterhin Probleme haben,
wenden Sie sich bitte an Ihren Händler oder ein autorisiertes Servicezentrum, um Hilfe zu
erhalten.
• Weitere Informationen nden Sie auf unserer Webseite www.acer.com.
5
Deutsch
Umgebung
Temperatur:
• Betrieb: 5 °C bis 40 °C
• Nichtbetrieb: -10 °C bis 70 °C
Lufeuchtigkeit (nicht kondensierend):
• Betrieb: 10% bis 60%
• Nichtbetrieb: 10% bis 60%
Adresse des Herstellers
Acer Inc.
8F, 88, Sec. 1, Xintai 5th Rd. Xizhi, New Taipei City 221, Taiwan
HINWEIS
Sämtliche Bilder und Informationen in diesem Dokument sind nur als Referenz gedacht und können ohne
vorherige Ankündigung geändert werden. Bitte besuchen Sie unsere ozielle Webseite, um die neuesten
Spezikation zu erfahren: www.acer.com.
6
Français
Contenu de l’emballage
• Souris Bluetooth et sans l x 1
• Guide de démarrage rapide x 1
• Livret de garantie x 1
• Pile x 2
Présentation de l’appareil
1. Bouton gauche
2. Molette de délement (3D)
3. Bouton droit
4. Récepteur Nano USB
5. Témoin à diode
6. Capteur optique
7. Bouton Bluetooth
(changement de mode)
8. Support de récepteur USB
9. Compartiments des piles
Allumer la souris
1. Ouvrez le couvercle des compartiments des piles à l’arrière de la souris.
2. Installez deux piles AAA/LR03 dans les compartiments des piles.
3. Remettez le couvercle en place.
4. La souris est automatiquement allumée.
AVERTISSEMENT
Assurez-vous que les extrémités positive et négative sont correctement positionnées comme indiqué sur le
compartiment de la pile.
Connecter votre souris
• Utiliser le récepteur Nano USB
Branchez le récepteur Nano USB sur le port USB de type A de votre ordinateur. Vous êtes
maintenant prêt à utiliser la souris.
REMARQUE
C’est une connectivité Plug-and-Play, sans pilote. Assurez-vous que la distance entre votre ordinateur et la
souris est inférieure à 10 mètres.
• Associer votre souris à Bluetooth
1. Appuyez et maintenez le bouton Bluetooth au dos de votre souris pendant 2 secondes
pour passer en mode Bluetooth et lancer le processus d’association initial. Appuyez et
maintenez le bouton Bluetooth pendant 5 secondes pour relancer le processus d’association
(oul’association avec un nouvel appareil).
2. La diode commence à clignoter en bleu, indiquant que la souris est en mode Bluetooth et
prête à être associée.
3. Démarrez l’assistant d’association Bluetooth sur votre ordinateur et suivez les instructions.
1 2 3
4
5
6
7
8
9
7
Français
REMARQUE
- Une fois votre souris associée avec succès, vous n'avez pas besoin de l’associer à nouveau lors de la
prochaine utilisation de la souris.
- En cas d’échec de l’association, votre souris passe en mode veille après avoir clignoté en bleu pendant
environ 3 minutes. Veuillez répéter les étapes 1 à 3 ci-dessus pour relancer le processus d’association
Changement de mode
Appuyez le bouton Bluetooth pendant 2 secondes pour faire basculer votre souris entre le
mode sans l et le mode Bluetooth. La diode clignote en bleu pendant 3 secondes, indiquant
que la souris est en mode Bluetooth. La diode clignote en rouge pendant 3 secondes, indiquant
que la souris est en mode sans l.
Commutateur PPP
Vous pouvez passer entre les options DPI en appuyant plusieurs fois le bouton Bluetooth
pendant 1 seconde. Trois options sont disponibles pour la sélection: 800/1600/3200.
Notication de piles faibles
Lorsque le niveau des piles est faible, le rouge clignotant reste allumé si la souris est utilisée.
Après avoir cessé d’utiliser la souris, la diode clignote en rouge pendant 10 secondes, puis
s’éteint.
REMARQUE
La souris maintient une faible consommation électrique lorsqu’elle entre en mode veille. Il est
recommandé de retirer les piles si la souris n’est pas utilisée pendant une période prolongée.
Caractéristiques
• Modèle : AMR030
• Système d’exploitation : Windows® 7 ou
version ultérieure (Windows® 8 ou version
ultérieure / Mac OS X ou version ultérieure
sont nécessaire pour la fonction Bluetooth)
• Bluetooth: 5.0 ou version ultérieure
• Type de connexion : RF et BT
• Interface : Port USB de type A (dongle)
• PPP : 800/1600/3200
• Poids: 92g ± 5g (avec 2 piles AAA/LR03)
• Dimensions (Lo x La x H) :
114,3 x 60 x 27,36 mm
Attention
• Ne démontez pas l’appareil et n’utilisez pas l’appareil dans des conditions anormales.
• Ne plongez pas l’appareil dans l’eau.
• Si l’appareil ne fonctionne pas ou s’il y a eu une situation anormale, veuillez rebrancher l’USB.
• Si vous avez toujours des problèmes après avoir passé en revue les mesures correctrices,
veuillez contacter votre revendeur ou un centre de service agréé.
• Pour plus d’informations, veuillez visiter notre site Web sur www.acer.com.

8
Français
Environnement
Température:
• En marche : 5 °C à 40 °C
• À l’arrêt : -10 °C à 70 °C
Humidité (sans condensation):
• En marche : 10% à 60%
• À l’arrêt : 10% à 60%
Adresse du fabricant
Acer Inc.
8F, 88, Sec. 1, Xintai 5th Rd. Xizhi, New Taipei City 221, Taiwan
REMARQUE
Toutes les images et informations contenues dans ce document sont fournies à titre indicatif et sont
susceptibles d’être modiées sans préavis. Pour les dernières spécications, veuillez visiter notre site
ociel: www.acer.com.
9
Italiano
Contenuto della confezione
• 1 mouse wireless e Bluetooth
• 1 Guida rapida all’avvio
• 1 garanzia
• 2 batterie
Panoramica dispositivo
1. Pulsante Sinistro
2. Rotellina di scorrimento (3D)
3. Pulsante Destro
4. Ricevitore nano USB
5. Indicatore LED
6. Sensore ottico
7. Tasto Bluetooth
(interruttore modalità)
8. Scomparto ricevitore USB
9. Alloggiamento batterie
Per accendere il mouse
1. Aprire il coperchio dello scomparto batteria nella parte posteriore del mouse
2. Inserire due batterie AAA nell'alloggiamento della batteria.
3. Riposizionare il coperchio.
4. Il mouse si accende automaticamente
AVVISO
Vericare che i poli positivo e negativo siano posizionati correttamente come indicato nell'alloggiamento
batterie.
Connettere il mouse
• usando il ricevitore nano USB
Inserire il ricevitore nano USB nalla porta USB Type-A del computer. Ora è possibile usare il mouse.
NOTA
Connettività Plug and Play, nessun driver richiesto. Vericare che mouse e computer non si trovino a più di
10 metri di distanza.
• Associazione del mouse con il Bluetooth
1. Tenere premuto per 2 secondi il tasto Bluetooth presente nella parte posteriore del mouse
per passare alla modalità Bluetooth e iniziare il processo di associazione. Tenere premuto per
5 secondi il tasto Bluetooth per avviare di nuovo il processo di associazione (o per associare
un nuovo dispositivo).
2. L'indicatore LED inizia a lampeggiare per indicare che il mouse è in modalità Bluetooth ed è
pronto per l'associazione.
3. Avviare la procedura guidata per l'associazione Bluetooth sul computer e seguire le
istruzioni.
1 2 3
4
5
6
7
8
9
10
Italiano
NOTA
- Una volta completata l'associazione, non deve essere eseguita di nuova la volta seguente che si usa il
mouse.
- Se l'associazione non viene completata, il mouse passa in modalità Sospensione dopo avere lampeggiato di
colore blù per circa 3 minuti. Ripetere i passaggi da 1 a 3 sorpa per riavviare il processo di associazione.
Interruttore modalità
Premere il tasto Bluetooth per 2 secondi per passare il mouse dalla modalità Wireless a quella
Bluetooth e viceversa. Il LED lampeggia di colore blù per 3 secondi per indicare che il mouse si
trova in modalità Bluetooth. Il LED lampeggia di colore rosso per 3 secondi per indicare che si
trova in modalità Wireless.
Interruttore DPI
È possibile scorrere le opzioni DPI premendo ripetutamente il tasto Bluetooht per 1 secondo.
Èpossibile selezionare tre opzioni: 800/1600/3200.
Notica batteria in esaurimento
Quando il livello di carica della batteria è basso, l'indicatore rosso rimane acceso se si sta
usando il mouse. Una volta interrotto l'uso del mouse, il LED lampeggia per 10 secondi e poi si
spegne.
NOTA
Quando il mouse si trova in modalità Sospensione riduce il consumo di corrente. Si consiglia di togliere le
batterie se il mouse non viene utilizzato per un periodo di tempo prolungato.
Speciche
• Modello: AMR030
• Sistema operativo: Windows® 7 o successivo
(Windows® 8 o successivo / Mac OS X o
successivo sono richiesti per lafunzione BT)
• Bluetooth: 5.0 o successivo
• Tipo di connessione: RF e BT
• Interfaccia: Porta USB Type-A (Dongle)
• DPI: 800/1600/3200
• Peso: 92g ± 5g (con 2 batterie AAA)
• Dimensioni (L x P x H):
114,3 x 60 x 27,36 mm
Attenzione
• Non smontare o utilizzare il dispositivo in condizioni anomale.
• Non immergere il dispositivo in acqua.
• Se il dispositivo non funziona o si presentano anomalie termiche, scollegare e collegare l'USB.
• Se i problemi persistono dopo avere adottato le azioni correttive consigliate, mettersi in
contatto con il rivenditore oppure con il centro assistenza autorizzato.
• Per maggior informazioni, visitare il nostro sito web: www.acer.com.
11
Italiano
Ambiente
Temperatura:
• Operativa: da 5 °C a 40 °C
• Non-operativa: da -10 °C a 70 °C
Umidità (senza condensa):
• Operativa: da 10% a 60%
• Non-operativa: da 10% a 60%
Indirizzo costruttore
Acer Inc.
8F, 88, Sec. 1, Xintai 5th Rd. Xizhi, New Taipei City 221, Taiwan
NOTA
Tutte le immagini e le informazioni contenute nel presente documento sono come riferimento e sono soggette
a cambiamenti senza preavviso. Per le speciche più recenti, visitare il sito web uciale: www.acer.com.
12
Español
Contenido del paquete
• 1 ratón inalámbrico y Bluetooth
• 1 guía de inicio rápido
• 1 folleto de garantía
• 2 Pilas
Visión general del dispositivO
1. Botón izquierdo
2. Rueda de desplazamiento (3D)
3. Botón derecho
4. Receptor nanoUSB
5. Indicador LED
6. Sensor óptico
7. Botón Bluetooth
(cambio de modo)
8. Receptáculo del receptor USB
9. Compartimiento de pilas
Encienda el ratón
1. Abra la tapa del compartimento de pilas de la parte trasera del ratón.
2. Instale dos pilas AAA en el compartimento de las pilas.
3. Vuelva a colocar la tapa de la pila.
4. El ratón se enciende automáticamente.
ADVERTENCIA
Asegúrese de que los extremos positivo y negativo estén orientados correctamente según se indica en el
compartimiento de las pilas.
Conecte su ratón
• Usar el receptor nanoUSB
Conecte el receptor nanoUSB al puerto USB Tipo A de su ordenador. Ahora ya puede usar el
ratón.
NOTA
Incluye conectividad Plug & Play no se necesitan controladores. Asegúrese de que la distancia máxima
entre el ordenador y el ratón sea de 10 metros.
• Emparejar el ratón con Bluetooth
1. Mantenga pulsado el botón Bluetooth de la parte trasera del ratón durante 2 segundos para
cambiar al modo Bluetooth e iniciar el proceso de emparejamiento. Si mantiene pulsado el
botón Bluetooth durante 5 segundos, el proceso de emparejamiento comenzará de nuevo
(ose podrá emparejar con un dispositivo nuevo).
2. El LED empieza a parpadear en azul para indicar que el ratón está en el modo Bluetooth y listo
para emparejarlo.
3. Inicie el asistente de emparejamiento Bluetooth en el ordenador y siga las instrucciones.
1 2 3
4
5
6
7
8
9
13
Español
NOTA
- Cuando el ordenador esté emparejado correctamente, no tendrá que volver a emparejarlo la próxima vez
que use el ratón.
- Si el emparejamiento no se realiza correctamente, el ratón entrará en el modo de suspensión después de
parpadear en azul durante unos 3 minutos. Repita los pasos del 1 al 3 anteriores para reiniciar el proceso
de emparejamiento.
Cambio de modo
Pulse el botón de Bluetooth durante 2 segundos para cambiar el ratón entre los modos
Inalámbrico y Bluetooth. El LED parpadea en azul durante 3 segundos para indicar que el ratón
está en el modo Bluetooth. El LED parpadea en rojo durante 3 segundos para indicar que el
ratón está en el modo Inalámbrico.
Cambio de DPI
Puede cambiar entre las opciones de DPI pulsando repetidamente el botón Bluetooth durante
1 segundo. Hay tres opciones disponibles para elegir: 800/1600/3200.
Aviso de pila con poca carga
Cuando el nivel de carga de la pila sea bajo, el parpadeo rojo permanecerá activo si el ratón se
está usando. Tras detener el ratón, el LED parpadea en rojo durante 10 segundos para después
apagarse.
NOTA
El ratón mantendrá un consumo de energía reducido en el modo de suspensión. Se recomienda sacar las
pilas si no va a usarse el ratón durante un periodo de tiempo prolongado.
Especicaciones
• Modelo: AMR030
• Sistema operativo: Windows® 7 o posterior
(Windows® 8 o posterior/Mac OS X o
posterior necesarios para la función
Bluetooth)
• Bluetooth: 5.0 o posterior
• Tipo de conexión: radiofrecuencia y Bluetooth
• Interfaz: puerto USB Tipo A (unidad de
conexión)
• DPI: 800/1600/3200
• Peso: 92 g ± 5 g (con dos pilas AAA)
• Dimensiones (largo x ancho x alto):
114,3 x 60 x 27,36 mm
Precaución
• No desmonte el dispositivo ni lo ponga en funcionamiento en condiciones anómalas.
• No sumerja el dispositivo en agua.
• Si el dispositivo no pudo ponerse en funcionamiento o se produjo una situación térmica
anómala, conecte el USB de nuevo.
• Si el problema persiste después de aplicar las medidas correctivas, póngase en contacto
con su distribuidor o con un centro de servicio técnico autorizado para obtener ayuda.
• Para más información, visite nuestro sitio web en www.acer.com.
14
Español
Características medioambientales
Temperatura:
• Encendido: 5 °C a 40 °C
• Apagado: -10 °C a 70 °C
Humedad (sin condensación):
• Encendido: 10% a 60%
• Apagado: 10% a 60%
Dirección del fabricante
Acer Inc.
8F, 88, Sec. 1, Xintai 5th Rd., Xizhi, New Taipei City 221, Taiwan
NOTA
Todas las imágenes y la información de este documento tienen nes meramente ilustrativos y están
sujetos a cambios sin previo aviso. Para consultar las especicaciones más recientes, visite nuestro sitio
web ocial: www.acer.com.
15
Русский
Комплект поставки
• Bluetooth и беспроводная мышь x 1
• Краткое руководство x 1
• Гарантийный талон x 1
• Батарейка x 2
Обзор устройствА
1. Левая кнопка
2. Колесико прокрутки (3D)
3. Правая кнопка
4. Наноприемник USB
5. Индикатор
6. Оптический датчик
7. Кнопка Bluetooth
(переключатель режимов)
8. Держатель USB-приемника
9. Отсеки батареек
Включите мышь
1. Откройте крышку отсека батареек в нижней части корпуса мыши.
2. Вставьте 2 батарейки формата AAA в отсеки батареек.
3. Установите крышку на место.
4. Мышь автоматически включится.
ПРЕДУПРЕЖДЕНИЕ
Следите за тем, чтобы при установке батареек их положительные и отрицательные полюса
соответствовали значкам полюсов в отсеках батареек.
Подключите мышь
• Использование наноприемника USB
Вставьте наноприемник USB в разъем USB Type-A вашего компьютера. Теперь мышь
готова к использованию.
ПРИМЕЧАНИЕ
Это подключения Plug and Play (никакие драйверы не требуются). Расстояние между компьютером и
мышью должно быть не больше 10 метров.
• Сопряжение мыши по Bluetooth
1. Нажмите и 2 секунды удерживайте кнопку Bluetooth в нижней части мыши для
переключения в режим Bluetooth и запуска внутреннего процесса сопряжения.
Нажмите и 5 секунд удерживайте кнопку Bluetooth для повторного запуска процесса
сопряжения (или для сопряжения с новым устройством).
2. Индикатор начнет мигать синим, указывая на то, что мышь находится в режиме Bluetooth
и готова к сопряжению.
3. Запустите мастер сопряжения по Bluetooth на вашем компьютере и выполните инструкции.
1 2 3
4
5
6
7
8
9
16
Русский
ПРИМЕЧАНИЕ
- После успешного сопряжения мыши вам в следующий раз не придется повторять процедуру
сопряжения.
- Если установить сопряжение не удастся, то индикатор будет мигать синим примерно 3 минуты,
и затем мышь перейдет в режим Сон. Для повторного запуска процесса сопряжения повторите
описанные выше шаги 1-3.
Переключатель режимов
Нажмите и 2 секунды удерживайте кнопку Bluetooth для попеременного переключения
мыши между режимами Беспров. и Bluetooth. Индикатор будет мигать синим 3 секунды,
указывая на то, что мышь находится в режиме Bluetooth. Индикатор будет мигать красным
3 секунды, указывая на то, что мышь находится в режиме Беспров.
Переключатель DPI
Для циклического переключения между вариантами DPI раз за разом нажимайте
кнопку Bluetooth и 1 секунду удерживайте ее нажатой. Доступные для выбора варианты:
800/1600/3200.
Уведомление о разряде батареек
При низком уровне заряда батареек индикатор продолжит мигать красным, если мышь
используется. После того, как использование мыши прекратится, индикатор будет 10
секунд мигать красным и затем погаснет.
ПРИМЕЧАНИЕ
После перехода в режим Сон мышь продолжит потреблять незначительное количество
электроэнергии. Советуем извлекать батарейки, если не будете использовать мышь в течение
долгого времени.
Технические характеристики
• Модель: AMR030
• Операционная система: Windows® 7
или новее (для использования функции
Bluetooth требуется Windows® 8 или
новее / Mac OS X или новее)
• Bluetooth: 5.0 или новее
• Тип подключения: РЧ и Bluetooth
• Интерфейс: разъем USB Type-A (адаптер)
• DPI: 800/1600/3200
• Вес: 92 ± 5 г (с 2 батарейками AAA)
• Размеры (Д x Ш x В):
114,3 x 60 x 27,36 мм
Внимание!
• Не разбирайте устройство и не пользуйтесь им при ненормальных условиях.
• Не погружайте устройство в воду.
• В случае неработоспособности устройства или при возникновении ненормального
нагрева извлеките и снова вставьте штекер в разъем USB.
• Если проблемы сохранятся после попытки их устранить, то обратитесь за помощью к
продавцу или в авторизованный сервисный центр.
• Дополнительные сведения см. на нашем веб-сайте www.acer.com.
17
Русский
Условия эксплуатации
Температура:
• При работе: от 5 °C до 40 °C
• При хранении: от -10 °C до 70 °C
Влажность (без образования конденсата):
• При работе: от 10% до 60%
• При хранении: от 10% до 60%
Адрес изготовителя
Acer Inc.
8F, 88, Sec. 1, Xintai 5th Rd. Xizhi, New Taipei City 221, Тайвань
ПРИМЕЧАНИЕ
Все изображения и информация в этом документе приведены только для справки и могут быть
изменены без уведомления. Актуальные технические характеристики см. на нашем официальном
веб-сайте: www.acer.com.
Не выбрасывайте устройство как обычный мусор. Сдайте его на переработку, чтобы
свести к минимуму загрязнение окружающей среды
Дата производства указана на этикетке устройства
18
ةيبرعلا
 
•1 ×   
•1 ×    
•1 ×  
•2 × 
   
1. 
2.( )  
3. 
4. USB 
5.LED 
6. 
7.( )  
8.USB  
9. 
 
1..        
2..   AAA  
3.. 
4..     

.             
   
• USB  
   .   A   USB   USB   
.  

. 10          .     
•  
1.               
   5        .    
.(   )   
2..             LED  
3..          

.                  -
 . 
  3               -
.     1-3  
1 2 3
4
5
6
7
8
9
19
ةيبرعلا
 
  .           
  .       
 3    LED 
.       
 3    LED 
DPI 
   .        DPI    
.800/1600/3200 : 
  
           
    

 10    LED         .
. 

     .          
.    

•AMR030 :
•   Windows® 7 : 
Mac OS X /    Windows® 8)
(BT     
•   5.0 :
•RF & BT : 
•() A   USB  :
•DPI: 800/1600/3200
•5 ± 92 :
(2 ×  AAA  )
•:( ×  × ) 
 27.36 × 60 × 114.3

•.            
•.    
•.USB               
•             
.       
•.www.acer.com         

: 
•40°C  5°C :
•70°C  -10°C : 
:( ) 
•60%  10% :
•60%  10% : 
  
.Acer Inc
8F, 88, Sec. 1, Xintai 5th Rd. Xizhi, New Taipei City 221, Taiwan

.               
.www.acer.com :            

Other Acer Mouse manuals

Acer PREDATOR CESTUS 510FOX User manual

Acer

Acer PREDATOR CESTUS 510FOX User manual

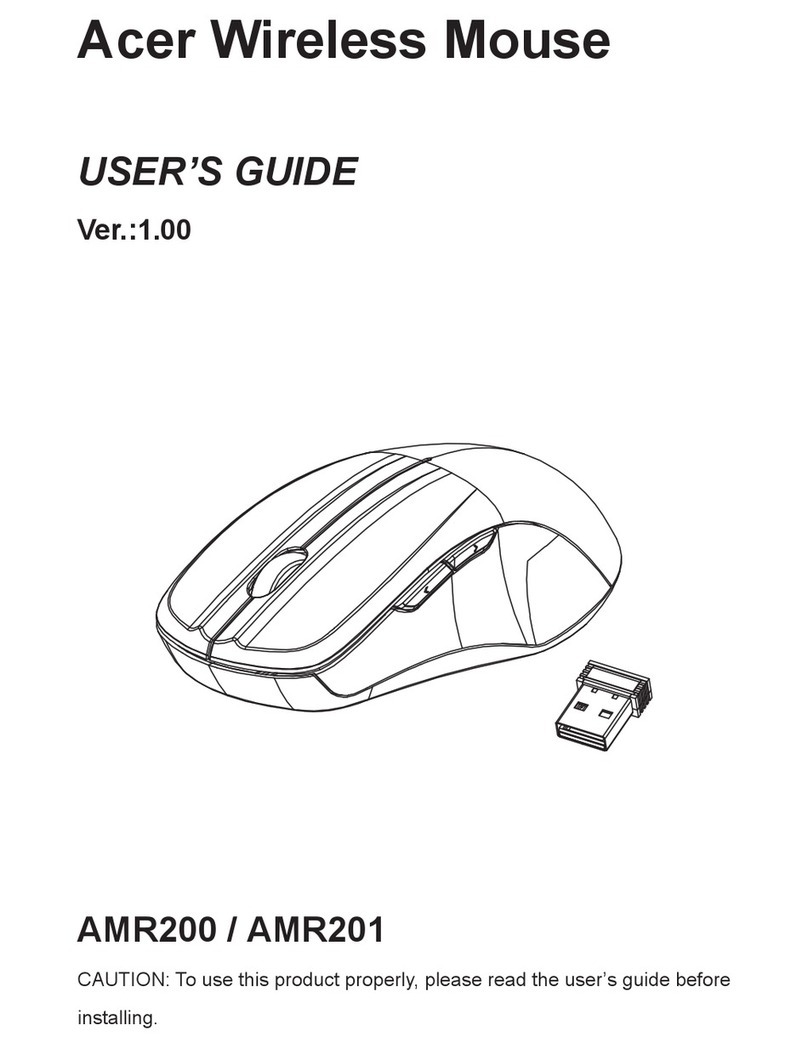
Acer AMR200 User manual

Acer

Acer AMR200 User manual

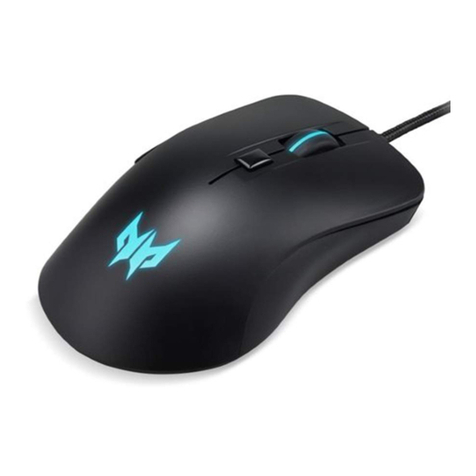
Acer Predator CESTUS 310 PMW910 User manual

Acer

Acer Predator CESTUS 310 PMW910 User manual

Acer AMR800 User manual

Acer

Acer AMR800 User manual

Acer AMR814 User manual

Acer

Acer AMR814 User manual

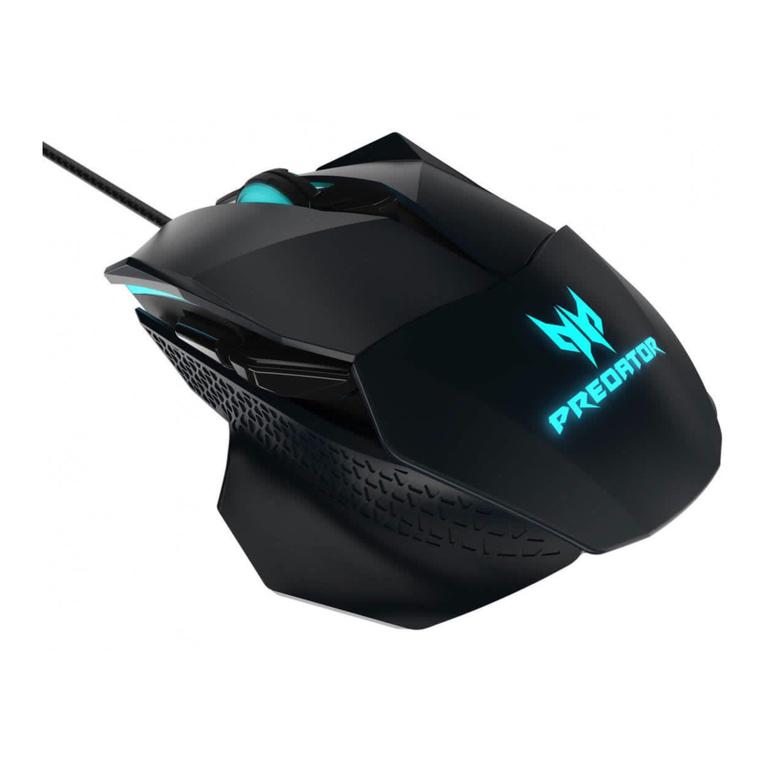
Acer PREDATOR CESTUS 500 User manual

Acer

Acer PREDATOR CESTUS 500 User manual

Acer AMR100 User manual

Acer

Acer AMR100 User manual

Acer SM-9063 User manual

Acer

Acer SM-9063 User manual

Acer PREDATOR CESTUS 350 User manual

Acer

Acer PREDATOR CESTUS 350 User manual

Acer PREDATOR CESTUS 315 User manual

Acer

Acer PREDATOR CESTUS 315 User manual

Acer PREDATOR CESTUS 330 PMW920 User manual

Acer

Acer PREDATOR CESTUS 330 PMW920 User manual

Acer PREDATOR CESTUS 330 User manual

Acer

Acer PREDATOR CESTUS 330 User manual

Acer NITRO MOUSE II User manual

Acer

Acer NITRO MOUSE II User manual

Acer NITRO User manual

Acer

Acer NITRO User manual

Acer PREDATOR CESTUS 300 User manual

Acer

Acer PREDATOR CESTUS 300 User manual

Acer PREDATOR CESTUS 335 User manual

Acer

Acer PREDATOR CESTUS 335 User manual

Acer Predator CESTUS 320 User manual

Acer

Acer Predator CESTUS 320 User manual

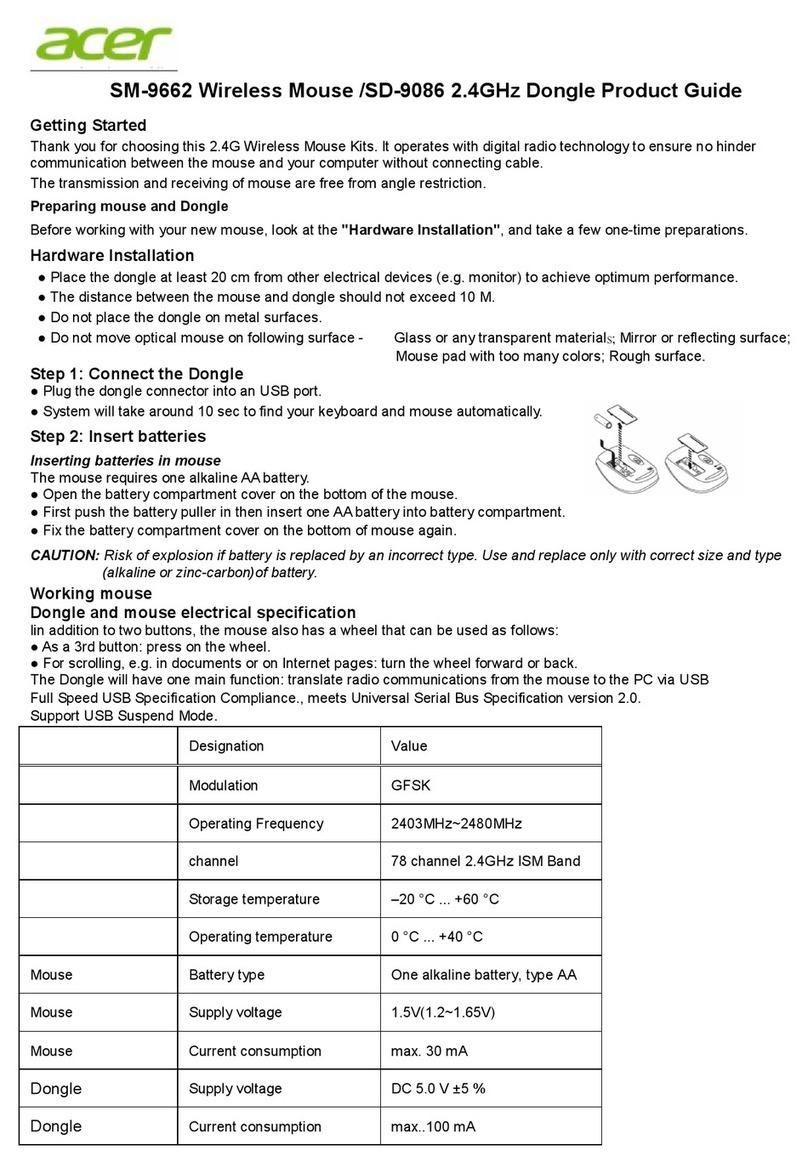
Acer SM-9662 User manual

Acer

Acer SM-9662 User manual

Acer LZ20400161 User manual

Acer

Acer LZ20400161 User manual

Acer MT1BF User manual

Acer

Acer MT1BF User manual

Acer PREDATOR CESTUS 510 User manual

Acer

Acer PREDATOR CESTUS 510 User manual

Popular Mouse manuals by other brands

Lioncast LM60 user manual

Lioncast

Lioncast LM60 user manual

Hama Wireless Optical Mouse Operating	 instruction

Hama

Hama Wireless Optical Mouse Operating instruction

Microsoft X18-29049-01 Start

Microsoft

Microsoft X18-29049-01 Start

PROZIS KINACTION user manual

PROZIS

PROZIS KINACTION user manual

Emprex BTC M883AU user manual

Emprex

Emprex BTC M883AU user manual

Aivia KRYPTON user guide

Aivia

Aivia KRYPTON user guide

Alienware AW720M user guide

Alienware

Alienware AW720M user guide

Genesis Xenon 200 Quick installation guide

Genesis

Genesis Xenon 200 Quick installation guide

Logitech G100 Getting started

Logitech

Logitech G100 Getting started

Logitech G500 user guide

Logitech

Logitech G500 user guide

LG LSM-100 owner's manual

LG

LG LSM-100 owner's manual

Velleman PCM6 instructions

Velleman

Velleman PCM6 instructions

Elecom M-D18DR Series user manual

Elecom

Elecom M-D18DR Series user manual

MOB MO7641 user manual

MOB

MOB MO7641 user manual

Manhattan MLDX user manual

Manhattan

Manhattan MLDX user manual

Gamezone Toriado Instructions for use

Gamezone

Gamezone Toriado Instructions for use

Verbatim 96674 quick start guide

Verbatim

Verbatim 96674 quick start guide

Value Creator perixx PERIMICE-520 user manual

Value Creator

Value Creator perixx PERIMICE-520 user manual

manuals.online logo
manuals.online logoBrands
  • About & Mission
  • Contact us
  • Privacy Policy
  • Terms and Conditions

Copyright 2025 Manuals.Online. All Rights Reserved.