Please use the checklist to ensure that your order is complete:
Base unit × 1 Power cord × 1 Quick start guide × 1
Before beginning, please make sure that you have the following items:
The unit mounted in the rack with power supply
One computer for configuring the network connection
A complete set of cables
The unit can be mounted in a 19” rack. Please confirm that air intake in the front
of the unit and air exhaust in the rear of the unit will not be obstructed in the rack.
Unpacking
Rack Mounting and Cable Connecting
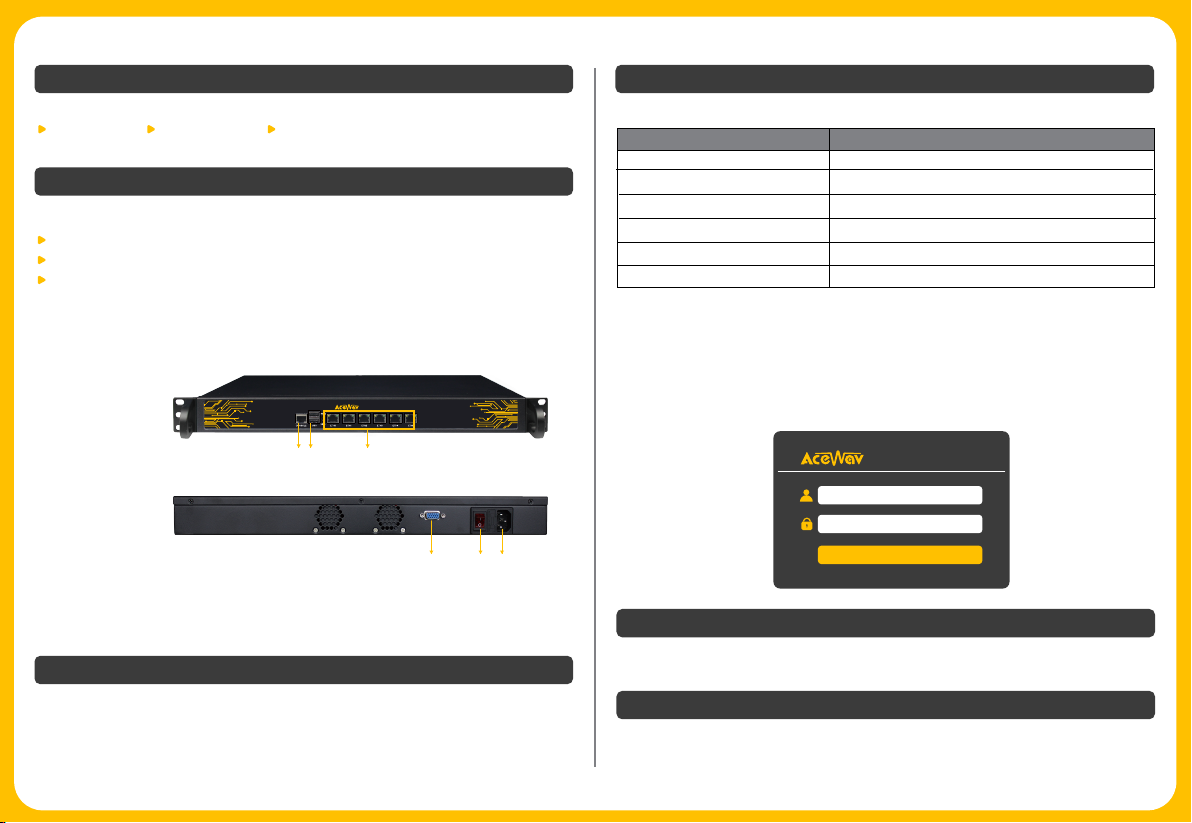
Each iView built-in Ethernet port has a corresponding default IP address.
Launching Web Interface
Connect your management computer to the Ethernet port (any Ethernet port is ok)
on the device. Plug the power cord to the power supply connector and then turn on
the power switch.
Connecting your iView The user manual can be obtained by emailing Acewav Sales team or Acewav Procare team.
The images shown here are for reference only. Actual product may look different.
Specifications are subject to change without advanced notice.
Documentation
Notice
Launch the web browser on the PC. Enter the corresponding IP address of the Ethernet
port in the browser address bar to connect with the unit. Input default user name
“admin” and password “admin” to log in to the unit. The login tab is displayed as
below:
Change the IP address and subnet mask of management computer, making it in the
same network with the device, according to which Ethernet port you connect.
Device Ethernet Port IP Address/Subnet Mask
192.168.1.201/255.255.255.0
192.168.2.201/255.255.255.0
192.168.3.201/255.255.255.0
192.168.4.201/255.255.255.0
192.168.5.201/255.255.255.0
192.168.6.201/255.255.255.0
ETH2
ETH3
ETH4
ETH5
ETH1
ETH0
1. Console 2. USB interface 3. ETH0~ETH5
Front panel
Rear panel
4. VGA interface: used to connect a displayer, display the server command interface
5. Power switch button
6. Power: AC 100~240V, 50/60HZ
iView IPTV
1 2 3
4 5 6
iView IPTV
admin
Password
Login


