ACOPOWER LiONCooler X30A User manual

Rechargeable Solar Fridge Freezer

Quick Start Guide
Welcome to LiONCooler - a revolution in battery powered portable cooling!
Quick Contents Check:
LiONCooler fridge/freezer
LiONCooler lithium-ion Battery (comes already inserted into the cooler)
Power Cords Accessory Kit: AC Wall x1; 12V/24V DC Vehicle x1; Solar x1
Note: Solar panels to recharge the LiONCooler battery are available as a separate accessory
and not included. However, the Solar power cord connector IS included in the power cords
solution.
STEP 1. Switching LiONCooler ON/OFF:
The main advantage for new owners of LiONCooler is the ability to power the cooler either plugged
into a wall outlet OR “unplugged” in cordless battery mode. Think of it like your smartphone which
has a built-in battery so you can ‘go mobile’. Here we will guide you through some simple steps of
checking power operation by using either the battery or AC wall socket. (Later in Step 4 we cover
powering your cooler in a vehicle using 12/24v sockets).
Cordless Battery Power Mode and Test:
Turn ON the Battery.
Press and hold the battery power button for about 3 seconds. A yellow light should illuminate and
The battery is neatly slotted into the front face of the
LiONCooler. You can perform these functions either with the
battery inside the cooler or with the battery removed. Some
customers purchase extra spare batteries so this guide step
is also useful for testing your spare batteries. The battery
has its own independent power button which is located on
the front of the battery itself.
STEP 2. Fridge or Freeze Temperature Settings:
When the LiONCooler is powered ON and running, press + or - button on the control panel to adjust
the temperature you want. After that, the control panel will display the current inside temperature
of the cooler. Don’t worry. The display will gradually change until the cooler reaches your desired
temperature. It’s a good idea to pre-chill the fridge and food/drinks before setting out on a trip. Just
treat it like the fridge in your kitchen.
Temperature setting range: -4℉~68℉(-20℃~+20℃)
Next, let’s show you how to operate LiONCooler using just the battery without plugging into a wall
outlet.
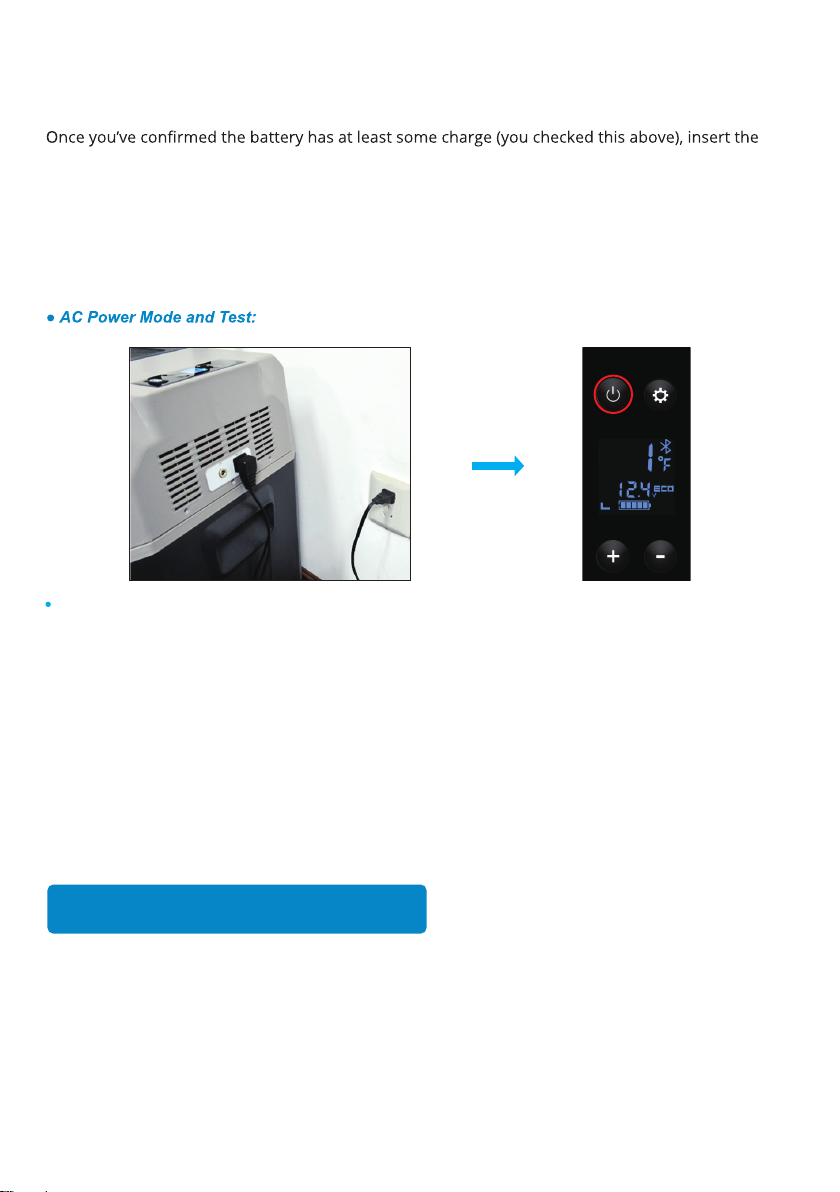
battery into the cooler and unplug all other cords. You’re now in ‘cordless mode’. Turn the battery
power button ON (yellow light) then turn the LiONCooler power button ON (LED control panel on
top of the cooler). You’re all set to go! Now that you’re in ‘cordless mode’, LiONCooler will run for as
long as the battery lasts (usually 10+ hrs at fridge temperatures; less if freezing).
- see TIP below for recharging your battery.
Plug in the AC power cord to a wall outlet. The power button is located on the control panel on top
of the cooler. Press and hold the power button on the cooler for about 3 seconds. The LED display
will illuminate.
Turn ON the LiONCooler.
TIP:
In order to recharge the battery, the battery must be switched on (yellow light) and the cooler
plugged into a wall outlet. You only really need to turn the battery ON when you are ‘going mobile’ i.e.
have no access to a wall outlet OR you need to recharge the battery. Batteries can also be recharged
when removed from the cooler by using an external power pack (available as a separate accessory
separately).

STEP 3. Changing Temperature Display - Fahrenheit or Celsius:
With the AC power cord connected to a wall outlet, use the power button and turn the cooler OFF.
operate the SETTINGS in this mode. Press and hold the SETTINGS button (gear wheel) for about 3
release the SETTINGS button again until E5 is displayed. Next press + or - to toggle between your
desired temperature display units: ℉and ℃.
LionCooler
Step One Step Two Step Three Step Four Step five
Press and hold
the SET button
over 3 seconds
E1 should be
displayed
on screen and
Keep pressing
the SET
button until
E5 shows up
Then press + or
-, select desired
units: ℉and ℃
STEP 4 . Using LiONCooler in a Vehicle - protect your vehicle battery:
LiONCooler is ideal for road trips and can be connected to
your 12/24v socket charger often called a ‘cigarette lighter
socket’. The 12/24v cord (round red connector) is included in
the power cord accessory kit. Connecting LiONCooler to
your vehicle will ensure your cooler is running and can also
help recharge the internal LiONCooler battery (Reminder:
to recharge the battery, the battery button must be
switched ON - yellow light illuminates).

For example:
When the unit is connected to the car, we suggest setting the car battery protection to H or M level. L
is suggested when the unit is powered in a wall outlet or in ‘cordless mode’ running on LiONCooler’s
own battery. ‘L’ means you don’t need to protect anything because you’re not connected to a vehicle
battery power source.
TIP:
If you have a good memory and can get into a routine of doing the following, simply getting into the
vehicle is stationary/parked
is another way of ensuring you don’t end up with a flat car battery
steps above but we all love a workaround suggestion! Either way - make sure to protect your vehicle
battery!
STEP 5. Cooling Power Settings MAX or ECO mode:
Built-in Safety Control:
When your vehicle engine is running, there is no chance of LiONCooler draining your
and you leave the
LiONCooler connected to the 12/24v socket, the cooler will continue to ‘draw’ power
from your vehicle battery. In order to protect your vehicle battery, LiONCooler has
safety settings for this situation.
With the LiONCooler switch ON, press and hold the SETTINGS (gear wheel) button for
about 5 seconds to change the battery protection mode. There are three options:
H(igh), M(edium), L(ow).
When you want a faster ‘booster’ chill or freeze, setting LiONCooler to MAX mode is the ideal setting.
However, keep in mind that using MAX also consumes more power which can be more noticeable in
will last. So, we recommend that
once your desired temperature is reached and being maintained, that you set the cooler to ECO
mode. Pre-chilling drinks/produce ahead of time wherever possible will also enable you to switch to
ECO mode sooner; just think of it like placing warm food/drinks in your kitchen fridge which will take
longer to cool down and make your fridge ”work harder”.
With the LionCooler switched ON and running, press the SETTINGS (gear
wheel) button to select control mode, and then you can switch between
MAX(Quick cooling) and ECO (Energy-saving) mode. Only press the button
briefly to ‘toggle’ between MAX/ECO.
TIP:
Keep a close eye on the LED display screen when holding down the SETTINGS
button. If you hold down for too long, it is easy to accidentally find yourself in the
12/24v

STEP 6. Restore factory settings:
recurring error codes appear, a good idea is to simply clear out the memory by restoring the cooler
time to time.
Turn ON the battery and turn OFF your LiONCooler (see Step 1) then press and hold the SETTINGS
hold down the + and - buttons at the same time until you see “-188” displayed.
Step Three Step Four
Step One Step Two
LiONCooler purchase. We strive to answer support emails within 48hrs. Normal Hours of Business
for us to serve you with technical support.
vehicle battery protection settings mode (Step 4). This is no problem. It takes a bit of practice and you
can always just step away and start again!


Power Green Life!
Thanks for choosing ACOPOWER
www.ACOPOWER.com
Add: 4120 Valley Blvd, Walnut, CA 91789, USA
Your
This manual suits for next models
13
Table of contents
Other ACOPOWER Freezer manuals


