ACOUSTIC SOLUTIONS SP150 User manual

page 1
INDEX
SAFETY INSTRUCTIONS PAGE 2
CONTROLS EXPLAINED PAGE 3
SET UP INSTRUCTIONS PAGE 4
SET UP INSTRUCTIONS cont. PAGE 5
TO PLAY A CD PAGE 6
TO LOAD A CD TO THE HARD DRIVE PAGE 7
TO PLAY MUSIC FROM THE HARD DRIVE PAGE 8
SEARCH COMMANDS WHEN PLAYING HARD DRIVE PAGE 9
PAGE 10
PAGE 11
PAGE 12
PAGE 13
PAGE 14
PAGE 15
PAGE 16
PAGE 17
PLAYLIST COMMANDS
PLAYLIST COMMANDS cont
FRONT PANEL CONTROLS
ADVANCED FUNCTIONS
ADVANCED FUNCTIONS cont
ADDITIONAL INFORMATION
SEARCH COMMANDS WHEN PLAYING HARD DRIVE cont
ADVANCED FUNCTIONS cont
PAGE 17
CONTACT INFORMATION

For your convenience a mains plug with a fuse (3 Amp)
has been fitted to this appliance. For your safety please
observe the following information.
• The SP 150 is designed to operate on an AC mains
supply of 230 volts, 50 Hz.
• The SP 150 system is a class 1 product and it shall only
be connected to a mains supply outlet with a protective
earthing connection.
• The wires in the mains lead are coloured in accordance
with the following code:
BLUE - NEUTRAL
BROWN - LIVE
YELLOW/GREEN - EARTH
CAUTION
RISK OF ELECTRIC SHOCK!
DO NOT OPEN!
This product complies with
European low voltage (73/23/
EEC) and electromagnetic
compatibility (89/336/EEC)
directives.
WARNING:
A terminal marked with the “Lightning” symbol is a
hazardous live and connection to this terminal should only
be made by service personnel.
The exclamation point within an equilateral triangle is
intended to alert the user to important operating and
maintenance instructions in the service literature relevant
to this appliance.
SAFETY INSTRUCTIONS
IMPORTANTANT SAFETY INSTRUCTIONS
• Read and keep these instructions available for future
reference.
• For indoor use only.
• The unit must only be connected to a suitable mains
power supply using the mains power lead provided.
• To reduce the risk of fire or electrical shock, do not
expose this unit to rain or moisture.
• The apparatus shall not be exposed to dripping or
splashing.
• No naked flame sources, such as candles, should be
placed on this product.
• No objects filled with liquids, such as vases, shall be
placed on the apparatus.
• Unplug the unit from the wall socket during lightning
storms and when it is not going to be used for a long
period of time.
• Take care that foreign objects do not enter, or liquids are
not spilled, into the enclosure through any openings. If
this should happen, refer to qualified service personnel
before attempting to use.
• Ensure adequate ventilation - do not cover this unit with
curtains, etc.
• Do not install near any heat source, such as radiators,
or other equipment that produces heat.
• Protect the mains power cable from being damaged.
CAUTION: To reduce the risk of electric shock, do not
remove any cover. NO USER-SERVICEABLE PARTS
INSIDE, REFER ANY SERVICING TO QUALIFIED
SERVICE PERSONNEL.
UK MAINS PLUG DETAILS
E
L
N
BLUE TO
NEUTRAL
FUSE
BROWN TO
LIVE
CORD
GRIP
GREEN+YELLOW
TO EARTH
page 2
SAFETY INSTRUCTIONS

CONTROLS EXPLAINED
WARNING:
• Non-rechargeable batteries are not to be recharged
• Only the recommended batteries or equivalents are
to be used
• Batteries must be inserted in the correct (+) and (-) polarities
• Remove exhausted batteries
• Do not mix old and new batteries
• Do not mix batteries of different types
1
9 10 11 12 13 14 15
2 3 4 5678
1
2
3
4
5
6
7
9
11
13
15
8
10
12
14
16
18
19
17
1 INFO Displays hard drive data
2 MENU Menu navigation button
3 INTRO Activate intro mode
4 BACK Skip back to previous function
5 PLAYLIST Activate playlist menu
6 ARTIST Search by artist from harddrive
7 STAND BY On/off standby power function
8 PREVIEW Activat preview mode
9 CD MENU CD play/load menu button
10 RANDOM Activate random play mode
11 SEGUE Activate segue play mode
12 UP Navigation key
13 QUICK KEY Quick access to popular menu’s
14 DOWN Scroll down through menu’s
15 OK Select button for desired function
16 ALBUM Search by album from harddrive
17 PLAY CONTROLS Play/pause, Stop, FFW, RRW controls for CD or
HD
18 TRACK Search by track from harddrive
19 ALPHA/NUMERIC KEYS Data entry keys, plus playlist hot keys
REMOTE CONTROL FEATURES
Front Panel Reference Chart
1 IR ACTIVE Remote in use indicator
2 LCD DISPLAY LCD display containing information
3 COMPRESS File compression in progress
4 RANDOM Random mode active
5 SEARCH-ALBUM/
TRACK
Scroll through albums/Tracks on the hard drive
6 IR SENSOR Sensor for remote control
7 CD DRAWER CD loading drawer
8 POWER BUTTON Power On / Off switch
9 REWIND/SKIP Fast rewind or skip backwards through track
10 FORWARD/SKIP Fast forward or skip forwards through track
11 PLAY/PAUSE Play / Pause track
12 STOP Stop current track
13 CD MENU CD play/load menu activation
14 EJECT Eject the current CD in drawer
15 CD ACIVE CD currently playing or transfering
NOTE: If the remote control unit only works when operated
near to the SP 150, replace the batteries. Use 2 x AAA 1.5V
batteries only.
REMOTE CONTROL REFERENCE CHART
page 3
CONTROLS EXPLAINED

The SP 150 HD juke box is similar to a conventional CD
player, but has an integral 40Gb hard disc for storage.
It has been designed to be used as part of a Hi Fi system,
and requires connection to an amplifier which accepts
AUX or Line inputs.
The output of the SP150 can be adjusted (described on
page 15), however the default output setting is 280 mV
which is suitable for connection to most domestic Hi Fi
equipment.
Please ensure that the power lead is free from damage,
and has not been twisted or kinked.
If the power cable fitted to the SP150 is damaged in any
way, please do not connect to a mains power supply, but
return the unit to your dealer for a replacement product.
If your mains power outlet is switched, ensure the power
is switched off and then connect the SP150 to the mains
power supply pushing the plug firmly into the socket. Then
turn the power switch on the mains power outlet to on.
SET UP INSTRUCTIONS
Note: Please connect audio output leads first before
connecting the mains power to the SP150.
Note: if the power plug fitted to the SP150 does not
match the power sockets used in your worldwide
location, please consult your dealer for further
information.
The SP150 is fitted with a self regulating power supply
and will automatically adjust to the voltage setting in your
region.
POSITIONING THE SP 150
CONNECTION OF AUDIO OUTPUT
CONNECTION OF MAINS POWER
The SP150 is fitted with a mains power plug which is
applicable to your worldwide location.
The SP150 is fitted with two RCA phono jacks which deliver
line level audio signals to a suitable amplifier. Using the
lead supplied take one end and push both the white and
red RCA plugs into the corresponding sockets located on
the rear of the SP150.
Ensuring that no twists or kinks are apparent, or that the
cable has been damaged in any way, take the other end
of this cable and push the RCA plugs in to corresponding
input sockets on the rear of your amplifier.
Please ensure that you have connected the SP150
to corresponding line input sockets, and not a phono
(turntable) input sockets. This would cause the phono
sockets to become overloaded.
TURNING THE POWER ON/OFF
The power button on the SP150 is located on the far right
of the front panel. Located next to the power switch is an
LED (light emitting diode) which indicates that the power is
ON when it is green. The LCD screen will also illuminate
and has a green-yellow background light.
To turn ON the SP150, depress the power switch until you
hear and feel a positive click. At this time the LED will be
green.
To turn the SP150 OFF, simply reverse the process above,
the LED will also go off.
Note: It is safe to leave the SP150 connected to the mains
power supply for a reasonable length of time, however as
with most electrical equipment, you would be advised to
remove connection to the mains power supply if the unit
was going to be left unattended to considerable lengths
of time.
The SP150 is designed to stack within a group of Hi Fi
separates. It does not contain any ventilation grills, so the
proximity of other equipment is not critical, however it is
not advised to cover the SP150 with any material which
might impair its cooling.
The unit can be placed on top of most other pieces of
Hi Fi equipment, however it is our recommendation to
place it on the top of any Hi Fi stack, and try to avoid
placing it directly on top of any high-powered equipment
which may generate excessive heat or electronic radiation,
eg. a power amplifier.
The SP150 has a standby power setting which can only be
operated by the remote control by pressing button 7.
The SP150 has been designed to offer automatic file
compression as a default factory setting. This means that
the file compression process will take place without the
need for compression programs that would be necessary
when using a computer.
It is necessary for the SP150 to be placed in standby mode
periodically as file compression is a process which occurs
automatically whilst in standby mode or can be controlled on
manually from the system menu (see advanced functions
page 14 for further information on file compression)
Press the standby button on the remote control to place
the SP150 in standby mode, and file compression will
start. If you press the standby button on the remote control
again within 5 seconds the file compression process will
cease and the SP150 will revert to standby without file
compression. If after 5 seconds, if you press the standby
button again, the SP150 will resume normal function.
STANDBY POWER SETTING
page 4
SET UP INSTRUCTIONS

It is important that the last screen displays ‘Ready’. The
system is now fully functional and ready to work.
Note: Please do not turn the power off during the above
process as this may cause damage to the file structure
located on the hard drive.
If ‘Ready’ is not displayed on the LCD screen, then it will be
necessary to re-boot the system.
Initially turn the power off using the power switch on the
front panel. Wait a few seconds then switch the power
back on by pressing the power switch again.
When power is applied to the SP150, the internal electronics
will commence a start up routine.
This is not dissimilar to a computer as some of the
components used in the SP150 are derived from computer
technology.
You will see the following sequence appear on the LCD
screen;
It is necessary for file compression to occur to allow music
which is stored in the SP150 to be compressed to make
best use of the capacity of the hard drive. Therefore we
recommend that the SP150 is put into standby mode
overnight to allow this process to be done.
In STANDBY mode the power LED on the front panel will
illuminate RED, and the COMPRESS LED on the front panel
will flash YELLOW when files are being compressed.
START UP ROUTINE
STANDBY POWER SETTING cont.
If this is not successful, please either consult your local
dealer or ring our customer support helpline on:
08712 307747 inside United Kingdom
+441327 340601 outside United Kindom
Please note that our customer helpline is open
Mon-Fri 09:00-16:30 (GMT) excluding National holidays.
SET UP INSTRUCTIONS cont.
The SP150 will automatically stop file compression when
this process has been completed.
We recommend however that if the SP150 is left unattended
for prolonged amounts of time that standby mode is not
used, but the mains power be disconnected from the
appliance.
page 5
SET UP INSTRUCTIONS
Please note: After playing a CD and returning to the
‘Ready’ menu, if you wish to play the CD again it is
necessary to re-start the CD playing process. Either
eject the CD drawer, or press CD Menu on the
remote control (9) or (13) on SP150 front panel. The
start up process for CD play will then recommence.
The default controls for the SP150 affect tracks
stored on the hard drive, and therefore pressing
play from the ready menu will take you to tracks
stored on the hard drive in the first instance.
1. Press eject on the front panel (14), to open the CD
drawer.
2. Place a CD into the drawer with the label uppermost
and press eject again.
3. The CD drawer will close load the CD, and it will
prompt you to decide:
- either to play the CD as normal, or
- to load the contents of the CD onto the hard drive.
4. Using the up/down keys on the remote control (12 and
14), toggle between play or load depending on what
you decide.
3.Use the up/down keys on the remote control to search
through the titles of the CD names stored to locate the
correct title.
4. If the correct CD title is not shown, this will be because
the CD is not stored in the database (see updating
database in user manual page 15), in this case choose
‘Other’ from this menu and the SP150 will display tracks
as numbers rather than by their name when playing this
CD.
5. If you find the correct CD title from the list, press OK
on the remote control and the SP150 will commence
playing the first track on the CD.
The CD active light on the front panel will illuminate to
indicate that the CD is playing
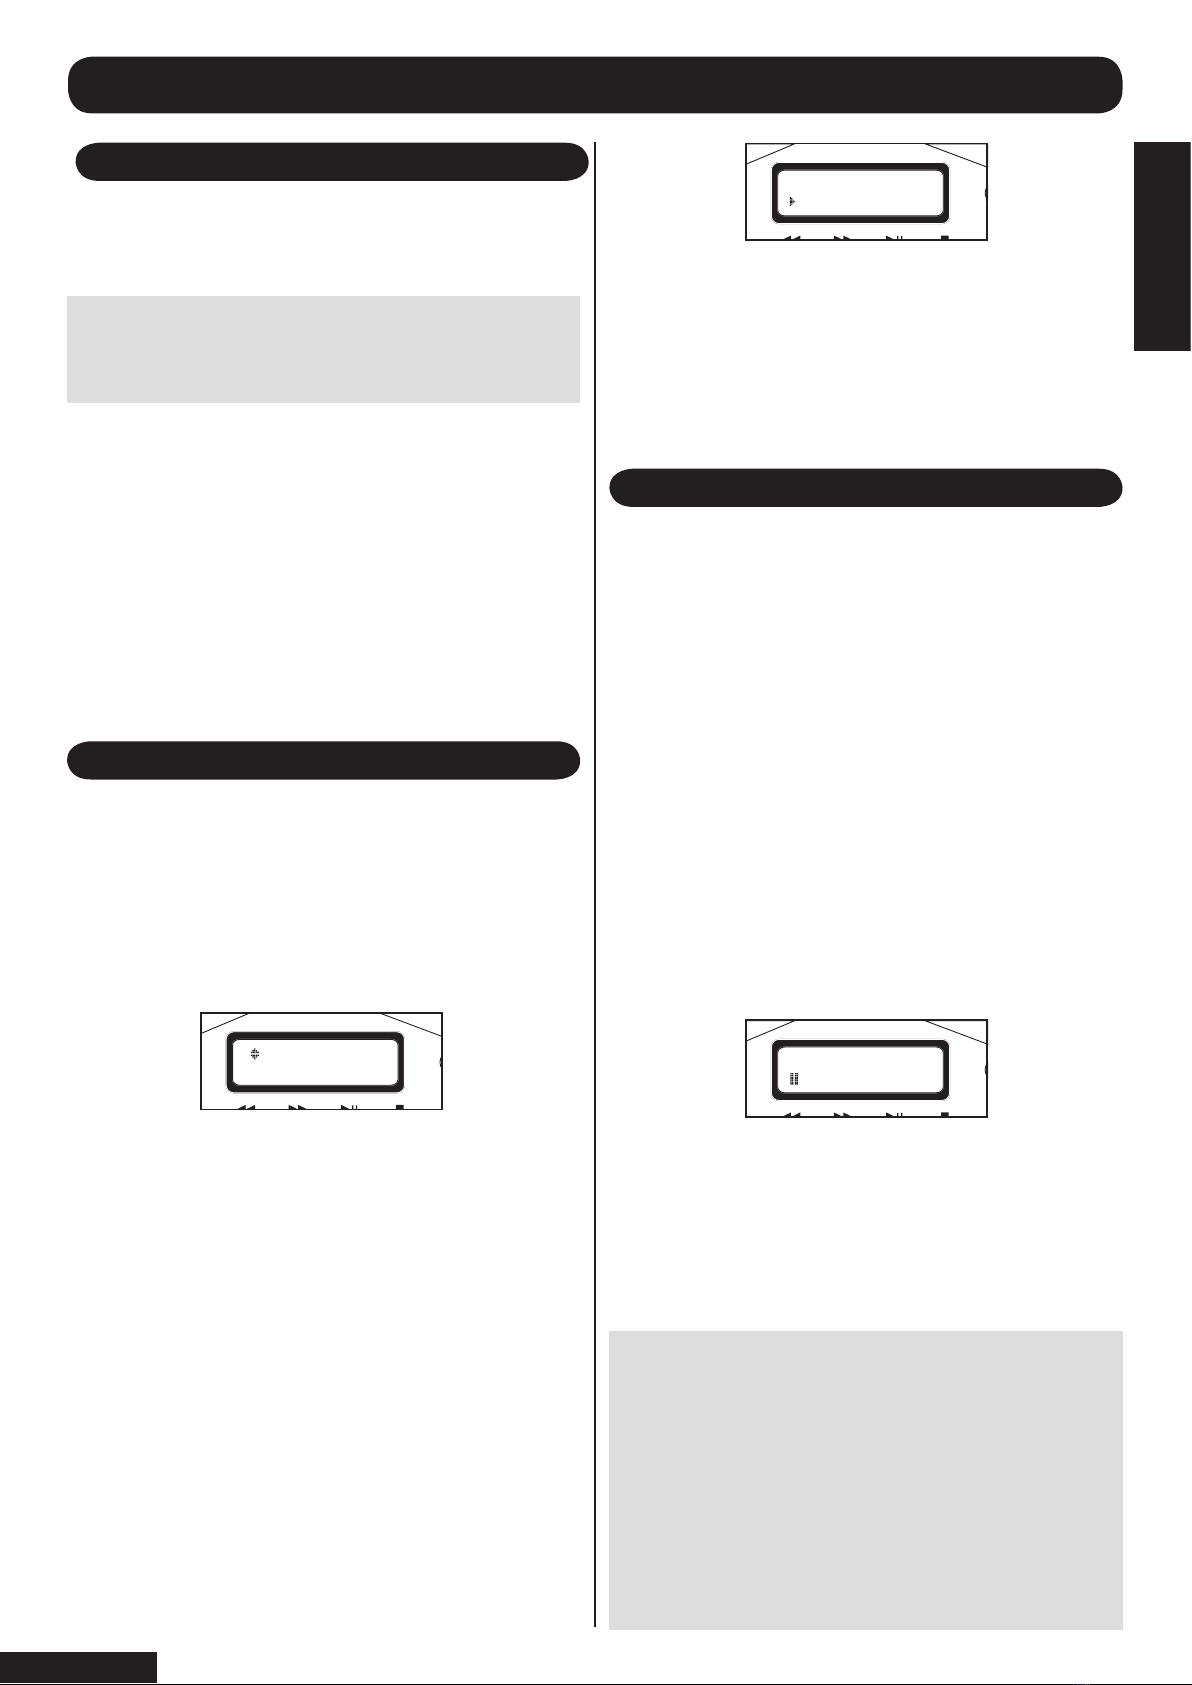
The following information will be displayed in the LCD
screen when playing music from the CD
TO PLAY A CD
TO PLAY A CD
1. Toggle to PLAY using the up/down keys on the remote
control, and then press OK on the remote control (15)
2. The SP150 will then use the database of known CDs
it has stored in memory to indentify the CD you wish to
play
You will see screen similar to this:
OTHER CD CONTROLS
The SP150 is designed to be simple to operate, and the
sequence for playing or transferring music to the hard
drive should become easily understood once you have
become accustomed to the SP150.
GETTING STARTED
Note: When you operate the SP150 for the first
time the internal hard drive will be empty and
contains no music. Therefore certain keys on the
front panel and remote control will not function.
It is necessary to record music onto the hard drive for
these functions to become effective.
Whilst playing a CD the SP150 operates similarly to a
conventional CD player. The following keys are effective
from either the remote control or the front panel:
>>I (skip up/fast forward)
Press this key once to advance to the next track on the
CD . Hold this button down to fast advance through
the current track on the CD. (Note that the fast forward
function does not operate from the remote contol).
I<< (skip back/fast reverse)
Press this key once to skip backwards to the previous
track on the CD. Hold this button down to fast reverse
through the track on the CD (Note that the fast reverse
function does not operate from the remote contol).
►/ ll (play/pause)
During play mode pressing this key will pause the CD
playing, and the pause symbol will be displayed on the
LCD screen.
During pause mode pressing this key again will resume
playing the CD, and the play symbol will be displayed on
the LCD screen.
■ (stop)
During play mode pressing this key will completely
stop the CD playing, the LCD screen will prompt you to
‘please wait’, and then the LCD will display ‘Ready’.
The title and artist information will scroll across line one,
the second line of the display will show the play/pause
status, track number from within that album, and a count
up of track time.
The letters CD will also be displayed on the second line,
which indicates that the CD is being played rather than
tracks from the hard drive (HD)
page 6
TO PLAY A CD
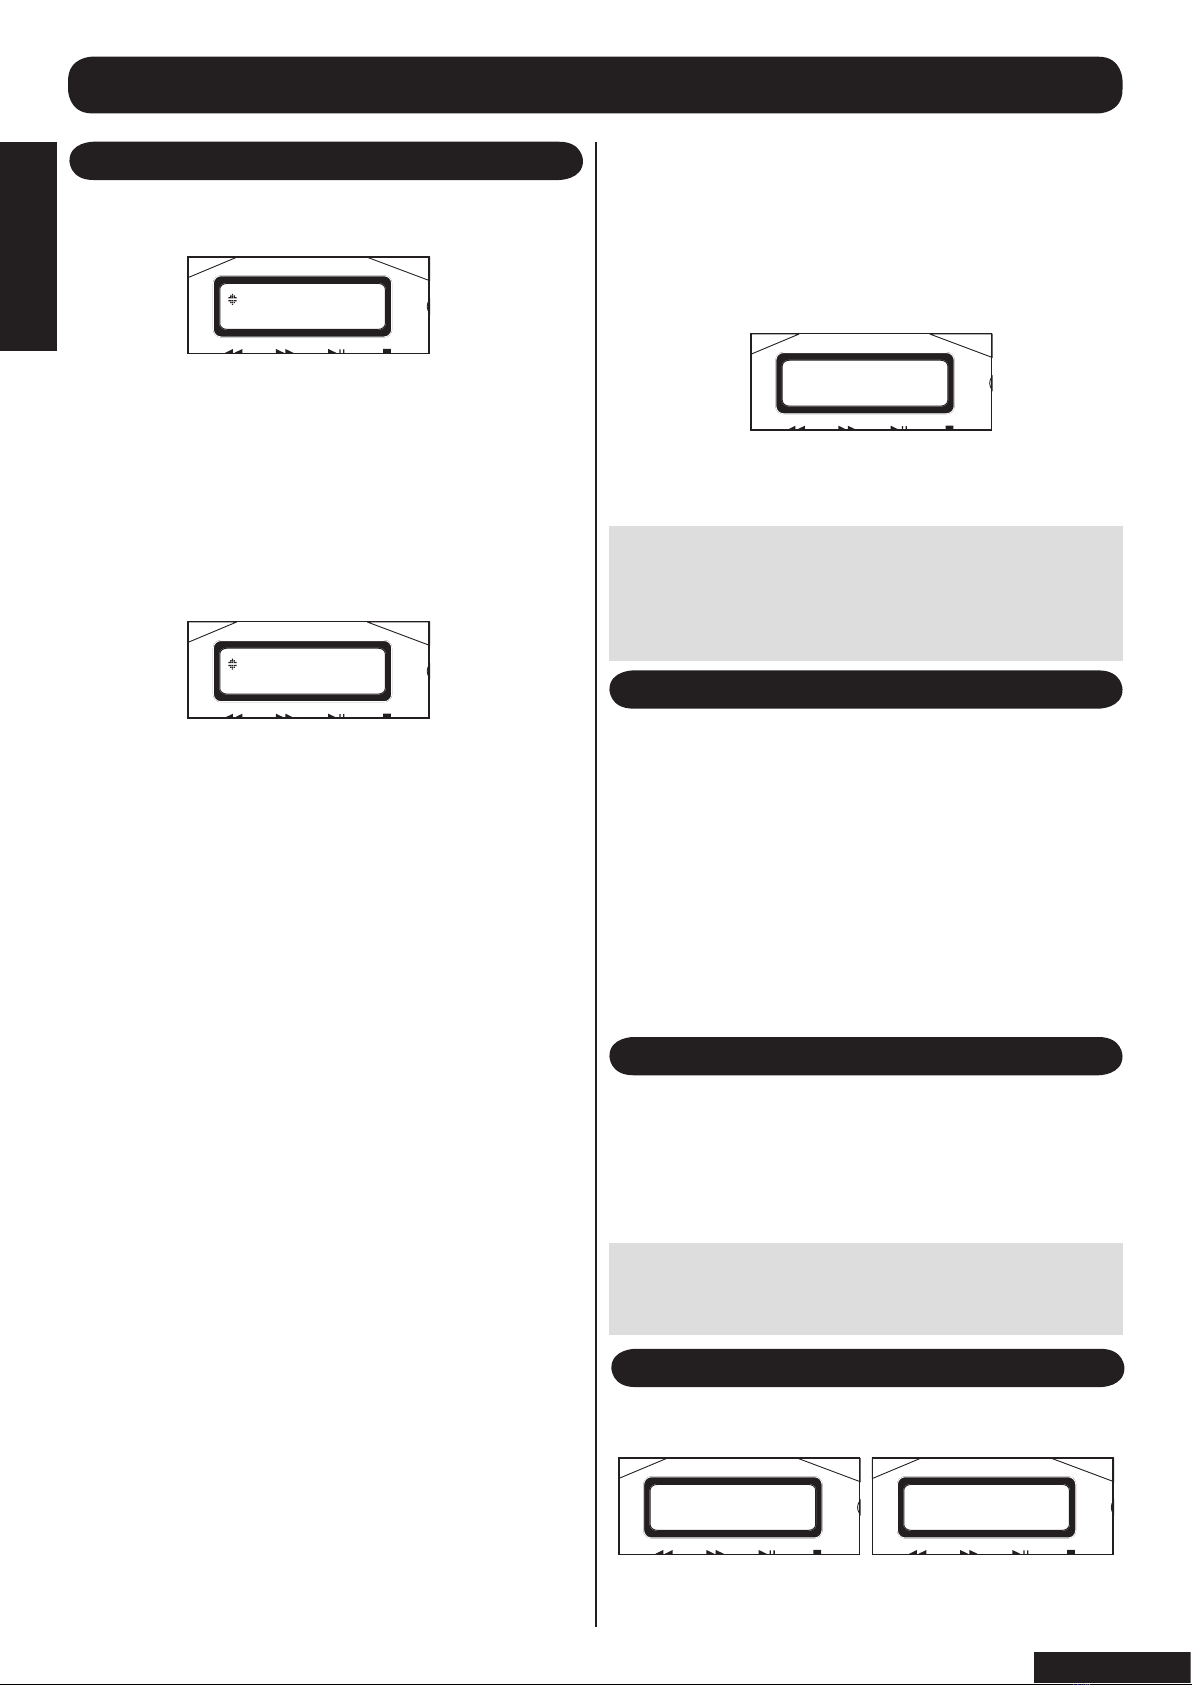
1. As described above when inserting a CD into the SP150
you will see the following screen:
2. Using the up/down keys on the remote control (12 and
14), select load and press OK on the remote control (15).
3. The SP150 has an automatic file compression system
which works in standby mode (see later section for an
explanation on compression on page 14). You are asked a
question ‘compress later?’
You will see this screen:
Using the yes/no command you can tell the SP150 to
either compress this music, “yes”, or do not “no”. The
reason for this is some music formats, such as classical
music for instance, are better reproduced when they
are not compressed. Therefore using this command
you can exclude certain CDs from being compressed
automatically.
4. Using the up/down keys on the remote control (12 and
14) toggle between yes and no as required, then press OK
on the remote control (15) to select.
5. You will be asked to select a CD name from the music
title data base stored on the SP150.
6. Use the up/down keys on the remote control to search
through the titles of the stored CD names to locate the
correct title.
10. If the correct CD title is not shown, this will be because
that CD is not stored in the database (see updating
database page 15). In this case choose ‘Other’ from this
menu and the SP150 will display the tracks as numbers.
The SP150 will automatically name the album, such as
“Album 1”, and will number subsequent unknown albums
in sequential order, such as “Album 2, 3, 4” etc.
11. When you have decided on the title of the CD then
press OK (15) to start the file transfer process.
12. If the CD has been previously copied to the hard drive
you will be asked if you wish to ‘overwrite’?. You may wish
to do this if the previous copied CD stored on the hard disc
drive was corrupt in any way.
TO LOAD A CD ONTO THE HARD DRIVE
Note: The file transfer process of the SP150 is one
of the fastest on the market. When the SP150 is
new this will be fastest, as the hard drive is empty,
and this transfer rate will slow as the hard drive
becomes fuller.
Using the up/down keys on the remote control (12 and 14)
toggle between yes and no then press OK.
13. The SP150 will overwrite the existing CD if you choose
yes, or return to the ready menu if you choose no.
You will see the following screen when file transfer is
underway:
14. You will see the progression of the file transfer process
by the percentage figure of each track, and the particular
track being copied on the second line of the LCD display
TO LOAD A CD TO THE HARD DRIVE
As the CD is being copied to the hard drive it is possible
to listen to a preview of each track as is is transferred.
This length of each preview is dependent on the speed of
transfer, but should be between 10-25 seconds of each
track.
1. To turn the preview mode ON, press the preview button
on the remote control (8).
2. Pressing this button repeatedly will toggle between
preview ON and preview OFF.
3. Choose either ON or OFF, and the SP150 will select
this setting after 2-3 seconds, and will then return to the
previous menu.
Ready indicates that the SP150 has finished this opera-
tion and awaits further instructions
PREVIEW MODE DURING FILE TRANSFER
Unlike many other hard drive systems, it is possible to
access tracks already stored on the hard drive whilst
recording a new CD to the hard drive.
Please refer to the section “playing music from the hard
drive” for information on these functions.
OTHER FUNCTIONS DURING FILE TRANSFER
When the tracks from the CD have been copied to the hard
drive you will LCD screen displays similar to these:
WHEN FILE TRANSFER IS COMPLETE
Note: the file transfer process will be slower if music
is played from the hard drive during the file transfer
process.
page 7
TO LOAD A CD TO THE
HARD DRIVE

The SP150 is designed to allow you easy access to a large
amount of music stored on the hard drive.
There are many ways in which you can use the SP150,
and different options for how to access your music.
The following paragraphs explain the functions of the
SP150 when using the hard drive.
The title and artist information will scroll and display on line
one, the second line of the display will show play/ pause
status, track number from within that album, and a count
up of the track time.
The following keys are effective from either the remote
control or the front panel:
1. ►/ ll (play/pause)
During play mode pressing this key will pause the hard
drive playing, and the pause symbol will be displayed on
the second line of the LCD screen.
During pause mode pressing this key once will resume
playing the CD, and the play symbol will be displayed on
the LCD screen.
2. >>I (skip up/fast forward)
Press this key once to advance to the next track. Hold this
button down to fast advance through the current track.
(Note that the fast forward function does not operate from
the remote contol).
3. <<I (skip back/fast reverse)
Press this key once to skip backwards to the previous
track. Hold this button down to fast reverse through the
current track. (Note that the fast forward function does not
operate from the remote contol).
4. ■ Stop
During play mode pressing this key will completely stop the
hard drive playing, and the LCD will display ‘Ready’.
TO PLAY MUSIC FROM THE HARD DRIVE
PLAY MODES
1. RANDOM
The SP150 can treat your entire stored music collection as
one big album and can randomly jump between all tracks.
This gives an endless assortment of music.
Note: When in random mode the SP150 will decide
which track to play next. When first using a hard
drive juke box system this can be disconcerting as
you may expect the next track on a particular album
to be played.
The SP150 has a red LED indicator on the front panel (4) to
show that Random has been selected. Please note that the
random feature has no memory and tracks are randomly
selected, therefore it is conceivable that the same song
may be played more than once.
2. SEGUE (pronounced “seg-way”)
This allows the SP150 to mix tracks together continuously.
As one track finishes it is mixed together with the next
track to provide a seamless transition. This feature gives
a polished overall performance, and is especially useful
when using the SP150 for parties or gatherings giving
uninterrupted musical accompaniment.
3. INTRO
In this mode the SP150 will play the first 15 seconds of a
track and then move to the next track. This allows you to
listen and decide if you wish to hear that particular track.
If you wish to listen to that track press PLAY during the 15
seconds, and the SP150 will play the entirety of that track
and then revert to the intro mode after that track.
All of the above modes are user-selectable; to change any
of these settings use the following process:
1. Use the remote control to select which mode function
you wish to change (buttons 10, 3, 11)
2. Press this button once to display the current setting.
3. Press this button repeatedly to toggle between ON
or OFF.
4. Select ON or OFF and leave the SP150 to select
this command.
PLAY COMMANDS FOR HARD DRIVE
In this mode the SP150 operates in a similar way to a
normal CD player but will play tracks from the hard drive.
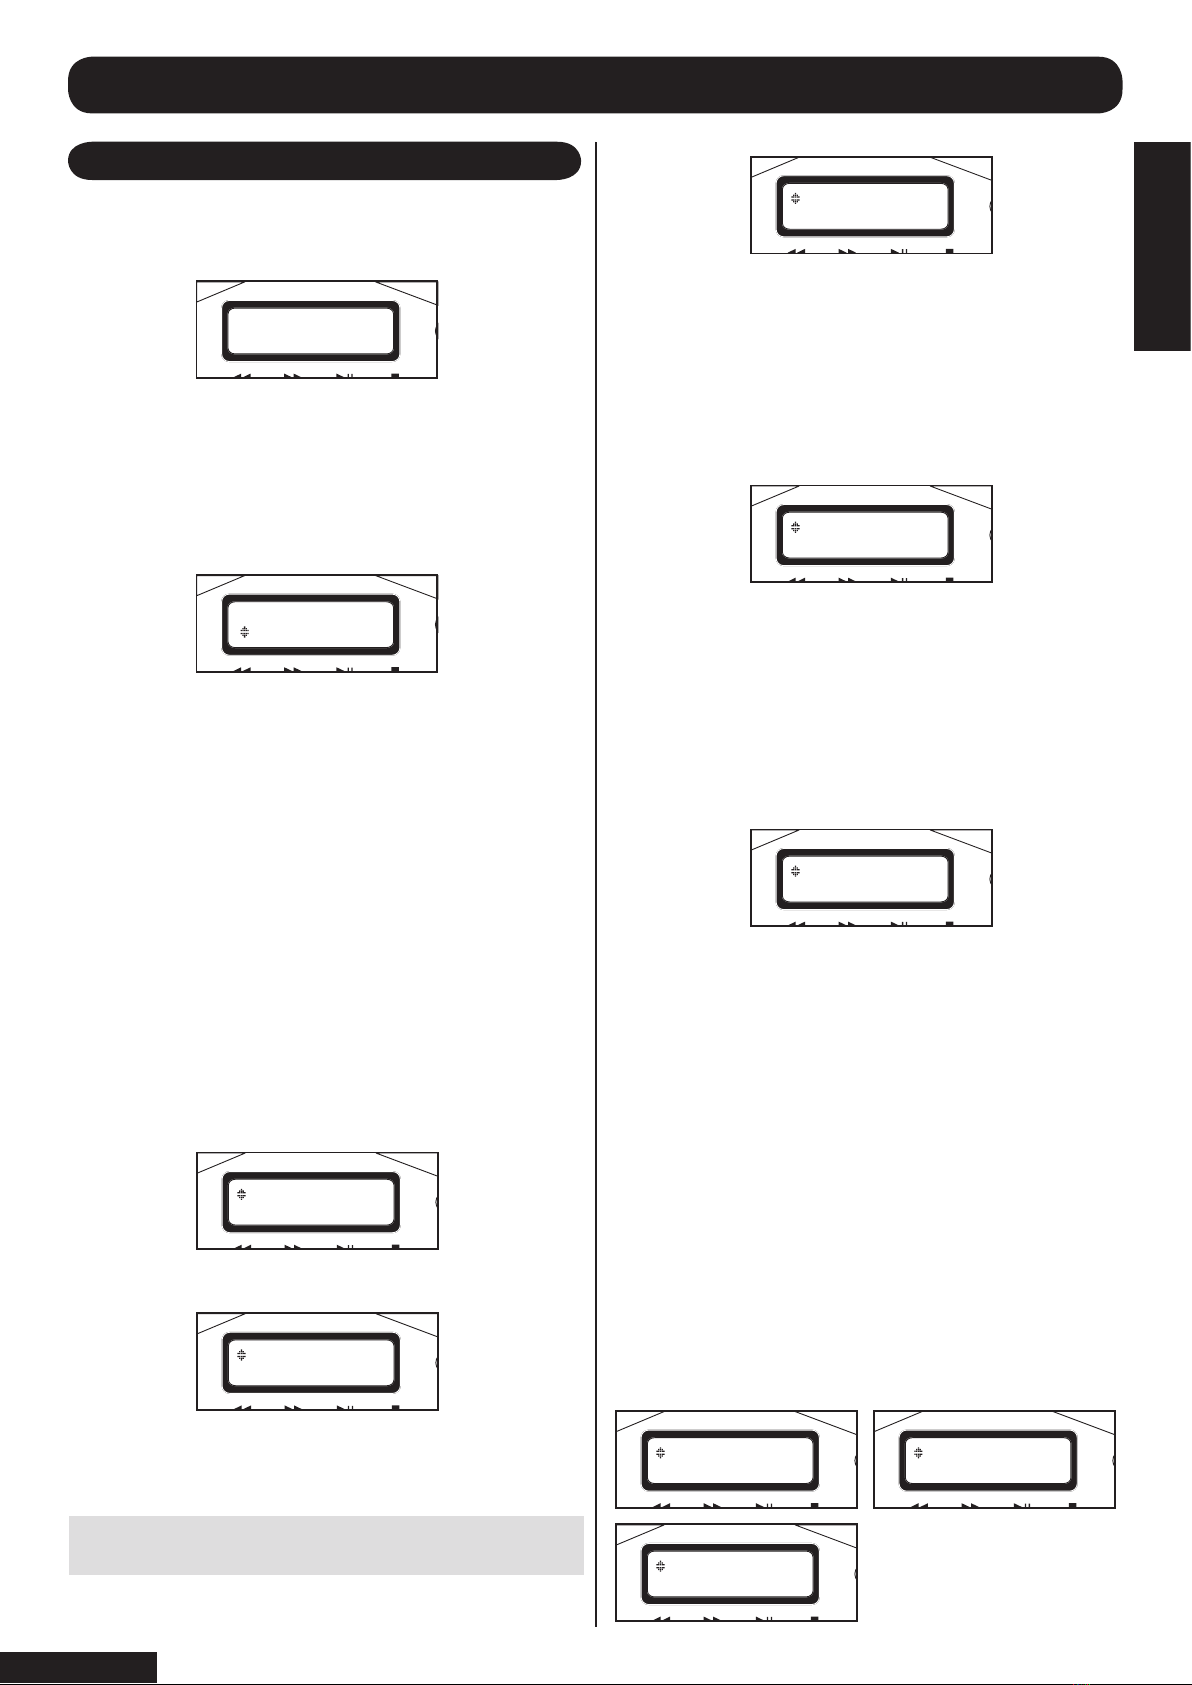
The information displayed in the LCD screen when playing
music from the hard drive is similar to that when playing
directly from a CD, however you will notice that the letters
HD appear on the second line on the display rather than
CD.
You will see an LCD screen similar to this:
Note: Unlike playing the CD as described in the
previous section, if the play button is pressed again,
the SP150 will continue from the previous playing
position from the hard drive.
The SP150 will also remember the last playing
position after the power has been switched OFF.
Pressing play from the hard drive menu will resume
playing from the same position again.
page 8
TO PLAY MUSIC FROM
THE HARD DRIVE

4. In this case 2 matches can be found for the characters
entered.
5. Use the arrow keys on the remote control (12 and 14) to
scroll up and down through the choices.
6. Press Play on the remote control to commence playing
that album immediately, or press OK on the remote control
(15) to select this album.
7. If you press OK the SP150 will then prompt you for
further actions.
8. Use the arrow keys on the remote control (12 and 14) to
scroll up and down through these choices:
Play, Compression, Rename , Delete.
The following screens will be displayed.
Press OK if you wish to play this album
2. Use the alpha numeric key pad on the remote control to
enter of the album title.
3. As you enter characters the SP150 will display the total
number of matches for the characters entered. Use the ‘C’
key to delete any unwanted characters.
2. Use the alpha numeric key pad on the remote control to
enter the artist’s name
3. As you enter the name, the SP150 will display the total
number of matches for the characters entered. Use the ‘C’
key to delete any unwanted characters.
4. In this situation 4 matches can be found for the input
characters.
5. Use the arrow keys on the remote control (12 and 14) to
scroll up and down through the choices.
6. Press OK or play on the remote control (15) to select
this artist. The track selected will then begin to play.
Because the SP150 contains a database of known albums
and song titles, it is possible to search the entire contents
of the hard drive to find a specific album, song or artist.
SEARCH COMMANDS WHEN PLAYING HARD DRIVE
SEARCH BY ARTIST
The SP150 will allow searches by artist, this will show both
complete albums by that artist, and also individual tracks
within compilation albums.
1. Press the artist button on the remote control (6)
SEARCH BY ALBUM
The SP150 will allow searches by album title. Because
the database can sometimes store both artist and album
names together, it is possible that searches can produce
results based on either pieces of information
1. Press the album button on the remote control (16)
Press OK if you wish to change the compression settings
stored against this album. Using the arrow keys to select
between yes/no will tell the SP150 if you wish to compress
this track later or not, then press OK.
Press OK if you wish to rename this album. Use the arrow
keys on the remote control (12 and 14) to advance through
the title, then use the C (cancel) key to delete characters.
Use the alpha numeric keys to enter a new title. Press OK
(15) when complete.
Press OK if you wish to delete this album. You will be
asked if you are sure, press OK to continue, or press back
to exit this function.
Note: This process cannot be reversed and the CD
will need to be reloaded.
page 9
SEARCH COMMANDS WHEN
PLAYING HARD DRIVE
The SP150 will allow searches by track title.
1. Press the track button on the remote control (18)
4. In this situation 13 matches can be found for the
characters entered.
5. Use the arrow keys on the remote control (12 and 14) to
scroll up and down through the choices.
6. Press Play on the remote control to commence playing
immediately, or press OK on the remote control (15) to
select this album.
7. The SP150 will then prompt you for further actions.
8. Use the arrow keys on the remote control (12 and 14) to
scroll up and down through choices:
Play, Delete track, Rename album, Rename track, or Add
to Playlist.
The following screens will be displayed.
Press OK if you wish to play this track
SEARCH BY TRACK
Press OK if you wish to delete this track. You will be asked
if you are sure, press OK to continue, or press back to exit
this function.
Press OK if you wish to rename the Album title.
Use the arrow keys on the remote control (12 and 14) to
advance through the title, then use C (cancel) key to delete
characters.
Use the alpha numeric keys to enter a new title. Press OK
(15) when complete.
Playlists are explained in more detail in the next section.
This track can be added either to a new playlist or to an
existing play list.
1. Using the arrow keys on the remote control (12 and 14)
choose either a new playlist or scroll through existing ones.
If no existing playlists are present the SP150 will prompt you
to create a new playlist (see playlist commands section)
2. Press OK to select.
3. If new playlist has been selected then you will need to
enter a name for it using the alpha numeric keys.
4. Press OK to confirm the name of the new play list and
add this track to it.
5. If you selected an existing playlist, press OK to add this
track to it.
SEARCH COMMANDS WHEN PLAYING HARD DRIVE
2. Use the alpha numeric key pad on the remote control to
enter the name of the track.
3. As you enter the name, the SP150 will display the total
number of matches for the characters entered. Use the ‘C’
key to delete any unwanted characters.
Press OK if you wish to rename the track.
Use the arrow keys on the remote control (12 and 14) to
advance through the title, then use C (cancel) key to delete
characters.
Use the alpha numeric keys to enter a new title. Press OK
(15) when complete.
Note: This process cannot be reversed and the CD
will need to be reloaded.
page 10
SEARCH COMMANDS WHEN
PLAYING HARD DRIVE

The SP150 allows an infinite number of playlists to be
created limited only by the spare capacity on the hard
drive. These could be used by individual family members,
or represent music styles or tastes. Any track which is
stored on the hard drive can be added to the playlists to
create individual compilations.
Once a playlist has been created it can be recalled at
any time. Once all tracks stored in the playlist have been
played, the SP150 will stop further playing.
When in playlist mode the SP150 will operate the play
commands as described in previous chapters with the
following buttons being effective;
►/ ll (play/pause)
>>I (skip up/fast forward)
■ Stop
If the skip up button is pressed at the end of a playlist,
the next available track from the album of the last stored
song in the playlist will be played, or if the random button is
pressed a randomly selected track will be played next.
The Random Play mode is ineffective when in playlist
mode, The playlist will play in order the tracks were stored
when the playlist was created.
1. To access the playlist menu press the playlist button on
the remote control (5)
2. Use the arrow keys on the remote control (12 and 14) to
scroll up and down through the choices.
Use this function to rename an existing playlist.
1. Press OK on the remote control to see existing
playlists.
2. Using the arrow keys on the remote control (12 and 14)
scroll through existing playlists.
3. Press OK to select a playlist.
4. Use the arrow keys on the remote control to advance
through the playlist names, then use C (cancel) key to
delete characters. Use the alpha numeric keys to enter a
new name.
5. Press OK (15) when complete.
Use this function to edit the tracks in an existing playlist.
1. Press OK on the remote control to see existing
playlists.
2. Using the arrow keys on the remote control (12 and 14)
scroll through the existing playlists.
3. Press OK to select a playlist.
4. The top line of the display shows the artist name and track
title, the bottom line shows the cut and past commands.
5. Using arrow keys on the remote control (12 and 14)
scroll through the tracks stored in the play list.
6. When you have reached the end of the tracks in the play
list you will see the word –end-.
7. From the track list select the track to be edited.
8. Press the C key on the remote control to delete this
selection.
9. This cut selection can be pasted in another number
location if required, or deleted.
10. To paste into another number location, use the arrow
keys on the remote control to select the desired number.
Then press OK on the remote control.
11. To delete this track from the playlist, press OK on the
remote control after the selection had been deleted.
12. If you wish to delete more than one track then after
deleting the previous track continue through the track list
and continue to delete those no longer required by pressing
C on the remote control.
13. When finished press OK, which will return you to the
ready menu.
Note: This process cannot be reversed and the CD
will need to be reloaded.
Use this function to delete a playlist permanently from
the SP150
1. Press OK on the remote control to show the
playlists stored
2. Using the arrow keys on the remote control (12 and 14)
scroll through the existing playlists.
3. Press OK to select a playlist to be deleted.
4. You will be asked if you are sure?
5. Press OK to continue, or press back to exit this
function.
PLAYLIST COMMANDS
Use this function when you wish to add a track playing on
the hard drive.
1. Press OK from the remote control to access this
function.
2. Using the arrow keys on the remote control (12 and 14)
choose either new playlist or scroll through existing ones.
3. Press OK to select.
4. If new playlist has been selected then you will need to
enter a name for it.
5. Press OK to confirm the name of the new play list and
add this track to it.
6. If you selected an existing playlist, press OK to add this
track to it.
ADD TO PLAYLIST
RENAME PLAYLIST
EDIT THE PLAYLIST
DELETE PLAYLIST
Note: This process cannot be reversed and the
playlist will need to be recreated.
page 11
PLAYLIST COMMANDS

Use this function to create a new playlist in preparation for
adding tracks to it.
1. Press OK on the remote control to enter this menu
2. You will be asked to enter the playlist name
3. Use the alpha numeric keys on the remote control to
input characters.
4. Use the C (cancel) key to make corrections.
5. Press OK when the name is correct
6. This play list (empty) has been stored ready for tracks
to be added.
NEW PLAYLIST
PLAY PLAYLIST
Use this function to play a saved playlist.
1. Press OK on the remote control to enter this menu
2. Using arrow keys on the remote control (12 and 14)
scroll through existing playlists to choose one.
3. When you have selected a playlist, press OK on the
remote control to select this playlist.
4. Your selected playlist will commence playing.
INTRO MODE IN PLAYLIST
Intro mode can be used when playing a playlist. As
described on page 8, the intro mode will play the first 15
seconds of each track in a playlist.
To activate the intro mode:
1. Use the remote control to select intro mode by pressing
button 3.
2. Press this button once to display the current setting.
3. Press this button repeatedly to toggle between ON or
OFF.
4. Select ON or OFF and the SP150 will accept this
command.
If you wish to listen to a track, press the play button once
during the 15 seconds intro and the SP150 will play the
entirety of that track, and then revert to the intro mode from
that point.
PLAYLIST HOT KEYS
The SP150 has the ability to provide one key instant access
to playlists from the numeric keys on the remote control.
This shortcut is limited to 10 playlists, and works with the
keys 0 to 9.
When naming your playlist, if you include a number after
the title, such as Paul 1 or Simon 2, when the 1 or 2
key is pressed on the remote control, this playlist will be
automatically selected and played.
This feature is effective if planning playlists for use during
an event when perhaps you would have 10 stored playlists
which represented different moods or times during that
event.
If two playlists are stored with the same number suffix,
ie Paul 1 and Simon 1, the SP150 will recognise the first
playlist created with that particular number.
PLAYLIST COMMANDS
page 12
PLAYLIST COMMANDS
FRONT PANEL CONTROLS
As has been described in previous chapters the front panel
controls for the following functions are effective for both
hard drive and CD control:
►/ ll (play/pause)
>>I (skip up/fast forward)
<<I (skip back/fast reverse)
■ Stop
These functions operate in the same manner as has been
described in previous chapters.
Rotary Dial
The rotary dial on the front panel allows instant access to
all stored albums on the hard drive.
1. Turn the Search-Album/Track dial on the front panel
once.
2. The LCD display will display the Albums stored.
3. Rotate the Search-Album/Track dial on the front panel
clockwise to scroll up through the albums stored on the
hard drive, or anticlockwise to scroll down through the
albums stored.
4. When you have located the album you wish to listen
to, press the Search-Album/Track dial on the front panel
once to select this album.
5. Then by rotating the Search-Album/Track clockwise
you are able to search through the album to select the
track you wish to play. Turning the dial anticlockwise
searches back through the tracks on that album.
6. Press the dial once to select the track you wish to play.
7. The SP150 will play the entire album from the track
selected, and then will play the next album stored on the
hard drive.
Please note that if Random is selected, after playing the
entire album the SP150 will resume random play of the
contents of the hard drive.
8. The following modes are usable when playing a slected
album using the rotary dial:
Intro mode
Segue
Playlist contols
These options operate in the same manner as described
in previous chapters.
Please note:
When using the rotary dial to locate an album and then
a desired track, the remote control functions for search
up/down are disabled, only the play function on the
remote control will operate. All remote control functions
will resume when selection has been made.
page 13
FRONT PANEL
CONTROLS

The menu button is used for system set up changes, and
there are 3 top level menus to choose from.
1. Compression On/Off
2. System
3. Compression settings
To access these menus press the menu button, and you
will see the following screens:
Compression On/Off. This allows the compression process
to be activated manually outside of the automatic process
which occurs when the SP150 is in standby mode.
1. To turn compression on press the OK button on the
remote control.
2. The compression light on the front panel will illuminate
to indicate this function is active.
3. All other controls can be operated whilst the SP150 is in
the compression mode.
4. To deactivate compression press the menu button again
on the remote control. The first menu function will show
compression off. Press OK button on the remote control to
turn off this compression feature.
The system menu allows changes, information and
upgrades to occur to the SP150 operating system.
1. To enter the system menu press OK on the remote
control.
2. The first system menu is Output level.
In this part of the instruction manual we explore features on
the SP150 which are not normally accessed for everyday
use and explain some of the technology used.
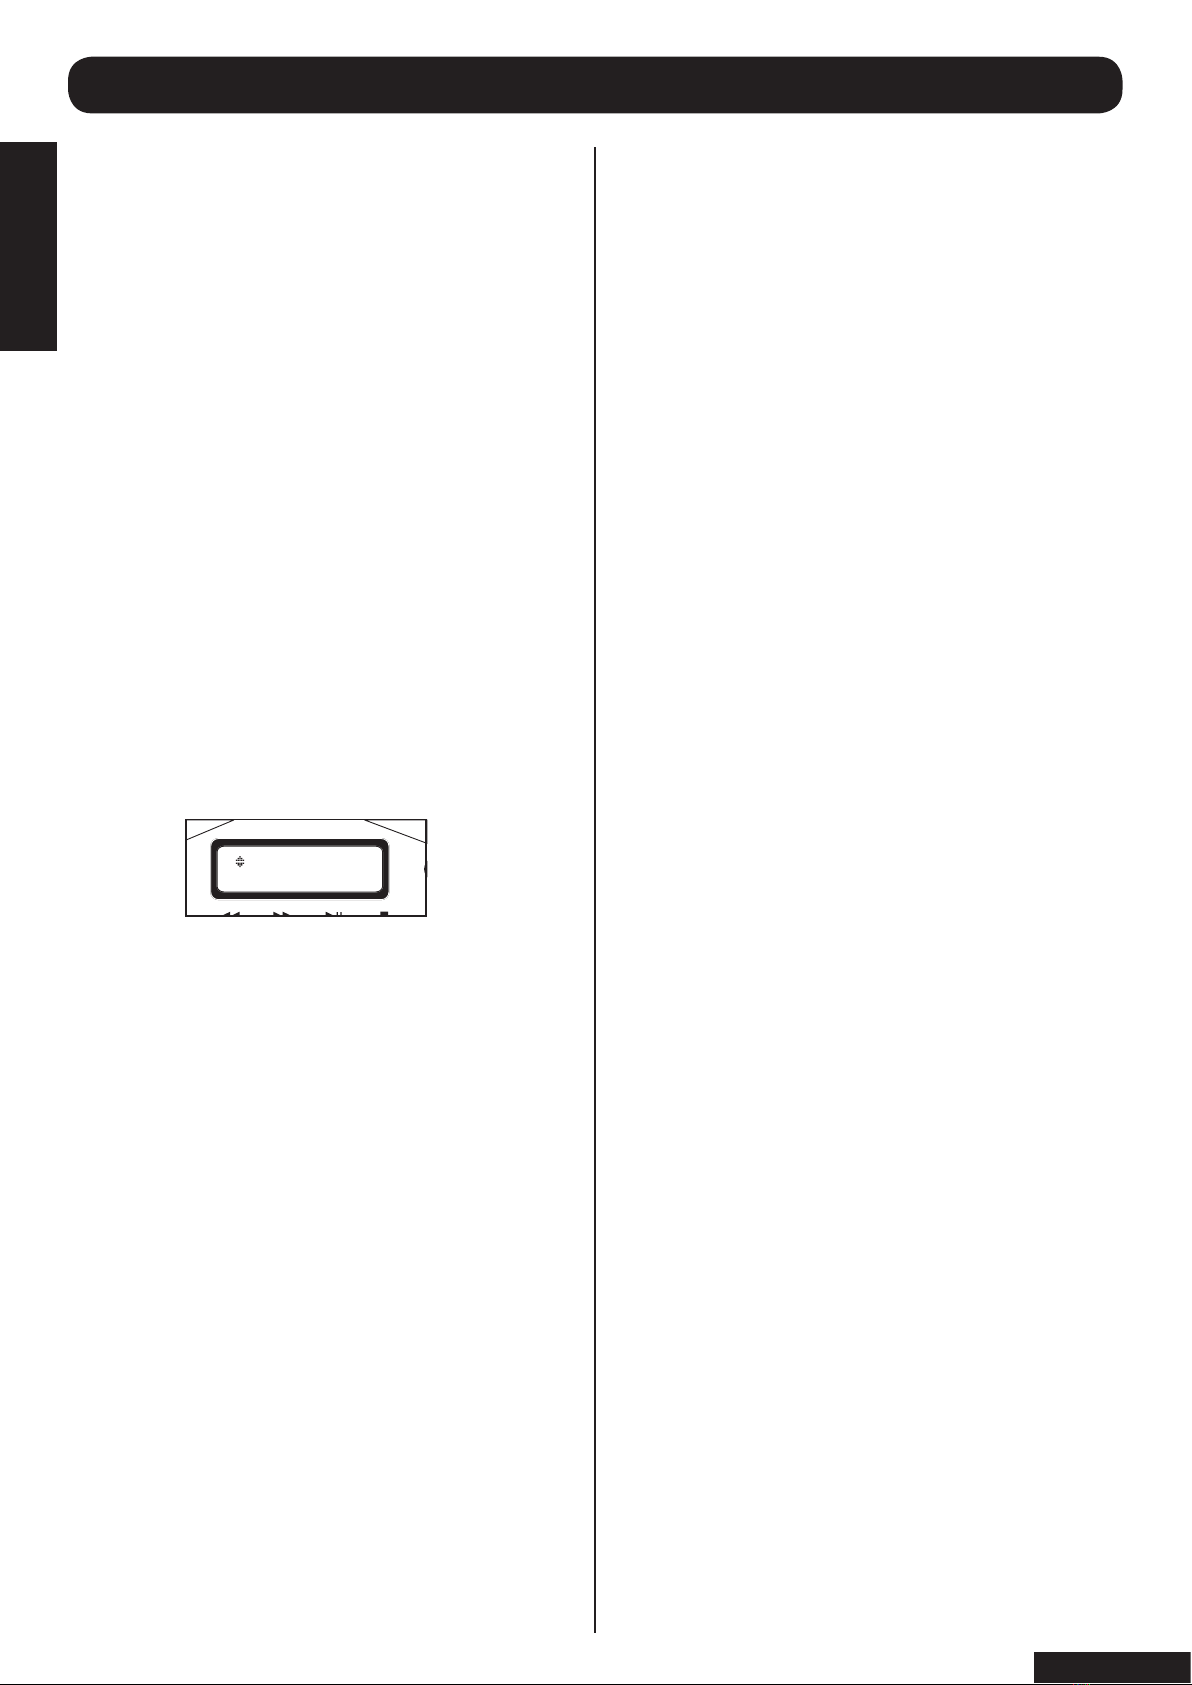
3.This shows that of the 31 songs stored all 31 are
compressed. When in standby mode no further
compression will take place as it is not necessary.
4.The display will then show a status of the disc capacity
5. The SP150 has a total hard drive capacity of 40Gb. In
this situation only 0.74Gb has been used leaving a further
38.32Gb storage capacity.
6. The SP150 will automatically return to the Ready menu
after displaying this information.
Please note that the SP150 will use some of the capacity of
the hard drive to store information such as playlists and the
database of album names and track titles. Therefore the
number of tracks compressed compared to spare capacity
on the harddrive is not simply a linear relationship.
ADVANCED FUNCTIONS
INFO BUTTON
Use this button to give the status of the total number of
tracks stored on the SP150, and to display how many of
those are compressed. It will also show the amount of
space used on the hard drive, and the remaining capacity.
1. Press the INFO button on the remote control (1)
2. The LCD display will show the following information:
MENU BUTTON
COMPRESSION ON/OFF
SYSTEM MENU
QUICK KEY
When playing the hard drive it is possible to use the quick
key to access the following functions:
Delete track
Rename album
Rename track
Add to playlist
1. Use the arrow keys (12 & 14) on the remote control to
scroll through the choices.
2. Press the OK button on the remote control (15) to make
a selection.
3. Follow the procedure for each process as described in
the relevent chapters in this manual.
page 14
ADVANCED
INSTRUCTIONS

After the SP150 has checked the hard drive, if there is any
malfunction it will display a malfunction code.
Please consult your local dealer or ring the Acoustic
Solutions customer helpline for further information.
08712 307747 inside United Kingdom
+441327 340601 outside United Kindom
Please note that our customer helpline is open
Mon-Fri 09:00-16:30 (GMT) excluding National holidays.
As software updates become available it is advisable to
install these.
Note: please ensure that you have registered your SP150
using the warranty card to ensure that you receive the
latest updates.
If it is necessary to update the operating software, this will
be introduced into the SP150 on a CD rom.
1. Press eject on the front panel (14), to open the CD
drawer.
2. Place the update CD into the drawer with the label
uppermost and press eject again.
3. The CD drawer will close load the CD, and it will
display that the CD is not an audio CD.
4. From the System menu select the “Upgrade” function
and press “OK” on the remote control (15).
5. The SP150 will then update the operating software
from the CD rom in the CD drawer.
6. The SP150 will then prompt you to reboot the system
for the new software to take effect. This will require the
power to be turned off, and then on again using the
power button on the front panel (8).
The SP150 uses the CDDB database to name CD’s
which are played or stored on the hard drive.
Note: please ensure that you have registered your SP150
using the warranty card to ensure that you receive the
latest updates. These are free for the first 12months.
It will be necessary to update the CDDB database to
ensure that the latest CD releases are recognised by the
SP150, and this will be introduced into the SP150 on a
CD rom.
1. Press eject on the front panel (14), to open the CD
drawer.
2. Place a CD into the drawer with the label uppermost
and press eject again.
3. The CD drawer will close load the CD, and it will
display that the CD is not an audio CD.
4. From the System menu select the “Update CDDB”
function and press “OK” on the remote control (15).
5. The SP150 will then update the database from the CD
1. The output signal level of the SP150 can be changed to
match the input sensitivity of the amplification equipment it
is connected to.
2. The default output level setting of the SP150 is 27, this
equates to 280mV.
3. To alter this setting use the up/down arrow keys on the
remote control to select a level between 0 and 31.
4. Press OK to confirm your selection, or after a time out
period of 30 seconds the SP150 will accept this new output
setting and revert back to the normal play menu.
5. The following table represents the respective output
senstivity levels for the output level numbers:
It is possible to check the revision number of the software
loaded onto the SP150.
From the System menu when scrolling through options
you will see a screen similar to this:
The SP150 will allow some self diagnostics on the hard
drive. This may be necessarry if the SP150 malfunctions
or develops a problem.
From the System menu scroll down using the up/down
keys on the remote control until you see the check disk
screen:
Press the OK button on the remote control to initiate a
check of the harddrive
Volume setting table:
Volume 0 2mV
Volume 3 4mV
Volume 7 8mV
Volume 11 17mV
Volume 15 35mV
Volume 19 70mV
Volume 23 140mV
Volume 27 280mV
Volume 31 560mV
OUTPUT LEVEL
SOFTWARE REVISION NUMBER
CHECK DISK
UPGRADE
UPDATE CDDB
page 15
ADVANCED FUNCTIONS
ADVANCED FUNCTIONS

:
The compression settings menu allows changes to be
made to the compression bit rates and also to the automatic
compression process when in stand by.
The compression level can be altered to compress the
contents of the harddrive to different quality levels.
The choices are:
Most compressed 128Kb
Normal 192Kb
High quality 320Kb
If you wish to store the maximum number of songs on the
hard drive, choose the setting “Most compressed”, however
the audio quality will be the lowest. Conversely for the least
amount of songs stored but with the highest audio quality
choose ‘High quality’.
The Factory default setting is Normal.
For every day use the normal setting will give a good
compromise between storage and sound quality.
Note: In the process of loading a CD into the SP150, you
are asked to decide if this CD is to be compressed later. If
a disc is required to be stored with ultimate sound quality
ensure that when asked to “compress later” the no option
is chosen. This will mean that this CD will be stored as a
faithful reproduction of the original without any compression
being applied.
To change compression settings:
1. From the menu Compress level, press OK on the remote
control (15) to select this menu.
2. The LCD display will show ‘Most compressed’, using
the arrow keys on the remote control (12 and 14) search
through Most compressed, High quality and normal.
3. When you have decided which compression level you
require press OK to select.
4. After 30 seconds of inactivity the SP150 will return to the
previous operating menu position.
The Compress Mode menu allows the automatic
compression process to be changed to a manual
operation.
The factory default setting is ‘Compress auto’. This
means that the SP150 will automatically compress
un- compressed files when placed in standby power
mode.
Changing this setting to ‘Compress manual’ will mean that
the compression process will need to be started manually
by using the compression on/off menu as described in
previous chapters.
To change the compression mode:
1. From the menu Compress mode, press OK on the
remote control (15) to select this menu.
2. The LCD display will show ‘Compress auto’, using the
arrow keys on the remote control (12 and 14) scroll
between Compress auto and Compress manual.
3. When you have decided which compression mode you
require press OK to select.
4. After 30 seconds of inactivity the SP150 will return to the
previous operating menu position.
COMPRESSION SETTINGS MENU
page 16
ADVANCED
INSTRUCTIONS
rom in the CD drawer.
6. The SP150 will then prompt you to reboot the system
for the new database to take effect. This will require the
power to be turned off, and then on again using the
power button on the front panel (8).
ADVANCED FUNCTIONS

ADDITIONAL INFORMATION
For service menu’s:
Format HD
Fix HD
Copy HD
Please contact our customer support helpline on:
08712 307747 inside United Kingdom
+441327 340601 outside United Kindom
Please note that our customer helpline is open
Mon-Fri 09:00-16:30 (GMT) excluding National holidays.
NOTE:
The SP150 will only play/record from CDs, and is not
compatible with MP-3 discs.
The SP150 will play/record from both CD-R and CD-R/W
CDs.
Power supply details:
power supply - 100 to 230 Volts AC
frequency - 50/60Hz
consumption - 50 Watts
Output voltage - < 2mV-560mV
Harmonic distortion - > 0.1% THD + N
Signal-to-Noise ratio - > 70 dBV
Processing:
16 bit Digital Processor
32 bit DSP
Compression 15:1 (in approx 90% real time)
CD Drive:
52 x playback
CD rip time - < 3 minutes (typical)
Hard Disc Drive:
40Gb capacity
Access time -
Display - 2 x 16 character backlit
LCD
Physical dimensions
Measurments - 43W x 28.5D x 9.5H (cms)
Weight - 4.8 Kg
SERVICE MENU
SPECIFICATION
CONTACT DETAILS
page 17
ADDITIONAL
INFORMATION
We trust you are completely satisfied with this product
from Acoustic Solutions Limited, however please feel free
to contact us if you experience any difficulties, or if you
would like to express your views regarding our products
Please write to:
Acoustic Solutions Limited.
Grand Union Buildings
54 High Street
Weedon Bec
Northampton
NN7 4QD
United Kingdom
Telephone +44 (0)1327 340601
Fax: +44 (0)1327 342298
www.acousticsolutions.co.uk
email: [email protected]
Through the process of continuous improvement,
Acoustic Solutions Limited reserves the right to change or
alter specifications without prior notice. E&OE
Table of contents
Other ACOUSTIC SOLUTIONS Jukebox manuals


