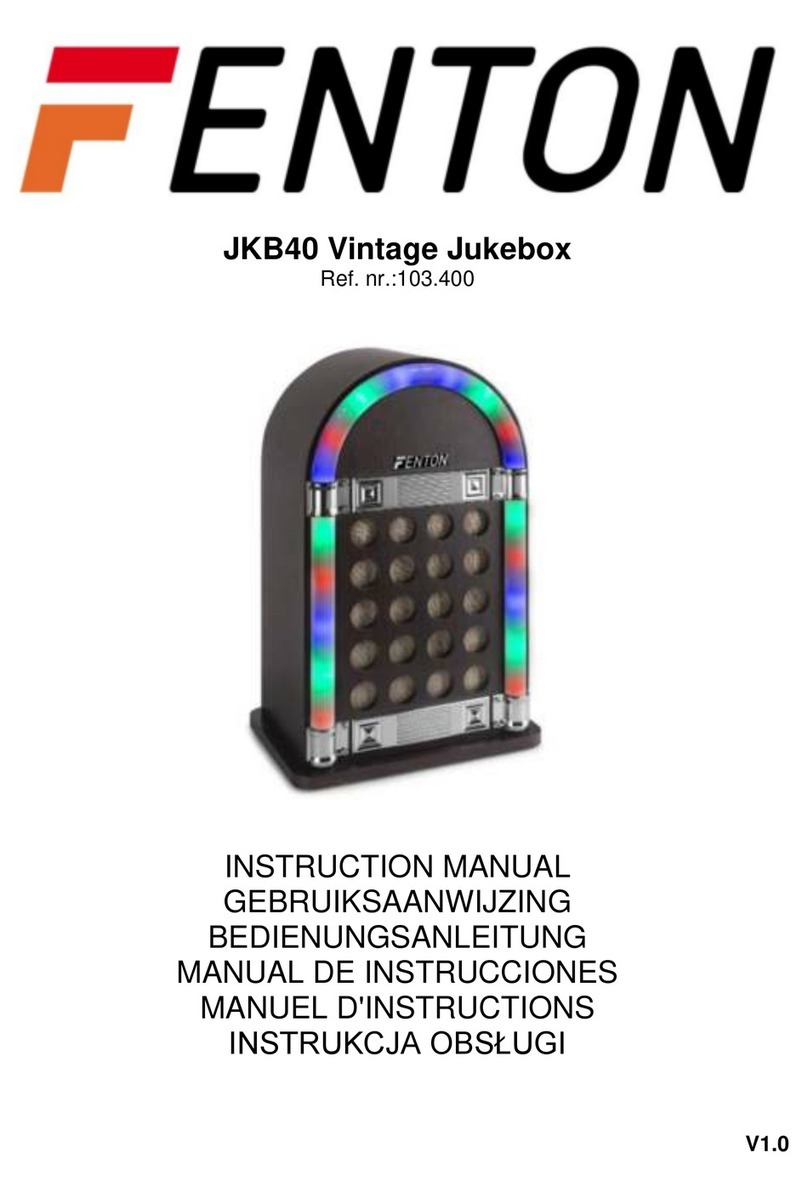
Ricatech RR500 User manual

USER MANUAL
RR500 JUKEBOX
WITHAM/FM RADIO, CD PLAYER AND MP4 DOCKING STATION
WWW.RICATECH.COM

On Placement
Do not use the unit in places which are extremely hot, cold, dusty, or humid.
Place the unit on a flat and even surface.
Do not restrict the air flow of the unit by placing it in a place with poor air flow, by covering it with a
cloth.
FCC Information (USA VERSION ONLY)
This device complies with Part 15 of FCC Rules.
Operation is subject to the following two conditions:
(1) Device may not cause harmful interference, and
(2) This device must accept any interference received, including interference that may cause undesirable
operation.
On Safety
When connecting or disconnecting the AC cord, grip the plug and not the cord itself. Pulling the cord may
damage it and create a hazard.
When you are not going to use the unit for a long period of time, disconnect the AC power cord.
On Condensation
When left in a heated room where it is warm and damp, water droplets or condensation may form inside the
unit. When there is condensation inside the unit, the unit may not function normally. Let the unit stand for 1
to 2 hours before turning the power on, or gradually heat the room up and dry the unit before use.
CD PLAYING
WARNING:
Should any trouble occur, disconnect the AC power cord and refer servicing to a qualified technician.
Do not place anything directly on the top of the unit. Damage to the unit can result.
ATTENTION SHOULD BE DRAWN TO THE ENVIRONMENTALASPECTS OF BATTERY DISPOSAL
WARNING: TO REDUCE THE RISK OF ELECTRIC SHOCK,
DO NOT REMOVE COVER (OR BACK).
NO USER-SERVICEABLE PARTS INSIDE.
REFER SERVICING TO QUALIFIED SERVICE PERSONNEL.
WARNING: TO PREVENT FIRE OR SHOCK HAZARD,
DO NOT EXPOSE THIS APPLIANCE TO RAIN OR MOISTURE.
CAUTION:TO PREVENT ELECTRIC SHOCK,
MATCH WIDE BLADE OF PLUG TO WIDE SLOT,
FULLY INSERT. (USA AND CANADA ONLY)
The Lighting flash with an arrowhead symbol, within
the equilateral triangle, is intended to alert the user to
the presence of uninsulated “dangerous voltage”
within the product’s enclosure that may be of sufficient
magnitude to cause an electric shock.
The exclamation point within the equilateral triangle
is intended to alert the user to the presence of
important operating and maintenance (servicing)
instructions in this owner manual.
LASER SAFETY
THIS UNIT EMPLOYS A LASER.
ONLY A QUALIFIED SERVICE PERSONNEL SHOULD OPEN COVER IN ATTEMPT TO
SERVICE THIS DEVICE DUE TO POSSIBLE EYE INJURY.
CAUTION: USE OF ANY CONTROLS, ADJUSTMENTS, OR
PROCEDURES OTHER THAN THOSE SPECIFIED HEREIN
MAY RESULT IN HAZARDOUS RADIATION EXPOSURE.
ENGLISH - 1

This section describes the compact disc controls in the order in which you
would normally use them.
Follow the instruction in a step-by-step sequence and in a very short time
you will master complete operation of the unit.
CD OPERATION
1. Rotate the VOLUME knob from OFF position towards the Max position to
turn on the unit.
2. Push the CD DOOR once to open the CD DOOR to insert a disc into the
DISC TRAY then push the CD DOOR again to close the CD DOOR.
**Make sure the CD DOOR is closed properly**
3. Press PLAY button.
4. Adjust the listening level by rotating the VOLUME knob.
NOTES
If the disc is seriously scratched, or too dirty, disc play may not start.
If an improperly centered disc is played, noise can be heard in the
mechanism. The use of such disc should be avoided.
Do not tilt the unit with discs loaded. Doing so may cause malfunction.
TO STOP DISC PLAY
Press the STOP button. Disc play will stop; the TRACK display will show the
total number of tracks.
TO LISTEN TO THE DESIRED TRACK
1. Press the F.F button, the CD player will skip ahead to the next track each
time when the F.F button.
2. Press the F.W button, the CD player will skip back to the previous track.
3. Press the PLAY button, play will start.
ENGLISH - 3

REPEAT DISC PLAY(IF EQUIPPED)
1. Press REP button once to repeat disc play of one track.
2. Press REP button twice to repeat disc play all the track.
3. Pressing once more turns off repeat mode.
PROGRAMMED DISC PLAY (IF EQUIPPED)
1. Press the STOP button.
2. Press the PGM button.
3. Select a track number then press PGM button again.
4. Repeat step 3 until all the desired tracks are programmed (Up to total 20
tracks).
RADIO
1. Rotate the VOLUME knob from OFF position towards MAX position to turn
on the unit.
2. Select AM or FM by sliding the FUNCTION selector.
3. Select radio station by rotating the TUNING knob.
4. To turn off the unit, rotate VOLUME knob to OFF position.
FM ANTENNA JACK (IF EQUIPPED)
For better FM reception, connect FM antenna wire (included) to the FM
ANTENNA jacks (located at the back cover)

LIGHT OPERATION
1. Rotate the LIGHT button to turn on all the light.
2. To turn off the light, rotate the LIGHT button again.
REMARK: (FOR NEON LIGHTS VERSION ONLY)
When MODE selector is switched to AM, the neon lights will be automatically
turned off.
LIGHT MODE (IF EQUIPPED BULB LIGHTS VERSION ONLY)
Switch the MODE selector at back cover to change the light mode.
LIGHT MODE (IF EQUIPPED LED LIGHTS VERSION ONLY)
The colours of the lights change over time, switch to HOLD at back cover to remain
static to your favourite colour. Switch to PLAY position to resume
*IMPORTANT NOTE: (LED LIGHTS VERSION ONLY)
The changing colors sequences of lights are controlled by IC, the lights maybe
turned off when the light mode in HOLD position is normal.
AUXILIARY CONNECTION “AUX IN”(IF EQUIPPED)
1. Connect your own device (i.e. MP3 player or IPOD) to the “AUX IN
connection”(located at the back of cabinet) with stereo plug and detachable
rack (packed separately). OR IF YOUR UNIT EQUIPPED WITH “AUX IN
socket”(located at the right side of cabinet) with RCA cord (packed
separately), the two ends of the cord should be connected to the holes of the
jack in accordance with the colors.
2. Adjust the ON / OFF switch next to the jack to the „ON‟position.
3. Rotate the mode selector to “CD-AUX”.
4. Adjust the sound with the VOLUME knob or the volume control of the device.
5. When change to another mode, the device will continue to play with no sound
until the ON / OFF switch is adjusted to „OFF‟position and switch off the device.
IMPORTANT NOTE:
1. Adjust the ON / OFF switch to the „OFF‟position when not in use.
2. The CD function will resume to normal only after the ON / OFF switch is adjusted
to „OFF‟position.
ENGLISH - 4
ENGLISH - 5

The following checks will assist in the correction of most problems which you may encounter will
your set. Before going through the check list below first check the following points.
**The power cord must be connected firmly.
Should any problem persist after you have made these check consult your nearest friendly dealer.
TROUBLESHOOTING GUIDE
Symptom
Possible Causes (and Remedies)
Radio Reception
No radio
The function switch is not in the correct
position.
Adjust the VOLUME knob.
Rotate the TUNING knob to find a radio
station.
Switch the AUX IN jack to “OFF”
CD Player Operation
Disc play does not start.
Reload the disc with the label side up.
Clean the disc.
Sound skips
Change the installation location.
Press reset button.
General
Unit not working
The AC power cord is not connected to an
outlet.
Check that the power cord is connecting
firmly.
Turn the power button from the “OFF”
position to “ON” position.
No sound output
Turn VOLUME clockwise.
Press reset button.
Switch the AUX IN jack to “OFF”& remote
RCA cord.
Severe hum or noise
The TV or VTR is too close to the stereo
system.
Separate from the TV or VTR.
SPECIFICATION
POWER CONSUMPTION : 15W
POWER SOURCE : PLEASE REFER
TO THE CAUTION
LABEL ON THE
BACK SIDE OF
UNIT.
LOUD SPEAKER : 2 X 3”8 Ohms.
ENGLISH - 6

Warranty:
Ricatech BV covers all products (Excl. accessories) with a 2 year warranty applying to all faults
caused by a factory-error. External physical damage will not be covered by our warranty
Warranty:
All hardware errors occurring within 2
years after purchase unless caused
by points mentioned below.
No Warranty :
Faults caused by:
*Dismountal by any other service
center then ours.
*Water and moisture damage
*Drop and bump damage
*Usage with non approved Ricatech
accessories.
*Short-circuit or over-voltage
*Physical damage, loss or damage to
accessories
Out of warrranty
repairs
Please be so kind to contact us for
out-of-warranty repairs. We will
provide you with a quotation with the
expected costs.
Goods out of warranty cannot be
returned to your reseller.
KLANTENONDERSTEUNING
Voor vragen of een probleem met uw Ricatech product kunt u telefonisch en per email contact opnemen met de Ricatech
klantenservice.
Email
Voor klantenondersteuning per email kunt u een email sturen naar s[email protected]. Vergeet niet het modelnummer,
serienummer van het product en uw naam & adres te vermelden en beschrijf duidelijk uw vraag of probleem.
Telefoon
Bel voor telefonische klantenondersteuning naar +32 3 3265694. Onze servicemedewerkers staan klaar om u te helpen.
Bezoek de website van Ricatech voor de volledige procedure: www.ricatech.com

IM-NYSRC-09X

HANDLEIDING
RR500 JUKEBOX
MET AM/FM RADIO, CD SPELER EN MP4 DOCKING STATION
WWW.RICATECH.COM

Plaatsing en gebruik
Gebruik dit apparaat niet in een extreme hete, koude, stoffige of vochtige omgeving
Plaats het apparaat op een vlakke ondergrond
Laat voldoende ruimte open om het apparaat voor ventilatie. Dek het apparaat niet af met een doek
of deken.
FCC Informatie (Hoofdzakelijk in USA)
Dit apparaat is geproduceerd in overeenkomst met deel 15 van de FCC Regelgeving. (USA)
Het gebruik van dit apparaat moet aan twee voorwaarden voldoen:
(1) Dit apparaat mag geen schadelijke interferentie veroorzaken.
(2) Dit apparaat moet elke vorm van interferentie kunnen verdragen, zelfs als deze ongewenste storingen
veroorzaakt.
On Safety
Bij het aansluiten en afkoppelen van het lichtnet dient u de stekker zelfte gebruiken, en niet de kabel. Een
kabelbreuk kan leiden tot een elektrische schok.
Haal de stekker uit het stopcontact wanneer u het apparaat voor een lange periode niet gebruikt.
Bij condensatie:
Bij grote temperatuur verschillen kan condensatie ontstaan op en in het apparaat wat storingen kan
veroorzaken. Laat bij een groot temperatuur verschil het apparaat 1~2 uur acclimatiseren en droog deze af
met een schone, niet-pluizende doek alvorens het apparaat aan te sluiten op het lichtnet.
WAARSCHUWING:
Bij problemen dient u onmiddellijk de stekker uit het stopcontact te halen en contact op te nemen met
Plaats geen objecten op het apparaat. Dit kan schade veroorzaken aan de behuizing.
WAARSCHUWING:
OM EEN ELECTRISCHE SCHOK TE VOORKOMEN,
-VERWIJDER NOOIT HET ACHTERPANEEL!
-ER ZIJN GEEN TE HERSTELLEN ONDERDELEN BINNENIN.
-ONDERHOUD DIENT U OVER TE LATEN AAN EEN
GEAUTHORISEERD SERVICE CENTER.
WAARSCHUWING:
OM EEN ELECTRISCHE SCHOK TE VOORKOMEN,
-BRENG DIT APPARAAT NOOIT IN CONTACT MET VOCHT EN REGEN.
Het icoon met bliksem schicht met pijl in een driehoek
geeft aan dat er zich ongeïsoleerde onderdelen in het
apparaat bevinden met een dermate hoog voltage dat
deze een elektrische schok kunnen veroorzaken.
Het icoon met uitroepteken in een driehoek is er om
u erop te attenderen dat een bepaald stuk tekst
belangrijke informatie bevat met betrekking tot het
gebruik en/of onderhoud van het apparaat.
Veiligheid m.b.t. de Laser
IN DIT APPARAAT IS EEN LASER VERWERKT.
ALLEEN EEN GEAUTHORISEERD SERVICE CENTER MAG ONDERHOUD PLEGEN
AAN DIT APPARAAT EN COMPONENTEN VERVANGEN.
LET OP: HET GEBRUIK OP ELKE ANDERE MANIER DAN AANGEGEVEN IN DEZE
HANDLEIDING KAN TOT LETSEL LEIDEN.
Nederlands - 1

AUDIO CD WEERGAVE:
In dit hoofdstuk word het gebruik van de ingebouwde CD speler beschreven.
Volg deze stap voor stap om de functies optimaal te kunnen benutten.
BEDIENING VAN DE CD SPELER
1. Zet de schuifregelaar aan de rechter zijde van het apparaat op CD/AUX
2. Draai de volume knop naar rechts om het apparaat aan te schakelen.
3. Druk de CD lade naar binnen totdat u een klik hoort en laat deze los.
4. Plaats een audio CD met de bedrukte kant naar u toe op het loopwerk en
controleer of deze goed is vastgedrukt.
5. Druk de deur dicht totdat u een klik hoort. De CD zal automatisch gestart
worden en het totaal aantal nummers zal weergegeven worden op het LCD
beeldscherm.
6. Druk op de “Play” toets om de weergave te starten.
7. U kunt het volume aanpassen met de volume knop.
NOOT!
Voorkom gebruik van bekraste, en kromme audio CD’s.
CD-ROMS met MP3 computer bestanden worden niet gespeeld.
Kantel het apparaat niet tijdens weergave van CD. Dit kan de lens permanent beschadigen!
WEERGAVE STOPPEN
Druk eenmaal op de “STOP” toets en de weergave zal stoppen. Het totaal
aantal nummers zal weergegeven worden.
EEN NUMMER SELECTEREN
1. Druk op de “FF” toets om een volgend nummer te selecteren.
2. Druk op de “RW” toets om een vorig nummer te selecteren.
3. Het gewenste nummer zal gedurende 5 seconden knipperen.
4. Druk binnen deze 5 seconden op de “PLAY” toets om weergave te starten.
Nederlands - 3

CD HERHALEN(optioneel)
NIET BESCHIKBAAR OP DIT MODEL
GEPROGRAMEERDE WEERGAVE (optioneel)
NIET BESCHIKBAAR OP DIT MODEL
AM/FM RADIO
1. Zet de schuifregelaar aan de rechter zijde van het apparaat op AM/FM
2. Draai de volume knop naar rechts om het apparaat aan te schakelen.
3. Selecteer het gewenste station met de ronde zender-zoek knop.
NOOT!
U kunt de antenne draad aan de achterzijde om een metalen voorwerp binden om de ontvangst te
verbeteren.
FM ANTENNE AANSLUITING (OPTIONEEL)
NIET BESCHIKBAAR OP DIT MODEL
ENGLISH - 4
Zender zoek knop
Schuifregelaar

BEDIENING VAN VERLICHTING
1. Draai de “LIGHT” knop naar rechts om de verlichting in te schakelen.
2. Draai de “LIGHT” knop naar links om de verlichting uit te schakelen.
NOOT!
De verlichting van de CD lade en de verlichting in het bovenste gedeelte van de jukebox blijven altijd
aan staan.
LICHT MODUS.
De kleuren worden automatsich gewisseld wanneer de LED schakelaar op de
achterzijde van het apparaat op “PLAY” staat.
Gebruik de “HOLD” schakelaar om uw favoriete kleur vast te zetten.
Wanneer de schakelaar op “HOLD” staat zal de verlichting aan blijven wanneer u
het apparaat uitschakelt.
*Belangrijk:
De kleur wisselingen worden door een computerchip gestuurd. Om een bepaalde
kleur te mengen worden de verschillende LED lampen gedempt en aan/uit
geschakeld. Wanneer enkele leds niet branden betekent dit niet dat deze defect
zijn.
INGANG VOOR EXTERNE AUDIOBRON “AUX IN”
1. Uw jukebox is uitgerust met een 3.5mm jack aansluiting waarmee u een externe
audio bron zoals MP3/MP4 speler of mobiele telefoon kunt aansluiten.
2. Monteer de bijgeleverde MP3/MP4 houder op de achterzijde van uw jukebox en
steek de reeds aanwezige 3.5mm Jack plug in de hoofdtelefoon aansluiting van
uw MP3/MP4 speler of mobiele telefoon.
3. Zorg ervoor dat de schuifregelaar op “CD-AUX” staat en de AudioCD gestopt is.
4. Zet de “ON/OFF”schakelaar naast de MP3/MP4 houder op ON.
5. Schakel uw externe audio bron aan en regel het volume met de “VOLUME”
knop.
NOOT!
Wanneer u de AUX ingang niet gebruikt dient u de schakelaar naast de MP3/MP4 houder op “OFF” te
zetten.
Zorg ervoor dat uw externe audio bron op een gemiddeld volume ingesteld staat.
Een te hoog ingangsvolume kan de versterker van uw Jukebox beschadigen.

De volgende adviezen kunnen uw helpen een probleem op te lossen bij het gebruik van dit
apparaat. Alvorens de onderstaande lijst te raadplegen dient u eerst te controleren of de stekker
juist in het stopcontact geplaatst is en of het stopcontact goed werkt. Mocht het probleem blijven
bestaan kunt u contact opnemen met ons technisch service center waarvan u de gegevens op de
laatste bladzijde van dit boekje kunt vinden.
PROBLEMEN EN ANTWOORDEN
Probleem
Oorzaak
Radio
Geen radio ontvangst
De functieschakelaar staat niet op AM/FM
Het volume staat te laag.
Er is geen zender geselecteerd
De AUX schakelaar staat op “AAN”
CD Speler
De CD wordt niet gestart.
De Audio CD is vies
De Audio CD is beschadigd
De Audio CD is verkeerd om geplaatst
De Audio CD is niet goed vastgezet op het
loopwerk.
Het geluid stottert, de CD slaat over
Uw apparaat staat onder een hoek
gekanteld.
De ondergrond vibreert / schokt.
Algemeen
Het apparaat gaat niet aan
De stroomstekker is niet aangesloten
De volume knop staat geheel naar links
Er staat geen stroom op het stopcontact
Het apparaat gaat wel aan, maar ik hoor
niets.
Schakel de AUX schakelaar op “OFF”
De volume knop staat te ver naar links.
Hinderlijk gebrom of andere storing
De jukebox staat te dicht bij een Televisie
De jukebox staat te dicht bij een Magnetron
SPECIFICATIES
STROOM VERBRUIK : 15W
STROOM BRON : Zie sticker..
LUIDSPREKERS : 2 X 3”/ 8 Ohms.
ENGLISH - 6

Garantue:
Ricatech BV biedt een fabrieksgarantie van 2 (twee) jaar op haar producten (excl. Accessoires)
bij fabricagefouten. Fysieke schade wordt nooit gedekt door de fabrieksgarantie.
Garantie:
Alle hardware fouten die zich voor
doen, twee jaar na aankoop tenzij
deze te wijten zijn aan een van de
onderstaande punten.
Geen Garantie :
Fouten veroorzaakt door:
*Demontage door een
niet-geauthoriseerd service center.
*Water en vocht schade
*Val en stoot schade
*Gebruik met niet-Ricatech
accessoires
*Kortsluiting of over voltage van het
stroomnet.
*Fysieke schade op welke manier dan
ook.
Reparaties
buiten garantie:
Voor reparaties buiten garantie kunt u
contact opnemen met ons service
center. Wij doen u een prijsopgave
toekomen met de geschatte kosten.
Goederen buiten garantie kunt u niet
retourneren aan uw verkoper.
KLANTENONDERSTEUNING
Voor vragen of een probleem met uw Ricatech product kunt u telefonisch en per email contact opnemen met de Ricatech
klantenservice.
Email
Voor klantenondersteuning per email kunt u een email sturen naar s[email protected]. Vergeet niet het modelnummer,
serienummer van het product en uw naam & adres te vermelden en beschrijf duidelijk uw vraag of probleem.
Telefoon
Bel voor telefonische klantenondersteuning naar +32 3 3265694. Onze servicemedewerkers staan klaar om u te helpen.
Bezoek de website van Ricatech voor de volledige procedure: www.ricatech.com

IM-NYSRC-09X

HANDBUCH
RR500 JUKEBOX
MITAM/FM RADIO, CD PLAYER UND MP4 DOCKING STATION
WWW.RICATECH.COM

Beim Aufstellen
Stellen Sie das Gerät nicht an Orten auf, die extrem heiß, kalt, staubig oder feucht sind.
Stellen Sie das Gerät auf eine flache, ebene Oberfläche.
Behindern Sie die Luftzufuhr des Gerätes nicht, indem sie es an einem Ort mit schlechter Belüftung
aufstellen oder es mit einem Tuch abdecken.
FCC Information (NUR USA VERSION)
Dieses Gerät erfüllt den Teil 15 der FCC Bestimmungen.
Der Betrieb unterliegt den beiden folgenden Bedingungen:
(1) Das Gerät verursacht keine störenden Interferenzen und
(2) Das Gerät muss jede empfangene Interferenz tolerieren, einschließlich Interferenzen, die
unerwünschte Bedienung auslösen.
Zu Sicherheit
Fassen Sie das Stromkabel am Stecker und nicht am Kabel, wenn sie es mit dem Stromnetz verbinden
oder trennen. Das Ziehen am Kabel kann es beschädigen und eine Gefahr hervorrufen.
Ziehen Sie den Netzstecker, wenn Sie das Gerät für eine längere Zeit nicht benutzen.
Zu Kondensation
Wenn das Gerät in einem beheizten Raum steht, in dem es warm und feucht ist, können sich
Wassertröpfchen oder Kondensation im Inneren des Geräts bilden. Wenn sich Kondensation im
Gehäuseinneren gebildet hat, funktioniert das Gerät möglicherweise nicht normal. Lassen Sie das Gerät 1
bis 2 Stunden ruhen, bevor Sie es einschalten oder erwärmen Sie den Raum schrittweise und trocknen Sie
das Gerät ab, bevor Sie es benutzen.
WARNUNG:
Trennen Sie beimAuftreten von Fehlern die Stromzufuhr und wenden Sie sich an qualifiziertes
Servicepersonal.
Stellen Sie keine Gegenstände auf das Gerät, dies könnte zu Beschädigungen führen.
BEACHTEN SIE DIE UMWELTSCHUTZBESTIMMUNGEN BEIM ENTSORGEN DER BATTERIEN
WARNUNG: ENTFERNEN SIE WEDER GEHÄUSE NOCH RÜCKWAND, UM
DAS RISIKO EINES ELEKTRISCHEN SCHLAGS ZU
REDUZIEREN. DAS GERÄT ENTHÄLT KEINE TEILE, DIE VOM
NUTZER GEWARTET WERDEN KÖNNEN. BITTE WENDEN SIE
SICH AN QUALIFIZIERTES SERVICEPERSONAL.
WARNUNG: UM FEUER ODER ELEKTRISCHEM SCHLAG VORZUBEUGEN,
SETZEN SIE DAS GERÄT WEDER REGEN NOCH FEUCHTIGKEIT
AUS.
VORSICHT: UM ELEKTRISCHEN SCHLAG ZU VERMEIDEN, STECKEN SIE
DEN BREITEN TEIL DES STECKERS VOLLSTÄNDIG IN DEN
BREITEN SCHACHT. (NUR USA UND KANADA)
Das Blitz-Symbol im gleichseitigen Dreieck soll den
Nutzer auf das Vorhandensein nicht isolierter
"gefährlicher Spannung" innerhalb des Gehäuses
hinweisen, die von ausreichender Größe ist, um einen
elektrischen Schlag zu verursachen
Das Ausrufezeichen im gleichseitigen Dreieck soll
den Nutzer auf wichtige Bedienungs- und
Wartungsanweisungen in diesem Handbuch
hinweisen.
LASERSICHERHEIT
IN DIESEM GERÄT IST EIN LASER EINGEBAUT.
WEGEN MÖGLICHER AUGENVERLETZUNGEN DARF NUR QUALIFIZIERTES
SERVICEPERSONAL DAS GERÄT ZU SERVICEZWECKEN ÖFFNEN .
VORSICHT:DIE VERWENDUNG VON ANDEREN BEDIENELEMENTEN, EINSTELLUN-
GEN ODER VERFAHREN ALS DEN HIER BESCHRIEBENEN KANN DAZU
FÜHREN, DASS SIE SICH GEFÄHRLICHER STRAHLUNG AUSSETZEN

CD WIEDERGABE
Dieser Abschnitt beschreibt die Compact Disc Bedienung in der Reihenfolge,
in der man sie normalerweise benutzt.
Befolgen Sie die Anweisungen schrittweise und Sie werden die vollständige
Bedienung des Geräts in sehr kurzer Zeit beherrschen.
CD BETRIEB
1. Drehen Sie zum Einschalten des Geräts den VOLUME Regler von OFF in
Richtung Max Position.
2. Drücken Sie CD DOOR einmal, um die CD-Schublade zu öffnen und eine
Disc einzulegen, drücken Sie dann CD DOOR erneut, um die Schublade zu
schließen.
**Stellen Sie sicher, dass die CD-Schublade richtig geschlossen ist**
3. Drücken Sie die PLAY-Taste.
4. Passen Sie die Lautstärke durch drehen des VOLUME Reglers an.
HINWEISE
Die Disc kann möglicherweise nicht wiedergegeben werden, wenn Sie zu
zerkratzt oder schmutzig ist.
Wenn die CD beim Einlegen nicht richtig zentriert wurde, können beim
Abspielen Geräusche von der Mechanik gehört werden. Die Verwendung
einer solchen Disc sollte vermieden werden.
Kippen Sie das Gerät nicht, wenn die Disc geladen wird. Dies kann zu
Fehlfunktionen führen.
CD WIEDERGABE BEENDEN
Drücken Sie die STOP Taste. Die Disc-Wiedergabe stoppt, die TRACK
Anzeige zeigt die Gesamtzahl der Titel.
EINEN GEWÜNSCHTEN TITEL ANHÖREN
1. Drücken Sie die F.F Taste, der CD Player springt mit jedem Druck auf die
F.F Taste einen Titel weiter.
2. Drücken Sie die F.W Taste und der CD Player springt zurück zum vorigen
Titel.
3. Drücken Sie die PLAY Taste, die Wiedergabe beginnt.
DEUTSCH - 1

WIEDERHOLFUNKTION (WENN VORHANDEN)
1. Drücken Sie die REP Taste ein Mal, um einen Titel zu wiederholen.
2. Drücken Sie die REP Taste zwei Mal, um alle Titel zu wiederholen.
3. Nochmaliges Drücken schaltet den Wiederhol-Modus aus.
PROGRAMMIERFUNKTION (WENN
VORHANDEN)
1. Drücken Sie die STOP Taste.
2. Drücken Sie die PGM Taste.
3. Wählen Sie eine Titelnummer und drücken Sie dann die PGM Taste erneut.
4. Wiederholen Sie Schritt 3 bis alle gewünschten Titel programmiert sind
(insgesamt bis zu 20 Titel).
RADIO
1. Drehen Sie zum Einschalten des Geräts den VOLUME Regler von OFF in
Richtung Max Position.
2. Wählen Sie AM oder FM durch Verschieben des FUNCTION Wählschalters.
3. Wählen Sie den Sender durch Drehen des TUNING Reglers.
4. Um das Gerät auszuschalten, drehen Sie den VOLUME Regler in die OFF
Position.
UKW ANTENNENBUCHSE (WENN VORHANDEN)
Verbinden Sie für einen besseren UKW Empfang die mitgelieferte
Wurfantenne mit den FM ANTENNA Buchsen (an der Gehäuserückseite)
DEUTSCH - 3
SENDERSUCHE
FUNKTIONSWÄHLER
Table of contents
Languages:
Other Ricatech Jukebox manuals

Ricatech
Ricatech RR3100 User manual

Ricatech
Ricatech RR2000 User manual

Ricatech
Ricatech RR300 User manual

Ricatech
Ricatech RR3000 Retro Classic User manual

Ricatech
Ricatech RR340 User manual

Ricatech
Ricatech RR510 User manual

Ricatech
Ricatech RR900 Retro XXL User manual

Ricatech
Ricatech RR700 User manual

Ricatech
Ricatech RR200 User manual

Ricatech
Ricatech RR1000 User manual