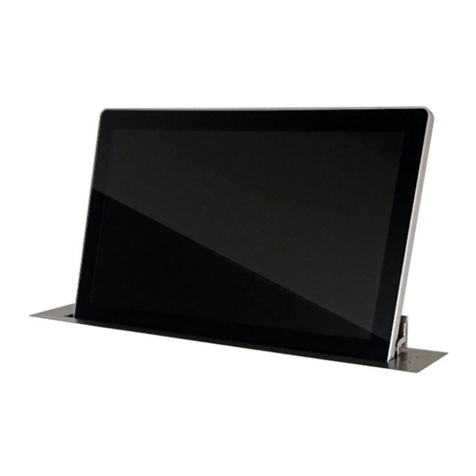
Ad Notam Smart Display Unit User manual

EN
ENEN
EN
SMART DISPLAY UNIT
TM
subject to modification, errors and omissions exce ted * 10-2017 * V1
USER MANU
AL


SUMMARY
GENERAL INFORMATION 04
INSTALLATION IN WET ROOMS 12
PRODUCT INFORMATION 13
GETTING STARTED 15
TROUBLESHOOTING 26
TECHNICAL SPECIFICATION 27
3
WARRANTY TERMS 36

GENERAL INFORMATION
GENERAL INFORMATION GENERAL INFORMATION
GENERAL INFORMATION -
--
-
SAFETY
SAFETYSAFETY
SAFETY
CAUTION
CAUTIONCAUTION
CAUTION
•Only qualified s ecialist staff may carry out service tasks. Service work is necessary, if the unit has been damaged,
e.g. if the mains lug or mains cable have been damaged, if liquid or items are resent inside the device, if it has
been ex osed to water or moisture, if it does not work ro erly or if it has fallen down.
•Never remove the casing covers or modify the roduct in any way. This can cause an electric shock or burn you.
•Immediately ull the lug, if you notice that your roduct emits smoke, smells burnt or emits unusual noises and
ask your s ecialist dealer for advice.
•Do not allow the roduct to come into contact with liquids. Liquid in the casing can cause a fire, electric shock or
damage the device. Immediately ull the mains lug out, if an item or liquid gets into the casing. Notice that the
a aratus shall not be ex osed to s lashing or dri ing liquids and no objects filled with liquids, such as vases,
shall be laced on the a aratus.
•Kee small items away from the roduct. These can fall into the casing and cause a fire, an electric shock or
damage the device. Don‘t try to reach into the housing or lugs with wires or the like.
4
• Never touch not-isolated arts of the lug, if the device is connected to the ower ada ter!
•Where the mains lug or an a liance cou ler is used as the disconnect device, the disconnect device shall
remain readily o erable.
•Avoid any im act and do not allow the roduct to fall!
SMART DISPLAY UNIT
TM

GENERAL INFORMATION
GENERAL INFORMATION GENERAL INFORMATION
GENERAL INFORMATION -
--
-
CLEANING
CLEANINGCLEANING
CLEANING
Do not clean the screen surface with a coarse item or tissues! These can damage the dis lay surface. A clean, dry
cloth is sufficient; never use aggressive cleaners or solvent such as alcohol, thinner or cleaning etrol to clean the
Dis lay Frame Unit
TM
. These agents may cause damages and corrode the casing. Do not wi e the screen
forcefully.
CAUTI
CAUTICAUTI
CAUTION
ONON
ON
Never a ly strong ressure to the screen of the Dis lay Frame Unit
TM
, because it could otherwise be damaged or
break.
Never touch the screen with ointed or shar items, such as encils, ball oint ens, knives, scal els, screwdrivers etc.
Wear rotective gloves when handling a damaged dis lay. Possibly leaking liquid crystal is oisonous and may under
no circumstances come into contact with eyes or mouth.
The screen of the monitor is coated with layers of thin films to revent unwanted reflections. Damages to these layers
5
can lead to irreversible changes in a earance such as uneven color, discoloration and/or scratches. So lease do
not aste, stick or write anything on the screen and avoid condensation.

GENERAL INFORMATION
GENERAL INFORMATION GENERAL INFORMATION
GENERAL INFORMATION -
--
-
MOUNTING
MOUNTINGMOUNTING
MOUNTING
Your roduct can either be installed on-wall or in-wall. ad notam offers multi le mounting systems
for almost every a lication and is sure to have also the a ro riate solution for your installation on
hand. Please ask your authorized ad notam artner for assistance in this regard.
IMPORTANT
IMPORTANTIMPORTANT
IMPORTANT
Please make sure to have the latest firmware installed before mounting the unit. For details lease visit the Su ort &
Service section of our website.
NOTE
NOTENOTE
NOTE
In order to have access to the USB ort after installation we recommend installing a USB extension cable.
CAUTION
CAUTIONCAUTION
CAUTION
ad notam does not offer any guarantee for the screws and dowels delivered with the roduct. These may need to be
6
re laced on site when considering the weight and quality of the load-bearing wall, since ad notam is not familiar with
the construction environment. Electrical installations are to be erformed by a skilled technician, while observing the
regulations of the standard VDE100 art 701. ad notam will not be held liable for im ro er installation!
NOTE
NOTENOTE
NOTE
To ensure ro er o eration only use the su lied cables. Using other cables and lengths may cause disturbances to
the image quality or even the functionality.
SMART DISPLAY UNIT
TM

GENERAL INFORMATION
GENERAL INFORMATION GENERAL INFORMATION
GENERAL INFORMATION -
--
-
INSTALLATION
INSTALLATIONINSTALLATION
INSTALLATION
O
OO
O eratio
eratioeratio
eration and storage requirements
n and storage requirementsn and storage requirements
n and storage requirements
The ambient tem erature for o erating the device is between +5 and +50 degrees Celsius. Do not install the device
in the roximity of heat sources, such as heating i es, heaters, furnaces or other devices, which radiate heat. It is not
necessary to rovide air circulation to dissi ate the heat. Mount the device in such a way that it is rotected against
moisture. Trouble free o eration is ensured u to 75% air humidity.To revent fire or electric shock, never allow
liquids to enter the unit. The roduct must be stored in dry and well-ventilated rooms, without extreme tem erature
fluctuations. Heat sources and aggressive active substances may not be stored in the roximity of the device. The
required storage tem erature is 0°C - +60°C at an air humidity of 5 - 85% RH. The device must be stored in the
com lete ackaging, as delivered.
I
II
Installation
nstallationnstallation
nstallation
Have this roduct installed by qualified staff only. Use the mounting systems which are s ecified or recommended by
ad notam. Install the roduct in a way that it is fixed ro erly and take care that children are not ex osed to danger.
Please take extra care during installation, avoid im acts. Before cabling your monitor system, check that the ower
7
is off. To avoid any ossibility of electric shock, always connect your equi ment to ro erly earthed outlets. Use of
ower cords or ada ters other than those rovided may cause fire or malfunction. Place this roduct as close to the
ower socket as ossible. Leave enough s ace to insert and remove the ower lug on demand. Even if you switch
off the roduct with your remote control, ower is not cut off unless the ower cord is un lugged.
installation environment
installation environmentinstallation environment
installation environment
Avoid direct light or sun ex osure, direct roximity to heat sources, outdoor installation. The roduct is s ecifically
designed for indoor use only. There is the danger of fire and of electric shocks and damage to the device, if it is
o erated outdoors. Do not lace any heat sources such as radiators and heat registers, etc. near the monitor. To
reduce eye strain, avoid installing the monitor system against a bright background such as a window. Position the
monitor system at the height of your eye level and directly in front of you at a comfortable viewing distance.

I
II
Installation of Power ada ters
nstallation of Power ada tersnstallation of Power ada ters
nstallation of Power ada ters
The device may only be o erated with the rovided ower ada ter. The rated voltage is indicated on the roduct
label. The device is factory-set to the o timal o erating voltage (see Technical S ecification). Use only ower cords
and lugs that are suitable for your local electrical outlets. Install the ower cords in such a way that it does not
obstruct anyone. Ensure furthermore that the cable is not clam ed and that it cannot be ulled out accidentally from
the ower ada ter. Do not install the ower cords in the roximity of heating elements and never lace heavy items
on the cable or ower ada ter. Do not modify or arbitrary re air the ower cords.
CAUTION
CAUTIONCAUTION
CAUTION
Do not use any ower cords or ada ters other than those rovided with this roduct! Use of ower cords or ada ters
other than those rovided with this roduct may cause fire, electric shock or malfunction. If several kinds of ower
cords are rovided with this roduct, use the one that fits your ower socket. Do not let the ada ter hang down while
using. Do not cover or wra the ada ter. Leave s ace around the ada ter to revent overheating. The individual
com onents can be destroyed, if the olarity is reversed or an incorrect connection is used.
A goodwill re lacement is not ossible in such cases, since each device is submitted to meticulous quality
ins ections rior to shi ing. The connecting lugs must be attached in such a way that the connector is held firmly.
Have trained technical ersonnel install the electrical facilities necessary for mounting. The ower ada ter has to be
installed in ventilated areas due to the heat emission! Connect the ower cord to a grounding outlet! Never cut or
damage the ower cord!
Please disconnect the device from the ower ada ter in the following cases:
•The device is out of use for a lengthy eriod.
•The device malfunctions or dis lays other unusual features, necessitating maintenance work.
•During a thunderstorm.
Please lan the ositioning of the ower ada ter and the source cables before roceeding with the structural
measures and ositioning of the monitor system. Observe the rotection zones when lacing the ower ada ter! For
in-wall a lications lease bear in mind that the ower ada ter has to be laced beyond the inset due to heat
emission!
SMART DISPLAY UNIT
TM
8

NOTE
NOTENOTE
NOTE
The ower ada ter should be adequately secured to revent it from becoming unstable and/or falling. Make sure the
ower source circuits are ro erly grounded. Use the su lied ower cord in order to connect it to the ower source. If your
installation requires a different ower cord, be sure to use an officially a roved ower cord dis laying the mark of the
safety agency that defines the regulations for ower cords in your country. Please consider that the AC outlet for the
ower ada ter is laced within reach of the monitor system and should be easily accessible in case it needs to be
owered off.
Do install the roduct in a dry environment where the o erating ambient tem erature might not
not not
not exceed 40°C /
104°F. Also don´t
don´t don´t
don´t osition the ower ada ter on to or on the back of the monitor system in order to revent
thermal overload. Ensure that your installation com lies with your national safety rules. Any servicing,
adjustment, maintenance or re air must be erformed only by service-trained ersonnel.
Ensure that the ower ada ter is installed in a serviceable location, to access it easily in case of a defect. If you
choose to lace the ower ada ter in a se arate s ace, take care that the ventilation is resent, because the ower
ada ters need convection cooling for stable working conditions.
When lacing the ower ada ter in a fully enclosed s ace, make sure the air flow around the sides and to of the
ower ada ter is not restricted. According to a common rule of thumb the minimum dimensions for a niche for
the ower ada ter may be defined as follows: lease calculate the length of the ower ada ter lus an additional ga
of at least 100mm all around for DC 12V ower ada ters and 200mm all around for DC 24V ower ada ters.

GENERAL INFORMATION
GENERAL INFORMATION GENERAL INFORMATION
GENERAL INFORMATION -
--
-
TRADEMARK
TRADEMARKTRADEMARK
TRADEMARK
ad notam
®
,
, ,
, MIRROR IMAGE
®
,
, ,
, MAGIC MIRROR
®
AD NOTAM, MIRROR IMAGE and MAGIC MIRROR are licensed trademarks of ad notam.
7
SMART DISPLAY UNIT
TM

GENERAL INFORMATION
GENERAL INFORMATION GENERAL INFORMATION
GENERAL INFORMATION –
––
–
DISPOSAL OF OLD EQUIPMENT AND BATTERIES
DISPOSAL OF OLD EQUIPMENT AND BATTERIESDISPOSAL OF OLD EQUIPMENT AND BATTERIES
DISPOSAL OF OLD EQUIPMENT AND BATTERIES
E
EE
Euro ean Union
uro ean Unionuro ean Union
uro ean Union
The following symbol indicates that electrical res . electronic equi ment and batteries signed with this symbol
should not be dis osed of as general household waste at its end of life. Instead, the roducts should be handed over
to the a licable collection oints for the recycling of electrical and electronic equi ment as well as batteries for
ro er treatment, recovery and recycling in accordance with your national legislation and the Directive 2002/96/EC
and 2006/66/EC.
NOTICE
NOTICENOTICE
NOTICE:
: :
: An a endix "Pb" below this symbol indicates that the battery contains lead.
By dis osing of the roducts correctly, you will hel to conserve natural resources and will hel to revent otential
11
negative effects on the environment and human health which could otherwise be caused by ina ro riate waste
handling of these roducts. For more information about collection oints and recycling of these roducts, lease
contact your local munici al office or your household waste dis osal service. Penalties may be a licable for
incorrect dis osal of this waste, in accordance with national legislation.
O
OO
Other Countries outside the
ther Countries outside the ther Countries outside the
ther Countries outside the E
EE
Euro ean Union
uro ean Unionuro ean Union
uro ean Union
These symbols are only valid within the Euro ean Union. If you wish to dis ose of these items outside the Euro ean
Union, lease do so in accordance with the a licable national legislation or other rules of your country for the
treatment of old electrical and electronic equi ment and batteries.

INSTALLATION IN WET ROOMS
INSTALLATION IN WET ROOMSINSTALLATION IN WET ROOMS
INSTALLATION IN WET ROOMS
For installations in wet rooms s ecific installation guidelines a ly, which are to be seen in the context of lacing the
ower ada ter outside of certain rotection zones. These regulations differ by region. Please contact a s ecialist for
this. In Germany electrical installations are to be erformed by a skilled technician, while observing the regulations of
the standard DIN VDE 0100 T.701.
According to this standard, ad notam monitor systems with DC 12V (Limited Power Source Class II, SELV) can be
installed at each osition (incl. Zones “0” and “1”) in harsh environments, also in showers and above a bath tub as
long as the monitor system is shielded from a sealed glass surface and the (external) ower ada ter is installed
beyond these rotection zones.
NOTE
NOTENOTE
NOTE
The safety current source has to be arranged outside the zones 0 - 2 and needs to be rotected against direct im act.
The assessment of the rotection zones on site of the installation must be erformed in accordance with the
12
valid national guidelines by a skilled local electrician. ad notam will not be held liable for im ro er installation!
SMART DISPLAY UNIT
TM
Zone
Class
Requirements
0
IP x6-8
waterproof, max. 2V,
only SELV qualified electronic devices
IP x5
hose waterproof, max. 50V,
only stationary electronic devices
(IP x5 or qualified SELV)
2
IP x4
splashproof,
only stationary electronic devices
(IP x4 or qualified SELV)
3
IP x0-3
devices with at least protection against
dripping water recommended

...
.
.
......
.
.
PRODUCT INFORMATION
PRODUCT INFORMATION PRODUCT INFORMATION
PRODUCT INFORMATION –
––
–
SCOPE OF D
SCOPE OF DSCOPE OF D
SCOPE OF DELIVERY
ELIVERYELIVERY
ELIVERY
Before using the device lease check the following contents of the box for com leteness:
•Smart Dis lay Unit
TM
monitor system..............................................
•BT remote
control................................................................................................................
13
• DC 12V, 90W ower ada ter.....................................................
•
Power cord.................................................................................................................

PRODUCT INFORMATION
PRODUCT INFORMATIONPRODUCT INFORMATION
PRODUCT INFORMATION
-
--
-
INPUT/OUTPUT OVERVIEW
INPUT/OUTPUT OVERVIEWINPUT/OUTPUT OVERVIEW
INPUT/OUTPUT OVERVIEW
U er side Lower side
14
1
11
1
Power in ut DC 12V
2
LED Out 2 connector
3
LED Out 1 connector
4
Micro hone In ut connector
5
USB 2 (OTG) connector
6
USB 1 (Host) connector
7
External Wi-Fi connector
8
S eaker out ut, 1 x Phoenix cli 4 in
9
RS232 connector
10
LAN Ethernet connector
11
Sensor (x4) connectors
SMART DISPLAY UNIT
TM

GETTING STARTED
GETTING STARTED GETTING STARTED
GETTING STARTED –
––
–
HOW TO CONN
HOW TO CONNHOW TO CONN
HOW TO CONNECT
ECTECT
ECT

Pairing a BT RC using the SDUs back cover “Pair” Button
Pairing a BT RC using the SDUs back cover “Pair” ButtonPairing a BT RC using the SDUs back cover “Pair” Button
Pairing a BT RC using the SDUs back cover “Pair” Button
In order to erform some of the tests below you’ll need to use the SDU’s Bluetooth Remote control.
The BT RC should be aired to one device only following the next ste s.
1. A ly ower to the SDU which is under test and wait till it is full booted (2 - 40 seconds)
2. (Re)Insert batteries to the BT RC. The BT RC LED is blinking to indicate it is in “discovery” mode.
Please Note: If BT RC LED sto s flashing after 2 seconds it means it is ALREADY PAIRED to another device.
Please move away other SDUs which might be aired or re lace the BT RC with another one.
3. While the BT RC LED is blinking ress the SDUs back cover “Pair” Button till the BT RC LED sto s blinking.
This should ha en in 3-5 seconds.
4. To indicate if the BT RC is successfully aired to the SDU Please ress the BT RC “Volume” button. The volume
indicator should a ear on the bottom of the SDUs dis lay showing volume changes.
5. Please Note: If this doesn’t seems to work… lease try ste s 2-4 again.
If still no success lease ress the SDUs back cover “Reset” button and try ste s 2-4 again..
Connect
Connect Connect
Connect Passive louds eakers
Passive louds eakersPassive louds eakers
Passive louds eakers
Two 8Ohm louds eakers can be connected to the s eaker out ut socket with louds eaker cables. Observe the
olarity (+ and -) of the connections to avoid hase errors (= incorrect stereo layback).
E
EE
External
xternal xternal
xternal Wi
WiWi
Wi-
--
-Fi antenna
Fi antennaFi antenna
Fi antenna
15
Connect an external Wi-Fi antenna to the antenna connector
Connect
Connect Connect
Connect a
a a
a 12VDC ower ada ter (90W max.)
12VDC ower ada ter (90W max.)12VDC ower ada ter (90W max.)
12VDC ower ada ter (90W max.)
DISPLA
y
FRAME
UNIT
TM


Warranty terms and Conditions
Provisions of Warranty
.
If your product proves to be defective, although is has been
used properly (in accordance with the written Handling Care,
Operating and Installation instructions supplied with it), during
a period of two years from the date of purchase, the product will
be repaired, or at ad notam´s option replaced free of charge. To
claim under this warranty the customer must take the product
and this Warranty Certificate before the end of the warranty
period to the dealer where the product was purchased. No
product defect occurs, if the product is operating according to
the specification.
2.
The customer shall transport the product to the dealer or ad
notam´s authorized service station at his own risk and shall be
responsible for any costs incurred in transporting the product.
The device to be resend to ad notam or its authorized dealer/
service station has to be packed properly by using exclusively
the original package.
3.
This Warranty does not cover the following items, and repair
charges are to be paid, even for defects occurring within the
warranty period:
(a)
Any defect that occurs due to mishandling (such as an
operation performed that is not mentioned in the Handling Care,
installation requirements or other sections of the instructions,
etc.).
(b)
Any defect that occurs due to repair, modification, cleaning,
opening of the product etc. performed by anyone other than ad
notam or an ad notam authorized service station.
(c)
Any defect or damage that occurs due to transport, a fall, shock,
etc. after purchase of the product.
(d)
Any defect or damage that occurs due to fire, earthquake, flood
damage, thunderbolt, other natural disasters, environmental
pollution and irregular voltage sources.
(e)
Any defect that occurs due to careless or improper storage
(such as keeping the product under conditions of high
temperature and humidity, near insect repellents such as
naphthalene or harmful drugs, etc.), improper maintenance, etc.
(f)
Any defect that occurs due to exhausted batteries, etc.
(g)
Any defect that occurs due to water, sand, mud, etc. entering
the inside of the product casing.
(h)
When any alterations whatsoever are made to the Warranty
Certificate regarding the year, month and date of purchase, the
customer’s name, the dealer’s name, and the serial number.
(i)
When proof of purchase is not presented with this Warranty.
(j)
When wrong installation materials and/or components, such
as loudspeakers or input devices are used.
(k)
When the product occurs with pixel errors within the specified
and permitted area. Pixel errors can be seen as light or dark areas
on the screen. This phenomenon is due to the characteristics of the
LCD/LED panel. The panel is only defective if there are more than
two pixel errors when the product is started up initially.
(l)
When the (front-)glass of the LCD/LED panel inside the product
is broken.
(m)
Allowable Measurement, Treatment and Coating tolerances
of the product´s glass or mirror, as defined in the product
specification.
(n)
Returned products which are not packed properly or are not
packed in the original/origin ad notam package. This is in
accordance with our quality assurance directive, since it is
impossible to identify if damages have occurred during
transportation or not. We are forced to send all inappropriately
packed products back to you at your own costs.
CertifiCate
4.
This Warranty applies to the product only; the Warranty does
not apply to any other accessory equipment, such as cables,
power supply, batteries and other cosumables/installation
equipment.
5.
ad notam’s sole liability under this warranty shall be limited
to repairing or replacing the product. Any liability for indirect or
consequential loss or damage of any kind incurred or suffered
by the customer due to a defect of the product, or for any loss
resulting from a delay in repair or loss of data, is excluded.
Compelling regulations by law remain unaffected by this.
6.
The warranty does not extent to damages caused by improper
installation, non-compliance with ad notam´s installation
instructions, incorrect operation or repairs carried out by private
persons or unauthorized dealers as well as in case of removed,
changed, destroyed or defaced serial numbers or in case of
mechanical damage due to impact or accident.
notes regarding Warranty maintenanCe
.
The warranty will only be valid if this Warranty Certificate is
duly completed by ad notam or an authorized dealer or other
documents contain sufficient proof. Therefore, please make
sure that your name, the name of the dealer, the serial number
and the year, month and date of purchase are all completed or
the original invoice or the sales receipt (indicating the dealer´s
name, the date of purchase and product type) is attached to the
Warranty Certificate. ad notam reserves the right to refuse free-
of-charge service if neither the Warranty Certificate is completed
nor the above document is attached or if the information
contained in it is incomplete or illegible.
2.
Since the Warranty Certificate will not be re-issued, keep it in
a safe place.
disClaimer of Warranty
ad notam makes no representations or warranties, either
expressed or implied, by or concerning any content of these written
materials or software, and in no case shall be liable for any
impelled warranty purchase are all completed or the original
invoice or the sales receipt of merchantability or fitness for any
particular purpose or for any consequential, incidental or indirect
damages (including but not limited to damages for loss of business
profits, business interruption and loss of business information)
arising from the use of inability to use these written materials or
software. Some states do not allow the exclusion or limitation of
liability for consequential or incidental damages, so the above
limitations may not apply to you.
This manual suits for next models
6
Table of contents
Other Ad Notam Monitor manuals


