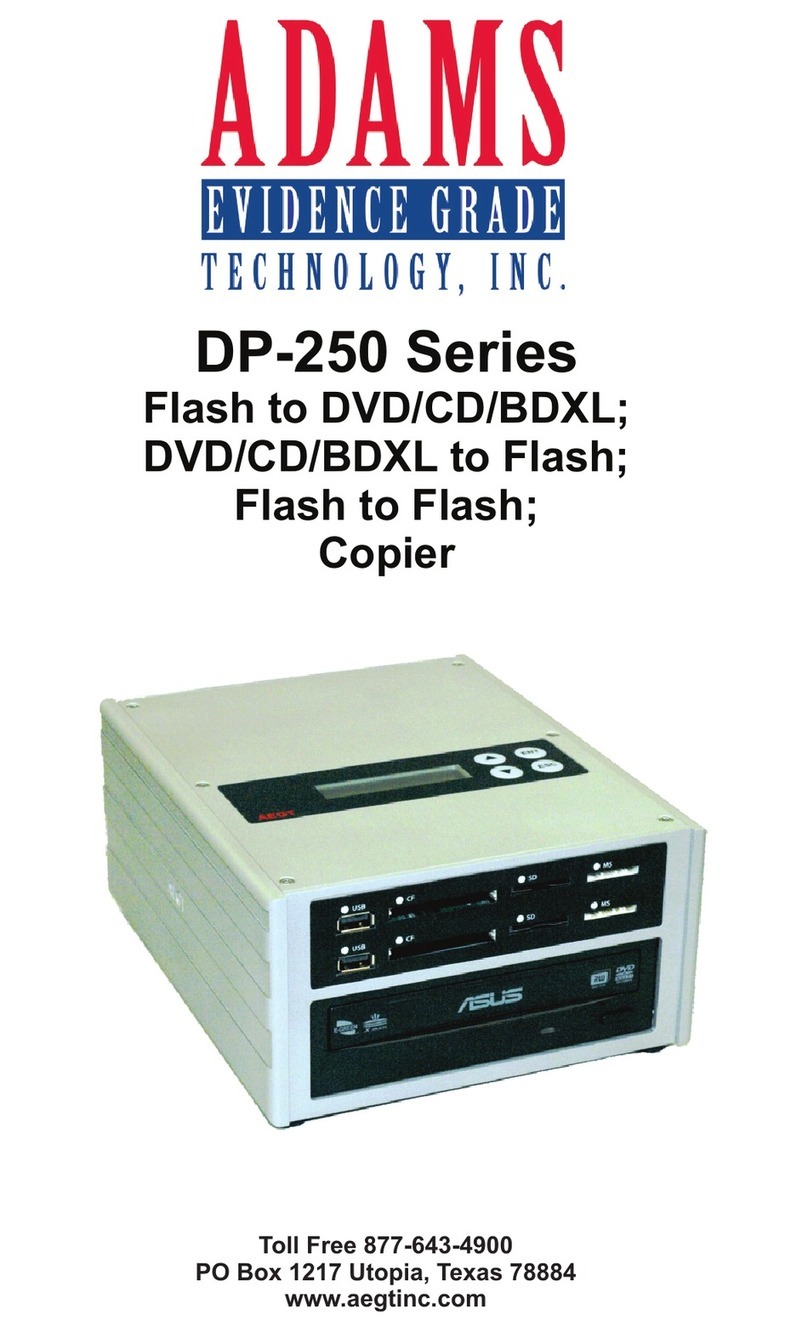
ADAMS Evidence Grade Technology DP-150 Series User manual

Toll Free 877-643-4900
PO Box 1217 Utopia, Texas 78884
www.aegtinc.com
DP-150 Series
Flash to DVD/CD/BDXL
Copier

IMPORTANT SAFETY PRECAUTION
WARNING
NOTICE:
This equipment has been tested and found to comply with the limits for a
Class A digital device, pursuant to Part 15 of the FCC Rules. These limits are
designed to provide reasonable protection against harmful interface when
the equipment is operated in a commercial environment. This equipment
generates, uses, and can radiate radio frequency energy and, if not installed
and used in accordance with the instruction manual, may cause harmful
interference to radio communications.
Operation of this equipment in a residential area may cause harmful
interference to radio communications, in which case the user will be required
to correct the interference at their own expense.
Use of the AEGT DP-150 Series, is for the legal backup/copy of licensed
materials and personal data. Any copy of licensed materials is the property
of the author or copyright holder. Any unauthorized copying, or resale of
copyrighted material is prohibited by US and International laws. We
discourage owners of the DP-Series from using this product in any illegal
way.
III
The DP-Series is a smart device, especially designed to provide a fast copy
function to copy the information from a variety of flash memory cards/USB
devices to DVD/CD/BDs.
DP-150-DVD proprietary use is for DVDs.
DP-150-BD-XL proprietary use is for Blu-rays.
The DP-Series is designed as a completely stand alone device with no edit
function, and cannot be connected to a Network, Server, Computer or any other
device. Most importantly, it does not hold Non-volatile memory nor contain a
Hard Drive. After a copy, or duplication there is NO data retained when power is
removed.
Easy to read LCD displays allow you to see the function mode and operation
status to ensure the completion of every copy.
Operating instructions and Technical Support Phone Number is included on a
label affixed to the top and back of the equipment case.
Free Telephonic Technical support is available for the useable life of the
equipment.
The DP-Series is your best choice for USB/Flash Memory card to Optical Disc
copies.

III
USB/Flash Memory Copier
1. Introduction ................................................................................................1
2. Features ....................................................................................................... 1
......................... ..................................................................... 3
5. Specifications
LCD Front Control Panel .............................................................................2
6. Operating Instructions .................................................................................4
1. Flash to Disc ........................................................................................... 4
1.1 Copy All Data..................................... ................................................4
1.2 Copy Select File .................................................................................4
2. Utility .................................................................................................. 5
2.1 Media Information ........................................................................ 5
2.2 Drive Information ........................................................................6
2.3 System Information ...................................................................... .6
2.4 Update BIOS ..................................................................................6
3. Setup ....................................................................................................7
3.1 Set Burn Speed ........................................................................... ..7
3.2 Start Up Menu ............................................................................. ....7
3.3 Set Over Size File.. ....................................................................... ...7
3.4 Set Span Mode............................................................................... ...8
3.5 Display Mode.. .............................................................................. .8
3.
Flash Media Interface ..................................................................................2
4.
1.4 Multi Session ..................................................................................... 5
1.3 Copy+Compare.................................................................................. 5
3.6 Language... ....................................................................................... .8
3.7 Set Time Zone ............................................................................... ..8
3.9.1 Boot Password.......................................................... ................9
3.9.2 Set up Password...........................................................................9
BASIC TROUBLESHOOTING .................................................................. 10
IV
3.8 Clear Setup............. .............................................................................8
3.9 Advanced Setup. ............................................................ .......................9

1
The AEGT DP-150 Series USB/Flash Memory Copier controller is a smart device
especially designed to provide a fast copy function to copy the information from a
variety of flash memory cards/USB devices to DVD±R/±RW/±R Dual Layer, CD-
R/RWs, BD-R/RE or BD-R/RE XLs. It is designed as a completely stand alone
device, with no edit function, and cannot be connected to a Network, Server,
Computer or any other device.
The LCD display allows you to see the function mode and operation status to ensure
the succession of the copy, and compare function.
The AEGT DP-150 Series is your best choice for USB/Flash Memory copying.
1. INTRODUCTION
2. FEATURES
·Stand Alone operation, no computer required, LCD display of current function
selected.
·No Hard Drive or Memory retention of the copied or original data when powered
off.
·No edit functions, No connectivity to a Network or external computer.
·Original date and time transferred to the copy.
·Supports most open format USB Devices.
·Supports all types of Flash Cards formatted in FAT16, FAT32, exFAT, ext2, ext3,
ext4, HFS, HFS+.
·Burn Speed Settable. (16X BD / 24X DVD / 48X CD)
·Supports Selective file copying, Multi-Session and Disc Spanning. (Flash to
Optical)
·Copy, Copy & Compare, Copy Select & Multi-Session. (Flash to Optical)
·Rugged Aluminum case for Desktop and Portable use. (120V AC and 12V DC).
Car kit available.
·System is ungradable via firmware when technical upgrades are made.
·One year manufacturer warranty - Life-time telephone technical support.
2
3. CONTROL PANEL
LCD
(2X16 characters)
Escape
Enter
Down
Up
ENT
ESC
Control Buttons
: Up/backward; Used to navigate backward in the menu
: Down/forward; Used to navigate forward in the menu
: OK/Enter/Select; Execute the function
: Back/Escape; Used to go back to previous function
LCD Display
The LCD display is a 2x16 Mono LCD screen. The system displays function information,
messages, and instructions on the LCD.
Warning
Do not plug in 2 or more memory cards at the same time.
1. The LED flashes during the execution process of task. After the task is Green
done, the LED will stay solid if the process is successful, otherwise the Green Red
LED will be on if the process failed.
2. turn off the unit when the task is under process. It may damage the DO NOT
controller or optical drive.
3. remove optical disc when the task is under process. It may damage the DO NOT
controller or optical drive.
4. It is strongly recommended that the capacities of the source and target media are
equal or similar.
5. The media plugged into the source slot cannot be overwritten (it is read only),
avoiding erasing the original data accidentally.
4. FLASH MEDIA INTERFACE

3
MODEL DP-150 Series
INTERFACE Internal SATA
SUPPORTED
MEDIA
MS SLOT: MS, MS-DUO, MSPro, MSPro-DUO
CF SLOT: CF Type I & II
SD SLOT: SD, SDPro, SD HS, Super HS SD,
SDXC, SDHC, MiniSD*, MiniSDPro*,
MircoSD* (*Adapter Required)
MMC, MMCPro, MMCII, RS-MMC
USB SLOT: USB 2.0 Type A
OPTICAL
DISCS: CD-R/RW, CD-ROM, CD-Audio, CD-Mini
DVD±R/±RW/±R DUAL LAYER,
DVD-Video, DVD-ROM
BD-R/RE(25/50 GB), BD-R LTH
BDXL-R/RE(100/128 GB)
SUPPORTED
OPTICAL DISC
READING &
WRITING SPEEDS
(ACTUAL SPEEDS
DEPEND ON THE
OPTICAL DISC AND
THE DRIVE)
Up to 56X on CDs
Up to 24X on DVDs
Up to 16X on BDs
SUPPORTED
FORMATS
FAT, FAT16, FAT32, exFAT, ext2, ext3, ext4,
HFS, HFS+
HUMIDITY
RUNNING: 20-80%
STORAGE: 5-95%
TEMPERATURE
RUNNING: 32°-167°F
STORAGE: -4°-185°F
5. SPECIFICATIONS
COOLING FORCED AIR
This function will copy from USB or flash memory card to DVD/CD/BD disc(s). A
high capacity USB or memory card with large data content can be copied to
several small capacity discs using Disc Spanning technology. Plug in a Flash
device (ex: USB, SD, MMS…) into the proper slot as the source and place a
blank disc into one DVD/CD/BD writer as target for copying.
a. First example: A USB drive with 119MB data content is copied to a CD disc.
b. Second example: A USB drive with 1115MB data content is copied onto two CD
discs using Disc Spanning. The system will detect the source and calculate how
many discs will be needed. After detecting the number of disc needed, the system
will start to copy. When the first blank disc has been written in full with data, it will
be ejected automatically and wait for the next blank disc. Remove the copied disc,
put in another blank CD disc and close the tray, then press "ENT" key to continue
the copy process.
ENT
ENT ENT ENT
ENT
4
Press ENT to confirm
PLACE A BLANK CD
ON TRAY AND CLOSE
[Flash to Disc]
1. Copy
Write 1/1 119MB
TTL 119MB 89MB
1. Flash to Disc [copy select file]
1.Select File
[Flash to Disc ]
2. Copy Select File
File Name and type
File created date/time N/Y
Press ENT to confirm your
selection (N changes to Y)
When Satisfied with
File Selection Press
ESC and Down
[copy select file]
2.Copy 439M
Result
Pass 1 Fail 0
Write 1 439M
TTL 439M 67M
[Flash to Disc ]
1. Copy
Write 1/2 676M
TTL 1115M 79M
Result
Pass 2 Fail 0
Write 1/2 676M
Wait button…
Need 2 CD Disc
=>D1 Continue
1. Flash to Disc
Write 2/2 439M
TTL 1115M 67M
6. OPERATING INSTRUCTIONS
1. Flash to Disc
1.1 Copy All Data
Write =total discs needed
119MB: source data size
89MB data copied so far
1/1
1. Flash to Disc
Result
Pass 1 Fail 0
ENT
ENT
ENT
ENT
ENT
1.2 Copy Selected File
Allows User to Select certain files from a Flash media device and copy it to an optical disc.

Allow different types of memory cards with small data files to be copied to one disc,
In the example below a USB drive with 100MB of data is used as the first source to
copy to a blank CD-R. When the copy finishes the disc will automatically be ejected.
Remove the USB drive, insert an SD card with 220MB of data as the second source
and copy to the same CD-R. After the copy is done, the CD-R will have two
sessions of data from both the USB drive and the SD card.
ENT
ENT
ENT
ENT
ENT
5
[Flash to Disc]
4. Multi Session
Copy x 1 100M
0% 0M
Result
Pass 1 Fail 0
[Flash to Disc]
4. Multi Session
Copy x 1 220M
0% 0M
Result
Pass 1 Fail 0
1.4 Multi Session
CD disc with two sessions of data
SD card as source
1. Flash to Disc
1. Flash to Disc [Flash to Disc]
3. Copy+Compare
Write 1/1 119MB
TTL 119MB 89MB
USB as source
&COMP 1/1 119MB
TTL 119MB 89MB
Result
Pass 1 Fail 0
1.3 Copy+Compare
Performs a Copy function followed by a Compare function. Copied discs files are
compared to the flash media bit for bit.
2. Utility
2.1 Disc Information
Display the information of the media installed on each device. Such as USB,
DVD/CD/BD, flash memory format and content size.
[ 3 ] USB
FAT32 72MB
[ 3 ]: the number of the device port
USB: the type of device
FAT32: the file format
72MB: data used on the device
2. Utility [Utility]
1. Disc Information
[ 1 ] 1Track
Data CD 702MB
[1 ] : the number of the device port
CD: the type of device
702MB: data capacity of the device
ENT ENT
6
This function shows the drive info that is connected to each internal port of the
controller. Information includes the port number that each drive is assigned to, brand
name and model of each drive and drive firmware version.
2.2 Drive Information
[# 1 ]: the number of device
P : 1: device’s port number
1.00: the version of device
ASUS DRW-24F1ST: device
model number
[# 2 ] : the number of device
P : 2: device’s port number
8.07: device’s model number
Press to switch info.
[# 1 ] P : 1 1.00
ASUS DRW-24F1ST
2. Utility [Utility]
2 .Drive Information
[# 2 ] P : 2
USB Sandisk 4GB 8.07
ENT
ENT
2.3 System Information
2.4 Update BIOS
Press to switch info. ID number
XXXXXXXXXXXXXXX
A0103B: controller model
128MB: system memory
V2.00.55: firmware version
XXXXXX: controller’s ID.
2. Utility [Utility]
3. System Information
A0103B 128MB
v2.00.55
This function displays the information of the controller board installed in the copier
section. Information displayed will be the controller model and firmware version.
This command allows you to update the firmware of the Copier section when
necessary. AEGT will automatically supply you with the latest firmware. Normally on
a CD. Once the update process is completed, the Copier will reboot automatically to
activate the new firmware.
ENT ENT
Note:
2. Utility [Utility]
4. Update BIOS
[Update BIOS]
Reading....
[Update BIOS]
Complete! Reboot!
1. Please insert the disc with firmware to Copier DVD/CD/BD device.
2. DO NOT put the firmware files in a folder.
ENT ENT

7
8
3. Setup
3.1 Set Burn Speed
Allows user to set the burn speed for copying needs.
Note: Due to difference of media, a median burn speed is recommended.
Selectable burn speeds:
CD: 1, 2, 4, 8, 10, 12, 16, 20, 24, 32, 36, 40, 44, 48, 50, 52(default), 56, MAX.
Audio CD: 1, 2, 4, 8, 10, 12, 16, 20, 24, 32 (default), 36, 40, 44, 48, 50, 52, 56, MAX.
DVD: 1, 2, 2.4, 4, 6, 8, 12, 16 (default), 18, 20, 24, MAX.
DVD DL: 1, 2, 2.4, 4, 6, 8 (default), 12, 16, 18, 20, 24, MAX.
Blu-ray: 1, 2, 4, 6, 8, 10, 12, MAX (default)
Press to select option
Press ENT to confirm
[Setup]
1. Set Burn Speed
[Set Burn Speed]
CD: 40x
3. Setup
[Set Burn Speed]
Audio CD: 32X
[Set Burn Speed]
DVD: 16x
3.2 Start Up Menu
Allows user to choose which function to appear immediately after the duplicator is
boot up. All functions are available for selecting from: "Flash to Disc", "Disc to
Flash", and "Flash to Flash".
Press to select option
Press ENT to confirm
[Setup]
2. Start Up Menu
[Start Up Menu]
Flash to Disc
3. Setup
ENT ENT
ENT ENT
Press to select option
Press ENT to confirm
Press to select option
Press ENT to confirm
Press to select option
Press ENT to confirm
[Set Burn Speed]
Blu-ray: 2x
3.3 Set Over Size File
Allows user to set what happens to a file that is too large for the target
Reject/Stop Copy: (default) stops the copy process
Skip: Skips the large file and continues the copy process
Press to select option
Press ENT to confirm
[Setup]
3. Set Over Size File.
[Auto Start]
Reject/Stop Copy
3. Setup
ENT ENT
ENT ENT
3.5 Display Mode
3.6 Language
Allows user to choose From English, Spanish, Portuguese, Japanese.
Press to select option
Press ENT to confirm
[Setup]
6. Language.
[Language]
English
3. Setup
ENT ENT
Press to select option
Press ENT to confirm
[Setup]
5. Display Mode.
[Language]
Basic
3. Setup
ENT ENT
3.4 Set Span Mode
Allows user to set how Disc Spanning is performed.
Preload Loading: (default) to be used if one optical drive is connected.
Multi Target: to be used if more than one optical drive is connected.
Press to select option
Press ENT to confirm
[Setup]
4. Set Span Mode
.
[Auto Start]
Preload Loading
3. Setup
ENT ENT
ENT ENT
3.7 Set Time Zone
Allows user to set up a time zone for the specific region based on GMT to time
stamp the disc copies. Options: "GMT +13" ~ "GMT -12".
Press to select option
Press ENT to confirm
[Setup]
7. Time Zone.
[Set Time Zone]
GMT-6
3. Setup
ENT ENT
3.8 Clear Setup
This function will set the copier back to factory default.
Warning: Do not use this function unless instructed by an authorized technician.
Press to
select option
Press ENT to confirm
[Setup]
8. Clear Setup
Clear Parameter To Default?
No
3. Setup Clear Parameter to default?
All Parameters were clear!
ENT ENTENT
Chose display mode that suits operational needs.
“Basic": displays a progress bar, along with the amount of total data in MB on the
master DVD (or in time for the master CD) disc.
"Expert": displays the percentage of the process completed, the amount of data
transferred and the total amount of data on the master disc.
"Show Timer": shows progress time bar.
“Show speed": shows the transfer speed in the process.

If it becomes necessary to set the unit to the factory default settings Go To:
Settings >> Clear Setup >> Yes
Default Settings
Basic Troubleshooting
9
Unit does not turn on or unit receives no power.
a. Check power adapter light and power outlet to make sure power connections are secured.
b. Check power switch on the back of the unit is set to the correct position ( I ).
The Optical drive does not open and/or drive LED does not light up.
b. If a disc is stuck inside a drive, insert a paper clip or safety pin into the pinhole
underneath the drive door and push gently. Make sure the power is OFF during this step.
Press the EJECT button of the drive a few times to test the disc tray.
The blank DVD/CD/BD is not recognized in the Optical drive.
a. Test the blank disc in another optical drive. A faulty writer will not recognize blank discs.
b. Change the blank disc to another disc. A defective blank disc will not be recognized by
the writer drive.
a. Do not open the tower casing as this will void the warranty, unless instructed by an
authorized technician.
High Failure Rate
a. Change media type. Certain types of media may not be compatible with the drives. Poor
quality media can also cause a high failure rate.
b. Lower the burn speed using step 5.1
Machine becomes Hung Up
a. Holding down the ESC key to abort the copy process may cause the machine to become
hung up. If this happens turn OFF and then ON the DP-150 Series.
b. Change the Master Source. It may have errors on it, or be of too poor quality causing the
machine to become hung up.
Buttons do not work
a. Wait for the unit to finish its process.
For troubleshooting assistance contact Adams Evidence Grade Technology, Inc.
Technical Support
Toll Free...877-643-4900
3.9.2 Setup Password
Allows user to set a password to protect from unauthorized changes to the Setup.
Press to select character Press ENT to confirm
Press ENT to move to the next position
Press to select option
Press ENT to confirm
[Setup]
9 .
Advanced Setup
[Advanced Setup]
3.
Setup Password
3. Setup
[Setup Password]
Enable
[Setup Password]
==> _
[Setup Password]
==> _ _ _ _ _ _ OK?
3.9 Advanced Setup
3.9.1 Boot Password
Press to select
character
Press ENT to confirm
Press ENT to move to the next position
Press to select option
Press ENT to confirm
[Setup]
9 .
Advanced Setup
[Advanced Setup]
2.
Boot Password
3. Setup
[Boot Password]
Enable
[Boot Password]
==> _
[Boot Password]
==> _ _ _ _ _ _ OK?
ENT ENT
ENT ENT
ENT
ENTENT
ENT
Allows user to set up password for the copier to prevent unauthorized use.
Password can be up to 6 characters.
10 rev 11/19/2019
NOTE: IF PASSWORD IS LOST. PLEASE CALL TECHNICAL SUPPORT FOR A
ONE TIME MASTER PASSWORD
NOTE: IF PASSWORD IS LOST. PLEASE CALL TECHNICAL SUPPORT FOR A
ONE TIME MASTER PASSWORD
This manual suits for next models
2
Table of contents
Other ADAMS Evidence Grade Technology Copier manuals
