Adaptive Beta-Brite 1024 Owner's manual

i
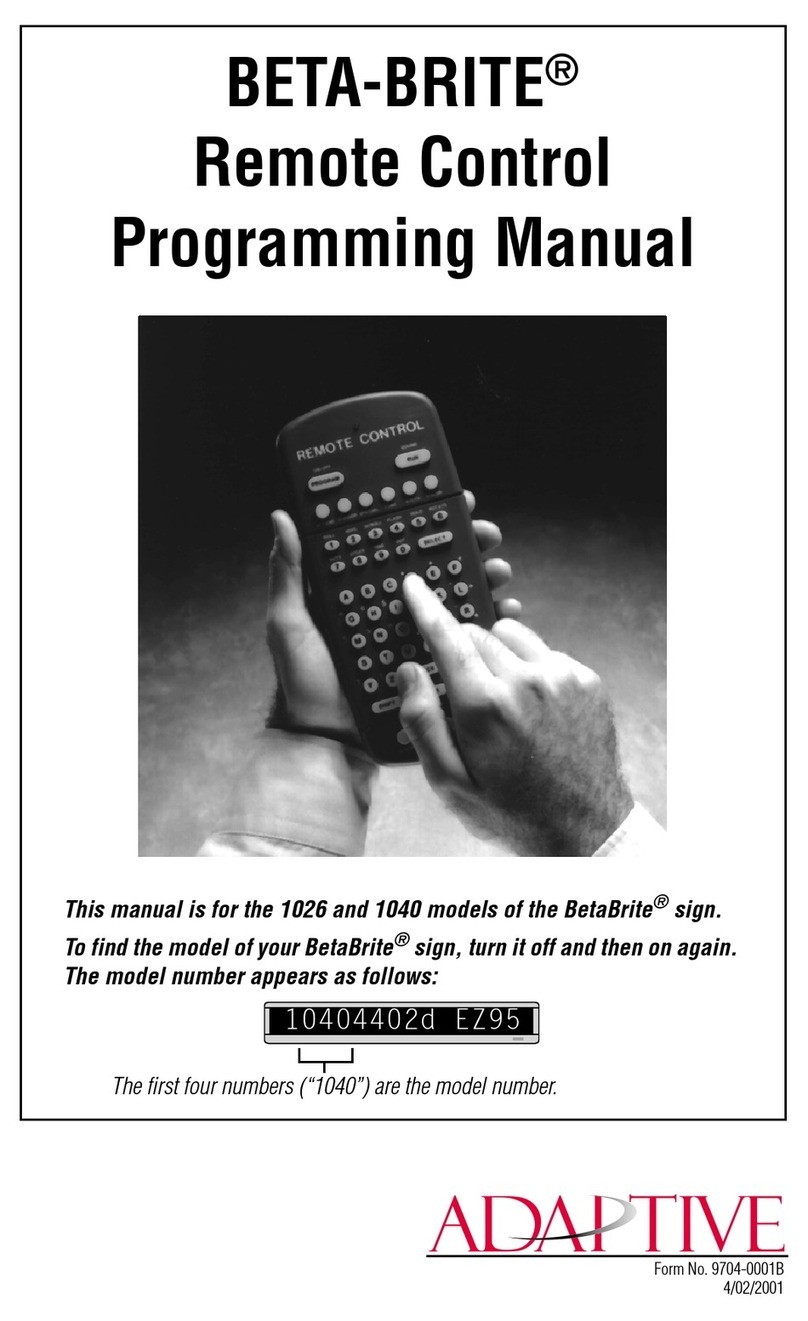
BETA-BRITE
®
Remote Control
Programming Manual
This manual is for the 1024 and 1040 models of the BetaBrite sign.
To find the model of your BetaBrite sign, turn it off and then on again.
The model number will appear as follows:
10404402d EZ95
The first four numbers (“1040”) are the model #.
Form No. 9704-0001A
9/21/98

ii
NOTE: Due to continuing product innovation, specifications in
this document are subject to change without notice.
Copyright © 1998 Adaptive Micro Systems, Inc. All rights reserved.
BETA-BRITE, BIG DOT, and SMART ALEC are trademarks of Adaptive Micro Systems, Inc.
registered in the United States Patent and Trademark Office.
Alec, ALPHA, AlphaLert, AlphaNET, AlphaNET
plus
, AlphaNET
plus
II, ALPHAVISION,
Automode, Director, EZ KEY II, EZ95, PagerNET, PrintPak, PPD, Solar, and TimeNet are
trademarks of Adaptive Micro Systems, Inc.
Visit our Internet World Wide Web site:

iii
Contents
General information ...................................................................... 1
Using a Remote Control to operate your sign..................................................1
Basic sign operation ..................................................................... 3
Turning a sign on and off.................................................................................3
Setting a sign’s time and date..........................................................................4
Clearing a sign’s memory................................................................................5
Setting a sign’s password................................................................................6
What to do when you forget a sign’s password........................................7
How to delete a sign’s password..............................................................7
Sound control..................................................................................................7
Beginning text messaging............................................................... 8
Example 1 — Using upper and lowercase in messages..................................8
Example 2 — Displaying messages in file name order (A, B, C, etc.)............10
Example 3 — Displaying messages in time order.........................................12
Example 4 — Changing the text of an existing message...............................14
Example 5 — Deleting messages..................................................................16
Advanced text messaging ..............................................................17
Example 6 — Displaying the time and date...................................................17
Example 7 — Using fonts and colors............................................................20
Example 8 — Speeding up and slowing down messages .............................23
Example 9 — Special effects with modes (Trailing modes)...........................25
Example 10 — International characters ........................................................26
Graphics...................................................................................28
Example 11 — Creating a movie marquee ....................................................28
Example 12 — Mixing text with graphics......................................................33
Example 13 — Deleting a graphic.................................................................35
Appendixes ...............................................................................36
Appendix A — Modes, fonts, and colors available on signs..........................36
Appendix B — Sign diagnostic test...............................................................38
Appendix C — Connecting the sign to a computer........................................39
Appendix D — Updating the sign’s firmware (EPROM).................................40
Quick Reference Card...................................................................41

iv

Remote Control Programming Manual
General information: Using a Remote Control to operate your sign 1
General information
You can operate a BETABRITE sign in two ways:
• by using a hand-held Remote Control
• by using a computer with special software (see “Appendix C”)
Using a Remote Control to operate your sign
A Remote Control is a hand-held keyboard used to operate a
BETABRITE sign. Most of this manual shows you how to program
messages on your sign using a Remote Control.
A Remote Control needs four AAA batteries to operate.
YZ
STUVW
X
MNPQ
R
O
GHIJKL
ABCDEF
123456
7890
AUTO SPEED TIME DOT
ROLL WIPE SCROLL FLASH HOLD ROTATE
APPEND CURSOR SPECIAL FONT WIDTH COLOR
ON - OFF
REMOTE CONTROL
SOUND
INSERT BACK ADV DELETE
#
¢
$%& *
<>
=/+-
;:”’ ,.
?!
PROGRAM RUN
SELECT
SPACE RETURN
SHIFT CAPS SHIFT
Figure 1: Infrared (IR) Remote Control keyboard
Use one of the SHIFT keys to
access these white functions
(like ROLL and TIME) . . .
. . . and these white characters
(like # and !).
Press PROGRAM to put
the sign into programming
mode. (This mode is used
to set the date and time,
type in messages, etc.)
Press RUN twice to exit
programming mode.
To turnthesignoff or on,
hold down SHIFT and
then press PROGRAM.
Point this end of the Remote Control at a sign.

Remote Control Programming Manual
2 General information: Using a Remote Control to operate your sign
To program a sign with a Remote Control:
• stand at least 5 feet and no more than 30 feet from the sign
• make sure nothing reflective is in front of the sign (Light from the
sign’s display that is reflected back can interfere with the Remote
Control.)
• if nearby fluorescent lights interfere with the Remote Control,
you may have to relocate either the lights or the sign.
If a sign is this far from the floor... ...then hold a Remote Control this far
away:
10 feet from 10 to 30 feet
15 feet from 19 to 30 feet
20 feet from 25 to 30 feet
Figure 2: Using a Remote Control with a sign

Remote Control Programming Manual
Basic sign operation: Turning a sign on and off 3
Basic sign operation
Turning a sign on and off
When you plug in the sign’s power supply, the sign starts up
automatically, and unplugging the power supply turns the sign off.
However, instead of unplugging a sign, there is another way to turn a
sign off:
Holding down
SHIFT
and then pressing
PROGRAM
turns a sign off and on.
NOTE: Messages that you have programmed into the sign will
not
be
lost when you turn a sign off. Messages will be retained for
up to 30 days if the sign is not powered.
When a sign starts up, the following will be displayed:
8K RAM
THEN
WED 1:26 PM
THEN
This is the software (or “firmware”) inside the sign.
This is the amount of memory inside the sign.
Becausethetimeand date are not updatedwhenthe
sign is off, the time and date must be re-
programmed each time the sign is turned back on.
(See “Setting a sign’s time and date” on page 4.)
10404402d EZ95

Remote Control Programming Manual
4 Basic sign operation: Setting a sign’s time and date
Setting a sign’s time and date
Once set, a sign will remember the time and date unless the sign is
unplugged or interrupted by a power loss.
NOTE: Because the time and date are not updated when the sign is
off, the time and date must be re-programmed each time the
sign is turned back on.
Step When you do this... You see this...
1 Press
PROGRAM
.
2 Press
BACK
until SET TIME appears.
3 Press
ADV.
4
Press
D
to set the day of the week.
Press
H
to set the hour.
Press
M
to set the minute.
NOTE:Press
SELECT
, to change from 12-hour
(AM/PM) to 24-hour mode (0 - 23).
5 Press
BACK
until SET DATE appears.
6 Press
ADV
.
7
Press
D
to set the correct day.
Press
M
to set the month.
Press
Y
to set the year.
NOTE:Press
SELECT
to display the date in
different formats—for example, JAN 26,
1994 or 1/26/94, or 26/1/96, etc.
8 After setting the date and time, press
RUN
twice to return to normal operation.
PROG TEXT A
SET TIME
SET W/D ,H&M
THEN
MON 2:29 AM
TUE 11:21 AM
SET DATE
SET WITH D,M,&Y
THEN
JAN. 1 ,1994
OCT. 14 ,1997

Remote Control Programming Manual
Basic sign operation: Clearing a sign’s memory 5
Clearing a sign’s memory
NOTE: Clearing a sign’s memory erases all messages, graphics, and
the password that have been programmed into the sign.
Step When you do this... You see this...
1 Press
PROGRAM
.
2 Press
BACK
until CLEAR MEMORY appears.
3 Press
ADV.
4Press
Y
to clear the sign’s memory. The sign will return to normal operation and display a series of demo
messages.
PROG TEXT A
CLEAR MEMORY
WARNING!
THEN
CLEAR ALL? Y/N

Remote Control Programming Manual
6 Basic sign operation: Setting a sign’s password
Setting a sign’s password
Some signs allow you to set a personal password to protect your
messages and graphics from tampering by others.
NOTE: DON’T FORGET YOUR PASSWORD! If you do, you won’t
be able to operate the sign.
However,
if you do forget the password
, see “What to do when
you forget a sign’s password” on page 7.
Step When you do this... You see this...
1 Press
PROGRAM
.
2 Press
BACK
until SET PASSWORD appears.
3 Press
ADV
.
4 Press
Y
to set a password.
5
Type a 6-character password. (Only asterisks will
appear on the sign as you type.)
Re-type the password when prompted.
CORRECT will appear if you entered the same
password.
Ifyoufailedtotypethesamepassword,ERRORwill
appear, and you’ll have to start over from Step 1.
6 Press
RUN
twice.
7
Press
Y
to password protect the sign.
NOTE:If you select
N
, then a password will not be
needed when you press
PROGRAM
.
PROG TEXT A
SET PASSWORD
SET PASSWORD? Y/N
ENTER 6 CHAR’S
******
RE-ENTER THE 6
THEN
******
THEN
CORRECT
THEN
PROG TEXT A
PASSWORD RUN? Y/N
SECURE
The sign will return to normal operation.
Now,wheneveryoupressPROGRAM,you’llhave
to type the password you just entered.
THEN

Remote Control Programming Manual
Basic sign operation: Sound control 7
What to do when you forget a sign’s password
How to delete a sign’s password
If you no longer want to be prompted to password protect a sign, you
must clear the sign’s memory in order to delete the password. To do this,
see “Clearing a sign’s memory” on page 5.
Sound control
Normally, when you press a Remote Control key while programming
a sign, the sign will beep.
If you want to turn the beeping off, hold down
SHIFT
and then press
RUN
. (To turn the beeping on again, repeat this.)
Step When you do this... You see this...
1 Press
PROGRAM
.
2 Hold down
SHIFT
and press
L
six times.
3 Enter a new password. (See “Setting a sign’s password” on page 6.)
PROG TEXT A
******
CORRECT
THEN
PROG TEXT A
THEN

Remote Control Programming Manual
8 Beginning text messaging: Example 1 — Using upper and lowercase in messages
Beginning text messaging
This section shows you how to start creating messages on your sign.
Example 1 — Using upper and lowercase in messages
In this first example, you’ll display the text
THIS IS YOUR FIRST
MESSAGE
like this:
. . . and then the text
This is your second message
:
Step When you do this... You see this...
1 Press PROGRAM.
2 Press ADV.
3
Type
THIS IS YOUR FIRST
MESSAGE
Note: If you make a
mistake while
typing, press
DELETE to erase a
letter.
Your first message
will look like this.
THIS IS YOUR
FIRST MESSAGE
THEN
Yoursecondmessagewilluse
lowercase text.
This message must be shown
on three displays because the
words “second message”
won’t fit on a single line.
This is your
second
THEN
THEN
message
PROG TEXT A
“A” is the file name of your message
A]
[AUT], which stands for Automode, will
appear as you type your first character.
Automode automatically displays your
message in different formats. Your message should
look like this when
you’re done typing.
A] [AUT]T
A] IRST MESSAGE

Remote Control Programming Manual
Beginning text messaging: Example 1 — Using upper and lowercase in messages 9
4 Press RUN twice.
Now that the first message is done, we’ll enter a second message which contains upper and lowercase characters.
5 Press PROGRAM again.
6 Press SELECT.
7 Press B.
8
Type
T
Press CAPS to switch to
lowercase letters.
Type
his is your second
message
9 Press RUN twice.
Because Automode [AUT] was used in your message (see Step 3), the
text of your message will be displayed in a variety of formats. For
example, one of the formats (or modes) called Scroll moves your
message from the bottom to the top of the sign.
THIS IS YOUR
FIRST MESSAGE
THEN
PROG TEXT A
The
A
changes to a question mark (
?
) after pressing SELECT.
PROG TEXT ?
“B”isnowthe file name of yoursecondmessage.Ifyoupressed
Ainstead of B, you would have written over the first message.
B]
Your message should look like this when you’re done typing.
B]cond message
You should notice that . . .
• The first message doesn’t appear at all. (We’ll fix this is the
following example.)
This is your
second
THEN
THEN
message

Remote Control Programming Manual
10 Beginning text messaging: Example 2 — Displaying messages in file name order (A, B, C, etc.)
Example 2 — Displaying messages in file name order (A, B, C, etc.)
Once you’ve programmed messages into the sign, you may want to
set the order or sequence in which messages appear. This method will
display messages by their file name (A, B, C, etc.) or in alphabetical order.
Step When you do this... You see this...
This example continues where Example 1 left off.
This example assumes that there are two messages (files A and B) in the sign:
File A =
THIS IS YOUR FIRST MESSAGE
File B =
This is your second message
1 Press PROGRAM.
2 Press RUN.
3
If
RUN
appearsonthesign,
go to the next step.
Otherwise, press SELECT
until
RUN
appears.
4 Press B.
5 Press RUN.
You have just programmed the sign to run
only
message file B.
Next, we’ll program the sign to display message B first, then A.
6 Press PROGRAM.
7 Press RUN.
PROG TEXT B
TIME (or TIM) or DEMO (or CAN) may also appear here.
RUN
RUN
RUN B
This is your
second
THEN
THEN
message
PROG TEXT B
RUN

Remote Control Programming Manual
Beginning text messaging: Example 2 — Displaying messages in file name order (A, B, C, etc.) 11
8
If
RUN
appearsonthesign,
go to the next step.
Press SELECT until
RUN
appears.
9 Press B, then A.
10 Press RUN.
Using this method, you can program the order
of some or all of the messages you’ve entered on a sign.
RUN
The order of these letters determines the order in which
messages will appear on a sign.
(In this case, message B will appear first, then message A.)
RUN BA
File BFile A
These two messages will keep being
displayedinthisorderuntilanewfilename
order or a new message is entered.
This is your
second
THEN
THEN
message
THIS IS YOUR
FIRST MESSAGE
THEN
THEN

Remote Control Programming Manual
12 Beginning text messaging: Example 3 — Displaying messages in time order
Example 3 — Displaying messages in time order
In Example 2, you set the order of messages by file name. However,
that method could not specify an exact time when a message would
appear.
In this example, we’ll show you how to make a message appear and
disappear at times you specify.
NOTE: Unless a sign has a battery-backed clock, displaying
messages in time order will only work so long as a sign is
powered. When a sign without a battery-backed clock loses
power, its internal clock becomes inaccurate and must be
reset (see “Setting a sign’s time and date” on page 4).
Step When you do this... You see this...
For this example, make sure that your sign’s internal clock has been accurately set.
(See “Setting a sign’s time and date” on page 4.)
This example continues where Example 1 left off.
This example assumes that there are two messages (files A and B) in the sign:
File A =
THIS IS YOUR FIRST MESSAGE
File B =
This is your second message
In this example, we’ll program the sign to display File A on Monday through Friday from 1:10 PM to 2:30 PM.
We’ll program the sign to always display File B.
1 Press PROGRAM.
2Press SELECT until
B
appears.
3Hold down SHIFT and
press 9for TIME.
4 Press PROGRAM.
5Press SELECT until
A
appears.
6Hold down SHIFT and
press 9for TIME.
PROG TEXT A
PROG TEXT B
Since file B is already set up,
we’ll go on to file A.
ON ALWAYS
is the default
setting for a message. A
messagesetto
ONALWAYS
will run continuously.
B ON ALWAYS
PROG TEXT B
PROG TEXT A
First, we’ll select the
ON
time or when the message starts.
A ON ALWAYS

Remote Control Programming Manual
Beginning text messaging: Example 3 — Displaying messages in time order 13
7Press D(for day) until
M-F
(Monday through
Friday) appears.
8Press H(for hour) until
13:00
appears.
9Press M(for minute) until
13:10
appears.
10 Press SELECT.
11 Repeat Steps 7, 8, and 9 to set the
OFF
time (
2:30
or
14:30
in this example.)
12
Press RUN once.
(If TIME does not appear,
press SELECT until it
does.)
13 PressBAtosetthe display
order of these two
messages.
14 Press RUN once.
PressDto set the day, Hfor hour,and Mfor minute
(in 10-minute increments).
A ON M-F 0:00
Hours must be represented in 24-hour or military style.
So 1:00 PM = 13:00, 2:00 PM = 14:00, etc.
A ON M-F 13:00
Minutes are in increments of 10.
A ON M-F 13:10
After setting the ON time, select the
OFF
time or when the message stops.
A OFF M-F 0:00
TIME
RUN
or
DEMO
may also appear here.
TIME BA
This message
should appear
continuously.
This message
should only
appearbetween
the
ON
and
OFF
times you set.
File BFile A
This is your
second
THEN
THEN
message
THIS IS YOUR
FIRST MESSAGE
THEN
THEN

Remote Control Programming Manual
14 Beginning text messaging: Example 4 — Changing the text of an existing message
Example 4 — Changing the text of an existing message
After typing in a message, you may want to add or remove text from
it. The following is an example of this common situation:
Step When you do this... You see this...
This example continues where Example 2 left off.
This example assumes that there are two messages (files A and B) in the sign:
File A =
THIS IS YOUR FIRST MESSAGE
File B =
This is your second message
and
that File B, then File A is displayed.
In this example, we’ll change File A and File B to the following:
File A =
THIS IS YOUR FIRST MESSAGE, BUT NOW IT’S LONGER
File B =
This is the second message
(
your
changed to
the
)
1 Press PROGRAM.
2Press SELECT until
B
appears.
3Press ADV until the space
after
your
appears.
4Press DELETE until
your
(and the space after it) are
erased.
5 Press INSERT.
6Type
the
(and then SPACE).
7Press INSERT to turn text
insertion off.
8Press ADV until the first
few letters of
second
appear.
PROG TEXT A
PROG TEXT B
We’re going to delete
your
and replace it with
the
.
B] This is your
B] [AUT]This is
Text you type now will be inserted
here—after the space following
is
.
INSERT T]This is
INSERT is is the
B] T]This is the
the
has replaced
your
B] is is the sec

Remote Control Programming Manual
Beginning text messaging: Example 4 — Changing the text of an existing message 15
9
Press APPEND to go to
the end of the message.
DON’T OMIT THIS STEP.
10 Press RUN twice.
Next, we’ll add text to the end of File A.
11 Press PROGRAM.
12 Press SELECT until
A
appears on the sign.
13 Press APPEND.
14 To type a comma, hold
down SHIFT and press W.
15 Press SPACE and then
type
BUT NOW IT
.
16 To type an apostrophe,
hold down SHIFT and
press V.
17 Type
S LONGER
.
18 Press RUN twice.
B] cond message
File B
This is the
second
THEN
THEN
message
PROG TEXT B
PROG TEXT A
APPEND takes you to the end of a message.
A] IRST MESSAGE
A]IRST MESSAGE,
A] E, BUT NOW IT
A] , BUT NOW IT’
A] W IT’S LONGER
File A
THIS IS YOUR
FIRST MESSAGE
THEN
BUT NOW IT’S
THEN
LONGER
THEN

Remote Control Programming Manual
16 Beginning text messaging: Example 5 — Deleting messages
Example 5 — Deleting messages
To delete all the messages in a sign, see “Clearing a sign’s memory”
on page 5.
However, if you only want to delete selected messages, then use the
method shown in this example.
Step When you do this... You see this...
This example continues where Example 4 left off.
This example assumes that there are two messages (files A and B) in the sign:
File A =
THIS IS YOUR FIRST MESSAGE, BUT NOW IT’S LONGER
File B =
This is the second message
In this example, we’ll delete File B.
1 Press PROGRAM.
2Press SELECT until
B
appears on the sign.
3 Press DELETE.
4 Press Yto delete the file.
5 Press RUN twice.
PROG TEXT A
PROG TEXT B
DEL TEXT B? Y/N
PROG TEXT A
File A
THIS IS YOUR
FIRST MESSAGE
THEN
BUT NOW IT’S
THEN
THEN
LONGER
This manual suits for next models
1
Table of contents
Other Adaptive Remote Control manuals
