Adaptive ALPHA 200 Series Owner's manual
i
ALPHA
™
Remote Control
Programming Manual
for
ALPHA 200, 300, 400, 4000, and 7000 series signs.
Also for Big Dot
®
, and Solar signs.
© 1998-2000 Adaptive Micro Systems
Form No. 9704-0002B
1/25/01

ii
NOTE: Due to continuing product innovation, specifications
in this document are subject to change without
notice.
Copyright © 1998-2001 Adaptive Micro Systems, Inc. All rights reserved.
The distinctive appearance of this product is a trade dress of Adaptive Micro
Systems, Inc.
The following are trademarks of Adaptive Micro Systems: Adaptive, Alpha,
AlphaNet plus, AlphaEclipse, AlphaPremiere, AlphaTicker, AlphaVision,
AlphaVision InfoTracker, Automode, BetaBrite, BetaBrite Director, BetaBrite
Messaging Software, Big Dot, PPD, Smart Alec, Solar, TimeNet.
Visit us at our Internet World Wide Web site: http://www.adaptivedisplays.com, or

iii
Contents
General information ...................................................................... 1
Remote Control description.............................................................................1
Using the Remote Control with a sign.............................................................2
Basic sign operation...................................................................... 3
Turning a sign on and off.................................................................................3
Setting a sign’s time and date..........................................................................4
Clearing a sign’s memory................................................................................5
Setting a sign’s password................................................................................6
What to do when you forget a sign’s password........................................7
How to delete a sign’s password..............................................................7
Sound control..................................................................................................8
Remote Control sounds ...........................................................................8
Putting sounds in a message ...................................................................8
Setting a sign’s serial address.........................................................................9
Transferring a sign’s memory from one sign to another................................10
Beginning text messaging ..............................................................11
Example 1 — Using upper and lowercase in 1 and 2-line messages.............11
Example 2 — Displaying messages in file name order (A, B, C, etc.)............14
Example 3 — Displaying messages in time order .........................................16
Example 4 — Changing the text of an existing message...............................18
Example 5 — Deleting messages..................................................................21
Advanced text messaging ..............................................................22
Example 6 — Displaying the time and date...................................................22
Example 7 — Creating a news program on a sign ........................................26
Example 8 — Using fonts .............................................................................31
Example 9 — Using colors............................................................................36
Example 10 — Speeding up and slowing down messages ...........................37
Example 11 — Special effects with modes (Trailing modes).........................39
Example 12 — International characters ........................................................40
Graphics...................................................................................42
Example 13 — Creating a movie marquee ....................................................42
Example 14 — Using multi-line graphics......................................................48
Example 15 — Deleting a graphic .................................................................51
Example 16 — Using 1-line graphics............................................................52
Appendixes ...............................................................................55
Appendix A — Modes, fonts, colors, and graphics on signs.........................55
Appendix B — Understanding the cursor and line positions.........................59
Appendix C — Sign diagnostic test...............................................................60
Quick Reference Card ...................................................................61

iv
Warranty
Adaptive Micro Systems, Inc. warrants to the original purchaser that the sign,
keyboard and power supply will be free of defects in workmanship and materials
for a period of one year from the date of purchase.
Adaptive Micro Systems, Inc. will without charge, repair or replace, at its
option, defective product or component parts upon delivery to the factory service
department accompanied by proof of the date of purchase in the form of a sales
receipt.
This warranty does not apply in the event of any misuse or abuse of the
product, or as a result of any unauthorized repairs or alterations. This warranty
does not apply if the serial number is altered, defaced or removed from the sign.
The purchase price of this product does not include, from Adaptive Micro
Systems, Inc., any on-site support, service or maintenance.
Local ordinances prohibiting the use of flashing signs may exist in some
locations. Compliance with local ordinances is the sole responsibility of the
customer.
To obtain warranty coverage, this product must be registered. Please
complete the enclosed warranty registration card and mail it to Adaptive Micro
Systems, Inc.
How to obtain warranty service
1. Contact the distributor from whom the sign was purchased. If you do
not know where the product was purchased, contact Adaptive Micro
Systems Customer Service at 414-357-2020.
2. If the distributor cannot service the product, obtain a Return
Merchandise Authorization (RMA) number through that company.
An RMA number is required to obtain warranty service.
3. Fill out the Return Merchandise Authorization (RMA) Form on the
following page. To obtain warranty service, this form including the
RMA number must accompany the product.
4. Follow return instructions on the RMA form to return to Adaptive
Micro Systems, Inc.

v
Return Merchandise Authorization (RMA) form
RMA Number: ______________________________________________
Date of Purchase: ______________________________________________
Company Name: ______________________________________________
Contact Person: ______________________________________________
Address: ______________________________________________
______________________________________________
Phone Number: ______________________________________________
Description of Problem:______________________________________________
______________________________________________
______________________________________________
______________________________________________
______________________________________________
Return Instructions
Step 1: Obtain an RMA number from your distributor.
Step 2: Fill out this form and include proof of purchase receipt if product is under
warranty.
Step 3: Pack this form, the sign, keyboard and transformer in the original carton (or a
suitable replacement). Please write the RMA number on the outside of the
package. Any damage to the product during shipment is the responsibility of the
freight company or the owner of the sign.
Step 4: Ship the package,
postage/shipping prepaid
to:
Adaptive Micro Systems, Inc.
Attn: RMA No. __________
7840 North 86th Street
Milwaukee, WI 53224
PLEASE WRITE THE RMA NUMBER ON THE LABEL OF THE SHIPPING BOX.
THANK YOU.

vi
ALPHA Remote Control Programming Manual
General information 1
General information
A Remote Control can be used to turn a sign off and on or to clear its
internal memory. Also, a Remote Control can set a sign’s time and date
and its serial address.
However, a Remote Control’s most important—and most used—
purpose is the creation of text messages and graphic images on a sign.
To show you how to use a Remote Control, this manual presents
practical, everyday examples.
NOTE: Some signs (or a network of signs) can also be programmed
using a personal computer and special software. (See the
document
Network Configurations
, part number 9708-8046,
for more detailed information.)
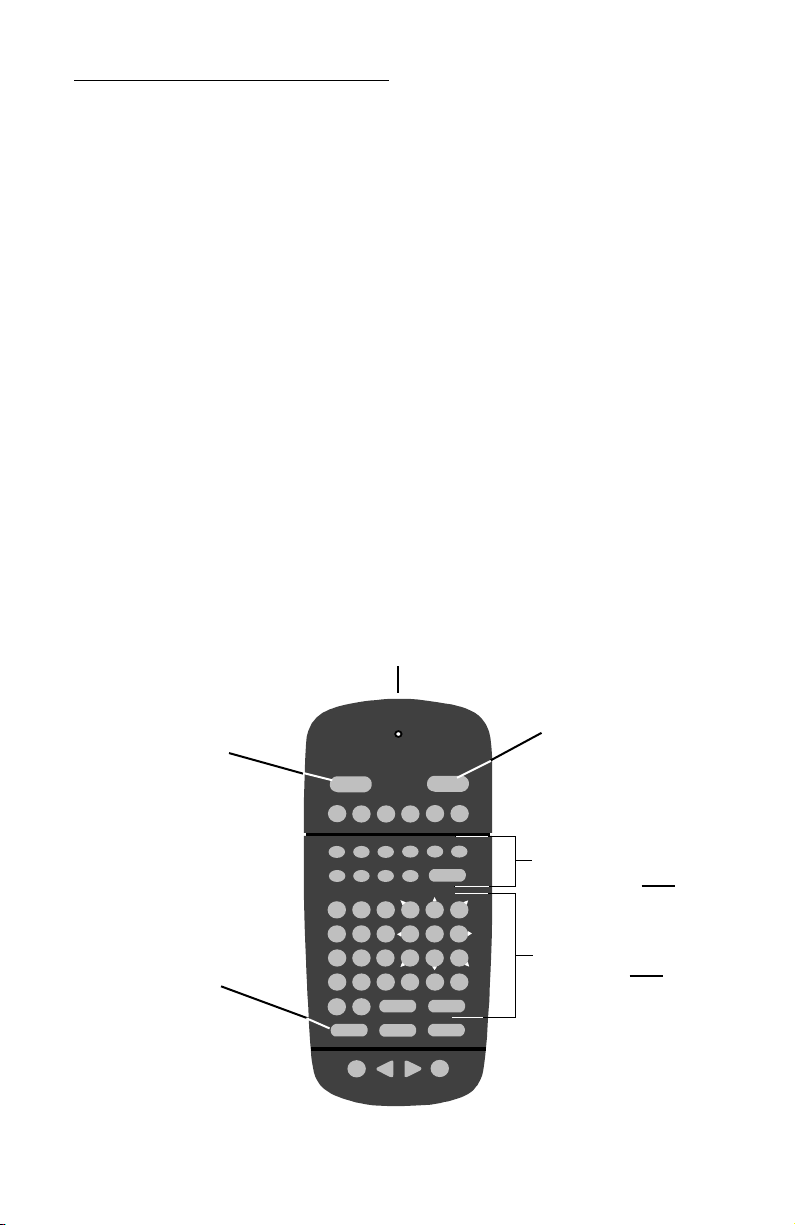
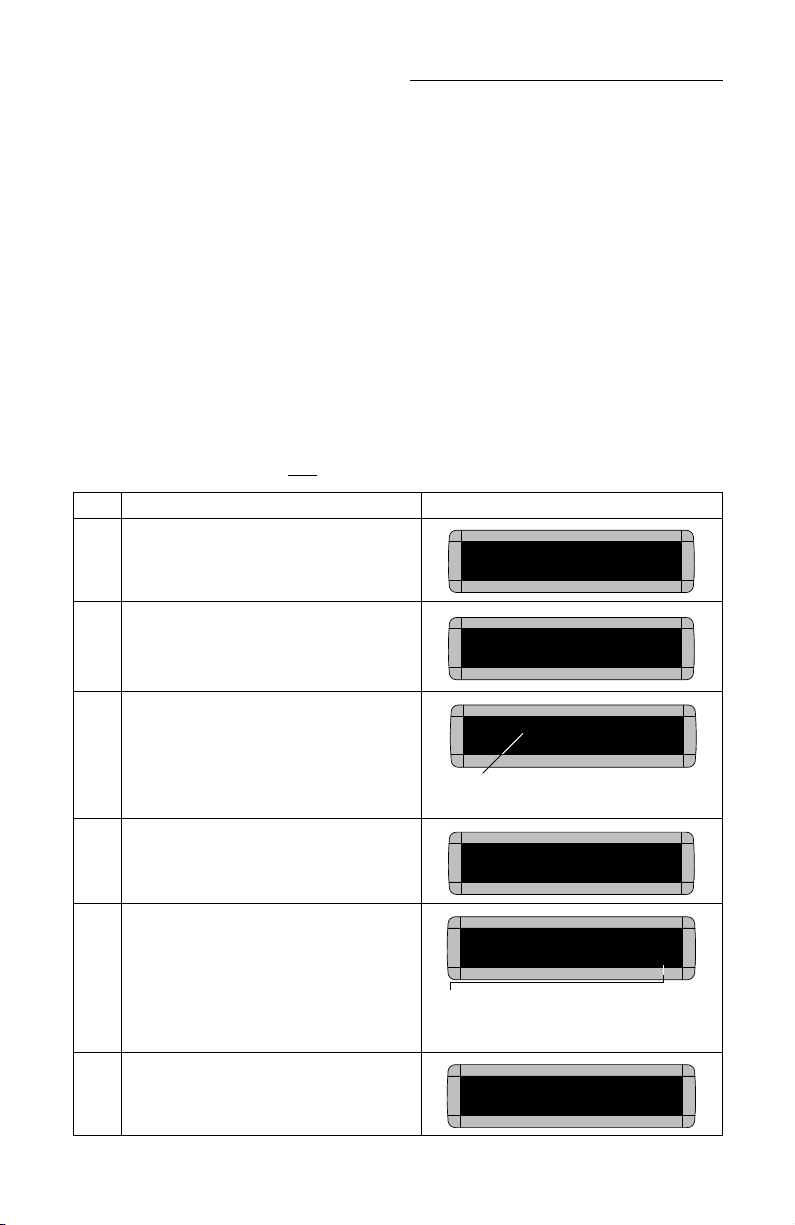
Remote Control description
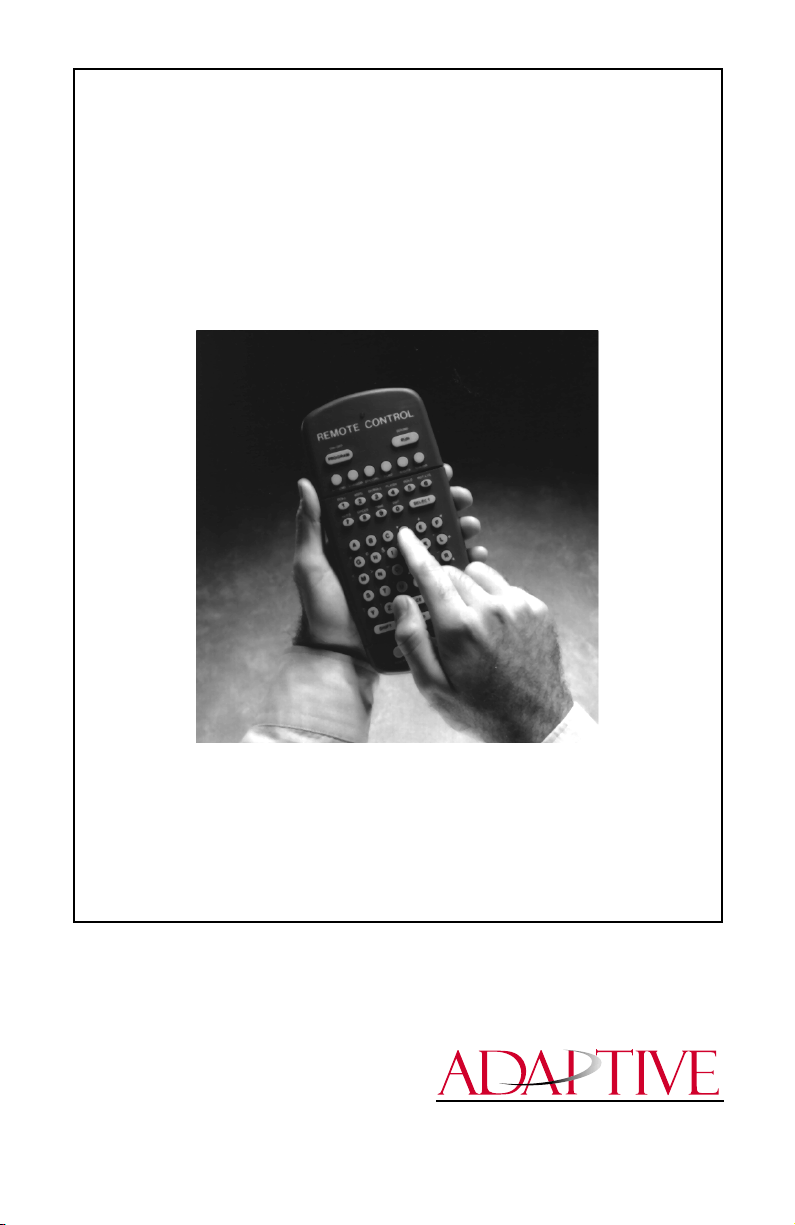
A Remote Control is a hand-held keyboard used to operate an
ALPHA sign. From its front, a Remote Control emits an infrared light
which controls many of the functions of an ALPHA sign.
A Remote Control needs four AAA batteries to operate.
YZ
STUVW
X
MNPQ
R
O
GHIJKL
ABCDEF
123456
7890
AUTO SPEED TIME DOT
ROLL WIPE SCROLL FLASH HOLD ROTATE
APPEND CURSOR SPECIAL FONT WIDTH COLOR
ON - OFF
REMOTE CONTROL
SOUND
INSERT BACK ADV DELETE
#
¢
$%& *
<>
=/+-
;:”’ ,.
?!
PROGRAM RUN
SELECT
SPACE RETURN
SHIFT CAPS SHIFT
Figure 1: Infrared (IR) Remote Control keyboard
Use one of the SHIFT keys
to access these white
functions (like ROLL and
TIME) . . .
. . . and these white
characters (like # and !).
Press PROGRAM to put
the sign into
programming mode.
(This mode is used to
set the date and time,
type in messages, etc.)
Press RUN twice to
exit programming
mode.
To turn the sign off or
on, hold down SHIFT
and then press
PROGRAM.
Point this end of the Remote Control at a sign.

ALPHA Remote Control Programming Manual
2 General information
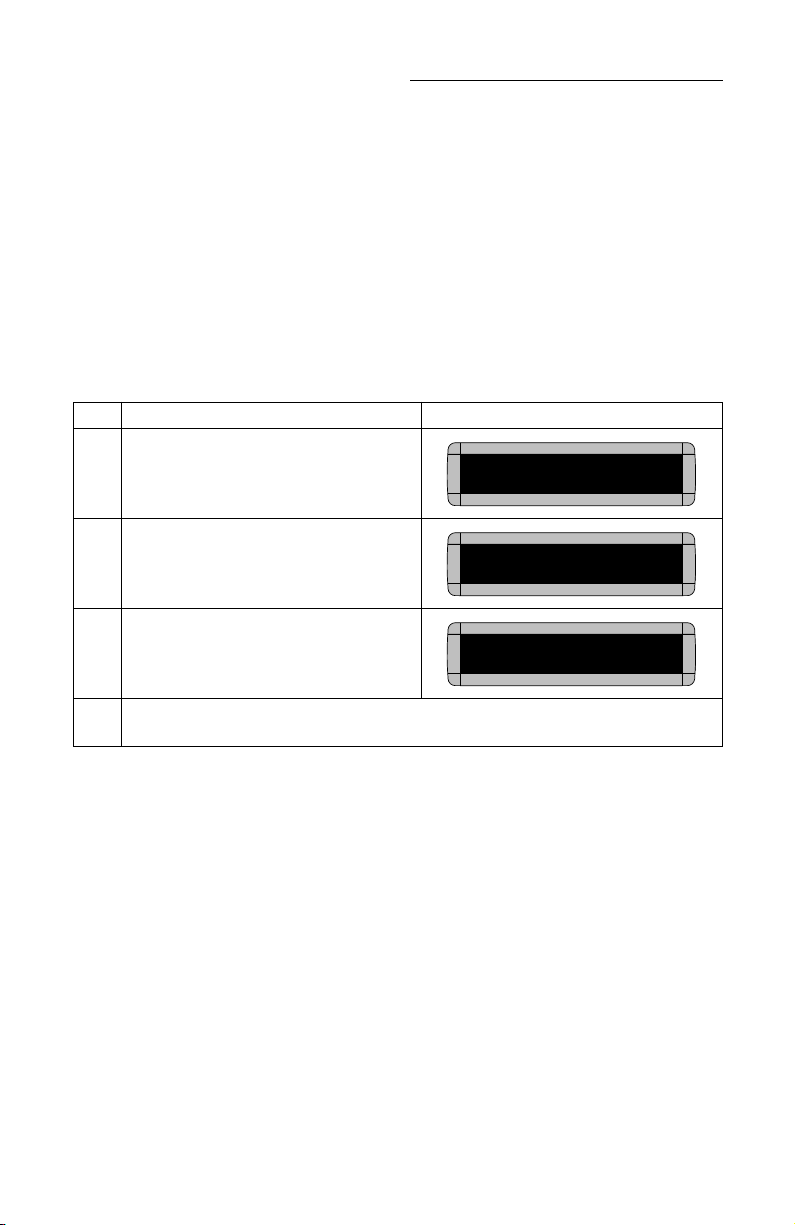
Using the Remote Control with a sign
To program a sign with a Remote Control:
• Stand at least 5 feet and no more than 30 feet from the sign.
• Make sure nothing reflective is in front of the sign. (Light from
the sign’s display that is reflected back can interfere with the
Remote Control.)
• If nearby fluorescent lights interfere with the Remote Control,
you may have to relocate either the lights or the sign.
30o
30o
30o
30o
If a sign is this far from the floor... ...then hold a Remote Control this far
away:
10 feet from 10 to 30 feet
15 feet from 19 to 30 feet
20 feet from 25 to 30 feet
Figure 2: Using a Remote Control with a sign

ALPHA Remote Control Programming Manual
Basic sign operation 3
Basic sign operation
Turning a sign on and off
When you plug in the sign’s power supply, the sign starts up
automatically, and unplugging the power supply turns the sign off.
However, instead of unplugging a sign, there is another way to turn a
sign off:
Using the Remote Control, hold down
SHIFT
and then press
PROGRAM
to
turn a sign off and on.
NOTE: Messages that you have programmed into the sign will
not
be
lost when you turn a sign off. Messages will be retained for
up to 30 days if the sign is not powered.
ALPHA Remote Control Programming Manual
4 Basic sign operation
Setting a sign’s time and date
Once set, a sign will remember the time and date unless the sign is
unplugged or interrupted by a power loss. However, models equipped
with battery-backed clocks will continue to keep accurate time.
Step When you do this... You see this...
1
Press
PROGRAM
.
2
Press
BACK
until SET TIME AND DAY or SET
TIME appears.
3
Press
ADV.
4
Press
D
to set the day of the week.
Press
H
to set the hour.
Press
M
to set the minute.
NOTE: Press
SELECT
to change from 12-hour
(AM/PM) to 24-hour mode (0 - 23).
5
Press
BACK
until SET DATE appears.
6
Press
ADV
. THEN
7
Press
D
to set the correct day.
Press
M
to set the month.
Press
Y
to set the year.
NOTE: Press
SELECT
to display the date in
different formats—for example, JAN
26, 2001 or 1/26/01, or 26/1/01, etc.
8
After setting the date and time, press
RUN
twice to return to normal operation.
PROGRAM
TEXT FILE A
SET TIME
AND DAY
SET TIME USING D,H & M
MONDAY 1:07 PM
SET TIME USING D,H & M
MONDAY 1:07 PM
SET
DATE
SET USING D,M & Y
JAN 26, 2001
JAN 26, 2001

ALPHA Remote Control Programming Manual
Basic sign operation 5
Clearing a sign’s memory
NOTE: Clearing a sign’s memory erases all messages, graphics, and
the password that have been programmed into the sign.
Step When you do this... You see this...
1
Press
PROGRAM
.
2
Press
BACK
until CLEAR MEMORY appears.
3
Press
ADV.
THEN
4
Press
Y
to clear the sign’s memory. The sign will return to normal operation and display a
series of demo messages.
PROGRAM
TEXT FILE A
CLEAR
MEMORY
WARNING!
CLEAR
ALL? Y/N
ALPHA Remote Control Programming Manual
6 Basic sign operation
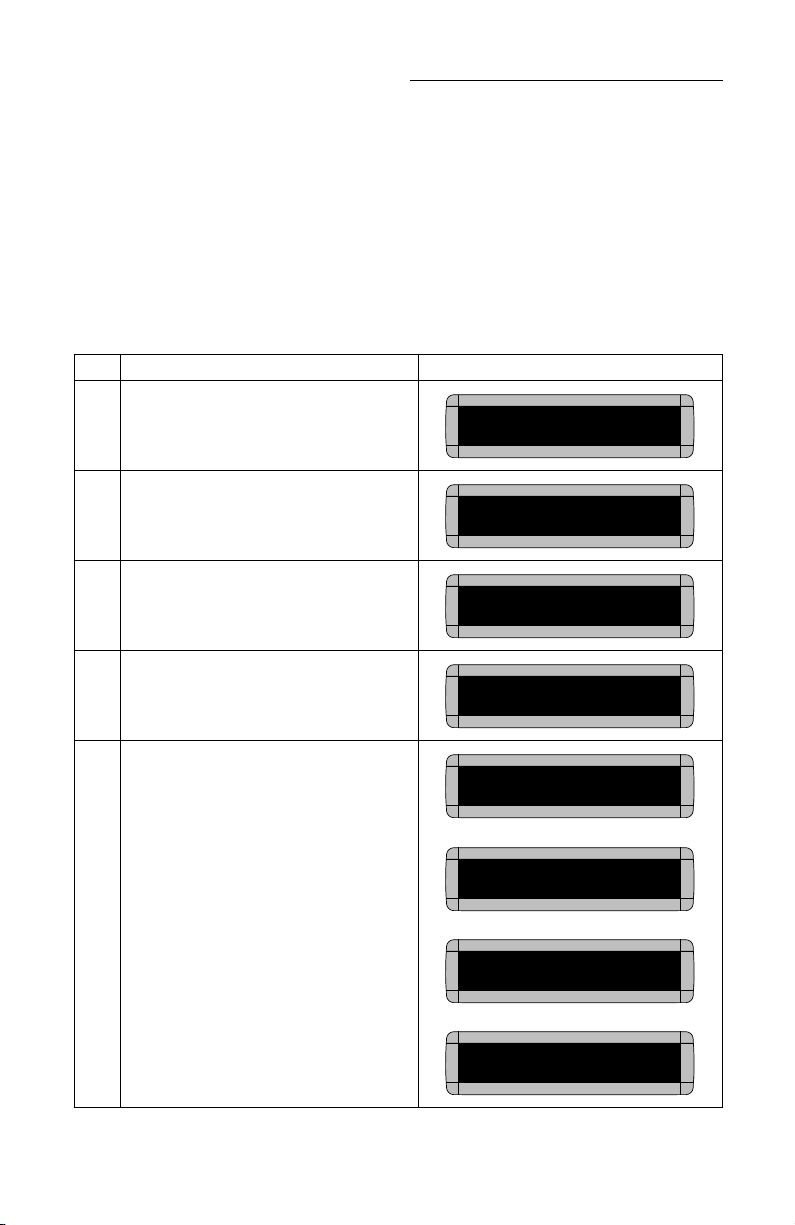
Setting a sign’s password
Some signs allow you to set a personal password to protect your
messages and graphics from tampering by others.
NOTE: DON’T FORGET YOUR PASSWORD! If you do, you won’t
be able to operate the sign.
However,
if you do forget the password
, see “What to do when
you forget a sign’s password” on page 7.
Step When you do this... You see this...
1
Press
PROGRAM
.
2
Press
BACK
until SET PASSWORD appears.
3
Press
ADV
.
4
Press
Y
to set a password.
5
Type a 6-character password. (Only asterisks
will appear on the sign as you type.)
Re-type the password when prompted.
CORRECT will appear if you entered the same
password.
If you failed to type the same password,
ERROR will appear, and you’ll have to start
over from Step 1.
THEN
THEN
THEN
PROGRAM
TEXT FILE A
SET
PASSWORD
SET PASSWORD? Y/N
ENTER 6 CHARACTERS
******
RE-ENTER THE 6
CORRECT
PROGRAM
TEXT FILE A

ALPHA Remote Control Programming Manual
Basic sign operation 7
What to do when you forget a sign’s password
How to delete a sign’s password
If you no longer want to be prompted to password protect a sign, you
must clear the sign’s memory in order to delete the password. To do this,
see “Clearing a sign’s memory” on page 5.
6Press RUN twice.
7
Press Yto password protect the sign.
NOTE: If you select N, then a password will
not be needed when you press
PROGRAM.
THEN
The sign will return to normal operation.
Now, whenever you press PROGRAM, you’ll
have to type the password you just entered.
Step When you do this... You see this...
1Press PROGRAM.
2Hold down SHIFT and press Lsix times. THEN
3Enter a new password. (See “Setting a sign’s password” on page 6.)
PASSWORD RUN? Y/N
SECURE
ENTER PASSWORD
PROGRAM
TEXT FILE A
ALPHA Remote Control Programming Manual
8 Basic sign operation
Sound control
Remote Control sounds
On some signs, whenever you press a Remote Control key, the sign
will beep. To turn this feature off (or on again), hold down SHIFT and
press RUN.
NOTE: On some signs, you will first have to press PROGRAM, then
hold down SHIFT and press RUN.
Putting sounds in a message
In addition to text and graphics, you can also place sounds in a
message:
NOTE: Sounds can not be placed in one-line signs.
Step When you do this... You see this...
1Press PROGRAM.
2Press ADV.
3Type THIS IS 1 BEEP
4To add a beep, press SPECIAL.
5Then press B.
6Press RUN twice. The message will be
displayed and 1 beep will sound.
PROGRAM
TEXT FILE A
:
A] :
[AUT]THIS IS 1 BEEP
A]
The [AUT], which stands for Automode, will
appear automatically when you start typing.
SPECIAL
[AUT]THIS IS 1 BEEP
A]
[BP3] means that you’ll hear 3 beeps when
this message is displayed. Press SELECT
to change to [BP1] for a single beep.
[AUT]THIS IS 1 BEEP[BP3]
THIS IS 1 BEEP

ALPHA Remote Control Programming Manual
Basic sign operation 9
Setting a sign’s serial address
The serial address is a number that you can assign to a sign.
Typically, this feature would be used for a sign that is connected to other
signs on a network. Giving a unique serial address to a sign allows you to
send messages to that particular sign.
See the document Network Configurations (part number 9708-8046)
for more detailed information on networking signs.
Step When you do this... You see this...
1Press PROGRAM.
2Press BACK until SET SERIAL ADDRESS or
SET SERIAL appears.
3Press ADV.
4
Type a number, like 10.
NOTE: A serial address is actually a number
from 0 to 255 in hexadecimal (00 to
FF). However, in typical use entering
a number from 00 to 99 is fine.
NOTE: When a sign leaves the factory, its
serial address is set to 00.
5Press RUN twice to set the new serial address and return the sign to normal operation.
PROGRAM
TEXT FILE A
SET SERIAL
ADDRESS
SERIAL ADDRESS = 00
SERIAL ADDRESS = 10
ALPHA Remote Control Programming Manual
10 Basic sign operation
Transferring a sign’s memory from one sign to another
You can transfer the messages from the memory of one sign to the
memory of any another signs by completing the following steps.
NOTE: To complete the transfer of memory from one sign to other
signs, all signs must be connected together and all must be
set to with the RS485 jumper. For further information on
connecting signs, see the Network Configurations Manual,
pn 9708-8046.
Step When you do this... You see this...
1Press PROGRAM.
2Press SPECIAL.
3Press D.
4The sending sign transmits all messages to the receiving sign(s) and then resumes displaying
messages as programmed.
PROGRAM
TEXT FILE A
:
SPECIAL :
SENDING
ALPHA Remote Control Programming Manual
Beginning text messaging 11
Beginning text messaging
This section shows you how to start creating messages on your sign.
Though a 2-line sign is used in all the examples, the differences
between using a 2-line sign and using a 1-line or other type of sign are
minor. (For more information, see “Appendix B — Understanding the
cursor and line positions” on page 59.)
Example 1 — Using upper and lowercase in 1 and 2-line
messages
In this first example, you’ll display the text THIS IS YOUR FIRST
MESSAGE on both lines of the sign, like this:
. . . and then the text This is your second message on just the bottom line:
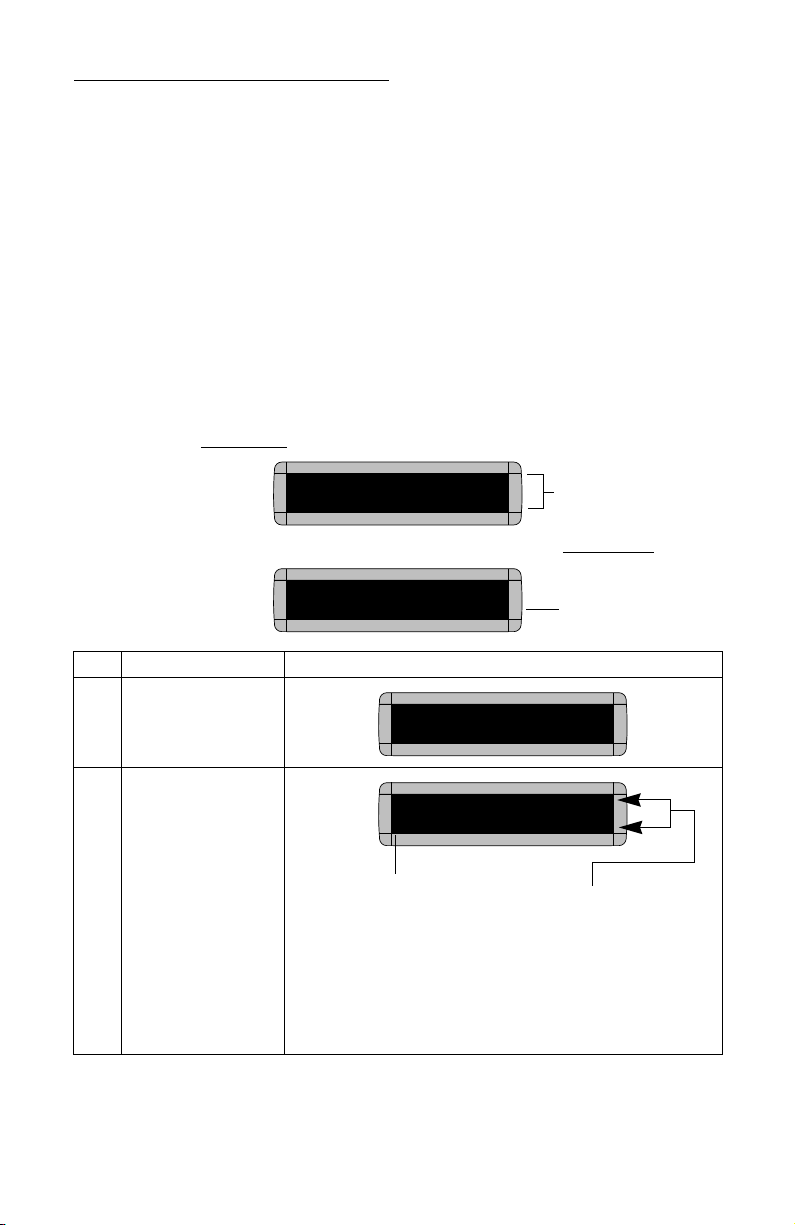
Step When you do this... You see this...
1Press PROGRAM.
2Press ADV.
THIS IS YOUR FIRST
MESSAGE
Your first message
will look like this.
This is your second
However, your second
message will just use
the bottom line of the
sign.
PROGRAM
TEXT FILE A
:
A] :
“A” is the file
name of
your
message
These dots are called the cursor. When
the cursor is on both lines (like here), it
means that the sign will try to display
your entire message on both lines of the
sign.
For more information on the cursor, see
“Appendix B — Understanding the
cursor and line positions” on page 59.

ALPHA Remote Control Programming Manual
12 Beginning text messaging
3
Type THIS IS YOUR
FIRST MESSAGE
Note: If you make a
mistake while
typing, press
DELETE to
erase a letter.
4Press RUN twice.
Now that the first message is done, we’ll enter a second message which contains upper and lowercase characters.
5Press PROGRAM again.
6Press SELECT.
7Press B.
[AUT]T
IS YOUR FIRST MESSAGE
[AUT], which stands for Automode, will
appear as you type your first character.
Automode automatically displays your
message in different formats.
Your message
should look like this
when you’re done
typing.
A]A
A]
THIS IS YOUR FIRST
MESSAGE
Because Automode [AUT] was used in your message (see
Step 3), the text of your message will be displayed in a variety
of formats. For example, one of the formats (or modes) called
Scroll moves your message from the bottom to the top of the
sign.
PROGRAM
TEXT FILE A
PROGRAM
TEXT FILE ?
The Achanges to a question mark
(?) after pressing SELECT.
:
B] :
“B” is now the file name of your second message. If you pressed
Ainstead of B, you would have written over the first message.

ALPHA Remote Control Programming Manual
Beginning text messaging 13
8
Press CURSOR until the
sign’s cursor is on the
bottom line.
9
Type T
Press CAPS to switch to
lowercase letters.
Type his is your second
message
10 Press RUN twice.
B] :
The cursor should end up here.
B]s is your second message
Your message should look like this
when you’re done typing.
This is your second
You should notice two things:
• This message only appears on one line. (This
is because the cursor was positioned on the
bottom line in Step 8.)
• The first message doesn’t appear at all.
(We’ll fix this in the following example.)
THEN
message

ALPHA Remote Control Programming Manual
14 Beginning text messaging
Example 2 — Displaying messages in file name order
(A, B, C, etc.)
Once you’ve programmed messages into the sign, you may want to
set the order or sequence in which messages appear. This method will
display messages by their file name (A, B, C, etc.) in the order you set
(C, B, A, for example.) If you do not set the sequence, the messages will
appear in alphabetical order.
Step When you do this... You see this...
This example continues where Example 1 left off.
This example assumes that there are two messages (files A and B) in the sign:
File A = THIS IS YOUR FIRST MESSAGE
File B = This is your second message
1Press PROGRAM.
2Press RUN.
3
If RUN appears on the
sign, go to the next
step.
Otherwise, press
SELECT until RUN
appears.
4Press B.
5Press RUN.
You have just programmed the sign to run only message file B.
Next, we’ll program the sign to display message B first, then A.
PROGRAM
TEXT FILE B
:
RUN :
TIME (or TIM) or DEMO (or
CAN) may also appear here.
:
RUN :
RUN B
This is your second
THEN
message
This manual suits for next models
4
Table of contents
Other Adaptive Remote Control manuals


