Adax ET ECO SX.2 User manual
Thermostat user instructions
GB
Explanation of programmes/modes/settings:
P1 – Lower temperature at night (night-time heating)
P2 – Programmes
Manual programme (works the same as when
starting the radiator for the first time – Step 1)
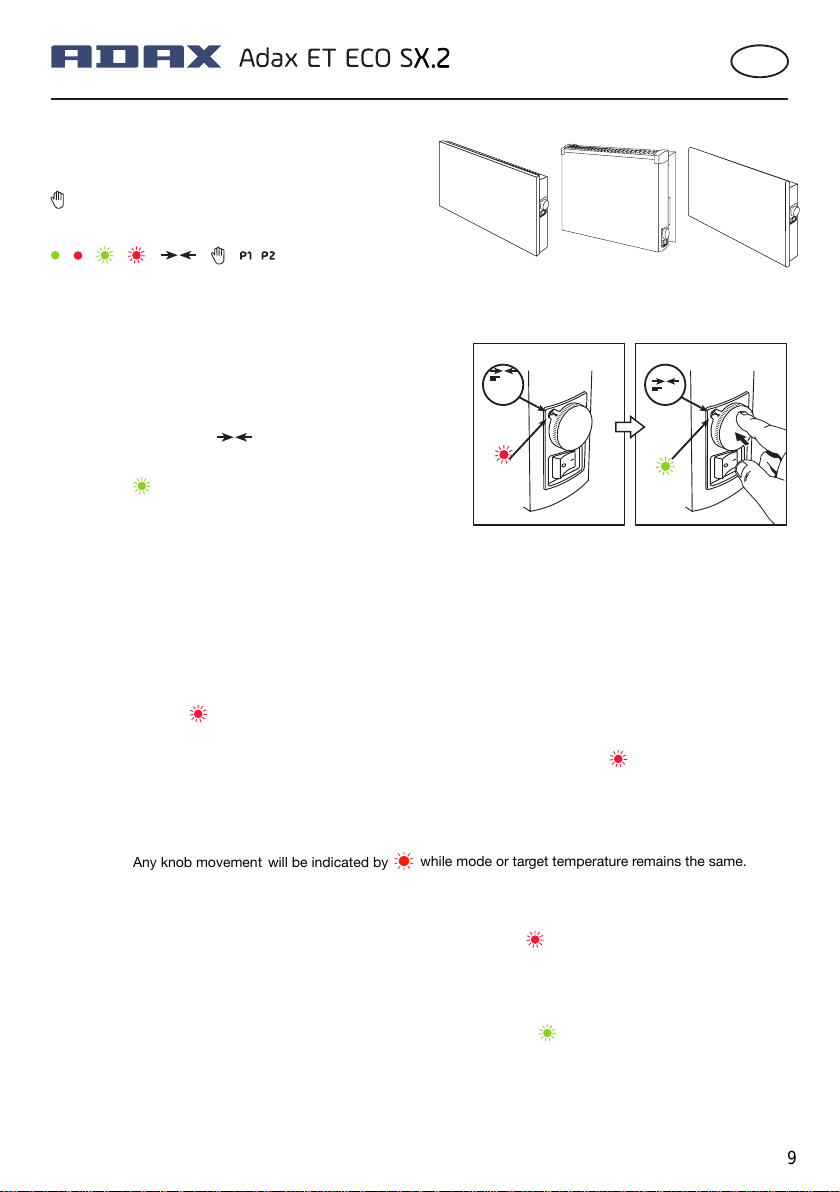
Step 1. Starting the radiator for the first time
Follow the steps below–
this process is used when you start the radiator for the first time,
and to reset the radiator after a power cut.
This calibrates and resets all settings.
1. Plug the radiator in to an electric outlet
2. Turn on the radiator
3. Adjust the control dial so 2 arrows face each other
(22°C) pointing towards the light
4. Press and hold the control dial in for 1 second untilthe light
blinks green
5. Press and hold the control dial in for 1 second untilthe light
blinks green
This process will reset all other settings; it is used when, for example, there has beena power cut or if you
want to cancel the night-time heatingprogramme.
Power cut
When a power cut occurs, the radiator will remember the settings (temperature) that were set
before the power cut occurred. It will start heating up again as soon as the power is on. If the temperature is changed,
the light will blink red– indicating a power outage.
To adjust the temperature, you must follow Step 1 “Starting the radiator for the first time”.
If the radiator is turned off for a long period (e.g. during the summer), the light will blink red when it is turned on
again–follow the process for Step 1.
Child safety mode
The thermostat (control dial) can be locked to prevent children and others changing the radiator’s settings and
temperature.
Activate child safety mode
1. Turn the control dial to the desired temperature (e.g. 22°C)
2. . Press and hold the control dial in for 3 seconds until the light blinks red
3. .If you turn the dial at this point, the light will blink red. You cannot change the temperature
Turn off Child safety mode
1. . Turn the control dial with the arrows (show the symbols) as when turning the radiator on
2. Press and hold the control dial in for 3 seconds until the light blinks green.
3. When the child safety mode is turned off, the radiator will heat at 22°C. Adjust to the desired temperature.
Hold 1 sec.
9
VP11 VPS10 Eco Basic
Any knob movement
will be indicated by
while mode or target temperature remains the same.

Program P1 – Lower temperature at night (night-time heating)
By activating programme P1, the temperature is automatically reduced by 5 °C for 7 hours.
Note: the programme must be activated when you require the lower temperature: e.g. 11 PM.
P1 must be activated at the time you require the lower temperature at night. When P1 is activated, the reduction
in temperature will be activated in the evening/night automatically.
If you see a green light + red light blinking when this module is selected, the start time for night-time heating
has not been specified
Activating P1 – Night-time heating
1. .The programme must be activated at the time you wish to reduce the temperature at night (e.g. 10.30 PM)
2. .Turn the control dial to P1 (P1- set to the light)
3. Press the control dial once. If the time is not given, a green light will blink!
4. .Press and hold in the control dial for 2 seconds until the green light blinks
5. Turn the control dial to the required temperature (22 degrees) and confirm by depressing the control dial.
Programme P1 will then reduce the temperature from 22 °C to 17 °C for 7 hours. After 7 hours, the radiator will warm up
to 22°C. If the temperature is adjusted when night-time heating is set, the updated temperature will be reduced by 5°C.
If a different “comfort” temperature is required, e.g. 22°C, this can easily be adjusted by setting a new “comfort”
temperature (e.g. 20°C. The reduced night-time temperature will then be 15°C).
Changing starting time for P1 – Lower temperature at night (night-time heating)
1. .Reactivated when the required starting time for night-time heating is set: e.g. 10 PM
2. Follow steps 2 – 5 under activating night-time heating.
Manuel mode
When activating the manual mode, the desired temperature is set by turning the control dial.
The radiator is heating up when the red light is on. When the green light is on, the room has reached the
settemperature.
1. Turn the control dial to the hand symbol and press once to confirm
Set the desired temperature you require. Adjust for night-time heating and/or set the temperatureto 5°C if the radiator
is set to guard against frost in a shed or holiday home.
Open window
This setting is set to Off by default. By registering an open window, it makes it possible to detect an open window
(registering a suddenly change in temperature). When the radiator senses a window is open, the temperature is
automatically set to anti-frost mode (7°C). When the window is closed– i.e. when the zone temperature starts to
increase – the radiator automatically reverts to the previous set temperature.
Activate / Deactivate Open window
1. .Turn the control dial to the hand symbol – Press to confirm
2. .Turn the control dial to 13°C
3. Status – Press in the control dial for 1 second twice – the green light will blink.
a. Open window is activated – Green light shows
b. Open window is deactivated – Red light shows
4. .Turn Open window off or on
a. Turn the control dial to the left to turn off – The LED light will turn red–Press the dial in to confirm. The green
light will blink.
b. Turn the control dial to the right to turn on – The LED light will turn green – Press the dial in to confirm. The
green light will blink.
5. When either is turned off or on – adjust to the desired temperature.
10
!
!
Trigger:
When 5 (or more) °C drop is detected during 10 minutes period.
indication will inform about detected open window. During this stage heater will be
inactive.
!
Adaptive heating start
This feature will measure time required to heat up to a certain temperatures and pre-starts heating to reach target
temperature at required time.
If enabled, it will start heating earlier in P1 and P2 modes.
If heater was turned off, measured values will be erased. Heater will collect values again.
Time is always measured, so environment changes will be adapted.
By default, this feature is disabled.Factory reset will disable this feature too.
Enable/Disable adaptive heating start:
1. Select Manual mode (Refer “Changing mode”).
2. Turn control knob to 15°C.
3. Press and release knob twice during 1 second indicated by.
will light up if adaptive heating is enabled.
will light up if adaptive heating is disabled.
4. Turn control knob to the left to disable ( LED will light up).
Turn control knob to the right to enable ( LED will light up).
5. Press control knob once to confirm selection, indicated by.
6. Adjust required temperature.
Resetting the radiator to factory settings
This process resets all radiator settings (programmes and services) to the factory settings so it can be set-up as new.
Factory settings
1. .Turn the control dial to the hand symbol – Press to confirm
2. .Turn the control dial to 11°C
3. .Press the control dial in for 1 second two times – The green and red lights will blink
4. .Press and hold in the control dial for 3 seconds until the green light blinks
The radiator is now reset to its factory settings.
Follow the instructions in Step 1 of the instructions to set up your radiator.
Programme P2 – Day/Week programme
Set up your own custom program / temperature for a day or week
Activate P2 – Choose Day- or Week mode
1. .Turn the control dial to P2 (P2 level with the LED light)
2. .Quickly press the control dial in two times during the course of 1 second. The green light will blink
3. Choose Day or Week mode
a. Turn the control dial LEFT to select WEEK MODE –
b. Turn the control dial RIGHT to select DAY MODE –
4. .Press the control dial in once to confirm your choice (Day or Week) – A blinking green light confirms your choice
11
!
!
!
!
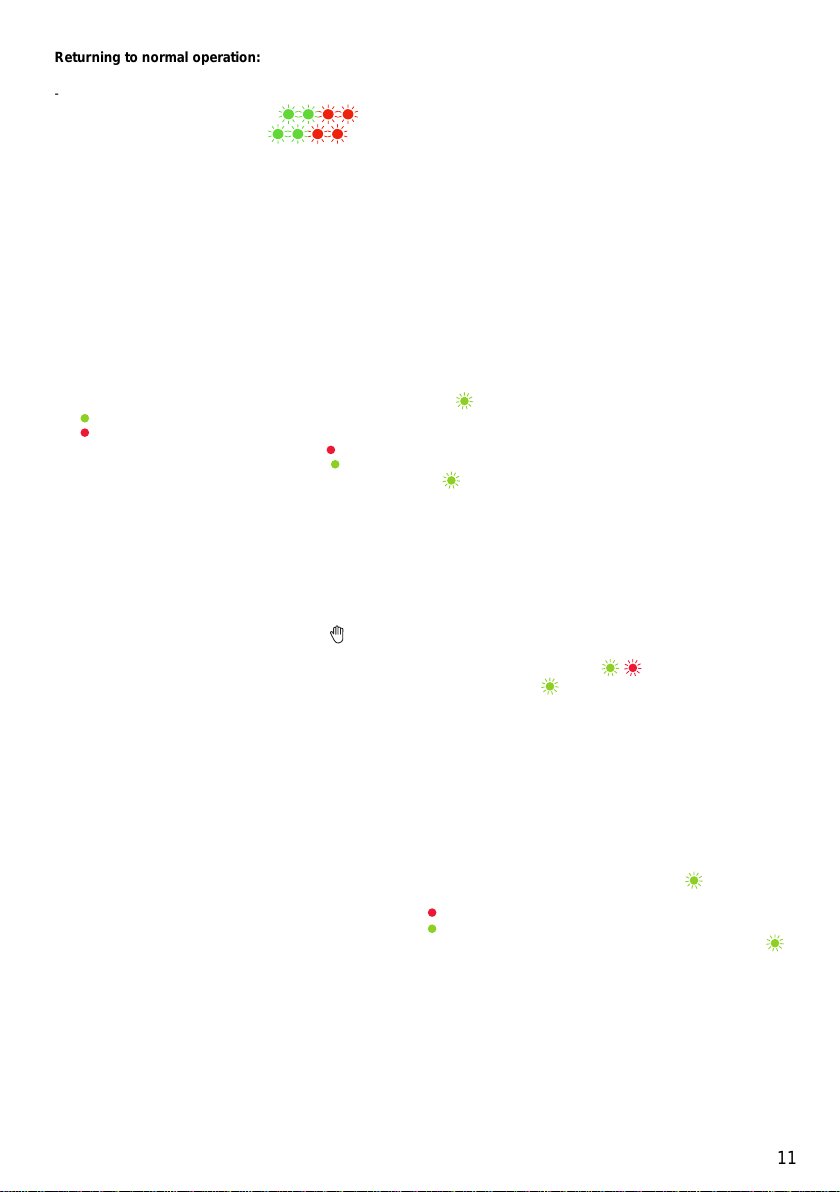
Returning to normal operation:
-
Automatically after 60 minutes.
-
If temperature rises 3 (or more) °C during 10 minutes period.
-
If control knob is pressed during
indication.
-
If control knob is turned during
indication
Set up times and temperature
The process must be carried out at the time you require the temperature to increase or decrease during the day.
1. Select the desired time (e.g. 10.30 PM)
2. Turn the control dial to the desired temperature (e.g. 18°C –night-time reduction)
3. Quickly press the control dial in 2 times during the course of 1 second – The green light will blink to confirm it is
set
The time and temperature are now set and will change to the set temperature at the same time every day.
1. Specify a new, adjusted temperature at the time you require (e.g. 6.30 AM)
2. Turn the control dial to the desired temperature (e.g. 22°C –comfort temperature)
3. Press the control dial in quickly 2 times during the course of 1 –The green light will blink to confirm it is set
Repeat the above process until you have set all the times and temperatures required during your Day or Week
schedule.
When the programme is active, the temperature will be adjusted at the times specified, irrespective
of the temperature showing on the control dial until you choose another programme or stop the programme.
Erase saved programme settings
1. Turn the control dial to P2 (P2 so it is aligned with the LED light)
2. Press the control dial in for 3 seconds – The green light will blink to confirm it is set
3. If no settings have been saved, the green and red light will blink
Your P2-settings are now erased.
Adax AS, Myresgt. 1 3060 Svelvik, Norway. www.adax.no Art.no: 62263 Dato: 01.04.2020
12
!
!
!
!
!
!
!
!
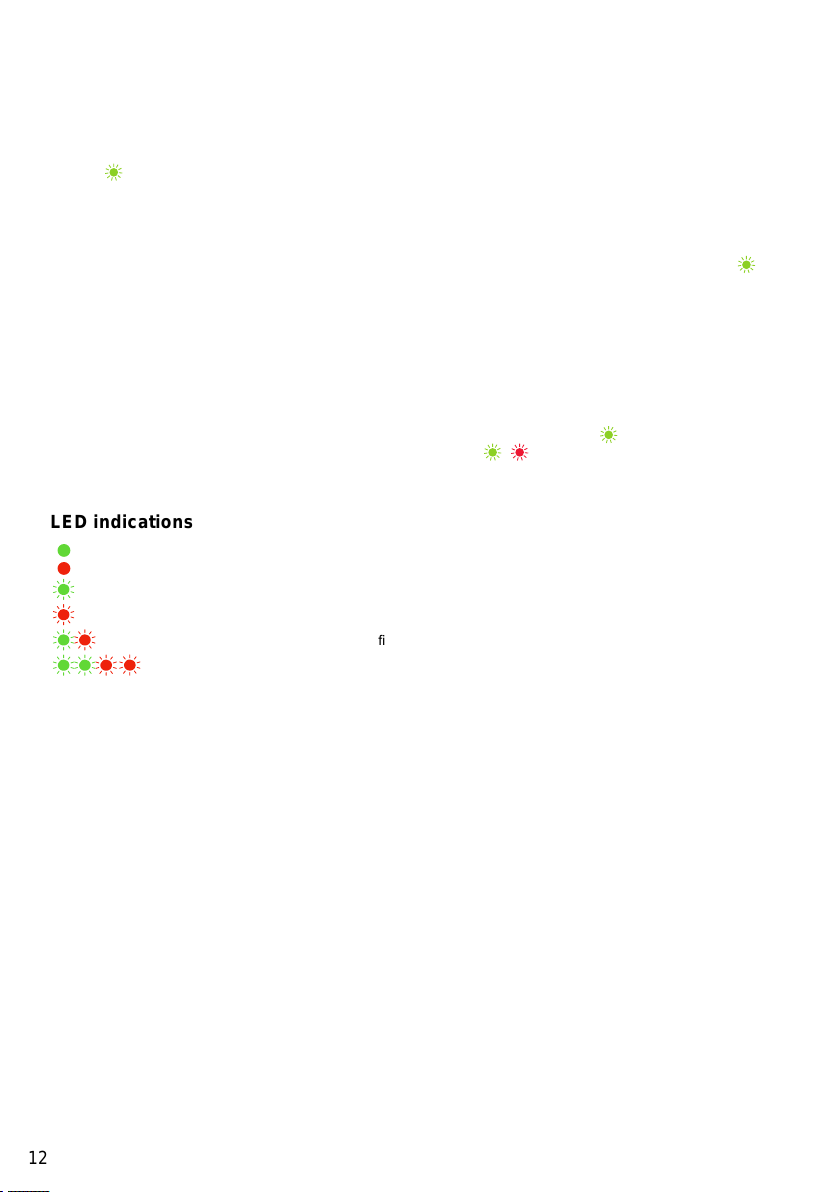
LED indications
- Idle (until ambient temperature drops).
- Heating (until ambient temperature increases).
- Knob input accepted.
- Child lock is active.
- Heater is inactive. Selected mode is not configured.
- Heater is inactive. Open window detected.
Table of contents
Other Adax Thermostat manuals


Popular Thermostat manuals by other brands

Verdant
Verdant VX-TR Network Installation

BANGGOOD
BANGGOOD BGL09RF-WIFI user manual

Honeywell Home
Honeywell Home T10 Getting started

White Rodgers
White Rodgers Comfort-Set 1F97-391 Installation and operating instructions

SCI USA
SCI USA FMT-24-SUPER-PROG owner's manual

Peco
Peco Performance pro T4000 series Technical specifications


