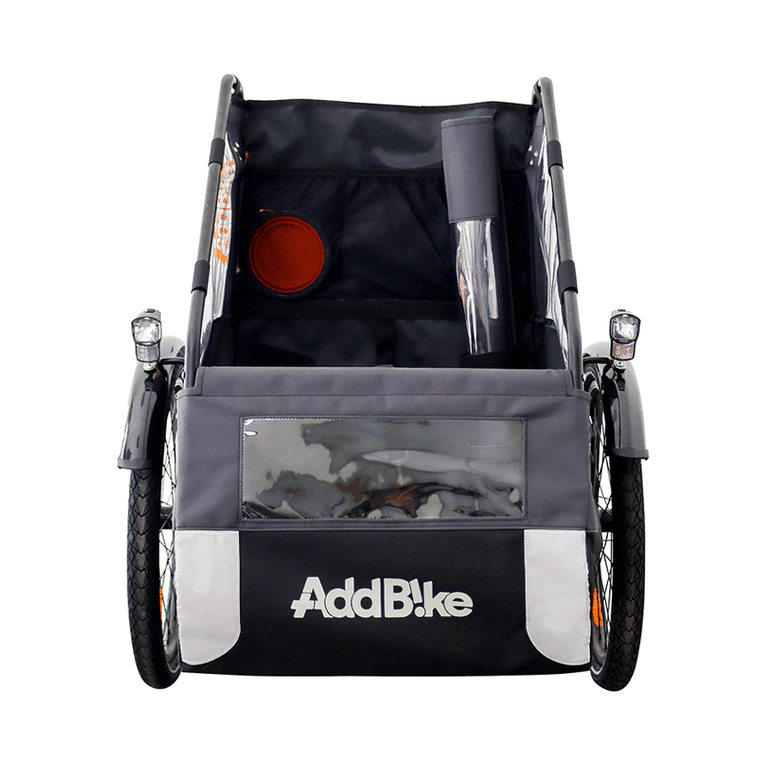
AddBike Carry'Dog Manual

Non-contractual photos
User and Installation Guide
Carry’Dog Module
September 2020
Applicable to the AddBike and the AddBike+
This document indicates the correct practices to be respected during the use and
assembly/disassembly of the Carry’Dog module. It is imperative to read this document in its
entirety in order to keep your bike, your AddBike, and your Carry’Dog in good working
condition for as long as possible.
Please keep this document.

2
The AddBike is an innovative solution that transforms your bike into a practical, easy to handle
cargo bike. It consists of a two-wheeled base that allows the transportation of loads and the
installation of modules specifically designed for the AddBike. These modules give your bike the
capacity to carry bulkier loads, groceries or a child.
Welcome to the family of AddBikers!
There is no need to invest in expensive and large cargo bicycles. With the AddBike you can
quickly and easily turn your own bike into a compact cargo bike.
This document concerns only the Carry’Dog module and is complementary to the “AddBike
User's and Installation Guide”.
This module is compatible with the AddBike and the AddBike+
Maximum capacity
Carry’Dog
35 kg
Dimensions (lxLxH in cm)
Carry’Dog volume
48*55*70
AddBike + Carry'Dog
68*78*92
Maximum size of the dog (in cm)
Maximum size of the dog from paws to
shoulder
50

3
Table of Contents
1. General Warning..................................................................................................................................... 4
2. Lexicon of the Carry’Dog module.................................................................................................... 5
3. Contents of the Carry’Dog module.................................................................................................6
4. Installing the Carry’Dog....................................................................................................................... 6
5. Using the Carry’Dog............................................................................................................................20
6. Uninstalling the Carry’Dog module..............................................................................................21
7. Cleaning....................................................................................................................................................21
8. Warranty...................................................................................................................................................21
9. Assistance in case of problems.......................................................................................................21

4
1. General Warning
Symbols and warnings:
WARNING!
This symbol indicates a hazard that could result in serious injury if the
instructions are not followed.
CAUTION!
This symbol indicates a hazard that may result in minor injury if the instructions
are not followed,
ADVICE!
This symbol indicates advice for the use or maintenance of your AddBike.
Before installing this module on your AddBike, make sure you have read and understood the
“AddBike User and Installation Guide”.
Read and follow the instructions in this guide: Read the entire guide carefully and follow the
instructions in order to use the Carry’Dog module safely. If you do not understand certain indications,
please contact your AddBike dealer or contact AddBike directly at: support@addbike.fr. Please keep
this manual for future reference. It is also important to take into account the directions for use of the
AddBike and that of the bike on which you are installing the AddBike.
The AddBike Company disclaims all liability in case of non-compliance with the instructions in this
User's and Installation Guide of the Module Carry’Dog and in case of modification of the product by
the user.
Using the Carry’Dog Module
The Carry’Dog module is designed to be used on the AddBike produced by our company. Do not try
to install or use this module on other cargo bikes or on a classic bike.
The Carry’Dog module is not designed to be stored outdoors for prolonged periods. It must be
stored in a dry and temperate place away from corrosive products.

5
2. Lexicon of the Carry’Dog module
Figure 1 - Lexicon of the Carry'Dog module

6
3. Contents of the Carry’Dog module
The Carry’Dog module is delivered in a parcel containing:
•The textile part of the module (shell, cover, front textile);
•The carpet/mat for the floor of the module;
•2 upper tubes;
•2 front tubes;
•1 crossbar;
•1 compact slat;
•2 screws BHC M5x30;
•4 screws BHC M5x30 with the 4 corresponding nuts;
•This Carry'Dog module manual.
Before assembling the Carry'Dog module on your bike, remember to check that the product is in
good general condition (no scratches, no bent parts).
4. Installing the Carry’Dog
The Carry’Dog module must be installed and uninstalled as explained.
Improper installation can lead to accidents that could cause serious injury.
We advise you to add the Carry’Dog module to your AddBike only when the
latter is properly installed on your bike so as to make this module easier to
assemble.
For the installation/deinstallation you will need an Allen wrench size 3, and an open-ended spanner
size 8:
Open-ended spanner (size 8)
Allen wrench (size 3)
Figure 2 - Tools needed

7
•Screw the provided compact slat to the lower front tubes with the 4 screws BHC M5x30
and corresponding nuts. You should end up with the result shown in figure 3;
Figure 3 –Fixing the compact slat to the front tubes
•Remove the screws on both sides of the compact plate of the AddBike seat. The same
applies to the screws on both sides of the highest compact plate of the AddBike backrest;
Figure 4 –Screws to be removed from the seat and backrest

8
•Insert the front tubes into the holes of the seat and line up the screw holes of both parts;
Figure 5 - Insertion of front tubes into the seat

9
•Replace the previously removed seat screws by inserting them through the holes in the
front tubes;
Figure 6 –Screws to be put back on the seat
•Install the textile shell:
oSlide on the black textile straps
oPosition the rear of the textile in front of the backrest

10
Figure 7 - Insertion of the textile
•At the back of the module, hook the 3 textile straps around the backrest of the AddBike, starting
with the bottom one;
Tighten the fabric on both sides, centering the fabric on the backrest as much
as possible.
Figure 8 –Tightening of the lower strap of the textile

11
•Thread the two upper tubes through the elastic straps of the textile in the direction of the
arrow shown in figure 9;
Figure 9 - Inserting the upper tubes into the textile straps
Remember to insert the end of the upper tubes into the last upper rigid strap
before assembling the rest of the structure.
Figure 10 - Inserting the upper rigid straps before assembling the tubes
•Insert the top tubes into the holes in the backrest and front tubes at the same time. If the
different tube sections do not line up, you have positioned the top tube in the wrong
direction;

12
Figure 11 - Inserting the upper tubes into the backrest
•Replace the previously removed backrest screws by inserting them through the holes in
the upper tubes;
Figure 12 –Screws to be replaced on the backrest
•First hook the upper strap on the back of the module, then hook the leash retaining strap
(vertical) as shown in Figure 13;

13
Figure 13 –Tightening the straps
Finally tighten the last strap on the backrest of the AddBike;
Tighten the fabric on both sides, centering the fabric on the backrest as much
as possible
No cables from the AddBike should be caught in the strap clamps.
1) Top strap tightened
2) Leash strap
tightened

14
Figure 14 –Tightened straps on the backrest of the AddBike
•Slide the crossbar into the sheath of the front textile cover;
Figure 15 - Inserting the crossbar into the sheath of the textile cover

15
•Position the crossbar between the two holes at the front of the module between the upper
and front tubes and fix it to the rest of the structure using the BHC M5x30 screws supplied;
Figure 16 - Installation of the cross bar
•Assemble the front textile with the shell of the Carry'Dog using the Velcro fasteners
provided for this purpose;

16
Figure 17 –Assembly of the front textile on the module
•Assemble the floor mat in the bottom of the Carry'Dog by attaching the four press studs
provided;
Figure 18 –Assembly of the floor mat

17
•Assemble the cover by attaching it to the module using the press studs and Velcro
fasteners shown in figure 19;
Figure 19 –Location of buttons and Velcro

18
Figure 20 –Assembly of the textile shell and the cover
If you wish to use the Carry'Dog without its cover, simply do not attach it to
the textile. You can then roll the cover up and place it in the bottom of the box,
attaching it in place with the elastic straps (see Figure 21).

19
You will find in Figure 21, all of the different storage elements in which to place
the accessories of your Carry'Dog such as the bowl and the rolled-up cover.
Figure 21 –Storage elements of the Carry’Dog
Dog
bowl
Rolled-up
cover
Elastic
straps
Pockets
Leash/
harness
attachment
loop

20
5. Using the Carry’Dog
Before making journeys with your dog in the Carry’Dog, we advise you to accustom your dog to this
form of travel. Here are a few tips that may help you:
1. Park your AddBike using the parking brake, the tilting-wheels lock and/or the kickstand of
your bike.
2. To facilitate the familiarisation process, do not hesitate to place a mat, blanket or any other
comfortable surface used by your dog. The presence of toys or other familiar objects can
help.
3. Open the front textile by undoing the Velcro then help your dog get settled in the
Carry'Dog, without forcing them, while avoiding sudden movements. The first few times,
the dog will not necessarily be able to climb in on their own. Do not hesitate to help them.
4. Once inside, encourage them to be in a seated or any stable position by encouraging them
verbally or with treats.
5. After a few moments, help them get out of the Carry'Dog, without jumping over the
crossbar.
You can repeat this exercise several times, until the dog feels comfortable with the Carry’Dog. Once
the dog feels comfortable in the module, start with a few rides by pushing the bike by hand. When
the dog is comfortable with the movement, you can start your first rides together!
Rules related to the use of the Carry'Dog
The maximum weight of the dog allowed in the Carry'Dog is 35 kg.
When transporting a dog in the Carry'Dog, make sure that the dog is securely
attached to the leash/harness attachment provided.
Do not transport children in the Carry'Dog.
Other manuals for Carry'Dog
2
Table of contents
Other AddBike Pet Care Product manuals
Popular Pet Care Product manuals by other brands

Bathmaster
Bathmaster 936-894-3292 Instructional booklet

Petsafe
Petsafe Staywell Magnetic 900 Series user guide

EYENIMAL
EYENIMAL PFBORRER002 user guide
strex
strex SP268 user manual

Evolution Dog Wash
Evolution Dog Wash Evolution Owner's/operator's manual

J&J Global
J&J Global Edenbranch 702001 quick start guide
