ADI AQ-16 User manual

THANK YOU!
We are grateful you chose ADI for your land mobile radio
applications. We believe this easy-to-use transceiver will provide
dependable and reliable communication to personnel operating at
peak efficiency.
ADI transceivers incorporate the latest in advanced technology.
As a result, we feel strongly that you will be pleased with the
quality and features of this product!
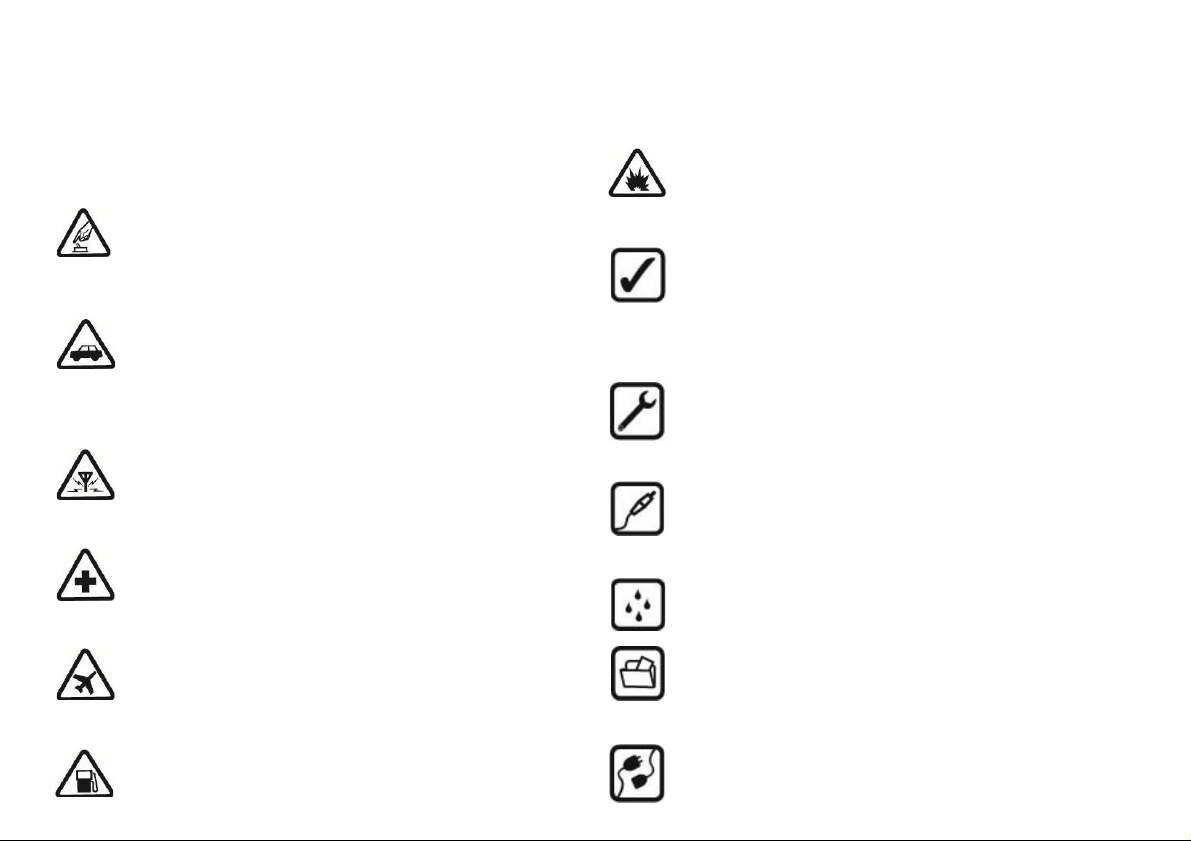
FOR YOUR SAFETY
Read these simple guidelines. ot following them may be
dangerous or illegal. Read the complete user manual for further
information.
SWITCH ON SAFELY
Do not switch the device on when transceiver use is
prohibited or when it may cause interference or danger.
ROAD SAFETY COMES FIRST
Obey all local laws. Always keep your hands free to
operate the vehicle while driving. Your first consideration
while driving should be road safety.
INTERFERENCE
All wireless devices may be susceptible to interference,
which could affect performance.
SWITCH OFF IN HOSPITALS
Follow any restrictions. Switch the device off near
medical equipment.
SWITCH OFF IN AIRCRAFT
Follow any restrictions. Wireless devices can cause
interference in aircraft.
SWITCH OFF WHEN REFUELING
Do not use the device at a refueling point. Do not use
near fuel or chemicals.
SWITCH OFF NEAR BLASTING
Follow any restrictions. Do not use the device where
blasting is in progress.
USE SENSIBLY
Use only in the normal position as explained in the
product documentation. Do not touch the antenna
unnecessarily.
QUALIFIED SERVICE
Only qualified personnel may install or repair this
product.
ENHANCEMENTS AND BATTERIES
Use only approved enhancements and batteries. Do not
connect incompatible products.
WATER-RESISTANCE
Your device is not water-resistant. Keep it dry.
BACK-UP COPIES
Remember to make back-up copies or keep a written
record of all important information.
CONNECTING TO OTHER DEVICES

When connecting to any other device, read its user
manual for detailed safety instructions. Do not connect
incompatible products.
UNPACKING AND CHECKING EQUIPMENT
Carefully unpack the transceiver. We recommend that you identify
the items listed in the following table before discarding the
packing material. If any item is missing or has been damaged
during shipment, file a claim with the carrier immediately.
Supplie Accessories
ITEM QUANTITY
Li-ion Battery Pack 1
Adapter 1
Desktop Charger 1
Rubber Antenna 1
Belt Clip 1
Hand Strap 1
User Manual 1
Warranty Card 1
PREPARATION
Li-ion Battery Pack Precautions
●Do not short the battery terminals or dispose of the battery by
fire. ever attempt to remove the casing from the battery pack.
●Keep the charging temperature always between 5ºC and 40ºC.
●Do not use the transceiver while charging the battery pack. We
recommend you switch the transceiver power OFF while
charging is taking place.
●Do not recharge the battery pack if it is already fully charged.
Doing so may cause the life of the battery pack to shorten or the
battery pack may be damaged.
●Use the battery pack only for its intended purpose. ever use
any charger or battery pack that is damaged.
●Do not short-circuit the battery. Accidental short-circuiting can
occur when a metallic object such as a coin, clip, or pen causes
direct connection of the positive(+) and negative(-) terminals of
the battery. (These look like metal strips on the battery.) This
might happen, for example, when you carry a spare battery
pack in your pocket or purse. Short-circuiting the terminals may
damage the battery or the connecting object.
Charging the Li-ion Battery Pack
The battery pack is not charged at the factory, please charge it
before use. Initially charging the battery pack after purchase or

extended storage (greater than 2 months) will not bring the
battery pack to its normal operating capacity. After repeating the
charge/discharge cycle two or three times, the operating capacity
will increase to normal.
Please charge the battery pack as follows:
1.Make sure the battery pack contacts are in contact with the
charging terminals.
2.Slide the battery pack or transceiver with a battery pack into the
desktop charger.
3.The charging LED lights red and charging begins.
4.After charging about 4 hours, when the light turns to green, it
means the battery pack is fully charged.
5.Then you can take off the battery pack or transceiver with the
battery pack and use it.
Installing/Removing the Battery Pack
To install the battery pack, Fit the extensions at the bottom of the
battery into the slots at the bottom of the transceiver’s body. Press
the top part of the battery towards the transceiver until a “click” sound
is heard.
To remove the battery pack, Slide the battery latches, on both sides
of the battery, downwards. Pull the top part of the battery away from
the transceiver’s body, and lift the battery from the transceiver’s body.

Installing/Removing the Antenna
1.Screw the antenna into the connector on the top of the
transceiver by holding the antenna at its base and turning it
clockwise until secure.
2.Turn the antenna counter-clockwise until you can remove it.
Installing the Belt Clip
If necessary, insert the belt clip at the back of battery pack.
Installing the Earphone
Insert the earphone plug into the earphone jacks.
Installing Han Strap
If necessary, you can install the hand strap in the back of
transceiver in order to easy carry.

GETTING ACQUAINTED
Orientation
1. Antenna
Rubber antenna using for receiving or transmitting a signal.
2. TX/RX In icator
Light green while receiving a signal, when FM radio activates or
when the squelch is open; Lights red while transmitting.
3.LCD Display
On the display you will see various indicators which show what
function you have selected.
4. Internal Microphone
Input the audio signal while you talk.
5. Up ( ) & Down ( ) Key
Up or down when selecting an operating frequency, channel,
menu, value or others.
6. Keypa
Input frequency, memory channel or function selection etc.
7. Power Switch/Volume Control
Rotate clockwise to switch power On or to increase the audio
output level; Rotate counter-clockwise to switch power Off or to
reduce the audio output level.
8. Speaker
Output the audio.
9. PTT Switch
Push and hold to transmit, release to receive.
10. Lamp Key
Push to light the LCD backlight, re-push to turn OFF the
backlight.
11. Programming Key (PKEY)
The default setting is Monitor function. Push and hold to open
the squelch temporarily and monitor the operating frequency.
12. Han Strap Hook
A loop on the top of transceiver, use to facilitate carrying the
transceiver.

13. Battery Lock Button
Use to lock/unlock the battery pack
14. Earphone/ Data Cable Jack
Connects an earphone; or connects a data cable for PC software
programming.
15. Li-ion Battery Pack
Supply the power to the transceiver.
Keypa Description
Key What You Operate
1 SQL In VFO/MR/CH mode, press [F]+[1] key to adjust the
squelch level.
2 LOW In VFO/MR mode, press [F]+[2] key to switch between
the high/low power output level.
3 SCAN In VFO/MR/CH mode, press [F]+[3] key to activate
scanning of frequencies and memory channels.
4 STEP In VFO mode, press [F]+[4] key to select the channel
step size as follows:
- 5.00, 6.25, 10.00, 12.50, 25.00 KHz.
5 REV In MR mode, press [F]+[5] key to switch reverse function
O /OFF. If you want to switch this function O , you have
to set offset frequency in VFO mode and save the
settings as memory channel.
6 RSQT In VFO/MR mode, press [F] + [6] key to set receiving
with CTCSS/DCS.
7 VGL In VFO/MR/CH mode, press [F]+[7] key to adjust VOX
level.
8 ASY In VFO mode, press [F]+[8] key to set offset direction &
frequency.
9 TSQT 1) In VFO/MR model, press [F]+[9] key to set transmitting
with CTCSS/DCS.
2) In MR/CH model, press [9]+Power On to show/no
show memory channel name.
0 LCK In MR mode, press [F]+[0] key to lock/unlock memory
channel when scan.
* V/M 1)In VFO/MR mode, press [V/M] key to change the
transceiver working mode between VFO and MR mode.
2)In VFO mode, press [F]+[V/M] key to save memory
channel.
3)Press [V/M]+Power On to change the transceiver
working mode between VFO and CH mode.
# VOX In VFO/MR mode, press [F]+[# VOX] key to switch VOX
function O /OFF.

F 1)In VFO/MR/CH mode, press and hold [F] for 2 seconds
to lock the keypad.
2)In VFO/MR/CH mode, press [F] key to activate the
second function with other keys in 10 seconds.
3)Press [F]+Power On to initialize fully all settings.
MENU In VFO/MR/CH mode, press [MENU] key to enter menu
mode.
EMG In VFO/MR/CH mode, press and hold [EMG] key 2
seconds to switch emergency alert function O .
FM In VFO/MR/CH mode, press [FM] key to switch FM
Radio function O /OFF.
UP Press [UP] key to select an operating frequency,
channel, menu value or others.
DOWN Press [DOWN] key to select an operating frequency,
channel, menu value or others.
Basic Transceiver Mo es
This section introduces you to the basic modes you can select on
this transceiver.
■VFO Mo e(VFO)
VFO is an abbreviation of Variable Frequency Oscillator.
Frequencies for both transmitting and receiving are generated
and controlled by the VFO.
Switch the power O , in this mode you can change the desired
operating frequency by using [UP]/[DOWN] key or via numeric
keypad direct input.
■Memory Recall Mo e(MR)
Memory recall mode is used for operation on memory channels
which store programmed frequencies.
Press [V/M] key to select, in this mode you can change memory
channels, using the [UP]/[DOWN] key or numeric keypad, where
you stored frequencies or related data.
Note:
You can’t enter this mode unless you program one memory channel at
least.

■Channel Display Mo e(CH)
Channel display mode is used for programming infrequently
changed values or conditions of functions.
Press [V/M] key to select, in this mode you can change menu
number by using [UP]/[DOWN] key.
Note:
You can’t enter this mode unless you program one memory channel at
least.
LCD Display
On the LCD display you will see various indicators show what
functions you have selected. Sometimes you may not recall what
these indicators mean or how to select them. In such a case, you
will find the following description very useful.
In icator Description Operation
1 Second Function, Select
Mode
[F]
2 Power Saver Use menu o.3
3FM FM Radio Function. [FM]
4●While transmitting,
show the relative power
output level:
:HI
:LOW
●While receiving, show
the relative strength of
received signal.
---
5 High/Low Output Power In VFO/MR mode,
press [F]+[2]
6 Automatic Power Off Use menu o. 1
7 Battery Gauge Indicator ---
8 Minus Offset Direction In VFO mode,
press [F]+[8]
9 Plus Offset Direction In VFO mode,
press [F]+[8]
10 Display the current
memory channel when in
MR Mode.
---

11 Display various
alphanumeric
informations, such as:
frequency, an operating
channel or menu selection.
---
12 VOX Hands-free VOX In VFO/MR mode,
press [F]+[# VOX]
13 R Reserve function In MR mode,
press [F]+[5]
14 Appear when the key lock
function is activated.
[F] (Press and
hold for 2
seconds)
15 Lock/Unlock Memory
Channel when scan.
In MR mode,
press [F]+[0]
16 CT CTCSS In VFO/MR mode,
Receiving:
press [F]+[6]
Transmitting:
Press [F]+[9]
17 DCS DCS In VFO/MR mode,
Receiving:
press [F]+[6]
Transmitting:
Press [F]+[9]
BASIC OPERATION
Turning Transceiver ON/OFF
1.Turn the [Power] switch clockwise to turn O the transceiver.
●
A music tone sounds.
●
You can enter Menu No.10 to set with this music tone or not when
switch power on.
2.To turn OFF the transceiver, turn the [Power] switch counter-
clockwise.
A justing the Volume
1.Turn the [Volume] control clockwise to increase the audio
output level and counter-clockwise to decrease the audio output
level.
●
If bac ground noise is inaudible because of the squelch function, press
and hold [PKEY] ey (the default setting is Monitor), then turn [Volume]
control to adjust the audio level you desire.
A justing Squelch Level
The purpose of the squelch is to mute the speaker when no
signals are present. With the squelch level correctly set, you will
hear sound only while actually receiving signals. The higher the

selected squelch level, the stronger the signals must be when
receive. The appropriate squelch level depends on the ambient
RF noise conditions.
1.In VFO/MR/CH mode, press [F]+[1] key to switch O .
●
The current squelch level appears.
2.Use [UP]/[DOWN] key to select a squelch level from 0 to 9
(default: SQL 2).
● “
Level 0” indicates continuously open setting, “Level 1” is loose
squelch (for wea signals) and “Level 9” is tight squelch (for strong
signals).
●
Select just the level at which the bac ground noise eliminated when no
signal is present.
3.Press any other than [PKEY],[LAMP] and [UP]/[DOWN] key to
complete the setting.
Transmit Output Selection
The transceiver has two output levels to suit your operating
requirements. Low output power during short-range
communications may reduce the possibility of interference to
other stations and will reduce current consumption.
1.In VFO/MR mode, press [F]+[2] key to switch O .
●
The current power output level appears.
2.Use [UP]/[DOWN] key to select High/Low output power level.
3.Press any key other than [PKEY],[LAMP] and [UP]/[DOWN] key
to complete the setting.
Setting a Frequency
1.Select VFO mode, use [UP] key to increase the frequency, and
[DOWN] key to decrease the frequency.
●
If you cannot select a particular frequency, the frequency tuning step
size needs to be changed. See “Changing Fre uency Step Size”
(Page xx).
●
You can also select frequencies with the numeric eys. See “Keypad
Direct Input” (Page xx).
Transmitting
1. ever transmitting without an antenna, doing this may damage

the transceiver.
2.To prevent interference, listen on the channel before
transmitting by pressing and holding [PKEY] key (Default:
Monitor).
3.When ready to begin transmitting, press and hold [PTT] switch
and speak in a normal voice level.
●
The TX/RX indicator on the top panel lights red and S/RF meter shows
the output power level.
●
Spea ing too close to the microphone, or too loudly, may increase
distortion and reduce intelligibility of your signal at the receiving
transceiver.
4.When you finish speaking, release [PTT] switch to receive.
Note:
If you transmit continuously for more than 3 minutes (Default setting of
TOT), the internal time-out timer generates a warning beep and the
transceiver stops transmitting. In this case, release [PTT] switch and let
the transceiver cool down for a while, then press [PTT] switch again to
resume transmitting.
MENU OPERATION
Menu Access
1.In VFO/MR/CH mode, press [MENU] key to enter Menu mode.
●
The menu appears.
2.Use the [UP]/[DOWN] key to select the desired Menu umber.
3.Press [F] key to confirm the selection
4.Then use the [UP]/[DOWN] key to switch O /OFF or select
numeric values.
5.Press [F] key again to complete the setting.
6.Press any key other than [PKEY],[LAMP], [UP]/[DOWN] and [F]
key to exit menu mode.
Note:
In this manual, when you enter and use menu system to select, or want to
activate the second function when press [F] ey with other eys, Please
ma e sure the operation in 10 seconds after pressing [F] ey. Otherwise,
the transceiver will turn bac to original wor ing mode.
Menu Configuration
No Item Description Operation
001 APO Automatic Power Off OFF,1-15H
002 APRO Voice Compander /Scrambler OFF/COMP/SC
RAMB
003 BATSAV Battery Saver O /OFF
004 BEEP Keypad Beeper O /OFF
005 BCLO Busy Channel Lock Out O /OFF
006 BAT-T Low Battery Tone O /OFF
007 DW Dual Watch when Use FM
Radio
O /OFF
008 LAMP LCD/Keypad Illumination OFF/CO T/KEY
009 LOCK Transceiver Lock Mode K+S/PTT/KEY/ALL
010 OPE -T Start-Up Tone O /OFF
011 ROGER Roger Tone O /OFF
012 SC MD Scan Method TO/CO
013 STE Squelch Tail Elimination O /OFF
014 TOT Time-Out Timer OFF,1-8MI
015 TXSTOP Transmitting Inhibit Function O /OFF
016 VOX D Select Hands-free VOX delay
time
1S-4S
017 VXB VOX Busy O /OFF
018 WID AR Wide/ arrow Band Selection ARROW/WIDE
019 DTMF Dual Tone Multi Frequency O /OFF
020 PTT ID Push-To-Talk ID O /OFF
021 AME Set-up ame of Memory
Channel
Edit by User
022 KEYSET Select the default function of
[PKEY]
MO I/CALL/EM
G/1750HZ
023 SET ID Send your ID to Receiver. Program by User
1. Automatic Power Off (APO)
Automatic Power Off is a background function that monitors
whether any keys have been pressed, or whether any control has
been turned. After the setting time passes without operations,
APO will automatically turn OFF the power. However, 1 minute
before the power turns OFF, a series of warning tones sound.
Access Menu o.1 to switch this function O (1-15 hours) or
OFF(default).
●
If the squelch opens or any settings are changed during the setting
time period while APO is ON, the timer resets. When the squelch closes
or you stop changing the settings, the timer begins counting again from
start.
2. Voice Compan er /Scrambler (APRO)
APRO offers 3 modes of selection, please access Menu o. 2 to
select COMP/SCRAMB/OFF(default) functions.

OFF: Switch off both functions.
COMP: Voice Compander, for clear audio output.
SCRAMB: Voice Scrambler, to keep your conversation
private.
3. Battery Saver (BATSAV)
The battery saver function decreases the amount of power used
when a signal is not being received and no operations are being
performed (no keys are being pressed and no switches are being
turned). While the channel is not busy and no operation is
performed for 5 seconds, battery saver activates. When a signal
is received or an operation is performed, battery save is disabled.
Access Menu o. 3 to switch this function ON(default) or OFF.
●
SAVE will appear when the function switches on.
4. Keypa Beeper (BEEP)
The transceiver beeps each time if you press a key on the
keypad. You can also switch this function OFF.
Access Menu o. 4 to switch this function ON(default) or OFF.
5. Busy Channel Lock Out (BCLO)
When receiving a signal, if BCLO function switches on, it will
forbid transmitting a signal in order to make sure the channel no
interference.
Access Menu o. 5 to switch this function O or OFF(default).
6. Low Battery Tone (BAT—T)
If the battery volume is lower than the default setting, the TX/RX
indicator will blink red continuously and you can’t transmit a
signal. When you push to talk, a “click” will be heart. In this case,
please re-charge the battery pack or replace a new one.
Access Menu o. 6 to switch this function ON(default) or OFF.
7. Dual Watch When Use FM Ra io (DW)
When the FM radio is used, the transceiver receives a signal, the
transceiver will automatically switch FM radio OFF and receive to
the signal, 10 seconds after stop receiving the signal, the FM
radio function will automatically switch O again. When the DW
function switches OFF, your transceiver will not scan for any
signal and FM radio works continuously.
Access Menu o. 7 to switch this function ON(default) or OFF.

8. Select the LCD/Keypa Illumination Mo e (LAMP)
You can access Menu o. 8 to turn O /OFF the background
lamp of keypad or LCD display (default: KEY).
OFF: There is no background lamp, when you press any key;
KEY: When you press any key, the background lamp of keypad
and LCD display will turn on and will keep for 5 seconds. If
there is no any key operation within 5 seconds, the timer
will be reset.
CONT: The background lamp of keypad and LCD display will
keep lighting even you do not have any operation.
9. Transceiver Lock Mo es (LOCK)
Press and hold [F] key for 2 seconds to switch the Lock function
O /OFF. There are 4 modes of transceiver lock. Access Menu
o. 9 to select (default: K+S):
K+S: The keypad and [UP]/[DOWN] key to be locked except [F]
key.
PTT: Only lock the [PTT] switch.
KEY: Only lock the keypad except [F] key.
ALL: Lock all the keys and buttons except [F] key.
10. Start-up Tone (OPEN—T)
When you switch the transceiver O , There will be a start-up
tone. You can access Menu o. 10 to switch this function
ON(default) or OFF.
11. Roger Tone (ROGER)
If you switch this function on, there will be a beep tone when
finish the conversation. Please access Menu o. 11 to switch
Roger Tone O or OFF(default).
12. Scan Metho s (SCN MD)
You can access Menu o. 12 to select scan method (TO/CO,
default:TO).
13. Switch On/Off Squelch Tail Elimination (STE)
When finish communication, there is a tail squelch, you can
access Menu o. 13 to eliminate (default: OFF).
Note:
Both of the transceivers should switch squelch tail elimination on in order

to use this function.
14. Time-Out Timer (TOT)
The built-in time-out timer limits each transmission time to a
maximum of 8 minutes (default: 3MIN). Just before the
transceiver stops the transmission, a warning beep sounds. It is
necessary to protect the transceiver from thermal damage.
Access Menu o. 14, press [F] key and then use [UP]/[DOWN]
key to select the desired time and press [F] key to complete the
setting.
15. Transmitting Inhibit Function (TXSTOP)
You can disable the TX function to prevent unauthorized
individuals from transmitting, or to eliminate the risk of
accidentally transmitting by yourself.
Access Menu o. 15 to switch O or OFF(default).
16.Han s-Free VOX Delay Time (VOX D)
In order to avoid that your latest transmitting will not be
transmitted, please delay the Hands-Free VOX delay time. You
can access Menu o. 16 and use [UP]/[DOWN] to select the
desired time (1S, 2S, 3S, 4S, the default setting: 3S) and press
[F] to complete the storing.
17.VOX Busy (VXB)
When receive a signal, in order to avoid VOX transmitting to mix,
you can access to Menu o. 17 and use [UP]/[DOWN] to switch
ON(default) or OFF, then press [F] to complete the storing.
18. Wi e/Narrow Ban Selection (WIDNAR)
You can access Menu o. 18 to select the desired channel
bandwidth (WIDE/ ARROW, default: WIDE).
19. Dual Tone Multi Frequency (DTMF)
The DTMF keypad is laid out in a 4×4 matrix, with each row
representing a low frequency, and each column representing a
high frequency. Pressing a single key will send a sinusoidal tone
of the two frequencies. The original keypads had levers inside, so
each button activated two contacts. The multiple tones are the
reason for calling the system multi-frequency. These tones are
then decoded by the switching center to determine which key was
pressed. Using this function, you can select these transceivers

which you would like to call. You can access Menu o. 19 to
select this function O /OFF(default).
20. Push-To-Talk ID (PTT ID)
PTT ID is a generic term for an A I-like system used in Two-way
radio systems. It provides identification of the transmitting radio
over the air, and is commonly used in Selective calling/signaling
systems. You can access Menu o. 20 to select this function
O /OFF(default).
21. Set-up Name of Memory Channel (NAME)
You can name memory channels using up to 6 alphanumeric
characters. When you recall a named memory channel, its name
appears on the LCD instead of the channel number. Please
access Menu o. 21 to name memory channels.
22. Select the efault function of [PKEY] key (KEYSET)
You can access Menu o. 22 to select the default function of
[PKEY] key (default: MONI).
1).MONI
In VFO/MR/CH mode, press [PKEY] key to monitor the channels;
release to no monitor.
2).CALL
In VFO/MR/CH mode, when switch DTMF function on, press
[PKEY] key, then plus other key (anyone from 0-9) to transmit the
DTMF code.
3).EMG
In VFO/MR/CH mode, press [PKEY] key to transmit emergency
alert; if you want to stop transmitting, press [PTT] key.
4).1750Hz
In VFO/MR/CH mode, press and hold [PKEY] key to transmit
1750Hz signal; release to stop transmitting.
Note:
You can also set the default function of [PKEY] ey with programming
software to be one of the above 4 items.
23. Sen your ID to Receiver (SET ID)
“SET ID” is the function for sending your ID to receiver. Before

using this function, you have to switch PTT ID function O .
Please access Menu o. 23 to input your ID and press [PTT] to
transmit.
OPERATING THRU REPEATERS
Compared to simplex communication, you can usually transmit
over much farther distances by using a repeater. Repeaters are
typically located on a mountain top or other elevated location.
Often they operate at higher ERP (Effective Radiated Power)
than a typical station. This combination of elevation and high ERP
allows communications over considerable distances.
Flow Chat for Repeater Access
Select a receiver frequency
▼
Select an offset direction
▼
Select an offset frequency
▼
Activate the tone function, if necessary
▼
Press [PTT] switch
Selecting Offset Direction & Frequency
Select whether the transmit frequency will be higher (RSY +) or
lower (RSY -) than the receiver frequency.
1. In VFO mode, select the desired RX frequency.
2.Press [F]+[8] key to enter offset direction & frequency selecting
mode.
● ”
RSY 0” will appear on LCD.
3.Use [UP]/[DOWN] key to select circularly from the following 3
modes:
RSY 0: no offset frequency;
RSY +: plus direction;
RSY -: minus direction.
4.Press [F] key to enter next menu setting mode.
●
If you select RSY 0, no offset frequency will be selected and the
transceiver will exit setting mode.

●
If you select RSY +, plus direction will be selected and 01.000 will
appear on LCD, now you can input frequency via eypad (frequency
range: 00.000~99.995).
●
If you select RSY -, minus direction will be selected and 01.000 will
appear on LCD, now you can input frequency via eypad (frequency
range: 00.000~99.995).
5.Press [F] key again to finish setting mode and exit VFO mode.
Note:
The combined frequency between offset frequency and transceiver’s
current wor ing frequency must be in the range of your transceiver, if not,
your setting of offset will not value.
Reverse Function
While monitoring a repeater, the reverse function allows you to
manually check the signal strength of a station accessing the
repeater.
1.Press [V/M] key to select MR working mode.
●
You should have to set offset direction and frequency in VFO firstly,
and save the setting as Memory Channel, Otherwise, you can use this
reverse function.
2.Press [F]+[5] key to switch reverse function O /OFF.
●
The receive frequency and the transmit frequency are exchanged.
●”
R” appears when the function is ON.
●
To switch reverse function OFF, press [F]+[5] ey again, “R” indicator
will not display on LCD.
Note:
●
If pressing [F]+[5] ey places the transmit frequency outside the
allowable transmit frequency range, an error beep sounds when [PTT] is
pressed, and transmission is inhibited.
●
If reversal would place the receive frequency outside a receive
frequency range, an error beep sounds when [PTT] is pressed. No
reversal occurs.
●
Automatic repeater offset does not function while Reverse is ON.
●
You can not switch Reverse ON or OFF while transmitting.
1750 Hz Tone
Some European repeaters require a 1750 Hz tone burst to be
accessed. For such European repeaters, perform the following.
1.In VFO/MR/CH mode, press [MENU] key to enter menu system.

2.Use [UP]/[DOWN] key to select Menu o.22 and press [F] key
to confirm your selection.
3.Then use [UP]/[DOWN] key to select "1750HZ" and press [F]
key to confirm your selection, then press any other keys except
[LAMP],[F] and [UP]/[DOWN] key to exit setting mode.
4.Press and hold [PKEY] key, a 1750 Hz tone will be transmitted.
●
You will hear a tone when you press and hold the [PKEY] ey.
5.Release [PKEY] key to receive.
CTCSS/DCS
You may sometimes want to hear calls from only specific persons
or groups. The CTCSS/DCS allows you to ignore (not hear)
unwanted calls from other persons who are using the same
frequency. Simply select the same CTCSS/DCS as selected by
the other persons in your group. A CTCSS tone is sub-audible
tone and is selectable from among the 51 tone frequencies and a
DCS tone is from among the 214 normal and reverse codes.
Set Receiving with CTCSS/DCS
1.In VFO/MR mode, press [F]+[6] key to switch CTCSS /DCS
function O /OFF.
●“
R OFF” will appear on LCD.
●
In CH mode, CTCSS/DCS function is not activated.
2.Use [UP]/[DOWN] key to select circularly from the following:
R OFF: receiving without CTCSS/DCS.
R CTC: receiving with CTCSS tone.
R NDCS: receiving with normal DCS code.
R IDCS: receiving with invert DCS code.
3.Then press [F] key to enter next menu setting mode.
●
If you select R OFF
,
the transceiver will exit receiving with
CTCSS/DCS setting mode and enter transmitting with CTCSS/DCS
setting mode.
●
If you select R CTC
, “
63.0“ will appear on LCD
,
now you can use
[UP]/[DOWN] ey to select the CTCSS tone you desired
,
then press [F]
ey to confirm your selection and enter transmitting with CTCSS/DCS
setting mode.
Table of contents
Other ADI Transceiver manuals


