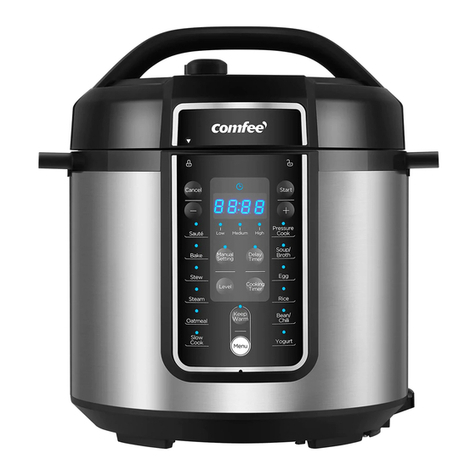
Admiral AD3036 User manual

Model: AD3036
Owner’s Manual
PLEASE READ BEFORE OPERATING THIS PRODUCT.
6 Quart
Pressure Cooker

IMPORTANT SAFEGUARDS
When using this appliance, basic safety precautions must always be followed, including the
following:
1. Read all instructions before using this product. Be sure to follow the instructions.
2. This appliance generates heat during use. Do not touch hot surfaces. Always use
handles or knobs when handling this pressure cooker.
3. Toprotectagainstre,electricshockorinjurytoperson,donotimmersecord,plug,
appliance body in water or other liquid.
4. ThisapplianceisNOTtobeusedbychildrenorbypersonswithreducedphysical,
sensory,ormentalcapabilities.
5. Close supervision is necessary when the appliance is in use or when water or oil is hot.
Do not use Pressure Cooker near children. Children should never play with the
appliance.
6. CAUTION:RiskofElectricShock.Cookonlyintheremovablenonstickcontainer.
7. Extremecautionmustbeusedwhenmovingapressurecookercontaininghotwateror
other hot liquids.
8. Thisappliancecooksunderpressure.Improperusemayresultinscaldinginjury.Make
certainunitisproperlyclosedbeforeoperating.Seepage5,“Assembly”.
9. Neverlltheunitover2/3full.IMPORTANT:Whencookingfoodsthatexpandduring
cookingsuchasrice,grainsordriedvegetables,donotlltheunitover½full.Over
llingmaycauseclogginginsidetheunitandcreatingexcesspressure.Seepage9,
“CookingPotMarking”,page10,13,18,20,“Capacity”.
10. Beawarethatcertainfoods,suchasapplesauce,cranberries,pearlbarley,oatmealor
otherdrycereals,splitpeas,noodles,macaroni,rhubarb,orspaghetticanbuildup
foam,froth,andsputter,andclogthepressurereleasedevice(SteamReleaseValve).
Recipesusingtheseitemsmustbefollowedcarefullytoavoidproblems.
11. Always check the pressure release valves for clogging or food build up before use.
Clean as necessary.
12. Afterpressurecooking,donotopenthepressurecookeruntiltheunithascooled
completelyandallinternalpressurehasbeenreleased.Ifthelidisdifculttoturn,it
indicates that the cooker is still pressurized – do not force it open. Any pressure
remaininginsidethecookercanbehazardous.SeeOperatingInstructions:page5,
“Assembly”andPage11,“Bobbervalve”.
13. Neverplaceanypartofthebody,includingface,hands,andarmsovertheSteam
ReleaseValve.Steamcanresultinseriousburns.
14. BecarefulwhenliftingandremovingLidaftercooking.AlwaystilttheLidawayfrom
youassteamishotandcanresultinseriousburns.Neverplaceyourfaceoverthe
Pressure Cooker.
15. Topreventriskofinjuryduetoexcessivepressure,replaceLidSealingGasketonlyas
recommendedbythemanufacturer.SeeCareandCleaninginstructions,page22,“Lid
andSealingGasket”.
16. Unplugfromoutletwhennotinuseandbeforecleaning.Allowtocoolbeforeputtingon
ortakingoffparts,andbeforecleaningtheappliance.
1

17. Alwaysattachplugtoappliancerst,thenplugcordintothe120Vwalloutlet.To
disconnect,turnanycontrolto“OFF”,thenremoveplugfromwalloutlet.
18. Donotoperatethisappliancewhenthepowercordorplugdamagedoriftheappliance
malfunctions,isdroppedorhasbeendamagedinanymanner.Returnittothe
AuthorizedServiceStationforexamination,repair,electricormechanicaladjustment.
19. TheuseofaccessoryattachmentnotrecommendedbyAdmiralmayresultinre,
electricshockorinjurytoperson.
20. Donotusepressurecookerforotherthanintendeduse.Misusecancauseinjuries.
21. Do not use outdoors.
22. Intendedforcountertopuseonly.Keep6inches(15.2cm)clearfromthewallandon
allsidesincludingthetop.Alwaysuseapplianceonadry,stable,levelsurface.
23. TakecaretoNOTPLACEthepressurecookerdirectlyunderyourkitchencabinets.
Whenreleasingsteamit’srecommendedtoprotectyourcabinetsbykeepingthe
pressurecookerawayfromcabinetssurfaces.
24. Donotletcordhangoveredgeoftableandcounter,ortouchhotsurface.
25. Donotplaceornearahotgasorelectricburner,oraheatedoven,orammable
material.
26. Whenmovingtheproduct,Donothangupthelidhandledirectly,pleaseusethebody
handle in order to preventing the drop of it.
27. WARNING:Hot,spilledfoodcancauseseriousburns.Keepapplianceandcordaway
fromchildren.Neverdrapecordoveredgeofcounter,neveruseoutletbelowcounter,
and never use with an extension cord.
28. Ashortpowercordistobeprovidedtoreducetheriskresultingfromitbeinggrabbed
bychildren,becomingentangledintrippingoveralongcord.
29. Theappliancehasapolarizedplug(onebladeiswiderthantheother).Toreducethe
riskofelectricshock,thisplugisintendedtotintoapolarizedoutletonlyoneway.
Iftheplugdoesnottfullyintotheoutlet,reversetheplug.Ifitstilldoesnott,contact
aqualiedelectrician.Donotattempttomodifythepluginanyway.
30. Donotusethispressurecookerforpressurefryingwithcookingoil.
SAVE THESE INSTRUCTIONS.
FOR HOUSEHOLD USE ONLY
2

POLARIZED PLUG
1. Yourapplianceisequippedwithapolarizedplug(onebladeiswider
thantheother).
2. Toreducetheriskofinjurythisplugmustbeinsertedintoaproperly
installed outlet.
3. Iftheplugdoesnottfullyintotheoutlet,reversetheplug.Ifitdoes
nott,pleaseconsultaqualiedelectrician.Donotattempttodefeat
thissafetyfeaturebymodifyingthepluginanyway.
WARNING:Improperuseofthepowercordmayresultinelectric
shock.Consultaqualiedelectricianifnecessary.
PREPARATION FOR USE
AC OPERATION
Unwind the AC power cord and extend it
to its full length. Insert the AC plug of the
cordintoanyconvenient120V60Hz
household outlet.
Powersource:120V~60Hz,1000W
Please note that this unit is equipped with a polarized AC plug which has
one blade wider than the other. This is a safety feature to reduce the
likelihoodofelectricshock.ThispolarizedACplugwillonlytina
polarizedACoutlet.Ifyoundthatyoucannotinsertthisplugintoyour
outlet,youmayhaveanobsoletenon-polarizedoutlet.Pleasedonottry
todefeatthissafetyfeaturebyusinganon-polarizedadaptororbylling
thewiderbladetomakeittintoyouroutlet.Ifthisplugdoesnottinto
youroutlet,youshouldcontactaqualiedlicensedelectriciantoreplace
your obsolete outlet.
AC Plug
AC Outlet
3

Steam release valve Lid handle
Steaming rack
Gasket holder
Anti-block cover
Sealing Gasket
Bobber valve
SST lid
Plastic lid
Cooking pot
Control panel
Bobber valve
Lid lock pin
Heating base
Power cord
Condensation
collector
PART DESCRIPTION
CONTROL PANEL
4
Lid warning lamp
Start key
Keep warm /
Cancel key
Delay
Timer lamp
Function lamps
Function knob Pressure display and
adjust key
Delay timer key
Time adjust key
Display screen
Temperature display and adjust key

Open Lid
Locked Lid Unlocked Lid
HOW TO USE YOUR ADMIRAL PRESSURE COOKER
Getting started:
Removeallpacking,paper,andcardboard(includinganylocatedbetween
theCookingPotandproductBody/housing).
Read and save the literature and be sure to read the service and warranty
information.
Assembly:
• PlaceinnerCookingPotintotheUnitbody
• PlaceLiduponPressurecookerandalign with .
Tolock,twistcounterclockwise,aligning with .
Tounlock,twistLidclockwiseandalign with .
A NOTE ABOUT PRESSURE COOKING
Pressurecookersgenerateintensesteaminordertobuildpressure.
Liquidisneededtocreatesteam.SoinorderforyourPressureCookerto
buildenoughpressuretocookyourmeal,thereneedstobeenoughliquid
inthepottoboilandgeneratesteam.Onecup–or8oz–ofliquid(itcan
bewater,chickenbroth,etc.)isusuallyenoughliquidtosuccessfullybuild
pressure.Ifyourrecipeistoothickordoesn’thaveenoughliquidinit,
thenyouwillreceiveanE6NoticationCodeduringthecookingcycle.
GETTING TO KNOW YOUR PRESSURE COOKER
1. RemovetheLidbyturningclockwisetounlock,aligning with .
RemovetheSealingGasketfromtheLidandwashthegasketand
theLidinwarmsoapywater.DrytheSealingGasketandLid
thoroughlybeforereattachingtheSealingGaskettotheLid.Ensure
theSealingGasketissmoothlyandsecurelyinplaceinthegasket
holder.IftheSealingGasketisnotinthecorrectpositiontheLidwill
notbeabletoformasealandwillnotbeabletogainpressure.
2. RemovetheCookingPotandtheCondensationCollectorandwashin
warm,soapywater.Drythoroughlybeforereplacingbackinthe
Pressure Cooker.
5

6
The Pressure Cooker has been designed with
safety in mind and has various safety measures.
1. PressurewillnotbuildiftheLidisnotshutcorrectlyandhasnotsealed.
2. AlwaysensureLidisinthecompletelylockedpositionandthe is
aligned with .
3. PressurewillnotbuildiftheSteamReleaseValvehasnotbeen
switched to the Seal position.
4. Overllingmaycauseariskofcloggingthevalvesanddeveloping
excess pressure.
5. Thegasketandthevalvescanberemovedforcleaning.(Seepages
21-23).
6. Oncethepressureincreases,theLidshouldnotbeopened.Safety
sensorsensurethepressureremainswithinthesetrange.Neverforce
theLidopen.
7. TheSteamReleaseValvehasanextendedngertab,designedto
keepthehandawayfromthetopofthevalve.Alwaysuseakitchen
utensilwhenoperatingthistab.SeeRELEASINGPRESSURE
Instructions on pages 11-12.SteamReleaseValveisdesignedtobe
loose-ttingforproperoperation.
8. The pressure cooking functions require liquid to work. If the inside of
theCookingPotdoesnothaveenoughliquid,anoticationwillappear
ontheDisplayScreen.SeeNOTIFICATIONCODEScharton
pages 25.
9. Attheendofcooking,theLidshouldnotbeunlockeduntilallthe
pressureisreleasedandthe“BobberValve”hascompletelydropped.
ThiscanbedoneusingtheNaturalPressureReleaseMethodorQuick
PressureReleaseMethod,explainedonpages11-12.
10.ScrolltheFUNCTION KNOBtoselectfunction,relatedfunctionlamp
willash.
11.TheTimeSelectionButtons(+and-)areusedtosetthecookingtime.
Toadvanceslowly,simplytap-touchthe+or-buttonandrelease.If
youhavepassedthedesiredtime,simplytap-touchtheoppositearrow
buttontoreturntothedesiredtime.
NOTE: Thetimercanbeselectedforallprogramsandcanbechanged
atanytimeduringcookingbytap-touchingCANCEL and selecting a
new function.
12. The PRESSURE ADJUST button is used to select desired cooking
pressure(HIGHorLOW).Eachpre-setcookingsettingautomatically
selectstheoptimumpressureforthatselection,butitcanbemanually
selectedwiththisbutton(seetheCookingGuideonpage15 for
availableadjustments).

7
13. The TEMP ADJUSTbuttonisusedtoselectdesiredtemperature
(HIGH,MEDIUMorLOW).Thetemperaturemayonlybeadjusted
on the SLOW COOK,andBROWN/ SAUTÉfunctions(seethe
CookingGuideonpage15foravailableadjustments).
14.Tap-touchtheSTARTbuttonformorethan1secondtostartsa
cookingfunction.Tostopacookingfunction,tap-touchtheCANCEL
buttonformorethan1second.Thenchangefromonecooking
function to another after cooking has begun.
15.TheDisplayScreenshowshowmuchlongerthefoodneedstocook
fromtheselectedtimeinhoursandminutesoncethePressureCooker
ispreheated.WhilethePressureCookerispreheating,thedisplay
screenwillshow,“HEAT”.
GETTING STARTED
(NOTE: The Pressure Cooker beeps as each button is pressed.)
1. AdddesiredingredientstoCookingPot.PlaceLidontopofPressure
Cooker and align with .Tolock,twistcounterclockwise,aligning
with .
2. Plug provided Power Cord into the Power Cord Port of the Pressure
Cooker.
3. Plug other end of the Power Cord into a wall power outlet.
4. Scrollthefunctionknobtoselectfunction,relatedfunctionlampand
thetimeonthescreenwillash.
5. Selectthedesiredcooktimebyusingthe+and-buttons.Selectthe
desiredtemperatureusingtheTEMP ADJUST button(ifapplicable).
Select the desired pressure using the PRESSURE ADJUST button.
(PleaserefertotheCookingGuidechartonpage15fortimeand
temperaturerecommendations.
Tap-touchtheSTARTbuttonformorethan1second.Forpressure
cookingfunctions,theword“HEAt”willappearontheDisplayScreen
duringpreheatingtime.OncethePressureCookerispreheated,the
selectedcookingtimewillappearonDisplayScreen.
Note:Forpressurecookingfunctions,13-15minutesisthe
approximateaveragepreheattime.Iffoodcontentislargerorvery
cold,preheattimemaytakeslightlylonger.
6. This Pressure Cooker allows you to delay the start of your cooking so
thatcookingnisheswhenyouneedit.Seepage8forinstructions
on the DELAY TIMER function.
7. Afterthesetcookingtimehaselapsed,thePressureCookerwill
beepagainandwillautomaticallyswitchtotheKEEP WARM setting.
TheDisplayScreenwillthenchangefromthecooktimetoanewtimer
thatwillcountupto4:00(4hours)oruntilyoutap-touchtheCANCEL
buttonmorethan1second.After4hoursintheKEEP WARMsetting,
the Pressure Cooker will turn off.

8
8. Toendacookingfunctionatanytime,tap-touchtheCANCEL button
morethan1second.
9. Whennished,unplugthePressureCookerandwaitforittocool
completelybeforeattemptingtoclean.
10.CAUTION:TheCookingPotandHeatingBasewillgetveryhotwhile
using this Pressure Cooker. Do not touch hot surfaces. Always use pot
holdersoroven-mittswhenusingthisPressureCooker.Alwaysliftthe
Lidbytiltingawayfromyoutoavoidthesteam.
HOW TO USE THE TIME DELAY
This Pressure Cooker allows you to delay the start of your cooking so
thatcookingnisheswhenyouneedit.Note:TheDELAY TIMER function
is not available on the BROWN/SAUTÉ,KEEP WARM,orYOGURT
settings.Note:DonotusetheDELAY TIMER function when the recipe
hasperishableingredientssuchasmeat,sh,eggs,ordairy,asthesemay
spoil.
1. AdjustthePressureCookersettingsusingtheinstructionson
pages9-21.
2. Aftersettingthecookingtime,tap-touchtheDELAY TIMER button. The
DELAY TIMERlampwillash,and“0:15”willashontheDisplay
Screen,toindicatethePressureCookerisbeingprogrammedonthe
delay setting.
3. Tap-touchthe+and-buttonsuntilyoureachthenumberofhoursand
minutesyouwantthecookingprocesstobedelayed(i.e.,setthe
amountoftimeyouwishtodelaythecookingcycle).Themaximum
delayis12hours(12:00).
4. Tap-touchSTARTbuttonformorethan1secondtobeginthedelay
feature.ThetimerandDELAY TIMERbuttonwillstopashing,while
the related Function lampwillcontinueashing.Thiswillindicatethat
the Pressure Cooker has been set on the DELAY TIMER setting. The
DisplayScreenwillcountdownthedelaytimeuntil0:00isreached.
When0:00isreached,theDELAY TIMERlampwillturnoffandthe
related Function lampwillstopashingtoshowthattimedelay
hasnished.Theword“HEAt”willappearonthedisplayscreenuntil
thePressureCookerisfullypressurized.Whentheselectedpressure
hasbeenreached,thetimerwillstartcountingdown.

9
COOKING POT MARKINGS
InsidetheremovableCookingPotaremarkingstoguidethelllevelof
theCookingPot.ThewordMAXindicatesthemaximumllline.
The1/3,1/2,and2/3markingsarehandyguidestouseinyourrecipes.
Theyareimportanttomonitorespeciallywithgrainsanddriedlegumes.
CAUTION:NeverloadtheCookingPotabovethemaximumingredient
levellinemarkedMAXontheinsideoftheCookingPot.
Foodsthatexpandduringcooking(e.g.,rice,beans,driedvegetables,
potatoes,carrots,etc.)shouldnevergoabovethe1/2mark.
Note: The Pressure Cooker cannot pressure cook without liquid. Ensure a
minimumof8ozofliquidisusedinsidetheremovableCookingPot
PRESSURE COOKING
Pressurecookingisanidealwaytocreatequick,avorfulmeals.Pressure
cookingisamethodofcookingfoodinliquid(water,stock,wine,etc.)in
asealedCookingPot.ThesealedPressureCookerretainssteamand
buildspressure,raisingthetemperatureoftheliquidinsidethepotabove
boilingpoint.Theincreasedtemperatureoftheliquidandthesteam
resultsinreducedcookingtimes.
HIGHPressureSettingis6.5-10PSI(45-70kPa).Itissuitablefora
wide range of foods.
LOWPressureSettingis3.3-6.5PSI(23-45kPa).Itismoresuitedto
delicatefoodslikechicken,shandsometendervegetables.
KEEP WARMSetting:Whencookingtimeiscompleted,thePressure
CookerautomaticallyswitchestotheKEEP WARM setting to prevent
overcookingandtokeepyourcookedfoodwarmuntilserving-perfectfor
busyfamilies,thoseontherunandthosewhoneedexiblemealtimes.
This setting is not hot enough to cook and should only be used to keep
warm,cookedfoodforserving.

10
IdealMealstoPressureCook:Soups,stocks,casseroles,sauces(e.g.,
pastasauces),meat,rice,rmvegetables(beetroot,potatoes)and
desserts(e.g.,pudding).
Capacity:NeverlltheCookingPotabovetheMAXline.Foodsthat
expandduringcookingshouldnevergoabovethe1/2mark.ThePressure
Cookercannotpressurecookwithoutliquid.Ensureaminimumof8ozof
liquidisusedinsidetheremovableCookingPot.
CAUTION:NeverusetheQuickPressureReleaseMethodwhencooking
foodshighinliquidcontent,suchascasseroles,stocksandsoups.See
RELEASINGPRESSUREinstructionsonpages11-12.
PlacethePressureCookeronaat,levelsurface.
PlaceCookingPotinsideHeatingBase.PlugthePressureCookerinto
awalloutlet.ThePressureCookerwillbeep,andtheDisplayScreenwill
illuminatewithfourdashes(----).
1. PlaceyourfoodandliquidinsidetheremovableCookingPot.
2. PlacetheLidontothePressureCookerandalign with Tolock,
rotate counterclockwise to the LOCKED position.
3. Usingthengertab,rotatetheSteamReleaseValvetothe“Seal”
position.
4. Scroll the FUNCTION KNOB to select the desired cooking function
5. Adjustthecookingtimeandpressureifnecessary.
Note:SeetheCookingGuideonpage15tondthepossibletimeand
pressureadjustments
6. Onceyouhavemadethedesiredadjustments,ifany,tap-touchSTART
formorethan1second.
7. The Pressure Cooker needs to gain pressure before pressure cooking
canbegin.WhenthePressureCookerisgainingpressure,“HEAt”
willappearontheDisplayScreenandthetimewillnotcountdown.
TheamountoftimethePressureCookertakestogainpressurevaries
accordingtohumidityandwatertemperature,butaverage
pressurizationtimeis13-15minutes.Whenpressurehasbeen
reached,“HEAt”willdisappearontheDisplayScreen,andthetimewill
begin to count down.
8. Afterthesetcookingtimehaselapsed,thePressureCookerwillbeep
andwillautomaticallyswitchtotheKEEP WARM setting. The Display
Screenwillthereforechangefromthecooktimetoanewtimerthat
willcountupto4:00(4hours)oruntilyoupresstheSTART/STOP
button. After 4 hours in the KEEP WARMsetting,thePressureCooker
willgointostand-bymode,andtheDisplayScreenwillilluminatewith
fourdashes(----).

11
TIP:
1. ThepressurecookingsettingsareintheCookingGuidetableon
page 15.
2. IfthelidisnotshutcorrectlyoriftheSteamReleaseValveisnotin
the“Seal”position,thePressureCookercannotgainpressureanda
NOTIFICATIONmessagewillappearintheDisplayScreen.Ensure
thattheSealingGasketisplacedevenlyinthelid.Seethe
NOTIFICATIONCODESchartonpages25.
3. ItiscommonforsomesteamtoreleasethroughtheBobberValveduring
thecookingcycle.Thisispartofnormaloperationoftheunit.
Note: The Pressure Cooker cannot pressure cook without liquid. Ensure a
minimumof8ozofliquidisusedinsidetheremovableCookingPot.
CAUTION:Duringcooking,steamwillbuildupinthePressureCooker,so
whenliftingtheLiduseakitchengloveormitttoprotectyourhand.
BOBBER VALVE
WhenBobberValveisinthe“UP”position,DONOTattempttoopenthe
Lid,asthePressureCookerisstillunderpressure.WhentheBobberValve
isinthe“DOWN”position,thepressurehasreleased.
RELEASING PRESSURE AT THE END OF COOKING
A. NaturalPressureReleaseMethod:Aftercookingcycleiscomplete,let
PressureCookernaturallyreleasepressurethroughtheBobberValve.
Unitwillgraduallycooldownonitsown.Waitatleast10minutesafter
cookinghascompleted,andthen,usingalonghandledkitchenutensil,
ickthetabontheSteamReleaseValvetothe“Release”position.Do
notplaceanypartofyourhandorbodyoverthesteamoutletontopof
thevalve,assteamisveryhotandcanscaldskin.Thepressurehas
beenreleasedwhensteamisnolongerescaping,theBobberValve
hasdroppedcompletely,andtheLidopensfreelywithminimalforce.
NeverforcetheLidopen.
“UP” position
Pressurized
“DOWN” position
Not pressurized

12
B. QuickPressureReleaseMethod:Usingalonghandledkitchenutensil,
ickthetabontheSteamReleaseValvetothe“Release”setting.
SteamwillreleaserapidlyfromtheSteamReleaseValve.Donotplace
anypartofyourhandorbodyoverthesteamoutletonthetopofthe
valve,assteamisveryhotandcanscaldskin.
CAUTION:Neverusethismethodwhencookingfoodshighinliquid
contentsuchascasseroles,beans,stews,stocksandsoups.Neveruse
thismethodwhencookingrice,asricetendstobeverydelicate.The
pressurehasbeenreleasedwhensteamisnolongerescaping,theBobber
Valvehasdroppedcompletely,andtheLidopensfreelywithminimalforce.
Pleasebepatient:thiscantakeupto10-20minutes.NeverforcetheLid
open.
CAUTION:
1. DonotforcetheLidtoopen.IftheBobberValvehasnotdropped
completelyandtheliddoesnotopeneasilythismeansthatthe
Pressure Cooker is still under pressure.
2. Duringcooking,steamwillbuildupinthePressureCooker,sowhen
liftingtheLiduseakitchengloveormitttoprotectyourhand.
3. ToavoidsuctionwhenremovingorsecuringtheLid,turntheSteam
ReleaseValvetothe“Release”(open)position.
Pressure Release Valve
Valve CLOSED (“Seal”)
Valve OPEN (“Release”)Valve REMOVE

13
USING THE LID AND STEAM RELEASE VALVE
SLOW COOKING
LOWSetting:Thisissuitableforsimmeringandslowcooking.
RecommendedcookingtimeinLOWisfor10ormorehours.
MEDIUMSetting:Thisisstandardmodeforslowcooking.Recommended
cookingtimeinMEDIUMisfor8ormorehours.
HIGHSetting:Thisisforfastercooking.Recommendedcookingtimesin
HIGHisfor4ormorehours.
KEEP WARMSetting:Whencookingtimeiscompleted,theCooker
automaticallyswitchestotheKEEP WARM setting to prevent overcooking
andtokeepyourcookedfoodwarmuntilserving-perfectforbusy
families,thoseontherunandthosewhoneedexiblemealtimes.This
settingisnothotenoughtocookandshouldonlybeusedtokeephot,
cookedfoodwarmforserving.
Capacity: Whenslowcooking,theideallllevelforyouringredientsis
betweenthe1/2and2/3marks.NeverlltheCookingPotabovetheMAX
line.
FUNCTION PRESSURE COOK LID REQUIRED STEAM RELEASE
VALVE POSITION
Rice Yes Yes Seal
Steam Yes Yes Seal
Beans Yes Yes Seal
Sauté No No Do not use Lid
Grain Yes Yes Seal
Slow Cook No Yes Release
Yogurt No Yes Release
Soup Yes Yes Seal
Oatmeal and Hot
cereals Yes Yes Seal
Stew Yes Yes Seal
Poultry Yes Yes Seal
Beef Yes Yes Seal

14
USING THE SLOW COOK FUNCTION
The SLOW COOKfunctiondoesnotusepressureinthecookingprocess,
butsomepressurecanbuildinsidetheunitduringcooking.Whenusing
thisfunction,ensuretheSteamReleaseValveisinthe“Release”position.
Thisfunctionwillcooksimilarlytostandardslowcookers,usinglower
temperaturesandlongercookingtimestoachievetender,avorfulmeals.
PlacethePressureCookeronaat,levelsurface.
PlaceCookingPotinsideHeatingBase.PlugthePressureCookerinto
awalloutlet.ThePressureCookerwillbeep,andtheDisplayScreenwill
illuminatewithfourdashes(----).
1. PlaceyourfoodandliquidinsidetheremovableCookingPot.
2. PlacetheLidontothePressureCookerandalign with .Tolock,
rotate counterclockwise to the LOCKED position.
3. Usingthengertab,rotatetheSteamReleaseValvetothe“Release”
position.
Note: Although this setting will not use pressure in the cooking
process,somepressurecanbuildinsidetheunitduringcooking.This
iswhyit’simportanttokeeptheSteamReleaseValveinthe“Release”
position.
4. Scroll the FUNCTION KNOB and select SLOW COOK function and
adjustthetimeandtemperatureasneeded.
Note:SeetheCookingGuideonpage15tondthepossibletimeand
temperatureadjustments.
5. Tap-touchSTARTformorethan1second.Thetimewillbegintocount
down.
6. Afterthesetcookingtimehaselapsed,theCookerwillbeepandwill
automaticallyswitchtotheKEEP WARM setting. The Display Screen
willthereforechangefromthecooktimetoanewtimerthatwillcount
upto4:00(4hours)oruntilyoupresstheSTART/STOP button. After 4
hours in the KEEP WARMsetting,theCookerwillturnoff.
Note: As the SLOW COOKfunctiondoesnotcookunderpressure,
youcanremovethelidduringcookingtocheckyourslowcooking
progress.OnlylifttheLidifnecessary.Sinceslowcookinguseslower
temperaturestocook,theCookerwillnotrecoverlostheatvery
quickly,whichmayimpactcookingtimes.
TIP:TheSLOWCOOKsettingsareintheCookingGuideonpage15.
CAUTION:Duringslowcooking,steammaybuildupintheCooker,so
whenliftingtheLiduseakitchengloveormitttoprotectyourhand.

15
COOKING GUIDE
STEAMING
The STEAMfunctionisperfectforgentlysteamingshandvegetables.
Itispre-programmedtousetheHIGHpressurecookingsetting.When
steaming,usetheSteamingRack.
Capacity:WhenthePressureCookerisusedwiththeSTEAMfunction,
themaximumcapacityofliquidshouldbejustundertherackwires,sothat
the liquid is not touching the food.
Note:Theunitcannotpressurecookwithoutliquid.Ensureaminimumof
8ozofliquidisusedinsidetheremovableCookingPot.
Function Pressure
cooking
Temperature
select
Cook time Delay
timer
Rice Yes N/A 12 minutes, can not adjust. Yes
Steam Yes N/A Default: 10 minutes
Can adjust from 3 minutes to 1 hour
Yes
Beans Yes N/A Default: 20 minutes
Can adjust from 5 minutes to 2 hour
Yes
Sauté N/A Yes Default: 30 minutes
Can adjust from 5 to 30 minutes
N/A
Grain Yes N/A Default: 30 minutes
Can adjust from 15 minutes to 2 hours
Yes
Slow Cook N/A Yes For High mode: Default: 4 hours
Can adjust from 4 to 12 hours
For Medium mode: Default: 8 hours
Can adjust from 8 to 16 hours
For Low mode: Default: 10 hours
Can adjust from 10 to 24 hours
Yes
Yogurt N/A N/A Default: 8 hours
Can adjust from 6 to 12 hours
N/A
Soup Yes N/A Default: 30 minutes
Can adjust from 5 minutes to 2 hours
Yes
Oatmeal Yes N/A Default: 20 minutes
Can adjust from 10 minutes to 2 hours
Yes
Stew Yes N/A Default: 35 minutes
Can adjust from 15 minutes to 2 hours
Yes
Poultry Yes N/A Default: 15 minutes
Can adjust from 15 minutes to 2 hours
Yes
Beef Yes N/A Default: 30 minutes
Can adjust from 10 minutes to 2 hours
Yes

16
USING THE STEAM FUNCTION
PlacethePressureCookeronaat,levelsurface.
PlaceCookingPotinsideHeatingBase.PlugthePressureCookerinto
awalloutlet.ThePressureCookerwillbeep,andtheDisplayScreenwill
illuminatewithfourdashes(----).
1. Add8ozofwatertothebottomoftheremovableCookingPotandinsert
thecookingrack.Ensurewaterisjustunderthewiresoftherackso
that food is not touching water.
2. Place your food on the cooking rack.
3. PlacetheLidonandlockbyrotatingcounterclockwisetothe
LOCKED position.
4. Usingthengertab,icktheSteamReleaseValvetothe“Seal”
position.
5. Scroll the FUNCTION KNOB and select STEAMfunctionandadjustthe
timeandpressureasneeded.
Note: SeetheCookingGuideonpage15tondthepossibletimeand
pressureadjustments.
6. Onceyouhavemadethedesiredadjustments,ifany,tap-touchSTART
formorethan1second.
7. The Pressure Cooker needs to gain pressure before pressure cooking
canbegin.WhenthePressureCookerisgainingpressure,“HEAt”will
appearontheDisplayScreenandthetimewillnotcountdown.When
pressurehasbeenreached,“HEAt”willdisappearontheDisplay
Screen,andthetimewillbegintocountdown.
8. Afterthesetcookingtimehaselapsed,thePressureCookerwillbeep
andwillautomaticallyswitchtotheKEEP WARM setting. The Display
Screenwillthereforechangefromthecooktimetoanewtimerthatwill
countupto4:00(4hours)oruntilyoupresstheSTART/STOP button.
After 4 hours in the KEEP WARMsetting,thePressureCookerwillturn
off.
TIP:SeetheSteamingChartonpage17.
CAUTION:Duringcooking,steamwillbuildupinthePressureCooker,so
whenliftingtheLiduseakitchengloveormitttoprotectyourhand.

17
STEAMING CHART
USING THE SAUTÉ FUNCTION
Thissettingdoesnotcookunderpressure.Itworkssimilarlytostandard
cooking,requiringdryheat,andthereforedoesnotneedtheLid.Placethe
PressureCookeronaat,levelsurface.
Do not use the Lid with this function.
PlaceCookingPotinsideHeatingBase.PlugthePressureCookerinto
awalloutlet.ThePressureCookerwillbeep,andtheDisplayScreenwill
illuminatewithfourdashes(----).
1. Scroll the FUNCTION KNOB and select SAUTÉfunctionandadjustthe
timeandtemperatureifnecessary,usingthe+and-buttons.
2. Tap-touchSTARTformorethan1second.
3. WhenthePressureCookerispre-heating,“HEAT”willappearonthe
DisplayScreen.Whenthetemperaturehasbeenreached,thetimerwill
startcountingdown.Usingplastictongs,carefullyaddyourfoodtothe
hot pot.
Food
Amount Amount
of water Pre-prep Cooking Time
Vegetables
Asparagus
1 lb 1 cup Whole/trimmed 4 - 5 minutes
Broccoli
1 bunch 1 cup
2-inch florets
2 - 3 minutes
Baby carrots or 1
inch pieces
1 lb 1 cup
Peeled and
trimmed 2 - 3 minutes
Cauliflower 1 medium head 1 cup
2-inch pieces
2 - 3 minutes
Corn on the cob 4 1 cup
6-inches
3 - 5 minutes
Green beans
1 lb 1 cup Whole/trimmed 2 - 3 minutes
Snow peas
1 lb 1 cup Whole/trimmed 1 - 3 minutes
White or Yukon
Gold potatoes
12 ounces
1 cup Quartered 7 - 9 minutes
Sweet Potatoes
12 ounces
1 cup Cut in 1 -inch
pieces
7 - 9 minutes
Yellow squash or
zucchini 1 lb 1 cup
Thickly sliced
6 - 8 minutes
Poultry
Eggs
8 1 cup Whole in shell 6 - 9 minutes
Fish
Lobster tails
Large
1 cup
In shell
3 - 4 minutes
Large Shrimp
1 lb 1 cup
Peeled and
deveined
1 - 3 minutes
Salmon
1 lb 1 cup
Cut in serving
size
pieces
3 - 5 minutes

18
SAUTÉcanbeusedforeachofthefollowing:
A. Brown(sear)meatsforcasserolesandsoups.Browningmeatpriorto
pressurecookingandslowcookingnotonlygivesyourfoodgreatcolor,
butitalsosealsinthejuicesandavorsandkeepsthemeattender.
B. Sautéonionsormirepoix(mixtureofchoppedonion,carrot,andcelery),
amongmanyotherfoods,oftenusedinpressurecookerandslow
cookerrecipes.Sautéingonionsallowscaramelizationwhichcontributes
toavorandcolorintheenddish.
Capacity:WhenthePressureCookerisusedtobrownorsautéitmaybe
best to cook in batches to ensure the food is evenly cooked.
RICE COOKING
Whencookingrice,usetheRICE or Grain function. This is suitable for all
typesofrice,includingwhiteand/orbrownrice.
The RICE and Multi Grain function cooks under pressure for faster cooking.
Capacity:Sincericeandgrainsexpandduringcooking,donotllCooking
Potabovethe1/2markwhenusingtheRICEandMultiGrainfunction.
USING THE RICE/ GRAIN FUNCTION
PlacethePressureCookeronaat,levelsurface.
PlaceCookingPotinsideHeatingBase.PlugthePressureCookerinto
awalloutlet.ThePressureCookerwillbeep,andtheDisplayScreenwill
illuminatewithfourdashes(----).
1. Measurethedesiredquantityofrice.
Note: 1 cup uncooked dry white rice = 2 cups of cooked white rice
(approximately).1cupuncookeddrybrownrice=2cupscookedbrown
rice(approximately).
2. Placethemeasuredriceinastrainerandwashricethoroughlyunder
coldwater.Washuntilthewaterrunsclear.Thisremovesexcessstarch
whichhelpstoachieveuferrice,andpreventsricegrainsstickingto
eachotherandtheCookingPot.Rinsingthericereducesthebuild-upof
starchywaterandbubblesthatsometimesformaroundtheValveCover
andLid,whichcancausespittingfromtheSteamReleaseValve.
3. Ensure the Cooking Pot is clean and dry before placing it inside the
HeatingBase.
4. Place the washed rice in the Cooking Pot. Add the quantity of water
neededforyourrecipe(Standardratio--1cupofuncookedrice:1.5
cupsofwater).Ensurethataminimumof8ozofliquidisplacedinside
theremovableCookingPot.

19
5. PlacetheLidonandlockbyrotatingcounterclockwisetothe
LOCKED position.
6. Usingthengertab,icktheSteamReleaseValvetothe“Seal”position.
7. Scroll the FUNCTION KNOB and select RICE or GRAIN function and
adjustthetimeandpressureasneeded.
Note:SeetheCookingGuideonpage15tondthepossibletimeand
pressureadjustments.
8. Onceyouhavemadethedesiredadjustments,ifany,tap-touchSTART
formorethan1second.
9. The Pressure Cooker needs to gain pressure before pressure cooking
canbegin.WhenthePressureCookerisgainingpressure,“HEAt”will
appearontheDisplayScreenandthetimewillnotcountdown.When
pressurehasbeenreached,“HEAt”willdisappearontheDisplay
Screen,andthetimewillbegintocountdown.
10.Afterthesetcookingtimehaselapsed,thePressureCookerwillbeep
andwillautomaticallyswitchtotheKEEP WARM setting. The Display
Screenwillthereforechangefromthecooktimetoanewtimerthatwill
countupto4:00(4hours)oruntilyoupresstheSTART/STOP button.
After 4 hours in the KEEP WARMsetting,thePressureCookerwillturn
off.
TIPS:
1. Donotkeepriceinthepotforextendedperiodsoftimeonthe
KEEP WARMsetting,asthericewillbecomedryandthequalitywill
deteriorate. Use the supplied plastic spoon to stir and serve the rice.
Neverusemetalutensils,asthesewillscratchthenon-stickcoating.
2. Asricegrainscanbedelicate,attheendofcookingwaituntilthe
pressurereleasesnaturally.DonotusetheQuickPressureRelease
Method(seepage11-12forinstructionsontheNaturalPressure
ReleaseMethod).
3. Standardratioforcookingrice--1cupofuncookedrice:1.5cupsof
water
CAUTION:Duringcooking,steamwillbuildupinthePressureCooker,so
whenliftingtheLiduseakitchengloveormitttoprotectyourhand.
Table of contents
