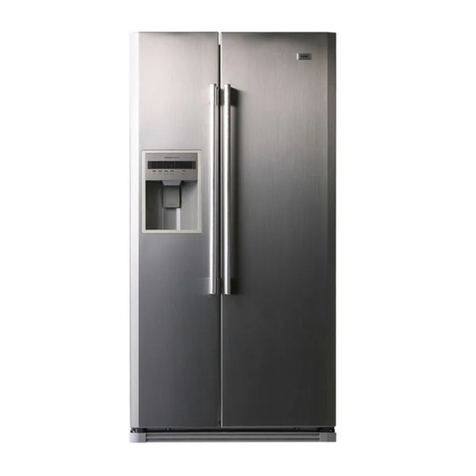
Admiral NT15H4 User manual

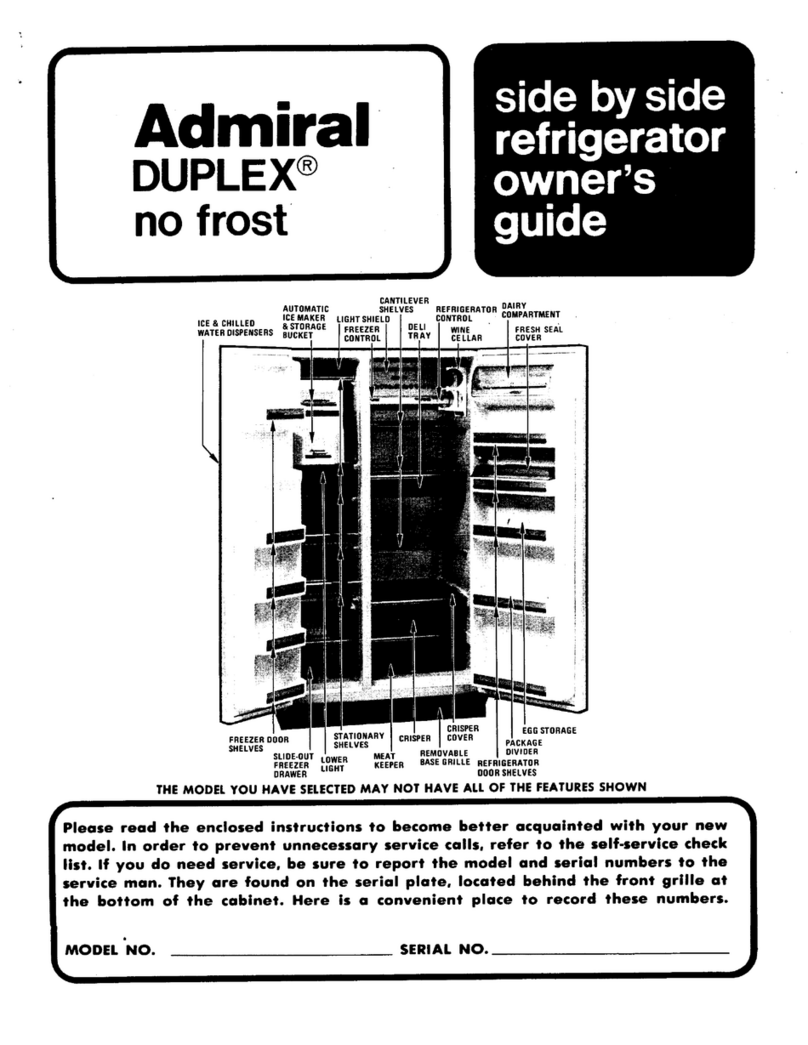
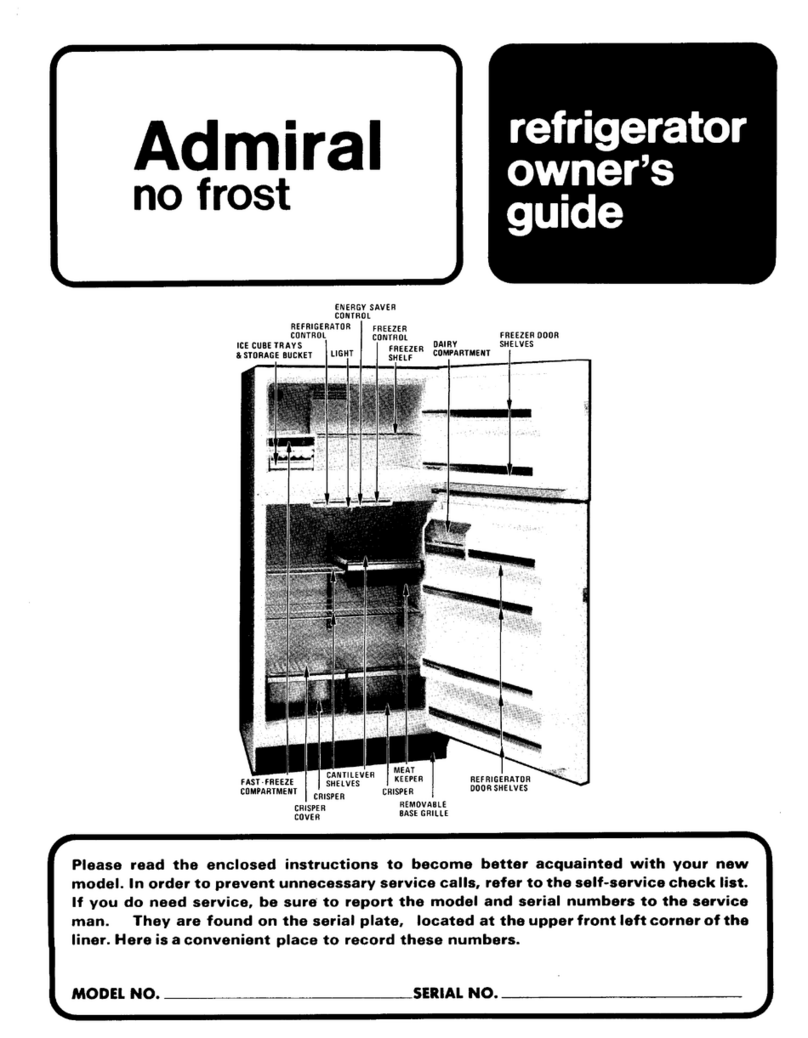
Admiral
no frost
REFRIGERATOR
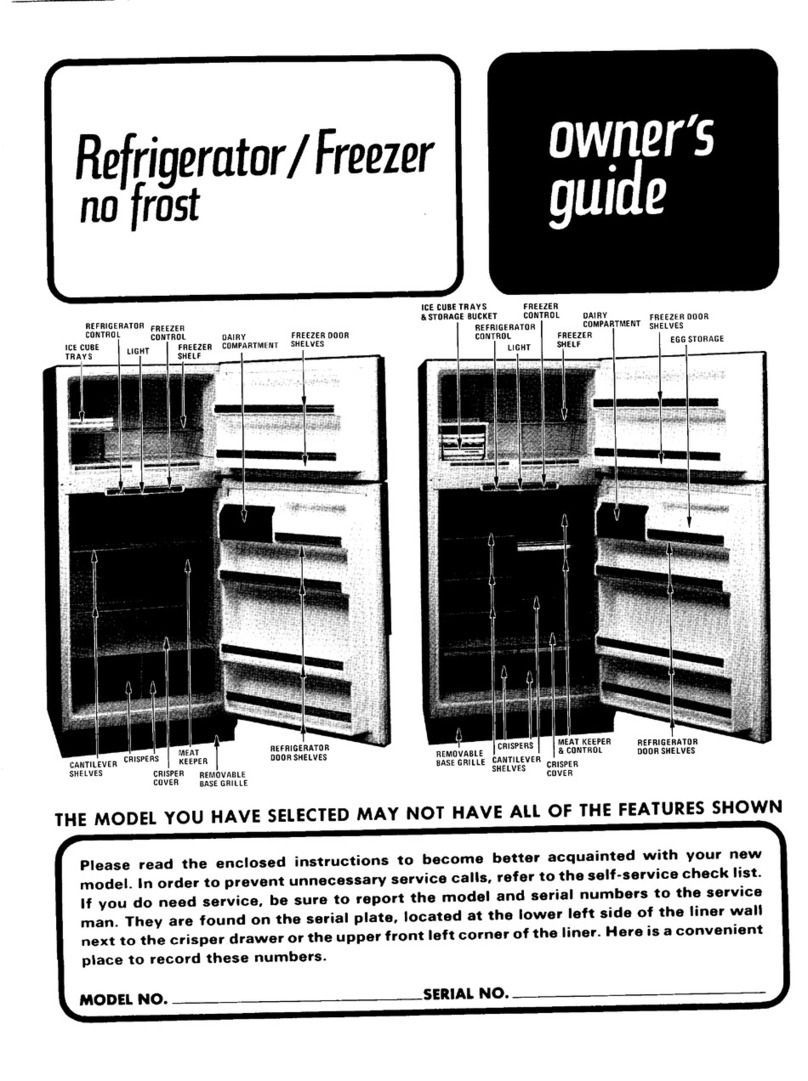
REFRIGERATOR ICE CUBE CONTROL
CONTROL TRAYS ENERGY SAVER
CONTROLFREEZER DOOR
ICE CUBE ENERGY SAVER WIRE DAIRY SHELVES
TRAYS CONTROL FREEZER DOOR TRIVET FREEZER COMPARTMENTL
CONTROL
WIRE FREEZER DAIRY SHELVES
TRIVET CONTROLCOMPARTMENT
SLIDE-OUT CRISPERS CRISPER REFRIGERATORCOVER REFRIGERATOR CRISPER DOORSHELVES
DOORSHELVES SLIDE-OUT CRISPERS COVER
SHELVES REMOVABLE SHELVES REMOVABLE
BASE GRILLE BASEGRILLE
Please read the enclosed instructions to become better acquainted with your new model. In order to
prevent unnecessary service calls, refer to the self-service check list. if you do need service, be sure
to report the model and serial numbers to the service man. They are found on the serial plate, located
at theupper front left corner of the liner. Here is a convenient place to record these numbers.
MODEL NO. SERIAL NO

INTRODUCTION Thisapplianceisequipped with a three- Your refrigerator may run for several hours
pronged grounding plug for your protection when you first start it. This is normal and
We welcome you into the Admiral family against possible electrical shock hazards.It shouldn't be cause for alarm.
must be plugged into a grounding recepta-
as an owner of a quality Home Appliance.
This product was designed, engineered, andcle.Where a standard two prong wall recep- WARM CABINET SURFACES
manufactured to the highest standards of tacleis encountered, it is thepersonal re-At times, the front surfacesof your refrig-
quality and performance. Please read these sponsibility and obligationof the customer erator cabinet may be warm to the touch.
instructions carefully to become better ac- to have it replacedwith a properlygrounded This isa normalfunctionof yourrefrigerator.
quainted with your new Admiral appliance,three-prong wall receptacle.DO NOT, under
any circumstances, cut or remove the third Thisfeature prevents moisturefrom conden-
(_ground)prong from the power cord. sing on the outsideof your refrigerator dur-
ing humid weather. This condition may be
DO NOT usean adapter plug. noticeablewhen you firststart your refrigera-
INSTALLATION AIIU.L.listedrefrigerators andfreezersare tor, during hot weather, andexcessiveor
equipped with this type plug.lengthy door openings.
LOCATION SAFETY REMINDER ENERGY SAVER CONTROL
If possible, place your model out of direct If you are not going to use your old refrig- During extremely humid weather, moisture
sunlightand away from heat sourcessuchas erator, besureto REMOVE THE DOORS so has a tendency to collect on objectsthat are
a radiator,oven, or range, a child won't beaccidentallytrapped insidecoolerthanthe surroundingair,just asdroplets
and suffocate.This is required bylaw in of water accumulateon a glasscontainingan
Your model should not beinstalledwhere many communities, iceddrinkduringa hot summerday.This refrig-
the temperature will go below 55°F.becauseeratorisbuilttoexactingstandardsand,there-
it will not runfrequently enough to maintain
proper temperatures inthe freezer.OPE RATIO N fore,contains condensatedriersthat are de-
signed to minimize any collection of moisture
For easeof installation,you should leave a SEll'rING CONTROLS on the cabinet external surface during periods
of high humidity.
space of about one-half inch between your Your new refrigerator has two controls.
refrigeratorand adjacent walls or cabinets. If One for regulating the temperature in the ENERGY SAVER
a wall prevents either door from opening at fresh food compartment and one for the ON OFF
least 900, movethe cabinet sideways aninch freezer.Thefreshfood compartment and the
or so to permit a 90°opening sobaskets and freezer compartment controls are located at
crispers canbe easily removed, the top front ofthefresh food compartment. U
LEVELING IS IMPORTANT Turn both controls to "No.5"to start your
refrigerator. If you live inan area of low humidity,or one
Arefrigeratorwill not operate properly un- inwhichthe humidityisconsiderablylowerdur-
lessit isleveland restsfirmly on all four cor- ingcertain seasons,youcan switchthe Energy
Rm
ners. Thereisa leveling screw beneath each " ISaverConrolto"ON"whichwilldisconnectthe
front corner at the base of the cabinet that I "5°I condensatedriersand decreasethe amountof
can be turned in or out as required, electricity you use.
If thefloor is not level and it isnecessary Inareasof relativelyhighhumidity,theEnergy
to raise the rearofthe cabinet, we suggest ..... ==_.SaverControl inthe "OFF" positionwill mini-
using a piece of plywood or other shim 5-NormalENERGYSAVER mize any collectionof moistureonthe outside
9-Coldest ON OFF
material, surface ofthe cabinet.
L_J
'
16. s. 4] FEATURES
In a day ortwo, you maydecide that one The fresh foodcompartmentiscooledby
or both compartments should be colder or a gentle stream of circulating chilled air.
warmer.If so, adjust the control(s) as in- To maintain the natural flavor, moisture
structed in the accompanying chart,and nutrition of fresh foods, we recommend
setf,e,hfoodco.fro,on"5.""_ that you cover openfood containers.Dishes
Tostart." Set,,eeze,co.fro,on"5." or trays containing left-oversshould also be
ELECTRICAL CONNECTION .... ,.... , ................ covered to seal in flavors.Storingfoods in
AND GROUNDING Re,,igera,o,,ooWARM."high..... bet, plastic bags or in theiroriginalair tight store
wrappings reducesthe evaporation of mois-
Turn fresh food control to next
This applianceisdesigned tooperate on aRefr,geratortooCOLD: Iowe .... bet.
nominal 115 volt, 15 amp., 60 cycle line.turefromthem and lengthensstorage time.
Turn freezer controlto next
There shouldbe a separate,grounded cir- FreezertooWARM: highernumber.
cuit, serving this appliance only. DONOT Tur.f......... troIt.... t
usean extensioncord. Fr,,e,,oo COLO......... her. SHELVES
SLIDE-OUT SHELVES move on plastic
Refrigerator OFF: Set fresh food controlon off_rails and may be easily pulled forward for ac-
POWER SUPPLY CORD fa\
t,TH3-P_ USE OF CONTROLS cess to foods placed toward therear. To re-
=_OUNBNGPLUG" 1_movea slide-outshelf, pull it toward you un-
IMPORTANT: EXCEPT WHEN START- til it stops,then lift the front edge slightly
ING, DO NOT CHANGE EITHER CON-and pull.completely out.
(D TROL MORE THAN ONE NUMBER AT
/'e"_ : TEMPERATURE TO STABILIZE BE-
FORE RESE'n'ING.
fect on thetemperature of the other com-
S_OUNO4NGTYPE partment.
WALL RECEPTACLE
•LOC*,ONOF,,O_SON,ow{,¢o.0The No. 9 freezercontrol setting isrecom-
PLUGMAy lie DIFFERENTON YOURMODEL
,.ANs.o.,..,.E=E. mendedforshort term use only.

FRUIT AND VEGETABLE CRISPER DOOR GASKETS REPLACING
The fruit and vegetable crispers slide out Your doorgaskets arevinyl. They may
for easyaccess tofoods stored within,be cleaned with abakingsoda solution, LIGHT BULB
They are completelyremovable forclean- soapand water or withamild scouring
ing (hand wash only) or foruse elsewherepowder. DISCONNECT THEPOWER
in your kitchen. The plastic crisper cover CORD BEFORE REPLACING
also serves as a refrigerator storage shelf. DEFROST PANLIGHT BULBS
To remove the cover,lift the frontedge
and pull straightout. To replace the coy- Defrostwater drains into a shallow panALWAYSUSEA 40 WATT,STANDARD
er, setrear bars on supports and push beneaththe cabinetand evaporates. Dur- BASE, APPLIANCETYPE BULB WHEN RE-
backuntil frontcan be lowered into place, ing periods of high humidity, watercouldPLACING A LIGHT.
If a restricted door opening does notper- remain in the pan. Thispan should be
mit removal of a drawer, tiltcrispers and cleaned once a month with a solution of
shelf assemblyup and remove bylifting strongsoapand water.
straight out.ENERGY TIPS
Keep your crisperstightly closed toinsure
crispness and freshness. Storing leafy vege-
tables, such as celery andlettuce in plasticFOR EFFICIENT ENERGY USE:
bagsreducesthe evaporation ofmoisture1. Be surerefrigerator islevel and ventila-
from them. tion around front grilleis notblocked.
Leveling Crisper Shelf /__ 2. Check doorseals occasionally for leak-
If the crispershelf is not level, adjustthet_ age. Check at various places, top, bot-
support leg as shown, tom, sides.
___ " " _ -- 3. Check the temperature,avoidunneces-
-_ c_ _ _ sary coldsettings.
4. Keep freezer full to near capacity, less
,=,sE coldair is lost during door openings.
To remove the defrost pan, grasp the base
grille at both ends and pull it straight out.5. Let hot dishes cool before putting into
Slide the pan out from underneath the refrigerator or freezer.
ICE CUBE SERVICE cabinet. 6.Cover liquids, if uncovered, the unit
Twist ends or depress center of flexible li'11, /DEFROSSUPPORT RAILS_ must work longer.
icecube trays for easy removal of ice cubes. T PAN 7. Clean refrigeratorcondenser coilsat
OPTIONAL _.L t_._ 1 _]_least twiceayear.
AUTOMATIC iCE MAKER
This model refrigerator isdesigned so an
Automatic Ice Maker can be easily installed 13
whenever you want it. Order the ice maker
kit numbershown on the label on the To replace the defrostpan, position theSAFETY TIPS
cabinet back. The kit contains installation in- side flanges to fitover slide railsandpush it
structions, water connection instructions in until it stops. 1. In case of power failure,minimize door
and other information concerning the ice
maker operation. To replacebase grille, align spring clips openings. If power failure is of long du-
with square opening in cabinet and tapeach ration, protect frozen food by placing
MAGNETIC DOOR GASKETS end until grille locks in place, blocks ofdry iceontop ofthe packages,
or check with a local frozenfoods locker
Door gaskets are magnetized to insurean plant about temporary storage.
air tightseal all around.Thesegaskets cling CONDENSER
to the cabinet front, oncethe doors are clos-2. Use the three-pronged plug only with a
ed to within their magnetic range. Your refrigerator will operate more et- grounding receptacleto provideprotec-
ficientlywhen the condenser is clean. It tion from electricalshock.
should be cleaned at least twice a year or
CLEANING more often if conditionsrequire it.It can 3. Unplug refrigeratorbefore cleaning con-
be adequately cleaned through the right denser or replacing light bulb.
DISCONNECT THE POWER front of the base opening.Graspthe base
CORD BEFORE CLEANING grille at both ends andpull straight out. 4.Remove the doors from out-of-use re-
Then reach through the base opening with frigerator. Prevent a child from becom-
INSIDE your vacuumcleaner attachment to clean ing accidentallytrapped and suffocat-
Clean both compartments and innerdoor the front and open end of the condenser, ing.
panelswith mild soap and water. Do notuse I'.#_'_ I I
an abrasive powder, solvent, polish cleaner ',
or undiluted detergent.
You may notice a slightdiscoloration ap- /_/" GOING ON
peering at the top and near the center of the
back wall of the fresh food compartment. VA C A T I O N_
This is no cause foralarm, but it should be J/ /
cleanedoffperiodically._-_ ] _opE.E/oIf you willbe gone fore month or less,DE OS
"''--- __ _N_ J/u_:_F:_leave the controlknobat its usualsetting.
OUTSIDE _CO.0E.sE.
Wash regularly with mild soap and water. _'_B=SEGRILLE During longer absences. (a)remove all
Rinse with clearwater.Never use abrasive food, (b) disconnect fromelectricaloutlet, (c)
scouring powders, automobile polish or fur- To replace base grille, align spring clips clean the refrigeratorthoroughly, including
niture polish. Glass Wax or a similar product with square opening in cabinet and tap each defrost pan, (d) leave doors open to prevent
will clean and protect the finish satisfactorily, end until grille locks in place, odor formation.

CHANGING
REVERSIBLE
DOORS
This refrigerator has been built with the
doors hinged on the right.Ifyou wish to
hinge the doors on the left, follow these in-
structions.If it becomes necessaryto return
the hinges to the right side, merely trans-
pose all references to "right"and "left"
whenfollowing theseinstructions.
TOOLS REQUIRED
Phillipsscrewdriver
End wrench (5/16")
Hex-head socket screwdriver (5/16")
Table knife
CHANGING DOORS
1.Turn the fresh food control to OFF and
remove all food from the interior.
2. Remove the handlesfrom the doors and
set aside. On the side of the doors that
you are going to install the handles, re-
movethesmallround screw hole plugs
with a table knifeand press them into
the holes on the opposite side of the
doors.
3. Using asocket screwdriver or end
wrench,removethe screws fromthe up-
per hinge. Carefully lift the door (includ-
ing upper hinge) off the center hinge
and placeit on a padded surface to pre-
ventscratching.Avoid losingthe spacer
thatwas between the hingeand the cab-
inet top.
4.Using a tableknife, pry theplug button
coverfrom the plastic bushingat the top
of the door. Savethe cover for future
use.
5. Lift the upper hinge and th_spacer
washers from the door and installthem
at the opposite corner.
6. Position the plug button cover, saved
from step 4,over the old hinge bushing
and press it into place.
7. Pry out the3 plastic plug buttons from
the cabinet top and pressthem intothe
opposite corner.
8. Lift the center hinge pin out of the hot-
tomdoor and center hinge.Carefully lift
the lower door off the lower hinge and
place iton a padded surface,ifthe metal
hinge pin pulls out of the lower hinge
when the door isremoved, pull it out of
the door bottom and press it back into
thehinge.
9.Remove the center hinge and spacer
from the cabinet.Transfer the two
screws from theleft end ofthedivider
bar to the right end. Install the center
hinge and spacer on the left end ofthe
dividerbar the same way itwas installed
on the right end. Tighten both screws
until they are just snug, then turn them
one-half turn more.
ContinuedOn Back

10.Prythe plug cover from the plastic
bushing at the top of thelower door
and press into theplastic bushing on
theoppositesideofthedoor.
11. Remove thebase grille by grasping at
both ends and pulling it straight out.
12.Removethelower hingeand spacer.
13.Rotatethelower hingecounterclock-
wise 90o and install it (including
spacer) tothe left leg ofthecabinet.
*" 'N
,r-- l.
_._..
NOTE: It will takeextra effort to install the
screws.Thescrews are selftapping and will
have to cut threads in the screw holes.
14.Pullthe metal hinge pin from the side of
the lower hinge and place it, including
thespacer washer, into thetop hole.
15. Pryout thetwo screw hole plug buttons
onthe bottomleft side of the top door
and lower door. Press in the plug but-
tons in theholes on theright sideof
both doors.
16. Setthelowerdoor on the bottomhinge,
making sure the hingepin enters the
bushing in the door bottom.
17. While holding the door in a closed posi-
tion,take the center hinge pin that was
removed in step 8,and insert it through
the leftho_eof thecenter hinge and into
the bottom door bushing.Make sure the
long pin goes into the bottom door and
the short pin goes into the top door.
18.Set the upper dooronthe center hinge,
making sure the hinge pin enters the
door bushing. When you close this door,
the gasket should hold it in place.
19.Making sure to use the same number o
spacersthat were originally used be-
neath the upper hinge, install the hinge
mounting screws. Before tightening
these screws, make sure the top of the
door is level with the cabinet top, and
the space between the door is equidis-
tantacross the entire front.Avoid over-
tightening these screws.Tighten both
until they are just snug,then turn them
in another one-half turn.
20.Examine the door gasket all around each
door, making sure no gaps are visible
between the gasket and cabinet.Ifa gap
shows, try stretching the gasket away
from the door sothe magnet will contact
the cabinet surface.
21.Remove the nameplates from the door
handles and install them on the opposite
handles asshown.To remove the name-
plates, remove thefront and back in-
serts from the metal handles. There is a
hole in the front insert behind the name-
plate. With the forefinger of the other
hand bend the nameplate from the rear

and it will pop out. Install by bending in ICE CUBES STICKING IN TRAY CABINET VIBRATES
at the front using the rear finger as a
lever. • Trays may be coated with residue film • Cabinet not level
from minerals in the water.Wipe trays • Weak floor
,1 withvinegar-soakedcloth until clean. If
; _ AOMtRAL INSERT residue isheavy, clean trayseach timere- REFRIGERATOR RUNS TOO LONG
frigerator is cleaned. •Modernrefrigerators are larger and run
colder,which requires morerunningtime.
,,_ _ WARM AIR FROM • Prolonged door openings.
:_- ; CABINET BOTTOM • Control set too cold
!_'_ •Normal air flow for condenser •Condenser needs cleaning.
: • Poor air circulation around condenser.
:ODOR IN CABINET
_:'; ___ NOFROSTINsERT_ • Odor producing foods should be coveredREFRIGERATOR RUNS TOO
•Interior needs cleaning FREQUENTLY
•Defrostpan needscleaning•Frequent running provides more stable
temperatures
22. Invert the handles andinstall on oppo-
site sides of the doors as shown. MOISTURE COLLECTS ON • Too many door openings
OUTSIDE SURFACE • Prolonged door openings
23. To replace the base grille, line up itsspr- • Hot humid weatherincreasescondensa-
ing clips withthe square openings inthe tion. As humidity decreases, moisture will REFRIGERATORWON'T RUN
cabinet andtap eachend in until the disappear.
grillelocks in place. •Temperature controlturned to OFF.
24,Replace all food end return the fresh• Line cord not pluggedin.
food control toits usualoperating posi- FOODS DRY OUT • Nopower atelectricaloutlet.
tion. (FRESH OR FROZEN) • House fuse blown.
• Packages not wrapped or sealed properly.
•Crispernottightly closed.IF YOU REQUIRE SERVICE AND
z_VO T]_ WATER ON FLOOR HAVE CHECKED THIS CHECK LIST
U_]_TI_--jj(_I_--]_SS,z_.L]_7 UNDER CABINET 1. Contact your Admiraldealer or therepair
• Defrost pan missing or not positioned cor- service he recommends.
SERVICECALLS rectly2.Follow procedure outlined under "To se-
cure warranty service" in the warranty.
WATER IN FRESH FOOD
BEFORECALLINGA TECHNICIAN,CHECK COMPARTMENT BoTIrOM 3,Contact the manufacturer at the national
THE FOLLOWING LIST FOR POSSIBLE headquarters if a satisfactory solution is
TROUBLES THAT YOU CAN REMEDY •Cabinet not level not reached in the first two steps. Write
WITHOUT DIFFICULTY.• Drain tube plugged to Master Care, Inc., Manager, Consum-
NOISY OPERATION er Relations Department, P.O.Box 2845,
• Fannoise--normal air flow. CABINET LIGHT NOT WORKING Bloomington, Illinois 61701 or call toll-
free: 800-447-8371(Illinoisresidentscall
•Defrost pan not positioned correctly •Bulb burned out 800-322-6302).Include model and serial
• Cabinet not level.•No power at outlet numbers of your appliance, purchase
date,dealer's nameand address, and
• Weakfloor.FRESH FOOD COMPARTMENT the name and address of the last com-
•Dishesrattling against each otherTOO WARM pany thatserviced your appliance.
Additional motors and controls areusedto • Refrigerator controlset too warm4. If you arenotsatisfiedwiththe service
provide theimproved performanceofthis•Freezercontrol setatcoldest position provided, youmay writetoMACAP, the
larger capacity refrigerator. Therefore, nor- Major Appliance Consumer Action Pan-
mal operating sounds may be more noticea- • Prolonged door openings el, at 20 N. Wacker Dr., Chicago,Illinois
biDthan on themodelit replaced. FRESH FOOD COMPARTMENT 60606.MACAP, asagroup of consumer
experts,receivescomments and corn-
SIZZLINGSOUND IN FREEZER TOO COLD plaints from appliance owners,studies
•Normal sound caused by defrost water •Refrigerator control set too coldindustry practices, and advises industry
dripping on defrost mechanism of ways to improve its service to custo-
FREEZER COMPARTMENTmers.Givethem all the necessary infor-
ICE CUBES EVAPORATE TOO WARM mationon your appliance as intheprevi-
ous step,including the brand name and
• Coldair moving over icecubes causes•Freezercontrolset too warma clear descriptionof theproblemand
cubes to shrink when not used regularly • Prolonged door openings the servicerequired.
Admiral,whose policy is oneof continuous productdevelopment,reserves the right tochange specifications without notice.
Admiral East Woodf,eld Road
Schaumburg,Illinois 60196
Printed in U.S.A. Home Appliances ]03772-1
Table of contents
Other Admiral Refrigerator manuals
