Admiral NT17E53GL User manual

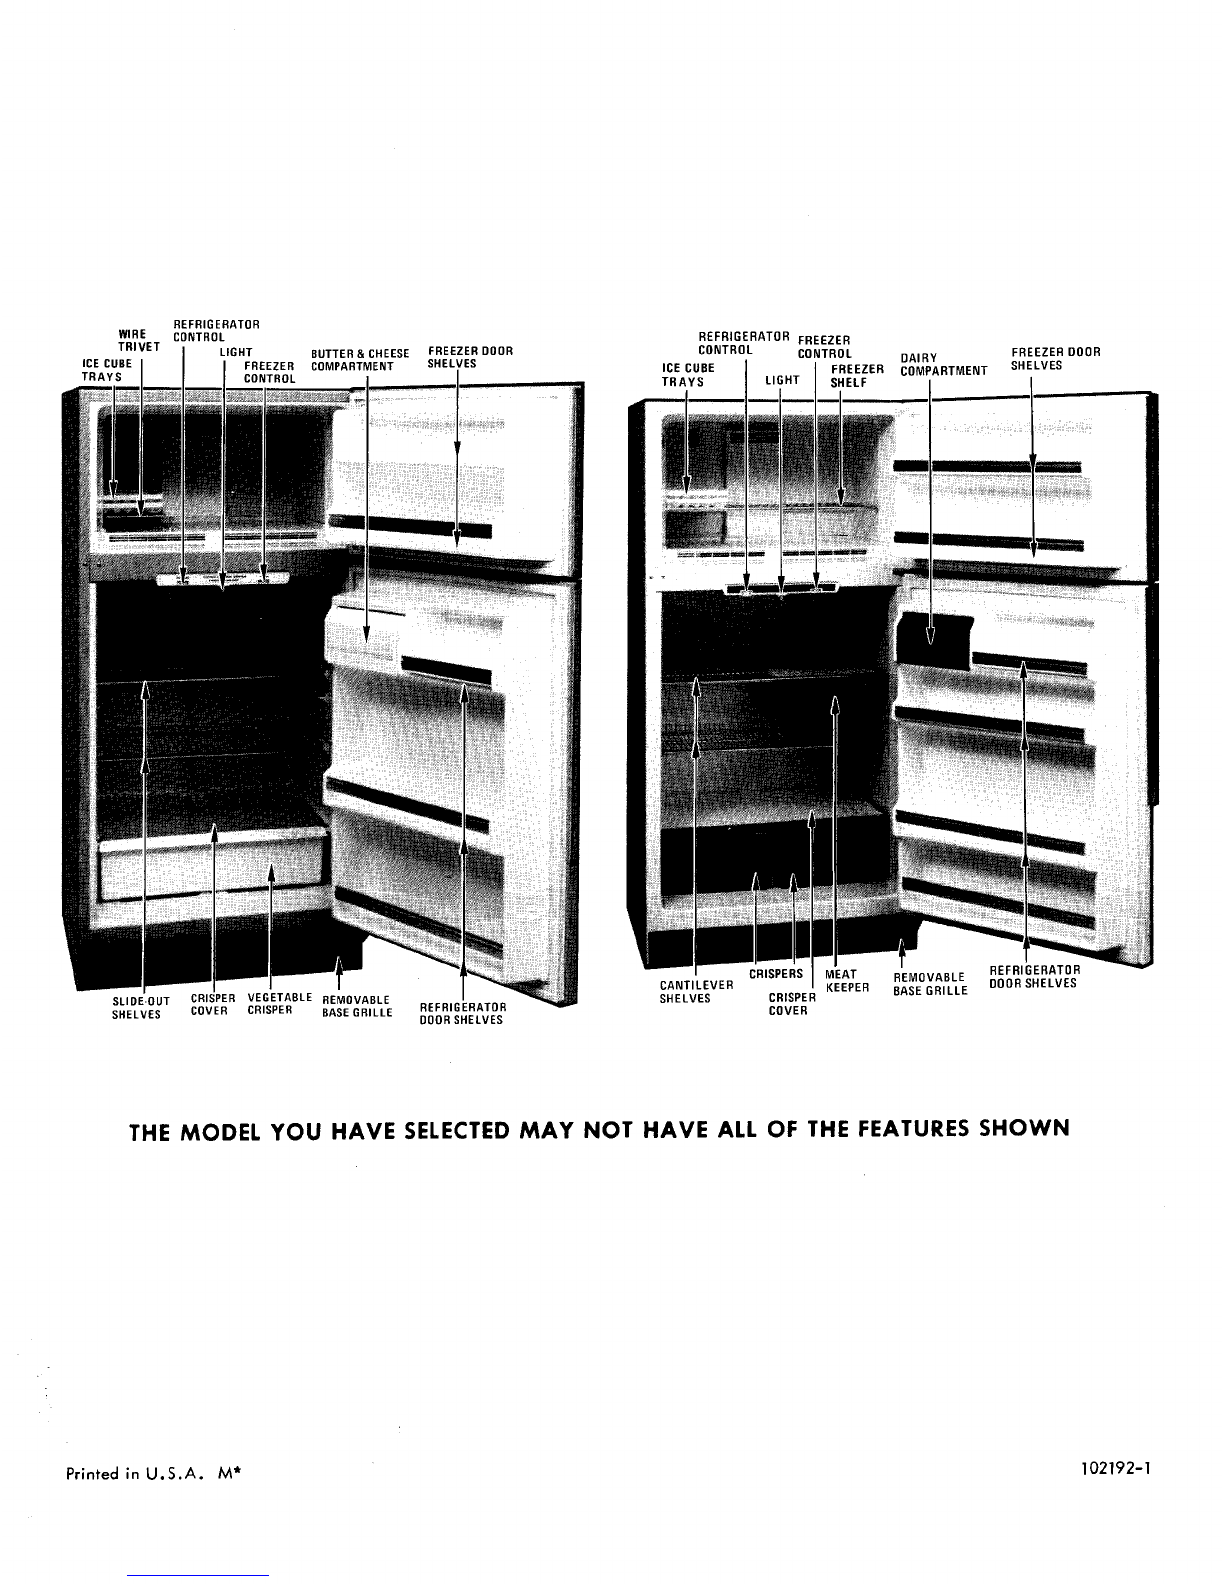
ICE CUBE TRAYS FREEZER
REFRIGERATOR FREEZER&STORAGE BUCKET CONTROL DAIRY FREEZERDOOR
REFRIGERATOR COMPARTMENT SHELVES
CONTROL CONTROLDAIRY FREEZER DOOR CONTROLFREEZER
ICE CUBE FREEZER COMPARTMENT SHELVESEGGSTORAGE
TRAYS SHELF SHELF
REFRIGERATOR MEAT KEEPER REFRIGERATOR
CANTILEVER CRISPERS DOOR SHELVESREMOVABLE & CONTROLDOOR SHELVES
BASE GRILLE CANTILEVER
SHELVES CRISPER REMOVABLESHELVESCRISPER
COVER BASE GRILLECOVER
THE MODEL YOU HAVE SELECTEDMAY NOT HAVE ALL OF THE FEATURES SHOWN
Please read the enclosed instructions to become better acquainted with your new
model. In order to prevent unnecessary servicecalls,refer to the self-service check list.
If you do need service, be sure to report the model and serial numbers to the service
man. They are found on the serial plate, located at the lower left side of the liner wall
next to the crisper drawer or the upper front left corner of the liner. Here is a convenient
place to record these numbers.
MODEL NO. SERIAL NO.
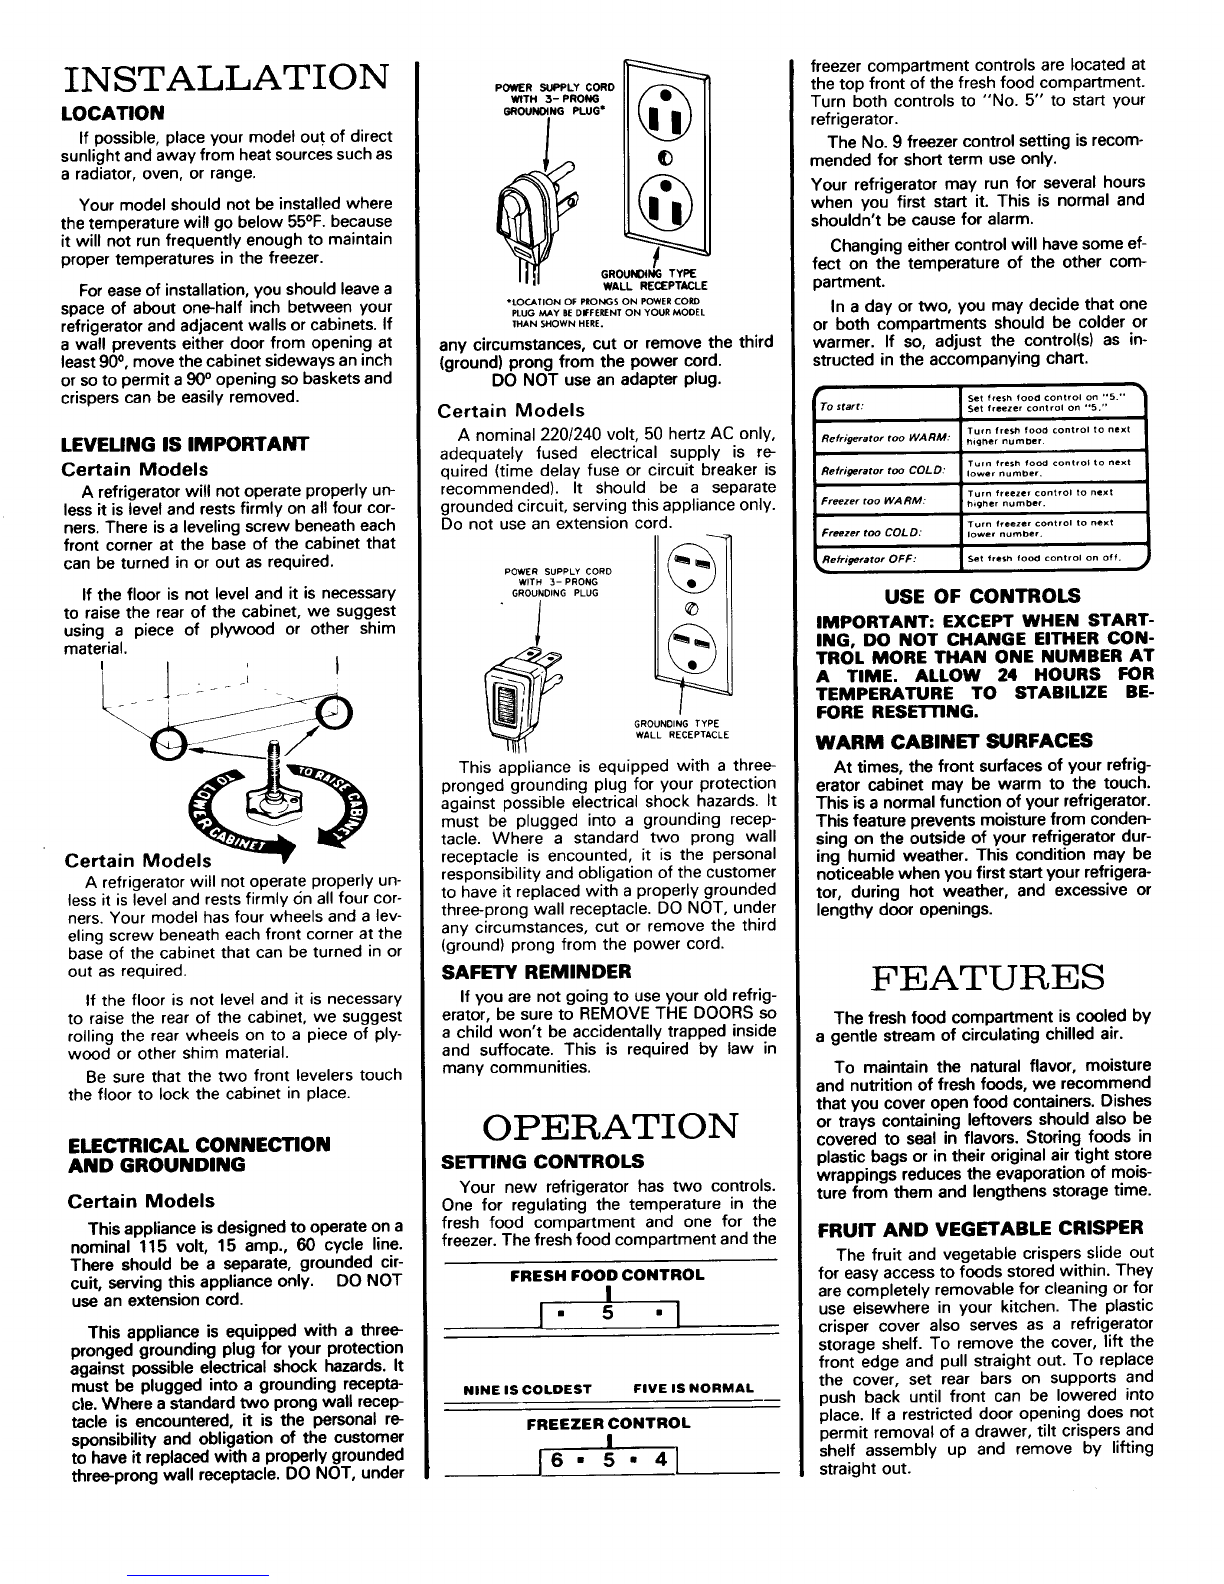
IN ST A LL AT ION % freezercompartmentcontrols are ,ocated at
POWERSU_L_CORO_ the top front of thefresh food compartment.
_TH 3-PRO_(,w-_ Turn bothcontrols to "No. 5" to start your
LOCATION GROUN_ NG PLUG*
_ refrigerator.
If possible,place your model out of direct The No. 9 freezer control setting is recom-
sunlight and away from heat sources such as (D mended for short term use only.
a radiator, oven, or range.Your refrigerator may run for several hours
Your model should not be installed where when you first start it.This is normal and
the temperature will go below 55°F.because shouldn't be cause for alarm.
it will not runfrequentlyenough to maintain
proper temperatures in the freezer, f _ Changing eithercontrol will have some ef-
GROUNI_NGTYPE fect onthe temperature ofthe other corn-
Foreaseofinstallation,you shouldleave a WALLRECEPTACLE partment.
space ofabout one-half inchbetween your "LOO_T,ONoFP_o_soNPO*ERCO_
PLUGMAyBEDIFFERENTONYOURMODELIna dayor two, you may decide that one
refrigerator andadjacentwalls or cabinets.If THANSHOWNHERE. or both compartments should becolder or
awallprevents either door from opening atany circumstances, cut or remove the third warmer. If so,adjust the control(s) as in-
least 90°, move the cabinet sideways an inch (ground) prong from the power cord. structed in the accompanying chart.
or so to permit a 90°opening so baskets and DO NOT use an adapterplug.
crispers can be easily removed. Setfresh food control on "5."
Certain Models To,,,: Se,f......... trolon"5."
Turn freshfood control to next
LEVEMNG ISIMPORTANTA nominal220/240volt, 50 hertz AC only,R_qrige,_t..... WARM".............
adequately fused electrical supply is re- Turnfresh food controlto next
Certain Models quired (time delay fuse orcircuitbreaker is R_fr_ger,to,too COLD: I....... bet.
A refrigerator will notoperateproperly un- recommended).ItShould be a separateTurnfreezer control to next
less it is level and restsfirmlyonall fourcor- grounded circuit,serving thisappliance only. FreezertooWARM: high ..... bet.
hers.There isa levelingscrew beneath each Donot use an extension cord. Tur,freeze,co.t,oltonext
front cornerat the baseofthecabinet that _ _ FreezertooCOLD."lower numt_er.
can beturned in or out as required. _RefrigeratorOFF:
POWER SUPPLY CORD_m Set fresh food control on off.
\o;
WITH 3- PRONG
If the floor is not level and it is necessaryGROUNDINGPLUG -_ USE OF CONTROLS
to raise the rear of the cabinet, we suggest " I
using a piece of plywood or other shim _ _ IMPORTANT: EXCEPT WHEN START-
material. (_ING,DO NOT CHANGE EITHER CON-
I 1 ' I _o /TROL MORE THAN ONE NUMBER AT
__ _ _ A TIME.ALLOW 24 HOURS FOR
-- - /_TEMPERATURE TO STABILIZE BE-
i__ FORE RESETIlING,
GROUNDING TYPE
WALL RECEPTACLE WARM CABINET SURFACES
els_ This appliance is equipped with a three-At times, the front surfacesofyour refrig-
pronged grounding plug for your protection erator cabinetmay be warm to the touch.
against possibleelectrical shock hazards. It This isa normalfunctionof yourrefrigerator.
must beplugged into a grounding recep- This feature prevents moisturefrom conden-
tacle.Where a standard two prong wall sing on the outside of your refrigerator dur-
Certain aDd receptacleis encounted, it is the personal ing humid weather. This condition may be
A refrigerator will not operate properly un- responsibility and obligation of the customer noticeable when you first start your refrigera-
less it is level and rests firmly on all four cor- to have it replaced with a properly grounded tor, duringhot weather, and excessive or
nets.Your model has four wheels and a lev- three-prong wall receptacle. DO NOT, under lengthy door openings.
efing screw beneath each front corner atthe any circumstances,cutor removethethird
base of the cabinet that can be turned in or (ground) prong from the power cord.
outas required. SAFETY REMINDER EA T U E S
If the floor is not level and itis necessary If you are not going to use your old refrig-
to raise the rear of the cabinet, we suggest erator, be sure to REMOVE THE DOORS so The fresh food compartment is cooled by
rolling the rear wheels on to a piece of ply- a child won't be accidentally trapped inside agentle stream of circulating chilled air.
wood or other shim material,and suffocate. This is required by law in
Be sure that the two front levelers touch many communities. To maintain the natural flavor, moisture
the floor to lock the cabinet in place, and nutrition of fresh foods, we recommend
that you cover open food containers. Dishes
ELECI'RICAL CONNECTION OPt,RATI ON ortrays containing leftovers should also be
covered to seal in flavors. Storing foods in
AND GROUNDING SE11"ING CONTROLS plasticbags or in their original air tight store
wrappings reduces the evaporation of mois-
Your new refrigerator has two controls, ture from them and lengthens storagetime.
Certain Models One for regulating the temperaturein the
Thisappliance is designedtooperate onafresh food compartmentand onefor the
nominal 115 volt,15 amp., 60 cycleline. freezer. Thefresh food compartment and the FRUIT ANDVEGETABLE CRISPER
There should be a separate, grounded cir- Thefruit and vegetablecrispersslide out
cult,servingthis appliance only. O0 NOT FRESH FOOD CONTROLforeasy access tofoods stored within.They
use an extension cord. | are completely removable for cleaning or for
I•5•Iuse elsewherein your kitchen. The plastic
This applianceis equipped with a three-crisper cover also serves as a refrigerator
pronged grounding plug for your protection storageshelf. To removethe cover, lift the
against possibleelectrical shock hazards. It front edge and pull straight out. To replace
must be plugged into a grounding recepta-NINE ISCOLDEST FIVEISNORMAL the cover, set rear bars onsupports and
cie. Where a standardtwo prongwallrecep-push back until front can be lowered into
tacle is encountered, it Jsthe personal re- FREEZER CONTROL place.If a restricted door opening does not
sponsibilityand obligation of the customer I permit removal of a drawer, tilt crispersand
to have it replacedwith a properly grounded shelf assemblyup and removebylifting
three-prongwall receptacle. DO NOT, under J 6 • 5 •4 ] straight out.

Keep your crispers tightly closed to insure The top of the quick-freeze compartment EGG STORAGE
crispness and freshness.Storing leafy vege- can be removed and put in a lower position Some models have an egg storage tray
tables, such as celery and lettuce in plastic on theside wall. The freezer shelf can alsowhich fits on any door shelf and can be
bags reduces the evaporation of moisture be lowered into another position, removed and carried to your working area.
from them.On other models top door shelf is sized to
SHELVES MEAT KEEPER hold a standard egg carton.
Certain Models Certain Models
Asliding draweris provided forshort DOOR SHELVES
SLIDE-OUT SHELVES move on plastic term storage of fresh meats. This meat Certain Models
railsand may be easily pulled forward for ac- keeper is suspended from one of the re-
cess to foods placed toward the rear.To re- frigeratorcompartment shelves. It slides Removable shelves may be easily adjust-
move a slide-out shelf, pull it toward you un-out to thefront so you can easily reach all ed to anotherposition on the door.Lift it
til it stops, then lift the front edge slightly items stored within.KEEP YOUR MEAT straight up until it clears the retainers on the
and pull completely out. KEEPER TIGHTLY CLOSED AT ALL door liner and pull straight out. Reverse this
TIMES. procedure when replacing a shelf.
1_ _"_____ All meats or poultry should bestored in _',,,_ _ .
their original store wrappings or in plastic
bags to reduce the evaporation of moisture
from them.
To remove the meat pan, pull it out until
it stops. Then applyalittle more pressure
and pull completely out.
MEAT KEEPER
Certain ModelsCertain Models MAGNETIC DOOR GASKETS
ADJUSTABLE CANTILEVER SHELVES The meat keeper, between thetop and Door gaskets are magnetized to insure an
can be moved up or down to suit your indi- second shelves, provides short term storage air tight seal all around. These gaskets cling
vidual needs. To remove a shelf, lift the front of fresh meats. It slides out to the front so tothecabinet front, oncethedoors are clos-
of the shelf straight up, rock slightlyand pull you can easily reach allitems stored within,ed to within theirmagnetic range.
straight out.To lock in another position,tilt
shelf with the front up. Insert hooks into the The meat keeper will provide extrachilling
desired frame openings and let the shelf set- only if the cantilever shelf that supports the RE PLA CTN G
tie into place. Makesure it is securely locked meat keeper is in the 2nd, 3rd, or 4th shelf
_ i adjustmentpositions"LIGHT BULB
J The temperature inside the meat keeper is
several degrees cooler than the surrounding IT IS RECOMMENDED THAT YOU DIS-
refrgerator compartment temperature. CONNECTTHE POWER CORD BEFORERE-
Therefore,you should keep your meat keep- PLACING LIGHT BULBS.
er tightly closed at all times.ALWAYS USE A 40 WATT, STANDARD
Certain ModelsThe sliding leveron the back wall,above BASE, APPLIANCE TYPE BULB WHEN RE-
THE FREEZERSHELF can be removed by the meat keeper, enables you to vary the in- PLACING A LIGHT.
lifting the right end up approximately six in- ternal temperature.With the lever set in the
ches, and pulling the left end bars out of the "COOL" position, the temperature in the
sockets in the sidewall.Reversetheremovaldrawer is the same as the surrounding air in
procedureto replace the shelf,making sure the food compartment. With the leverset at l,jl't LEAN I N ('_the right end bars are pressed completely the"COLD" position,thetemperature inthe Ijr
into the supports, drawer is colder and most good quality
meats can bestored for several'days.Select IT IS RECOMMENDED THAT YOU DIS-
thelever position that keeps themeat at theCONNECT THE POWER CORD BEFORE
temperature of your choice. CLEANING.
Allmeats or poultry shouldbestored in
their original store wrappings or in plastic Certain Models
bags to reduce the evaporation of moisture Your refrigerator can be easily rolled out
from them. for cleaning.Simply turn the leveler feet
Certain Models COUNTERCLOCKWISE until they turn free.
To remove the meat pan, pull it out until it Then pull the cabinet straight out.If you
THE FREEZERSHELF can be removed by stops. Then apply alittlemore pressure and have installed an automatic ice maker, we
(1) lifting the quick-freeze compartment pull completely out.
straightup until the left end bars of thefreez- recommend that you turn the water supply
er shelf are out of the sockets in the side wall off before moving the cabinet.
of the quick-freeze compartment.(2) Lift the ICECUBE SERVICE Aftercleaning behind yourmodel, push it
freezer shelf slightly and (3) pull to the left back and turn thelevelers CLOCKWISE to
until right end bars are out of the sockets in Twist ends or depress center of flexible
the right freezer wall. Reverse the removal ice cube trays for easy removal of ice lock cabinet in place.
procedure to replace the freezer shelf, cubes.
OPTIONAL AUTOMATIC INSIDE
li ,_ll_,) ICEMAKER Clean both compartments and innerdoor
This model refrigerator is designed so an panels with mild soap and water. Do not use
Automatic Ice Maker can be easilyinstalled an abrasive powder, solvent, polish cleaner
whenever you want it.Orderthe ice maker or undiluted detergent.
kit number shown on the label on the You may notice a slight discoloration ap-
cabinet back. The kit contains installation pearing at the top and near the center of the
instructions, water connection instructions back wall of thefresh food compartment.
and other information concerning the ice This is no cause for alarm, but it should be
maker operation, cleaned off periodically.
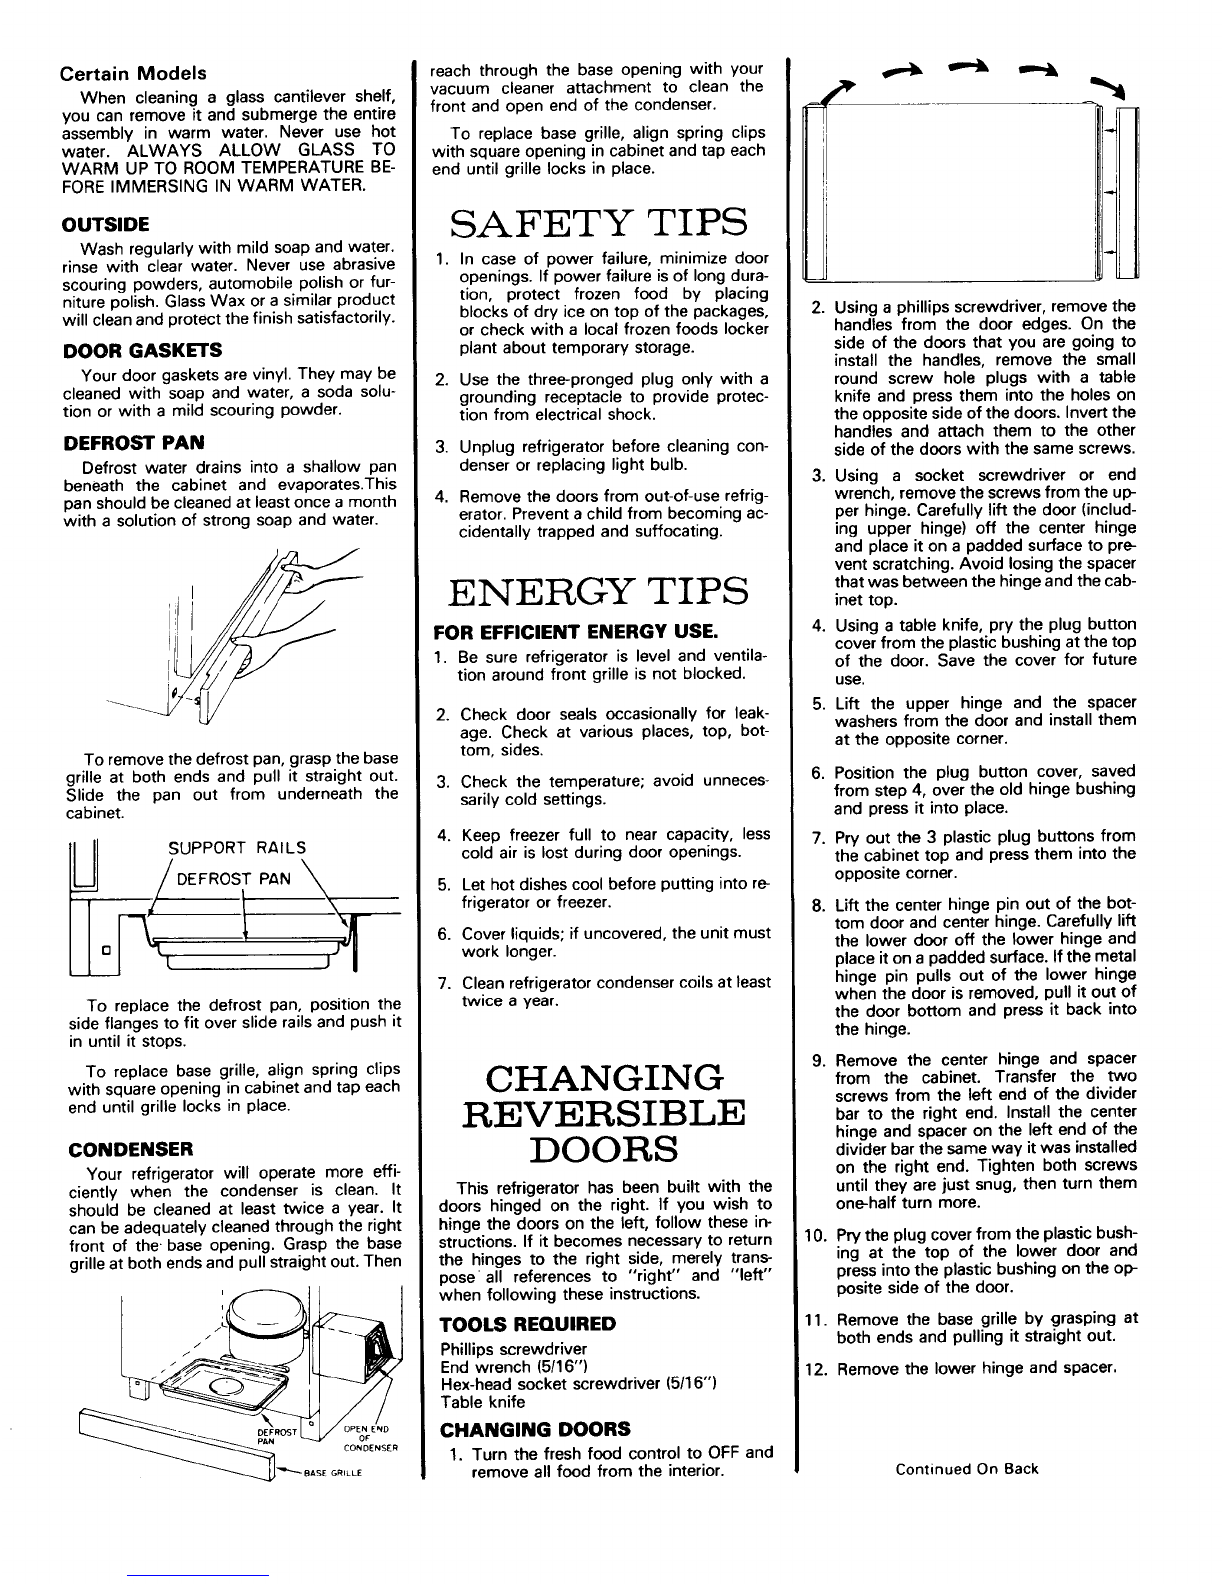
Certain Models reachthrough the base opening with your _ _
When cleaningaglass cantilever shelf,vacuum cleaner attachment tocleanthe _ _ill
you can remove it and submerge the entire front and open end of the condenser.
assemblyinwarmwater. Never use hotTo replace base grille,align spring clips
water. ALWAYS ALLOW GLASS TO with square opening in cabinet andtap each
WARM UP TO ROOM TEMPERATURE BE-enduntilgrille locks in place.
FORE IMMERSING IN WARM WATER.
OUTSIDESA F]_-_jTy TI_)S
Wash regularly with mild soap and water.I1[I._ i
rinse with clear water. Never use abrasive 1. In case of power failure, minimize door
scouring powders, automobile polish or fur- openings.If power failure is of long dura- __U
niture polish. Glass Wax or a similarproduct tion, protect frozen food by placing
will clean and protect the finish satisfactorily,blocks of dry ice on top of the packages, 2. Usinga phillips screwdriver, remove the
or check with a local frozen foods locker handles from the dooredges. On the
DOOR GASKETS plant about temporary storage, side ofthe doors that you aregoing to
install thehandles, removethe small
Your door gasketsarevinyl. Theymay be 2.Use the three-pronged plug only with a round screw holeplugs with a table
cleaned with soap and water, a soda solu- grounding receptacleto provide protec- knife and press them into the holes on
tionor with a mild scouringpowder, tion from electrical shock, theopposite sideof the doors. Invertthe
handles and attach them to the other
DEFROST PAN 3.Unplug refrigerator before cleaning con- side of the doors withthe same screws.
Defrost water drains into a shallow pan denser or replacing light bulb.
beneath the cabinet and evaporates.This 3.Using a socket screwdriver or end
pan shouldbecleanedat least oncea month 4. Remove the doorsfrom out-of-userefrig- wrench, removethe screwsfromthe up-
with a solution of strong soap and water, erator. Preventa childfrom becoming ac- per hinge. Carefully liftthe door (includ-
cidentally trapped and suffocating, ing upper hinge) off the center hinge
and place it on a padded surfaceto pre-
vent scratching.Avoid losingthe spacer
ENERGYTIPS that was between the hinge and the cab-
rl inet top.
[iiFOR EFFICIENT ENERGY USE. 4. Using a table knife, pry theplug button
cover from theplasticbushingat the top
1. Be sure refrigerator is level and ventila-of the door. Savethe cover for future
tion around front grille is not blocked, use.
-_ 2.Check door seals occasionallyfor leak- 5. Lift the upper hinge and the spacer
age. Check at various places, top, bot- washers from the doorand install them
To remove the defrost pan, grasp the base tom, sides, at the opposite corner.
grille at both ends and pull it straight out.3.Check the temperature; avoid unneces- 6. Position the plug button cover, saved
Slide the pan out from underneath the sarily cold settings,from step 4, over the old hinge bushing
cabinet,and press it into place.
4.Keep freezer full to nearcapacity, less 7. Pry out the 3 plastic plug buttons from
IU I///SUPPORTRAILS cold airis lostduring door openings, thecabinet top andpresstheminto the
DEFROST PAN 5. Let hot dishes cool before putting into re- opposite corner.
Ii [_Lt jj_.frigerator orfreezer. 8. Lift thecenter hinge pin out of the bot-
tomdoorand center hinge. Carefully lift
6.Coverliquids; if uncovered,the unit must the lower door off the lower hinge and
o work longer,place it ona padded surface. If themetal
7. Cleanrefrigeratorcondensercoilsat least hinge pin pulls out of the lower hinge
To replace the defrost pan, position the twice a year. when thedooris removed, pull it out of
the doorbottom and press it back into
side flangesto fit over slide railsand push it the hinge.
in until it stops.
TO replace base grille, align spring clips CHANOINO 9. Remove the center hinge and spacer
with square opening in cabinet and tap each from the cabinet.Transfer the two
screws from the left end of the divider
end until grille locks in place.REVERSIBLE bar tothe right end. Install the center
hinge and spaceron the left end of the
CONDENSER ]_)OORS divider bar the same wayit was installed
Your refrigerator will operatemore effi- onthe right end.Tighten both screws
ciently whenthe condenser is clean. It This refrigerator has been built with the until they are just snug, then turn them
should becleaned at least twicea year.It doors hinged on the right. If you wish to one-half turn more.
can beadequately cleaned through theright hingethe doors on the left, follow thesein-
front of thebase opening. Graspthebase structions.If it becomes necessaryto return 10.Pry the plug coverfrom the plasticbush-
grilleat both ends and pull straightout.Then the hinges to the right side, merely trans- ing at the top of the lower door and
pose all references to "right"and "left" pressinto the plasticbushingon the op-
_i _ when following theseinstructions, posite side of thedoor.
TOOLS REQUIRED 11. Removethebase grille by grasping at
Phillipsscrewdriver both ends and pulling it straight out.
End wrench (5/16")12.Remove thelower hinge and spacer.
__=_.__ _op_J,D Hex-head socket screwdriver15/16")
Tableknife
0E,SE_ 1.Turnthe fresh food control toOFFand
-_--B,s_G, remove all food fromthe interior.Continued On Back

13. Rotate thelower hingecounterclock-GOING ON MOISTURE COLLECTS ON
wise 90° and install it (including spacer)OUTSIDE SURFACE
tothe left legof the cabinet.VACATION ?•Hot humidweather increasescondensa-
tion. As humidity decreases, moisture will
If you will be gone for a month or less, disappear.
4[._ leave the controlknob at its usualsetting.
i 0OLI1 During longerabsences,(a)removeall ODOR IN CABINET
food, (b) disconnect from electrical outlet, (c) •Odor producing foods should be covered
clean the refrigerator thoroughly, including
OO defrost pan, (d) leave doors open to prevent , Interiorneeds cleaning
IiO_odor formation. • Defrost pan needs cleaning
SIZZLING SOUND IN FREEZER
AVOID • Normal sound caused by defrost water
dripping on defrost mechanism
NOTE: It will take extra effort to install the UNNECESSARY
screws. The screwsare self tapping and will FRESH FOODS DRY OUT
have to cut threads in the screw holes.SERVICE CALLS • Cover open food containers
• Keep crisper tightly closed
14. Pull the metal hinge pin from the side of Problems? Save yourself the nuisance of un-
the lower hinge and place it, including necessary service calls; check these first:
the spacer washer,intothe top hole. NOISY OPERATION FROZEN FOODS DRYOUT
• Fan noiseperfectly normal in no frost re-• Packages not wrapped orsealed properly
15.Pry outthetwoscrewholeplug buttonsfrigerators.You may notbeused to thisif
on thebottom leftsideof thetop door previous model was manual defrost.
and lowerdoor. Removethedoor stops REFRIGERATOR WON'T RUN
(metal plates)on thebottom ofeach • Cabinetnot level. • Temperaturecontrolturned to OFF
doorand install them on oppositesides.•Weak floor.
Press in the plug buttons in the holes on • Line cord not pluggedin
the right side of both doors.RED GLOW VISIBLE IN GRILLE •No power at electrical outlet
OPENINGS AT FRONT OF • House fuse blown
16.Setthe lower dooronthe bottom hinge, FREEZER COMPARTMENT
making sure the hinge pin enters the •Reflection of defrost mechanism during
bushing in the door bottom, normal defrost cycle. REFRIGERATOR RUNS
TOO LONG
17. While holding the door in a closed posi- ICE CUBES EVAPORATE •Modern refrigerators arelarger and run
tion, take the center hinge pin that was •Cold air moving over ice cubes causes colder, which requires more running time
removed in step 8, and insert it through cubes to shrink when not used regularly
the left hole of the center hinge and into •Prolonged door openings
the bottomdoor bushing. Make surethe WARM AIR FROM •Control settoo cold
long pin goes into the bottom doorand CABINET BOTTOM •Condenser needs cleaning
the short pin goes into the top door. •Normal air flow for condenser circulation •Poor air circulationaround condenser
18. Set the upper door on the center hinge,
making sure the hinge pinenters the CABINET VIBRATES
door bushing.When youclose thisdoor, •Cabinet not levelREFRIGERATOR RUNS
TOO FREQUENTLY
the gasket should hold it in place.•Weak floor •Frequent running provides more stable
temperatures
19. Making sure to usethe same number of FRESH FOOD COMPARTMENT
spacers that were originally used be- •Too many door openings
neath theupper hinge, installthehinge TOO WARM • Prolonged door openings
mountingscrews.Before tightening • Refrigerator control set too warm
thesescrews, make sure the top of the • Prolonged door openings
door is level withthe cabinet top, and WATER INFRESH FOOD
the space betweenthe door isequidis-COMPARTMENT BOTIrOM
tant across theentire front. Avoid over- FRESH FOOD COMPARTMENT•Cabinetnotlevel
tightening these screws. Tighten bothTOO COLD • Draintubeplugged
untiltheyarejust snug,thenturnthem•Refrigerator control set too cold
in another one-half turn.
20. Examinethedoorgasket all around each FREEZER COMPARTMENT
door, making sure no gaps are visible TOO WARM
betweenthe gasket and cabinet,lfagap • Freezer control settoowarm IF YOU NEED
shows,try stretching the gasket away • Prolonged door openings
from the door so the magnet will contact
the cabinet surface.SERVICE
CABINET LIGHT NOT WORKING
21. Toreplace thebase grille, line upits • Bulb burned outThemodel number,serialnumber, and bill
spring clips with the square openings in • No power at outlet of material (BM) numberof yourmodel are
the cabinet and tap each end in until the listed on a serial plate.The serial plate is Io-
grille locks in place. WATER ONFLOOR cated at thelower left side of the linerwall
next to the crisper drawer or the upper left
22. Replace all food and return the fresh UNDER CABINET front cornerof the liner. Refer to all of these
food control to its usualoperating posi- • Defrost pan missingor not positionedcor- numbers in any correspondence with your
tion. rectlydealer or distributorconcerning your model.
REFRIGERATOR
WIRE CONTROL REFRIGERATOR FREEZER
TRIVET LIGHT BUTTER & CREESE FREEZER DOOR CONTROL CONTROL DAIRY FREEZER DOOR
ICE CUBE FREEZER COMPARTMENT SHELVES ICE CUBE ] FREEZER COMPARTMENT SHELVES
TRAYS CONTROLTRAYS ISHELF
CRISPERS MEAT REMOVABLE REFRIGERATOR
DOOR SHELVES
CANTILEVER KEEPER BASE GRILLE
SLIDE-OUT CRISPER VEGETABLE REMOVABLE SHELVES CRISPER
SHELVESCOVER CRISPER BASE GRILLE REFRIGERATOR COVER
DOORSHELVES
THE MODEL YOU HAVE SELECTEDMAY NOT HAVE ALL OF THE FEATURESSHOWN
Printed in U.S.A.M* 102192-I
Table of contents
Other Admiral Refrigerator manuals


