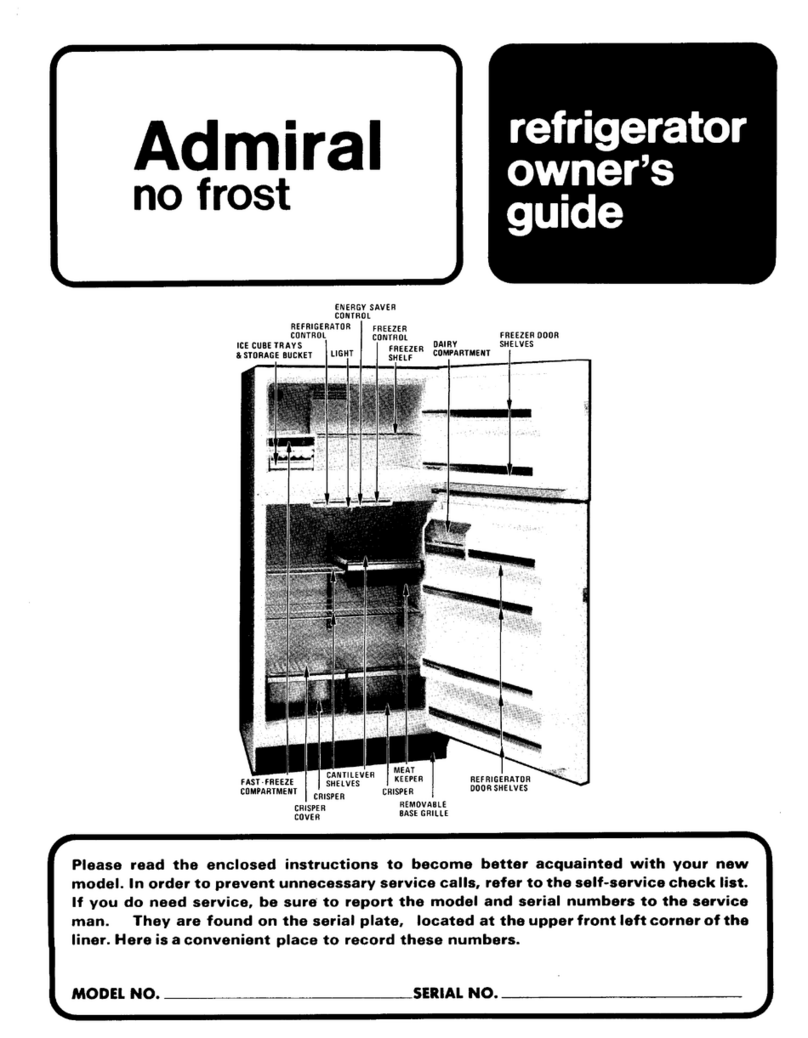
Admiral Duplex DNS22H9 User manual

side byside
refrigerator
owner's
guide
Admiral
DUPLEX®
no frost
CANTILEVER
AUTOMATIC SHELVES REFRIGERATOR DAIRY
ICEMAKER LIGHT SHIELD CONTROL COMPARTMENT
ICE& CHILLED &STORAGE WINE FRESH SEA'L
WATER DISPENSERS BUCKET CELLAR COVER
CRISPER EGGSTORAGE
FREEZERDOOR STATIONARY COVER
SHELVES SHELVES PACKAGE
SLIDE-OUT LOWER MEAT REMOVABLE DIVIDER
FREEZER LIGHT KEEPER BASEGRILLE REFRIGERATOR
DRAWER DOORSHELVES
THE MODEL YOU HAVE SELECTEDMAY NOT HAVE ALL OF THE FEATURESSHOWN
Please read the enclosed instructions to become better acquainted with yournew
model. Inorder to preventunnecessary service calls, refer to theself-service check
list. If youdo need service, besure to report the model and serial numbers to the
service man. They are found onthe serial plate, located behind the front grille at
the bottom of the cabinet. Here is a convenient place to record these numbers.
a
MODEL NO. SERIAL NO.

INTRODUCTION freezer compartment. Both controls are Io- '
cated at the upper rear of the refrigerator
We welcome you into the Admiral family compartment, just below _e light shield.
as an owner of a qualityHome Appliance. _ @ To start your refrigerator, set the refrigera-
This productwas designed,engineered,and tor controlon "F"and set the freezercontrol
manufactured to the highest standards of on "4". Let the refrigerator run at least two
qualityand performance. Please read these hours beforeloading it with food.
instructions carefully to becomebetter ac-
quainted with your new Admiral appliance...- IG EI
1tram_tlpm_ _ mca_rw M_ _ •|
INSTALLATION a
In"5 4 3 2] m.-m,¢m_,,_,n,
LOCATION TOCORRECTTHIS TOCORRECTTHIS _ ,,... .... .,_,,....
If you have agreed to install your new re- CONDITION.RAISE CONDITION,RAISE I
RIGHTCORERAHO LEFTCORNERAHD/
frigeratoryourself,pleasefollow these help- /ORLOWERLEFT ORLOWERRIGHT IMPORTANT: In a day or so you may de-
ful suggestions.C0RHER UlTI L C0 RlERURTI L cide that one or both compartments should
1. Removebaseskids and replacefront O00RSitLI 6 N D00 RS A L16 Nbe colder or warmer. DO NOT changeeither
lICROSS TOPOF ACROSSTOPOF control more than oneletter or one number
levelers. CIIDIIIET. CADIHET. at a time, Allow 24 hoursfor temperature to
2.Remove all exterior and interior tapeTo lock thecabinet in place, turn down stabilize before resetting. This does not ap-
carefully and retain old tape. Make a one or both leveler feet, located near the _ply when you first start your refrigerator.
small pad of this tape to pick off any re- front wheels. Rear leveler feet are not re- To turn off your refrigerator,set the refrigera-
maining taperesidues. This will elimi- quired, tot control on off.
hatethe needto usedangeroussolvents If the floor is not level and it is necessary
of any kind. to raise the rear ofthe cabinet,we suggest WARM CABINET SURFACES
rolling the rear wheels on to a pieceof At times,the front surfaces of your refrig-
3.Remove and discard cantilever shelf plywood or other shim material, erator cabinet may be warm to the touch.
packing clips located just above each This isa normalfunction ofyour refrigerator.
shelf where it hooks onto the frame. To ELECTRICAL CONNECTION This 'feature prevents moisturefrom con-
removea clip,wiggle sidewaysand pull AND GROUNDING densing on theoutside of your refrigerator
during humid weather. This condition may
straight out. This applianceis designed to operateon a benoticeable when you first startyour refrig-
nominal 115 volt,15amp.,60 cycleline.
Ill[II_at_, during hot weather, and excessiveor
There should be a separate, grounded cir-lengthy door openings.
cult,servingthis appliance only. DO NOT
use an extension cord.
co,oREFRIGERATOR
WITH :3- PRONG
=o,ooo. COMPARTMENT
4. Selec_alocation for your new refrigera- _)FEATUP,_.S
toraway from any heat sources.Allow a _ _ T(_
free flow of air through the front base To maintain the natural flavor, moisture
Igrille,and nutrition of fresh foods, we recommend
5. Your model should not be installed that all dishes,trays,and containers of food
where the temperature will go below _be covered.
55°F because it will not run frequently SHELVES
enough to maintain proper temperature GROUNOINGTYPE
WALLRECEPTACLE ADJUSTABLE CANTILEVER SHELVES
in the freezer. "LOCAtiONOFP*O_SONrowE*COtOcan be positioned to suit your special needs.
PLUG MAy 6E OIFFERENTON YOUR MODEL
6. For easeof installation, you shouldleave T.*NS.OwNHE,E. TO remove a shelf, lift the rear straight up a
a space of about one-half inch betweenThis appliance is equipped with a three- fractionof an inch and pull straight out.To
your refrigerator and adjacent walls or pronged grounding plug for your protectionlock the shelfinto another position, tilt shelf
cabinets, against possible electrical shock hazards. It with the front up. Insert hooks into desired
frame openings and let the shelf settle into
must be plugged into a grounding recepta- place.
IMPORTANT LEVEUNG cle.Where a standardtwo prong wall recep-_]I
INFORMATION tacle is encountered, itis the personalre-
sponsibility and obligation of the customer
To enhance its appearance and maintain to have it replaced with a properlygrounded
efficient performance, your refrigerator three-prong wall receptacle. DO NOT, under
should be level. If door alignment or leveling any circumstances, cut or remove the third
is necessary, remove the base grille by (ground) prong from the power cord.
grasping at both ends and pulling straight DO NOT use an adapter plug.
out. Adjust the front wheels as shown. All U.L.listedrefrigeratorsand freezersare DELl TRAY
TURNCLOCKWISETO equipped with this type plug. This tray slides out for easy access to
LOWERCABINETCORNER foodsstoredwithin. The tray can be usedfor
__ shortterm storage of lunch meats, cheeses,
-OPERATION bacon and other items you may choose.It is
completely removablefor cleaning or for use
SETTING CONTROLS elsewhere in your kitchen.
Your new refrigerator has two controls. The tray is attached to a cantilever shelf
One for regulating the temperature in the re-that can be adjusted to different levelsto suit
TORAISECABINETCORNER frigerator compartment and one for the your special needs.

VARI-COLD DRAWER AUTOMATIC DOOR CLOSERS FREEZER STORAGE DRAWER
TheVARt-COLD DRAWER is located at Both doors contain an automatic door The slide-out freezer drawer can bere-
the bottom of the compartment. The control closer which completely closes the door moved by pulling it out as faras it will go,
lever is located along the left side of the once it comes within six inches of the cabi- then lift the front edge and pull straight out.
drawer. As the controllever ismoved from net. It is important that your refrigerator be
the "Cool" setting toward the "Cold"set- reasonably levelforthe doorclosersto func- I/_ M
ting,the meat keeper temperature will get tion properly.
colder. Select the control position which
suits your needs the best. KEEP YOUR DOOR SHELVES
VARI-COLD DRAWER TIGHTLY CLOSED Removable shelves may be easily adjust-
AT ALL TIMES TO OBTAIN BEST RE- ed to another position on the door. Lift it
SULTS. straight up until it clears the retainersonthe /I\_-'=En_.s
All meats or poultry should be stored in -door linerand pull straight out. Reversethis __._____
their original store wrappings or in plastic procedurewhen replacing a shelf. _ _--
bags to reduce the evaporation of moisture \X _ Ill
from them.\_-..Jll .!i_ III _,Ecz, co.,,,,.E,,
You can storemost quality meats for _i i BOTTOM
several days. Ground meats and poultry If you noticethat the drawer is notsliding
should be used sooner, smoothly or easily, lubricate the slide rails
To remove the meat pan, pull it out un- with petroleum jelly. Apply lubrication to
til it stops.Then lift the front edge slight- points as shown. Also, make sure the bot-
lyand pullcompletely out.tomof the freezer is clean wherethe slide
railsmake contact.
FRUIT AND VEGETABLE CRISPER FRESH-SEAL COVER.
The fruit and vegetable crisper drawer
slides out for easy access to foods stored The FRESH-SEAL COVER is located on
within. It is completely removable for one of the largeadjustableshelvesonthe re- AUTOMATIC ICE MAKER,
cleaning or for use elsewhere in your kit- frigeratordoor. ICE AND WATER DISPENSERS
chen. The crisper cover also serves as a The FRESH-SEAL COVER seals the shelf
refrigerator storage shelf. To remove the from surroundingairand providesshortterm HOW THEY WORK
cover for cleaning, lift the front edge and storage of fresh foods. Keep the lid tightly Water flows from the household supply
pull straight out.Hand wash only. closed to insure freshnessof your foods, through a double water valve (1)to the water
Keepyour crispertightly closed to insure reservoir(2) and to the automatic ice maker
crispnessand freshness.Storing leafy vege- EASY CLEAN (3). Chilled water from thereservoir flows
tables, such as celery 'and lettucein plastic DOOR SHELF FRONTS through tubing in door (4) and is dispensed
bags reduces theevaporation of moisture Doorshelf frontscan be removed foreasy when the padded lever in thefountain (5) is
from them.cleaning of the door liner and shelf fronts, pressed.Theautomatic ice maker ejects ice
WINE CELLAR Lift the shelf frontstraightup untilit clearscubes into the storagebin (6)wherea motor-
the retainers onthe door liner and pull powered auger dispenses them into a glass
To use your wine cellar racks, pivot each straight out.Reverse this procedure when when the padded lever (7) is pressed.The
rack out until it locks into place. Thenslidereplacing the door shelf front,light switch (8) turns fountainlight on or off.
the bottles in as shown,i__(__ _ _ '_!I!1
FREEZER
DOOR COMPARTMENT
FEATURES FEATURES
EGG STORAGE To maintain the natural flavor,moisture
Your model has an egg tray that fits and nutritionoffresh foods, we recommend
securely on a door shelf. This tray can be that allfoods be wrapped or sealedproperly.
removed and carried to your working area. SHELVES
PACKAGE DIVIDER To remove a freezer shelf, lift the shelf
straight up, tilt sideways and pull straight
The package divider is located on one out. When replacinga freezer shelf,reverse
of the refrigerator door shelves.It provides
upright storage for packages or bottles, the removal procedure.
The divider can be adjusted to any posi- I_"_.,_I AUTOMATIC ICE MAKER
tion on the shelf by sliding sideways. _The water inlet tubing assembly requirea
to complete the water connection to the
MAGNETIC DOOR GASKETS water valveislocated inthe crisperdrawer in
Door gasketsbre magnetized to insurean a bag.
air tight seal all around. These gaskets cling Connect theice makerto the water supply
to the cabinet front, once the doors are asinstructedin the separateinstructions,fur-
closed to within their magnetic range, nished with the refrigerator.

The automatic ice maker will furnish a isleavinga film residue in the tray. Wipe the To stop dispensing ice, releasepressurejust
continualsupply of ice cubes. After installa-tray pockets with a cloth soaked in vinegar enough to stop the dispenser motor and
tion, it may take 8 to 24 hours for the ice until the film is cleaned out. If the residue leave the glass in place to hold the door
maker to furnish any cubes.The first two or seems heavy, cleanthetray each time you open untilice stops falling:With a little prac-
three batches of ice cubes may be under-cleanyour refrigerator, tice, you will learn to anticipate when to re-
sized and irregular due to air in the water lease pressureto prevent an unwanted dis-
supply line.They may also bediscolored due In order to remove the tray for cleaning, pense of ice, which occurs each one and one
tojmpurities from the new water supplytub-do the following: half seconds.
ing. Therefore, allcubes from the first two or .1. Remove the panel in front of theice
three harvests should be discarded,maker by pulling the bottomright hand
Ice cubes that havebeen in the ice dispen-corner of the panel forward.Then pull
ser for a long time may shrink and possibly the top right hand corner forward and
sticktogether. Also, they may acquirea food slide the panelout of the sockets on the
taste or odor. To avoid these conditions, oc-left side of the freezer liner.
casionallyempty dispenserand replenishthe _-
entire supply of ice cubes.An unlevel
refrigeratormay result in non.uniform cubes
which could stick together.
Certain sounds may accompany the vari-__.*er
ous operating cycles of the ice maker. The
motor may have a slight hum--a dull thump -- After installation, it maytake 2 to 3 daysto
may be heard as cubes are ejectad--the_fill the ice storage bin with cubes.
cubes will rattle as they fall into an empty
storage bin--water valve may click or 2.Check to see if the tray is level.REMOVING 1_REPLACING
"buzz"occasionally.All of these sounds are
normal and are no cause for alarm. 3.If the tray isnot level, the ice maker isin THE ICE DISPENSER BIN
the dumping cycle. Wait untilthe tray is Lift the front of the icestorage binand pull
level before proceeding.(About 8 min-it straight out. Wash the bin occasionally in
STARTING OR STOPPING utes.) mild soap and lukewarm water. To replace
YOUR ICE MAKER the bin, push it allthe way back untilthe bet-
Your automaticice maker is located near 4. If the tray is level move the wire arm to tom of the bin is behind the raised edge at
the top of the freezer compartment behind the "OFF"position.(1) the front of the shelf its rests upon. Make
the panel above the ice dispenser bin.Lift _._-ncsurethe tabs,at the back of the bin, that turn
the front of the ice dispenser bin and pull it CLIP ,_k_O ICECUBETRAY the spiral auger are positioned between the
straight out. _ ___._._f.__._ " --prongs from the auger motor.
ICE DISPENSER NOT WORKING
If your ice dispenser isnot used often, ice
clumps can form in the storage bin and
cause amalfunction of the ice dispenser.If
tthis happens, remove the storage bin and
__ __discardallicecubesthatarestucktogether.
Remove any clumps that are stuck in the
chute at the front of the bin, the ice chute in
thefreezer door and those blocking the dis-
Lowerthe wire arm from the OFF position. 5. Check the cube pockets to determine penser opening.
The wire arm stops the mechanism when whether the water is frozen,if not, be Never add ice cubesfrom another
the storage bin is full and restarts it after ice sureyou keep the tray levelso as not to m=u,rceto your km diqxmmw storage bin.
cubes have been dispensed. You can use spill the water while removing the tray. _could ¢aulm an ice jam in your dis-
the wirearm to stop production of icecubes pemmr. If this happens,remove thestorage
at any time.Pullthe armforward slightlyand 6.Remove the plastic retaining clip by bin and discard all ice cubes. Remove any
raise it onto the OFF notch, sliding in the direction indicated on the clumps that are stuck in the chute at the
"_'.,clip.(2) front of the bin, the ice chute in the freezer
i _ ' 7. Pullthe tray straight out off of the shaft,door and those blocking the dispenseropen.
.___(3) ing.
OPERATING YOUR WATER
• 8. To reinstallthe tray,reversethe removal DISPENSER
.._-_procedure. To dispense water, press a container
9. Reinstallthe panel that goes in front of against the padded lever at theleft side of
_r""WlRE ARM the ice maker by reversingthe removal the fountain. To stop the water flow, release
procedure,pressure. To minimize splashing,hold the
container as high as possible.
If you operateyour refrigeratorbeforetheShould it benecessaryto replacethetray
water connection ismade, keep the wire arm forsomereason,replacements can be order-
in the OFF position.After the water connec-ed from Master CareInc. Write to Master
tion is made, removethe wirearm from theCareInc., P.O. Box 2845, Bloomington, III.
OFF position. 6.1701or call toll-free: 800-447-8371 (Illinois
Ifyou plan to turn the icemakeroff for an residents call 800-322-6302);
extended period oftime,it is bestto shut off
the water supply. OPERATING YOURICE
DISPENSER
REMOVING. ICE CUBE TRAY Prevent ice cubes from missing your glass
If ice cubes seem to be sticking inthe tray, by holding it as high as possible (just below
it ispossiblethat the water in your area con- the ice chute). Press the glass against the
tains an abundance of mineraldeposits and padded lever at the rightside ofthe fountain. Continued

2.
When you first operate your dispenseror 5.Let hot dishes cool before putting into sL,_R_LS
after reconnectingwater to your refrigerator, refrigeratoror freezer. __, ._ _ ....
air will escape fromthe dispenserfor a few I_ili_minutes beforewater begins to flow. Draw 6.Cover liquids, if uncovered, the unit ..,_.
10 glasses of water and empty them in the must work longer.""
kitchen sink.This will insurecomplete filling , ._'_"_'_
m
of the reservoirwith fresh water. 7. Clean refrigerator condenser coils at
least twice a year.
SPILL TRAY
Donotdiscard waterinto the grille at theCLEANINGbottom of thefountain.This is a spill area,
not a drain. Normal spillswill be evaporated ,A,
inthe recessed area belowthe spill shelfs_
grille.Excessive spills should be removed DISCONNECTTHE POWER To replace base grille, line up the spring
with an absorbent sponge or cloth. The spill CORD BEFORE CLEANING clips on the base grille with the square open-
area should be cleaned occasionally, ings in the cabinet and tap each end in until
Your refrigerator can be rolled out for grille locks in place.
FOUNTAIN LIGHT cleaning.Turnthe levelers,at each front cor-
ner of the cabinet, COUNTERCLOCKWISE
The push button light switch is located untiltheyturn freely.Then pullthe cabinet CONDENSER
behind theRefreshmentCenter panelat the straight out. We recommend that you turnThecondenser shouldbe cleanedat least
top and onthe left side of your fountain. For the water supply off before moving thetwiceayear. If you move your refrigerator
replacement,use a 120V, 7 watt bulb. cabinet,out f0.rcleaning,thecondensercanbe clean-
After cleaning behind your refrigerator, ed through therear access opening. Thor-
REPLACING pushitbackand turn the levelers CLOCK- oughlyvacuum dirt and lint fromthe open
WISE until they touch the floor and lock the end of the condenser.
LIGHTBULBS cabinet in place. R[o_R AtC_GESS
o,.°ONN,CT..,.ow. ou =o, li
CORD BEFORE REPLACING Use mildsoapand water.DO NOT use I_ _
LIGHT BULBS scouring powders. Rinsewith clear water.
Use glasswax or a similar product for pro-
To replace the light in theupper rear re- tection of the finish.
frigerator compartment,grasp the light
shield at the bottomends and pullbottom Your door gaskets are vinyl.They may
out untilthe shield pulls free of theretainer be cleaned withabaking soda solution, o_._
lugs. Replacewith a 60 watt standard base, soap and water or with a mild scouring
appliance type bulb.To replace light shield, powder.=sE ,,
hookit over the upperretainer lugs and INSIDE
press inat thebottomuntilthe shieldsnaps If you do not pullthe cabinet out,the con-
into place. Usebakingsoda and warm water only on denser can becleaned through the left front
interior compartments and interior door base opening. Grasp thebasegrilleat both
The upper freezer light is replaced by re- liners.DONOT use liquid detergents, abra- ends and pull straight out.Reach through
moving the ice storagebin and reaching be- sive or solvent cleaners on interior parts, the base opening with your vacuum cleaner
hind the bottomof the light shield. Replace Rinse with clear water. Do not wash interior attachment to.clean the front and open end
with a 40 watt standardbase, appliancetype parts in your dishwasher, of the condenser.After cleaning, replace
bulb. Glass cantilever shelves can be removed base grille.
To replacethe lower freezerlight, slidethe and completely submerged in warm water.
plastic light shield to theleft until it is free. ALLOW GLASS TO WARM TO ROOM
Replacewitha25watt standardbase,appli- TEMPERATURE BEFOREIMMERSING. SAFETY TIPS
ance type bulb.Replace the light shield.
DEFROST WATER PAN 1.In caseof power failure, minimizedoor
openings. If power failureis oflong
Defrost water drains into a shallow pan duration, protect frozen food byplacing
beneath the cabinet and evaporates. During blocks of dryiceon topof the packages,
periods of highhumidity, water could remainor check withalocal frozenfoodslocker
in thepan.This pan should be cleaned once plant about temporary storage.
a month with a solutionof strongsoap and
water. 2. Use the three-pronged plug only with a
grounding receptacle to provide protec-
tion fromelectricalshock. DO NOT use
an adapter plug.
ENERGYTIPS IL 3.Unplugrefrigerator before cleaning con-
denser or replacing light bulb.
FOR EFFICIENT ENERGY USE: 4.Remove the doors fromout-of-use re-
1.Be sure refrigerator is level and ventila- frigerator.Prevent a child from becom-
tion around front grille is not blocked. _ing accidentally trapped andsuf-
focating.
2. Check door seals occsionallyfor leak-
age. Check at various places, top, bot-
tom, sides.GOINGON
3. Check thetemperature, avoid unneces-
sarycold settings.To remove defrost pan, grasp base grilleVACATION
at both ends and pull it straight out. Lift front
4. Keep freezer fullto near capacity, less of defrost pan and pull straight out.TOre- If you will begonefor a month or less,
cold air is lost during door openings,place,reverse procedureas shown, leave thecontrol knob at its usual setting.

During longer absences,(a) remove all MOISTURE ON REFRIGERATOR RUNS
food, (b) disconnectfrom electricaloutlet,(c) OUTSIDE SURFACE TOO LONG
clean the refrigerator thoroughly, including •Hot,humid weather increasescondense- •Under normal conditions, due to larger •
defrost pan, (d) leave doors open to prevent tion. When humidity drops, condensation size and colder temperatures, modern re-
odor formation, disappears, frigeratorsruna greater percentage of the
ODOR IN CABINET time.
•Prolonged or frequent door openings.
BEFORE YOU CALL • Defrost pan needs cleaning. •Condenser needs cleaning.
FORSERVICE• Food left uncovered. • Poor air circulationaround condenser.
AUTOMATIC ICE MAKER FOODS DRY OUT
Problems? Save yourself the nuisance of NOT OPERATING (FRESH OR FROZEN)
unnecessaryservice calls;check these first: •Stop arm in OFF position.• Packagesnot wrapped or sealed properly
NOISY OPERATION • Water supply turned off. •Crispernot tightly closed
•Fan noise perfectly normal in no frost •Water pressuretoo low.
refrigerators.You may not be usedto this IF YOU REQUIRE SERVICE AND
if previous model was manual defrost. •Freezertoo warm. HAVE CHECKED THIS CHECK LIST
•Cabinet not level ICE DISPENSER 1. Contact yourAdmiraldealeror the repair
•Weak floor NOT OPERATING service he recommends.
RED GLOW VISIBLE INFREEZER • Ice jam in the dispenser 2. Followprocedure outlinedunder"To se-
• Reflection of defrost mechanism during •Ice maker not operating curewarranty service"in the warranty.
normal defrost cycle. WATER DISPENSER 3. "Contactthe manufacturerat the national
SIZZLING SOUND IN FREEZER NOT OPERATING headquarters if a satisfactorysolution is
not reached in the first two steps.Write
•Normal sound caused by defrost water •Water supply turned off to Master Care, Inc., Manager, Consum-
dripping on defrost mechanism •Water pressuretoo low er RelationsDepartment,P.O. Box2845,
ICE CUBES EVAPORATE Bloomington, Illinois 61701or call toll-
•Cold air moving over ice cubes causes ICE DISPENSER MOTOR RUNS free: 800-447-8371(Illinoisresidents call
shrinkage. RUT DOES NOT DISPENSE ICE 800-322-6302). Include model and serial
•The freezer shelf, that the icebin sits numbers ofyour appliance, purchase
ICE CUBES STICKING IN TRAY upon, may not be properly secured be- date,dealer's name and address, and
hind front shelf retainerson linerwalls, the name and address of the last com-
eTrays may be coated with residue film pany that serviced your appliance.
from minerals in the water. Wipe trays
with vinegar-soaked cloth until clean. If WATER ON FLOOR 4. If you are not satisfied with the service
residueis heavy, clean trays each time re- UNDER CABINET provided,you may write to MACAP, the
Major Appliance Consumer Action Pan-
frigerator iscleaned. •Defrost pan missingor not positionedcor- el, at 20 N.Wacker Dr., Chicago, Illinois
rectly 60606. MACAP, asa groupofconsumer
WARM AIR FROM •Water connection loose on water valve experts, receives comments and corn-
CABINET BOTTOM plaints from appliance owners, studies
•Normalair flow for condenser circulation. REFRIGERATOR WON'T RUN industry practices, and advises industry
of ways to improve its serviceto custo-
FRONT CABINET SURFACE • Temperature control turned to OFF.mere. Give them all the necessaryinfor-
WARM TO TOUCH • Powercord not plugged in.mation on your applianceas inthe previ-
•Special design to prevent condensation • No power at electrical outlet, ous step, includingthe brand name and
a clear description of theproblem and
during periodsofhigh humidity. •Housefuse blown,the service required.
Admiral, whose policy is one of continuous product development,reservesthe right to change specificationswithout notice.
Admiral Schaumbur 9, Illinois 60196
Printed in U. S.A. Home Appliances 103759-1
Table of contents
Other Admiral Refrigerator manuals
