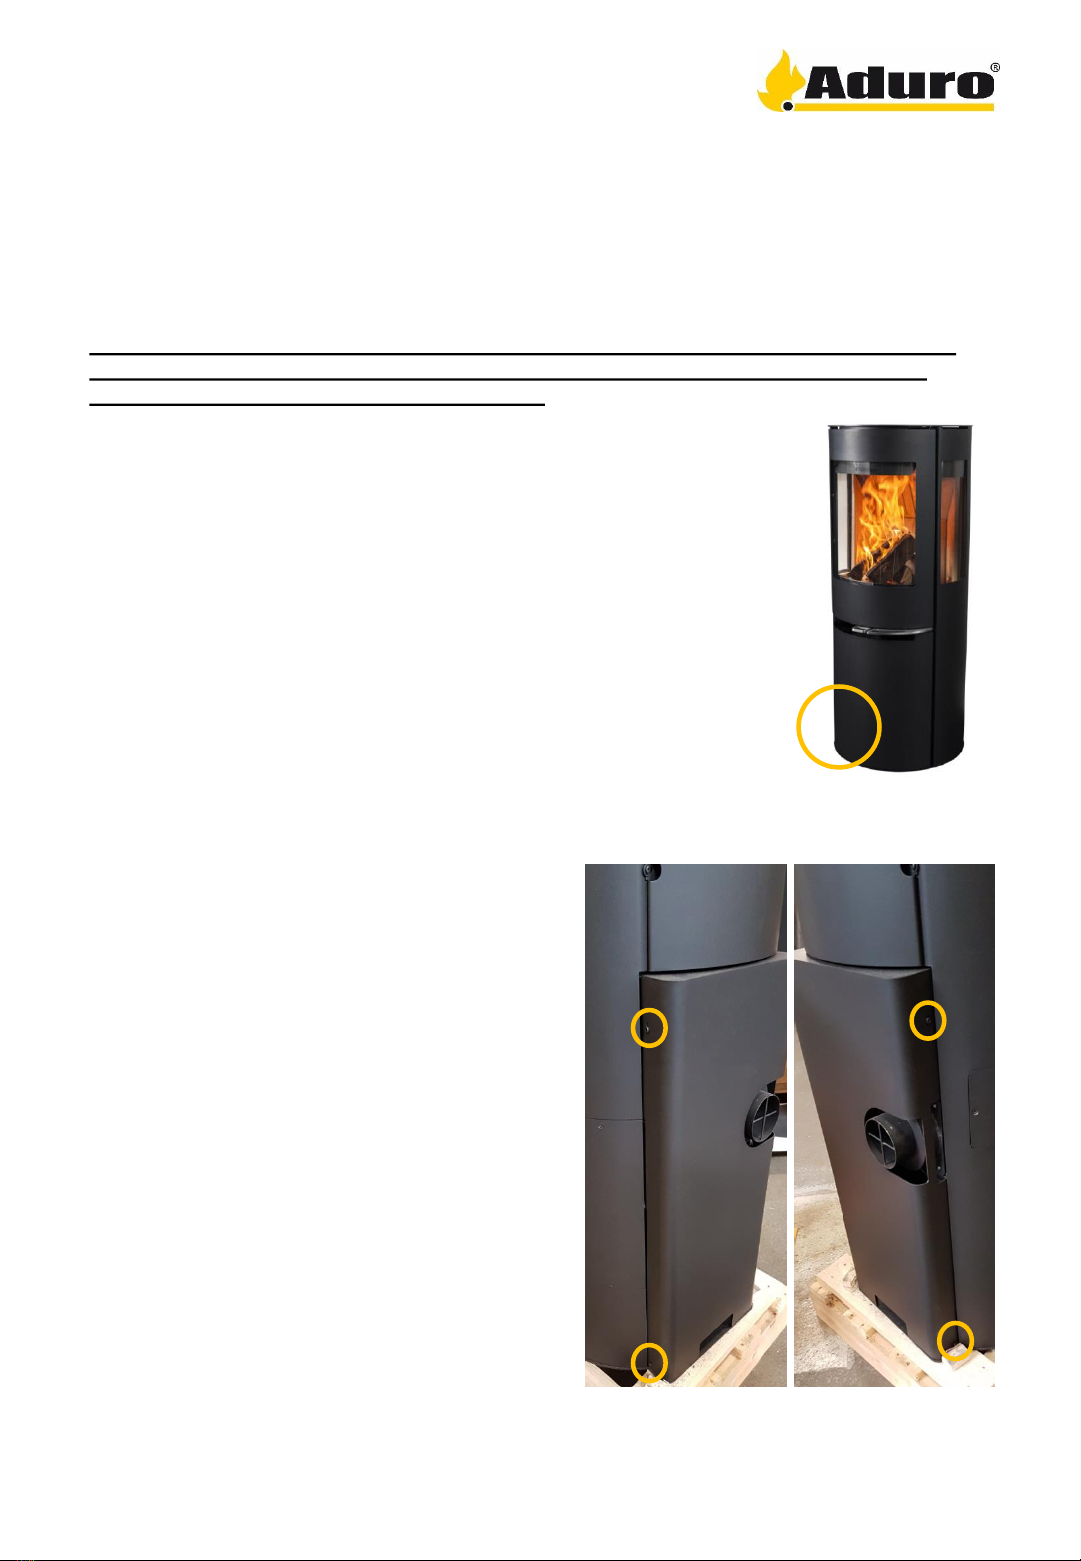
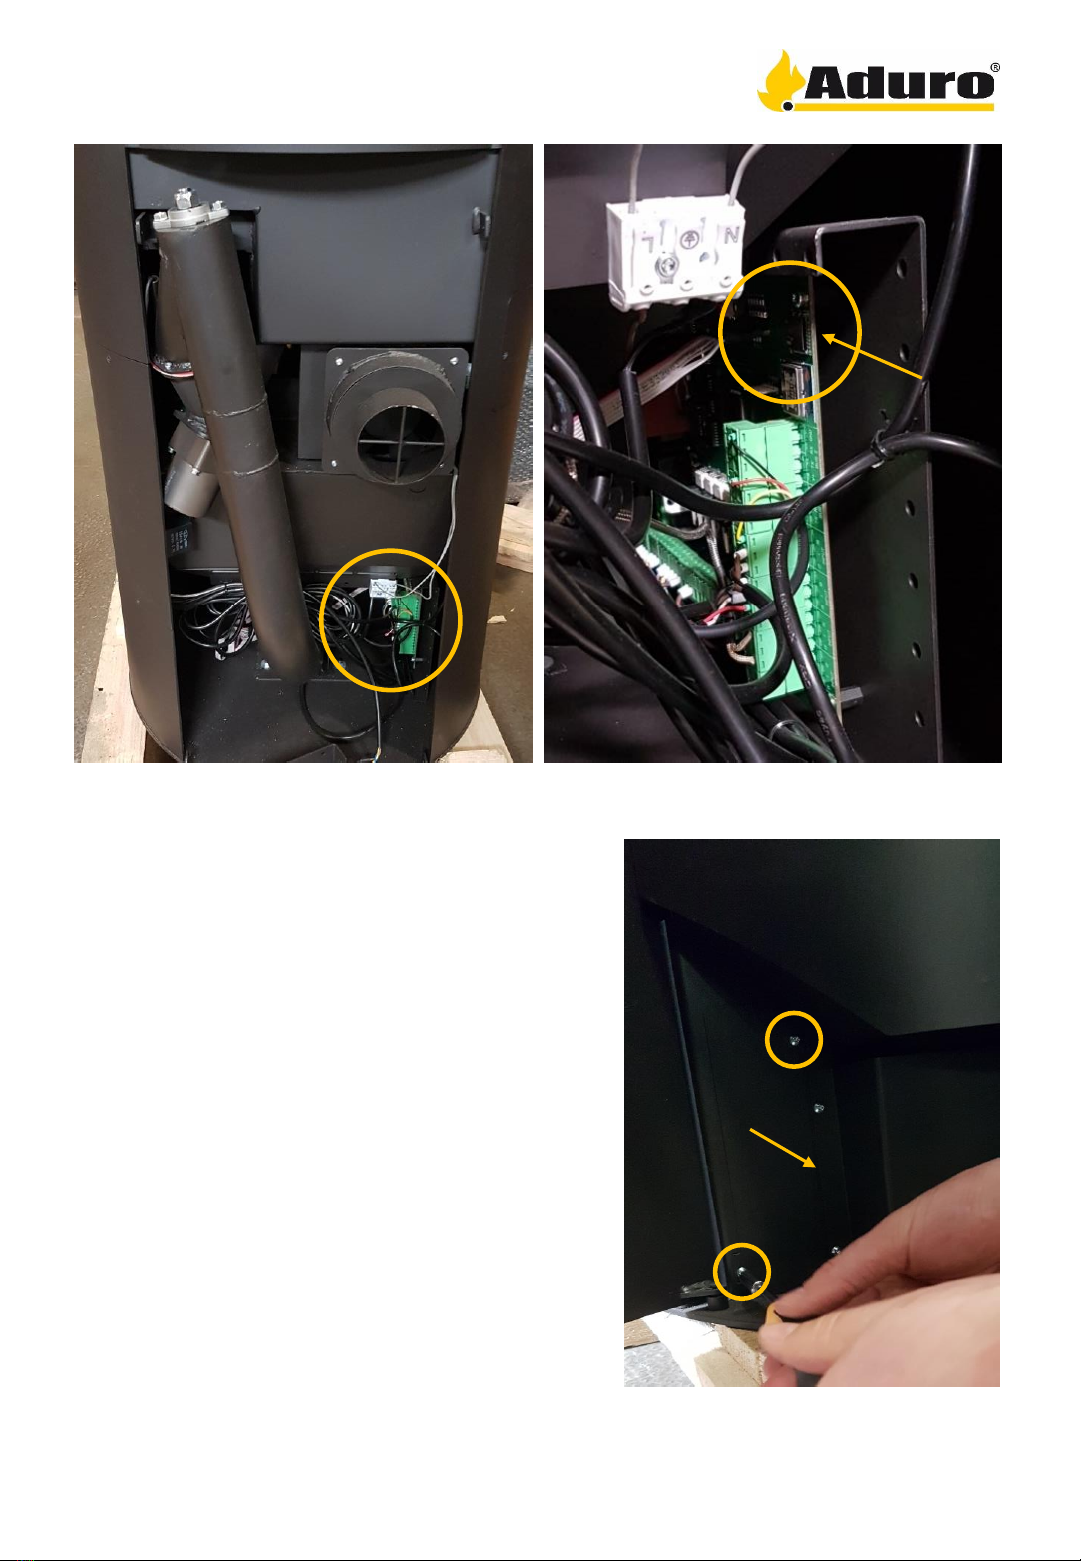
ADURO H1 Technical manual

adurofire.com ∙ tips.adurofire.com ∙ aduroshop.com ∙ [email protected]
ADURO H1- SYSTEM UPDATES VIA SD CARDS
In this guide we will illustrate how to access the control board to update the stove’s
system. Normal updates are automatically via internet and do not require a technical
intervention.
IMPORTANT: ONLY PERFORM UPDATES VIA SD CARD IF INSTRUCTED DIRECTLY BY
THE COMPANY. ALWAYS UNPLUG THE STOVE FROM THE POWER SUPPLY WHEN
PERFORMING MANTAINANCE OPERATIONS.
HOW TO ACCESS THE CONTROL BOARD
Important: The control board is located in the bottom left
part of the stove. You can access from the front or the
back of the stove. Use great caution when handling the
board as any damage (due to impact, liquid, moisture, dirt
or other) might have serious consequences.
You will need:
A dry cloth.
A screwdriver with Torx bits.
A small clipper (or wire cutter)
A MICRO SD card.
BACK ACCESS Aduro H1 –where to find the
control board
adurofire.com ∙ tips.adurofire.com ∙ aduroshop.com ∙ [email protected]
Screws holding the back panel
Accessing from the back is the easiest way to
reach the MICRO SD card slot on the control
board. To do so:
1- Clean the back of the stove with a dry cloth
to remove all dust and dirrt that might
otherwise come in contact with the board.
2 - Carefully remove the 4 tork screws on the
left and right side of the panel.
3–it might by easier to reach the slot by
clipping the fastener holding the cables on the
back of the board.
Now you can access the SD CARD slot on the
control board.

adurofire.com ∙ tips.adurofire.com ∙ aduroshop.com ∙ [email protected]adurofire.com ∙ tips.adurofire.com ∙ aduroshop.com ∙ [email protected]
MICRO SD SLOT
FRONT ACCESS
IMPORTANT:In some earlier models is not
possible to remove the board from the front
without first accessing the back. To do so:
1- Open the front bottor door cover of the
stove.
2 - Carefully remove the 2 tork screws and
slide out the panel.
3–If the panel does not slide out
completely, it is recommended to use the
back access to update the stove.
Now you can access the SD CARD slot on
the control board.
Control board
Remove the screws to slide out the panel

adurofire.com ∙ tips.adurofire.com ∙ aduroshop.com ∙ [email protected]
HOW TO UPLOAD THE NEW UPDATE
A MICRO SD card
adurofire.com ∙ tips.adurofire.com ∙ aduroshop.com ∙ [email protected]
File names
IMPORTANT: FORMAT THE SD CARD
BEFORE USE. The card must only contain
the update files.
Once you have access to the slot:
- Insert the MICRO SD card in the slot on the
control board.
- Connect the stove to the electrical power,
turn on the stove.
- Wait 5 minutes, the stove detect the new
software and will update automatically
- Turn off the stove, unplug the stove.
- Remove the MICRO SD card from the slot.
- Plug the stove.
The stove is now updated.

ADURO H1- UPDATE DEL SISTEMA VIA MICRO SD CARD
In this guide we will illustrate how to access the control board to update the stove’s
system. Normal updates are automatically via internet and do not require a technical
intervention.
IMPORTANT: ONLY PERFORM UPDATES VIA SD CARD IF INSTRUCTED DIRECTLY BY
THE COMPANY. ALWAYS UNPLUG THE STOVE FROM THE POWER SUPPLY WHEN
PERFORMING MANTAINANCE OPERATIONS.
HOW TO ACCESS THE CONTROL BOARD
Important: The control board is located in the bottom left
part of the stove. You can access from the front or the
back of the stove. Use great caution when handling the
board as any damage (due to impact, liquid, moisture, dirt
or other) might have serious consequences.
You will need:
A dry cloth.
A screwdriver with Torx bits.
A small clipper (or wire cutter)
A MICRO SD card.
BACK ACCESS Aduro H1 –where to find the
control board
Screws holding the back panel
Accessing from the back is the easiest way to
reach the MICRO SD card slot on the control
board. To do so:
1- Clean the back of the stove with a dry cloth
to remove all dust and dirrt that might
otherwise come in contact with the board.
2 - Carefully remove the 4 tork screws on the
left and right side of the panel.
3–it might by easier to reach the slot by
clipping the fastener holding the cables on the
back of the board.
Now you can access the SD CARD slot on the
control board.
aduro.it ∙ aduroshop.com ∙ [email protected]

MICRO SD SLOT
FRONT ACCESS
IMPORTANT:In some earlier models is not
possible to remove the board from the front
without first accessing the back. To do so:
1- Open the front bottor door cover of the
stove.
2 - Carefully remove the 2 tork screws and
slide out the panel.
3–If the panel does not slide out
completely, it is recommended to use the
back access to update the stove.
Now you can access the SD CARD slot on
the control board.
Control board
Remove the screws to slide out the panel
aduro.it ∙ aduroshop.com ∙ [email protected]

HOW TO UPLOAD THE NEW UPDATE
A MICRO SD card
File names
IMPORTANT: FORMAT THE SD CARD
BEFORE USE. The card must only contain
the update files.
Once you have access to the slot:
- Insert the MICRO SD card in the slot on the
control board.
- Connect the stove to the electrical power,
turn on the stove.
- Wait 5 minutes, the stove detect the new
software and will update automatically
- Turn off the stove, unplug the stove.
- Remove the MICRO SD card from the slot.
- Plug the stove.
The stove is now updated.
aduro.it ∙ aduroshop.com ∙ [email protected]

MANUTENZIONE
La Aduro H1 è progettata per richiedere un manutenzione limitata rispetto a prodotti similari.
Per maggiori informazioni leggere il manuale d’uso della stufa.
TROUBLESHOOTING
Importante: Consultare il manuale d’uso della stufa per una lista degli allarmi frequenti e
per istruzioni come reimpostare la stufa dopo un allarme.
A seguire una lista delle problematiche piú frequenti.
Alarm type/malfunction Diagnostic/Cause Solution
Alarm: no more pellet •La stufa ha esaurito i pellet. •Ricaricare il serbatoio con
pellet nuovo.
Alarm: no more pellet (falso
positivo)
La combustione viene interrotta
dopo 60 minuti.
•La stufa non funziona
correttamente a causa del
tiraggio debole o
insufficiente.
•La stufa non riesce a
raggiungere la temperaura
prevista per il livello di
potenza selezionato.
• Verificare l’installazione e il
tiraggio.
•Posizionare il regolatore
d’aria sulla posizione 5
come illustrato in
COMBUSTIONE
PELLET/SEZIONE V di
questa guida.
Alarm: cannot light up
Non si accende dopo 3 tenativi. •Possibile mancanza di
tiraggio adeguato • Verificare l’installazione e il
tiraggio.
Vetro molto sporco o annerito. •Tiraggio insufficiente
•La funzione di pulizia vetri é
disattivata.
• Verificare l’installazione e il
tiraggio.
•Posizionare il regolatore
d’aria sulla da 2 a 4 quando
si brucia legna.
La combustione a pellet é
disattivata dopo aver caricato
la legna.
•La porta non é chiusa
correttamente
•La porta é rimasta aperta
per piú di 3 minuti.
•
Controllare il meccanismo di
chiusura ed il sensore.
•La porta deve essere
richiusa entro 3 minuti.
La combustione a pellet é
disattivata dopo aver bruciato
la legna.
•La temperatura dei fumi é
superiore ai 50CO•If the stove is on the pellet
combustion will resume
once the smoke
temperature is below 50CO
App non si connette alla stufa •Connection not available •Check wifi connection
•Reboot app and connect
again
Il pellet si accumula nel
bruciatore •Possibile mancanza di
tiraggio adeguato
•Cover Bruciatore non
correttamente allineato
•
Verificare l’installazione e
Other manuals for H1
5
Table of contents
Other ADURO Pellet Stove manuals
Popular Pellet Stove manuals by other brands

Ashley
Ashley Classic Cast APC4000 owner's manual

Fröling
Fröling S1 Turbo Hydraulic schematics

Breckwell
Breckwell ECO-AIRE SP8000 Owner's operation and instruction manual

abc
abc 23kW SUPER VULCANO user manual

Napoleon
Napoleon Auburn NPS40 Installation and operating instruction

Petric
Petric PP27A-G3 Instructions for use, maintenance and installation

USSC
USSC Ashley AP5660 Installation and operating manual

Harman
Harman P68 Installation & operating manual

MCZ
MCZ SUITE Operation manual

Lopi
Lopi Horizontal Or Vertical Vent Freestanding Stove Yankee Pellet... user manual

Enviro
Enviro WINDSOR owner's manual

Harman
Harman PELLET P61A Installation & operating manual