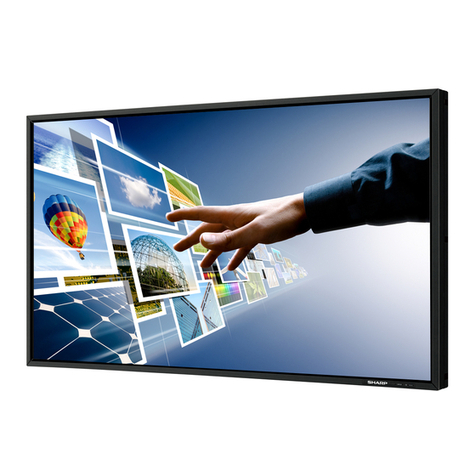
Advan AGM15TK User manual

AGM15TK
1
FCC Compliance Statement
This equipment has been tested and found to comply with the limits for a Class B digital
device, pursuant to Part 15 of the FCC Rules. These limits are designed to provide reasonable
protection against radio frequency interference in a residential installation. This equipment
generates, uses, and can radiate radio frequency energy. If not installed and used in accordance
with the instructions, it may cause interference to radio communications. However, there is
no guarantee that interference will not occur in a particular installation. If this equipment
does cause interference to radio or television reception (this can be determined by turning
this equipment off and on), the user is encouraged to try to correct the interference by one or
more of the following measures:
·Reorient or relocate the receiving antenna.
·Increase the separation between this equipment and the receiver.
·Connect this equipment to an outlet on a circuit different from which the
receiver is connected to.
·Consult the dealer or an experienced radio/TV technician for help.
Caution:
To comply with the limits for an FCC Class B computing device, always use the shielded
signal cord and shielded power cord supplied with this unit.
Caution to the user:
The Federal Communications Commission warns the user that changes or modifications to
the unit not expressly approved by the party responsible for compliance could void the user’s
authority to operate the equipment.
Notice of Compliance Canadian
Interference-causing Equipment Regulations
DOC Compliance Notice:
This digital apparatus does not exceed the Class B limits for radio noise emissions from
digital apparatus set out in the Radio Interference Regulations of the Canadian Department of
Communications.
DOC Avis de Conformation
Le présent appareil numérique n’emet pas de bruits radioélectriques dépassant les limites
applicable aux appareils numériques de la class B prescrites dan le Réglement sur le brouillage
radioélectriques édicté par le ministére des Communications du Canada.
Trademark
IBM,PC,PS/2,PS/V,PersonalSystem/2,andXGAareregisteredtrademarksofInternationalBusinessMachinesCorp.
Windows and Windows NT are either registered trademarks or trademarks of Microsoft Corporation in the United
States and other countries.
Apple Macintosh is a registered trademark of Apple Computer, Inc.
Quadra is a trademark of Apple Computer, Inc.
UNIXisaregisteredtrademarkintheUnitedStatesandothercountries,licensedexclusivelythroughX/OpenCompany
Limited.
ENERGYSTAR isaU.S.registeredmark.
©1999ADVANINT’L COPR.

2
User’s Guide
TCO95NOTICE
This product is delivered with a shielded cord set. In order to complete with TCO requirements
for low electromagnetic emission, this cord set must be connected to a grounded outlet. If
the cord set is replaced by another cord set it is not guarantee that the product still complies
with TCO requirements.

AGM15TK
3
QuickSetup(IBM/IBMCompatibleunderWindows95/98)
PleaseReadCarefullyWhenSetting Up YourNewMonitor
AGM15TK Monitor Screen Adjustment and Resolution Setting Procedure for IBM/IBM
Compatible Computers with Windows based OS system.
Before adjusting the monitor, all the necessary drivers should be installed to your System
and resolution has to be set to manufacturer’s recommended preset of 1024 x 768 @ 60Hz,
70Hz, 72Hz, 75 Hz or 85Hz.
To check the resolution, press the “SELECTUP”buttonon the monitor andthe“Information”
willdisplayunderthe OSD. Information will haveResolution,Horizontal and Vertical (Refresh
rate) frequency information.
To change the resolution to its factory recommended preset.
1. On a Windows 95 or 98, press right button on a Mouse to execute the Pop-up menu.
2. Press “Properties” to execute the “Display Properties”
3. Press “Setting” and change the resolution to 1024 x 768.
4. Press “Apply or OK” to select and press “OK” to keep the selected resolution.
5. Go back to “Display Properties” - “Setting” - “Advanced properties” - “Adapter”
6. On Adapter property, change the refresh rate to 60Hz, 70Hz, 72Hz, 75 Hz or 85Hz. If you
don’t have these options, choose “Adapter Default”. (60Hz recommended)
Screen Adjustment Procedure
1. Press the “AUTO” button.
2. If you still don’t have a clear display monitor, please refer to step 3.
3. Press “Start” and “Shut Down” in Windows 95/98 - It will display moire on screen
4. Press “MENU” then “DOWN” button on the monitor and highlight “Clock” and use “+”
or “-” to reduce or get rid of the vertical display noise (Jail bars).
5. Oncethe vertical displaynoise disappears, press “MENU”then “DOWN” again tohighlight
the “Clock-PHASE” and use “+” or “-” to reduce or get rid of the horizontal display noise
(Snowy effect).

4
User’s Guide
QuickSetup(IBM/IBM Compatible under WindowsNT4.0)
PleaseRead CarefullyWhen SettingUp YourNewMonitor
AGM15TK Monitor Screen Adjustment and Resolution Setting Procedure for IBM/IBM
Compatible Computers with Windows based OS system.
Before adjusting the monitor, all the necessary drivers should be installed to your System
and resolution has to be set to manufacture’s recommended preset of 1024 x 768 @ 60Hz,
70Hz, 72Hz, 75Hz or 85Hz.
To check the resolution, press the “SELECTUP”buttonon the monitor andthe“Information”
willdisplayunderthe OSD. Information will haveResolution,Horizontal and Vertical (Refresh
rate) frequency information.
To change the resolution to its factory recommended preset.
1. On a Windows NT 4.0, press right button on a Mouse to execute the Pop-up menu.
2. Press “Properties” to execute the “Display Properties”
3. Press “Setting” and change the resolution to 1024 x 768.
4. Change “RefreshFrequency” to 60Hz, 70Hz, 72Hz, 75Hz or 85Hz. (60Hz recommended)
Screen Adjustment Procedure
1. Press the “AUTO” button.
2. If you still don’t have a clear display monitor, please refer to step 3.
3. Press “Start” and “Shut Down” in Windows NT 4.0 - It will display moire on screen
4. Press “MENU” then “DOWN” button on the monitor and highlight “Clock” and use “+”
or “-” to reduce or get rid of the vertical display noise (Jail bars).
5. Once thevertical display noise disappears, press “MENU”then“DOWN”again to highlight
the “Clock-PHASE” and use “+” or “-” to reduce or get rid of the horizontal display noise
(Snowy effect).

AGM15TK
5
QuickSetup(Macintosh)
PleaseReadCarefullyWhenSetting Up YourNewMonitor
1. Set your Macintosh Adapter on pages 23 and 24.
2. Push the “APPLE” icon on the upper left corn and execute Control Panel->
Monitors&Sound. Select “Thousands” for the Color Depth, Select “1024X768, 60Hz,
70Hz, 72Hz, 75Hz or 85Hz” for the Resolution. (60Hz recommended)
* On some Apple G3 systems, you may not need to use the Macintosh Adapter.
Screen Adjustment Procedure
1. Press the “AUTO” button on the monitor.

6
User’s Guide
INTRODUCTION
Congratulations on your purchasing of the AGM15TK high performance 15-inch color TFT
LCD monitor. Driven by our strong focus on customer satisfaction, ADVAN has developed a
wide range of size and unique technology. ADVAN added features are Advanced Viewing
Solution(AVS), Advanced TimingSetup (ATS), and AdvancedMountingSolution(AMS).
ADVAN designed this monitor to provides flicker-free and color images at optional
resolutions. Through this user guide, we will introduce you step-by-step all the features,
functions and technical specifications of the LCD monitor. Surely you will have a refreshing
experience working with the monitor.
FEATURES
The AGM15TK is a 15-inch TFT-LCD monitor that is intelligent, microprocessor-based and
ergonomically designed display, compatible with most analog RGB (Red, Green, Blue) display
standards, including PS/V, PS/2, Apple Macintosh Centris, Quadra, and Macintosh II family
signals. The LCD monitor is capable of displaying crisp and vibrant color graphics with VGA,
SVGA, XGA (non-interlaced), and most Macintosh compatible color video cards.
·Advanced Viewing Solution (AVS): Our sophisticated filter extends the viewing angle
of the screen image, without sacrificing contrast ratio and brightness.
·Advanced Timing Setup (ATS): A unique technology from ADVAN is the One Touch
Auto Adjustment. Pressing the Auto Adjust button on the front panel, automatically
optimizes position, phase, clock, contrast and color balance. This allows the user to
maximize the perfect screen setting in the shortest amount of time.
·Advanced Mounting Solution (AMS): ADVAN and Ergoton share their technology to
improve flat panel environment, utilizing numerous ergonomic mounting solutions to
allow creative use in conjunction to product application.
·The monitor is able to properly function even in case of upgrade video cards or software
because of the wide auto-scanning compatibility range without requiring to buy a new
monitor.
·The internal microprocessor digitally controls auto-scanning. For horizontal scan
frequencies between 24.8 KHz and 60.2 KHz, and vertical scan frequencies between
56.3 Hz and 85.1 Hz. In each frequency mode, the microprocessor-based circuitry allows
the monitor to function at the precision-of a fixed frequency.
·The resident memory allows for storing factory default settings and also additional user
adjustment parameters.
·The maximum resolution achievable is XGA (1024 x 768), best suited for Windows
applications
·The compact and sleek cabinet design saves lot of your desk space and makes your desk
look neat and tidy.
·The monitor is compliant with VESA-DPMS power management standard. In order to
save energy, the monitor must be connected to a system compliant with the standard.
·The monitor is also compliant with the most stringent environmental scheme of TCO
95. In this scheme, no environmental harmful substances are used during the entire
manufacturing process.

AGM15TK
7
UNPACKING
Please check the following items are present when you unpack the box, and save the packing
materials in case you will need to ship or transport the monitor in future.
·ADVAN AGM15TK LCD Monitor and VGA cable
·AC Power cord
·AC-Adapter
·Floppy Disk (for test pattern and set up)
·User Manual, Registration Card, and Warranty Card
·Macintosh Adapter AD-A205, C-video(Composite Video) Cable, S-Video Cable, and
USB Cable
REGISTRATION
WARRANTY

8
User’s Guide
SCREEN POSITION ADJUSTMENT
In order to optimize the best viewing position, you can adjust the tilt of the monitor by using
both of your hands to hold the edges of the monitor as shown in the figure below. The moni-
tor can be adjusted to 30 degrees up as indicated by arrow below.
CONNECTING THE POWER CORD
·Check first to make sure that the power cord you use is the correct type required for
your area.
·This monitor has a universal AC adapter that allows operation in either 100/120V AC or
220/240V AC voltage area. No user-adjustment is required.
·Plug one end of the power cord to the AC adapter, plug another end to a proper AC outlet.
·For units to be used at 120 V AC:
Use a UL Listed Cord Set, Type SPT-2 wire and plug type SP-12N rated 10A/125V.
·For units to be used at 220/240 V AC (outside of U.S.):
Use a Cord Set consisting of H03VVH2-F cord and plug type SP-021A rated 2.5A, 250V.
The cord set should have the appropriate safety approvals for the country in which the
equipment will be installed and marked HAR.

AGM15TK
9
SAFETY PRECAUTION
·Avoid placing the monitor, or any other heavy object, on the power cord to prevent fire
or electrical shock from damage to the power cord.
·Do not expose the monitor to rain, excessive moisture, or dust to avoid fire or shock
hazard.
·Do not cover the slots or openings of the monitor for proper heat dissipation. Always
put the monitor in a place where there is adequate ventilation.
·Avoid placing the monitor against a bright background or where sunlight or other light
sources may reflect on the area of the monitor. Place the monitor just below eye level.
·Handle with care when transporting the monitor.
·Refrain from giving the shock or scratch to the screen, as screen is fragile.
CLEANING YOUR MONITOR
Please carefully follow the below guidelines when cleaning the monitor.
·Always unplug the monitor before cleaning.
·Use a soft cloth to wipe the screen and cabinet front and sides.
·Apply a small quantity of alcohol to a soft cloth to clean the monitor screen, if requires
more than dusting.

10
User’s Guide
PRESET MODES
To reduce the need for adjustment for different modes, the monitor has default setting modes
that are most commonly used as given in the table below. If any of these display modes are
detected, the monitor automatically adjusts the picture size and centering. When none of the
mode is matched, the user can store their preferred modes in the user modes. The monitor is
capable of storing up to 7 user modes. The only condition to store as a user mode is the new
display information must have 1 KHz difference for horizontal frequency or 1 Hz for vertical
frequency or the sync signal polarities are different from the default modes.
edoM)VxH(noituloseR)zHK(.qerF.H)zH(.qerF.V
1053x0465.1307
2053x0469.7358
3004x0469.7358
4004x0275.1307
5004x0279.7358
6084x0465.1306
7084x0460.5376
8084x0469.7327
9084x0465.7357
01084x0463.3458
11006x0081.5365
21006x0089.7306
31006x0081.8427
41006x0089.6457
51006x0087.3558
61426x2387.9457
71867x42018.8406
81867x42014.8406
91867x42015.6507
02867x42010657
12867x42017.8658

AGM15TK
11
POWER MANAGEMENT FUNCTION
The monitor is equipped with the power management function which automatically reduce
the power consumption when not in use in three power level modes.
·Stand-by Mode
The monitor goes into stand-by mode when the horizontal sync signal is off for about 10
seconds. In this mode, the screen goes off and the power LED blinks for 3 seconds On
and 1 second Off. The screen is displayed after the horizontal sync signal is restored.
·Suspend Mode
The monitor goes into suspend mode when the vertical sync signal is off for about 10
seconds. The power consumption during this is less than 8 W. In this mode, the screen
goes off and the power LED blinks for 3 seconds On and 1 second Off. The screen is
displayed after the vertical sync signal is restored.
·Off Mode
The monitor goes into power-off mode when the vertical and horizontal sync signals are
off for about 10 seconds. In this mode, the screen goes off and the power LED blinks for
3 seconds On and 1 second Off. The screen is displayed after the vertical and horizontal
sync signals are restored.

12
User’s Guide
DDC
To make your installation easier, the monitor is able to Plug and Play with your system if
yoursystemalsosupports DDC protocol.TheDDC (Display Data Channel)isa communication
protocol through which the monitor automatically informs the host system about its
capabilities, for example, supported resolutions and corresponding timing. The monitor
supports DDC1 and DDC2B standard.
INSTALLATION
To install the monitor to your host system, please follow the steps as given below:
Steps
1. Use the VGA cable that provides D-SUB 15P connector and connect to the
15-pin connector on the VGA controller card.
2. Connect the DC power to the DC power connector on the monitor.
3. Connect one end of AC power cord into the AC Adapter and the other end to AC
power outlet.
4. Then turn the computer on and then the monitor.
5. If the monitor still does not function properly, please refer to the troubleshooting section
to diagnose the problem.

AGM15TK
13
DDC
To make your installation easier, the monitor is able to Plug and Play with your system if
yoursystemalsosupports DDC protocol.TheDDC (Display Data Channel)isa communication
protocol through which the monitor automatically informs the host system about its
capabilities, for example, supported resolutions and corresponding timing. The monitor
supports DDC1 and DDC2B standard.
INSTALLATION with USB hub (Optional)
To install the monitor to your host system, please follow the steps as given below:
Steps
1. Use the VGA cable that provides D-SUB 15P connector and connect to the
15-pin connector on the VGA controller card.
2. Connect the DC loop cable from the USB hub to the DC power connector on the monitor.
3. Connect the DC power to the USB hub.
3. Connect one end of AC power cord into the AC Adapter and the other end to AC
power outlet.
4. Then turn the computer on and then the monitor.
5. If the monitor still does not function properly, please refer to the troubleshooting section
to diagnose the problem.

14
User’s Guide
Display for Video and Image Playback
Explains how to use our AGM15TK to play VCR, view television, video game, or digital
camera images. It also show you how to connect video and other types of video equipment to
the display.
Connecting with Video Equipment
You can connect many types of video equipment to the display. The equipment must have
either Super VHS video (S-video) ports or composite video ports. To install the monitor to
your video equipment, please follow the steps as given below:
Steps
1. Make sure the video equipment has a Super VHS (S-video) or a Composite video connector.
2. Turn off the computer, display, and video equipment before any types of connection.
3. For composite video, plug one end of an RCA cable into the video out port on the video
equipment then connect the other end to the monitor video input port.
4. For S-video, plug one end of the S-video cable into the video out port on the video equipment
then connect the other end to the monitor S-video input port.
5. Connect the DC power to the DC power connector on the monitor.
6. Connect one end of AC power cord into the AC Adapter and the other end to AC
power outlet.
7. Then turn the video equipment on and then the monitor.
Connecting to a Television Signal
The display doesn’t have a tuner. To view television on the display, you need to use either the
VCR or TV tuner card in your computer to change channels.
Video and Sound
This monitor doesn’t have any speaker for sound. If you’re using the display to play a video
or view television images, you need to connect external speakers to your television or video
equipment for sound.

AGM15TK
15
USER CONTROLS
Front Panel Controls
1. PowerLED: Lights up to indicate the power is turned ON.
2. Power Switch: To turn ON or OFF the power.
3. +: To increase the value of the parameter in the OSD you have selected for adjustment.
To increase the brightness directly when OSD menu is not activated.
4. -: To decrease the value of the parameter in the OSD you have selected for adjustment.
To increase the brightness directly when OSD menu is not activated.
5. Select Up: To enter OSD menu then can use as moving upward in the OSD menu.
6. Select Down: To move downward in the OSD menu.
SwitchPCdisplayto Videodisplay and vice versabyonetouchwhen OSD menu is not activated.
7. Auto Button: One touch Auto adjust or Exit OSD menu.
Standard OSD Operation
1. Press menu button to activate the OSD.
2. Use Select Up or Down keys to move up or down through the menu. The parameter will be highlighted wehn
selected.
3. Then use + or - to increase or decrease the value of the parameter, or make selection between different options.
4. To quit the OSD screen at any time during the operation, press Auto button. If no keys are pressed for a time period,
the OSD automatically disappears.

16
User’s Guide
OSD Scren Basic Section
Under VGA display
MENU ADVAN
MODE : 800 x 600 H + 53.9KHz V + 85.4Hz
Auto Adjust
No Yes
Auto Adjust
Brightness
Contrast
Black-Level
MENU ADVAN
MODE : 800 x 600 H + 53.9KHz V + 85.4Hz
Clock
49%
Clock
Clock-Phase
V-position
H-position
MENU ADVAN
MODE : 800 x 600 H + 53.9KHz V + 85.4Hz
OSD Time
5 10 15 20
Image Sharpness
Expand
DOS Mode
Power Save
OSD Time
MENU ADVAN
MODE : 800 x 600 H + 53.9KHz V + 85.4Hz
www.advancorp.com
Tech Support Tel:
1-888-786-1688
OSD-Transparent
Welcome Message
Help

AGM15TK
17
OSD Scren Basic Section
Under C-Video, S-Video Display
ADVAN
Cmp Svid PC
Controls
V-Brightness
V-Contrast
V-Hue
V-Saturation
NTSC
MENU ADVAN
MODE : 800 x 600 H + 53.9KHz V + 85.4Hz
Dither
No Yes
Dither
Gamma

18
User’s Guide
metInoitpircseDnoitcnuF
tsujdAotuAlliwtsujdA-otuAehT.noitcnufsihtnonrutot+sserP
,kcolC,noitisoP-H,noitisoP-Vtsujdayllacitamotua
5tuobasekatssecorpelohweht,tsartnoCdna,esahP-kcolC
dehcattaehtnielifnrettaptsetehtesuesaelP(.sdnoces
.)tsujdAotuArofksidytiliturotinomDCL
ssenthgirB.ssenthgirbehtesaercedroesaercnioT
tsartnoC.tsartnocehtesaercedroesaercnioT
leveLkcalB.levelkcalbehtesaercedroesaercnioT
kcolC.kcolctodtsujdaoT
esahP-kcolC.esahp-kcolctsujdaoT
noitisop-V.drawnwodrodrawpuneercsehtevomoT
noitisoP-H.drawnwodrodrawpuneercsehtevomoT
ecnalaBroloC.srolocBGRecnalabotuA
ecnalaB-deR.deRecnalaB
ecnalaB-neerG.neerGecnalaB
ecnalaB-eulB.eulBecnalaB
yrotcaFllaceR
roloC .teserprolocyrotcafoterotseR
ssenprahSegamI.ffOronOssenprahsegamiteS
dnapxE 867x4201nahtssel(.neercsllufotneercsllamsehtdnapxE
)noituloser
edoMSOD.027ro046taedomSODrednuyalpsidteS
evaSrewoP.ffOronOevasrewopehtnruT
emiTDSO.emitgniraeppaneercsDSOteS
tnerapsnarT-DSO.ffOronOnoitcnuftnerapsnartDSOteS
emocleW
egasseM .ffOronOnoitcnufegassememoclewteS
pleHegassemplehyalpsiD
rehtiD.ffOronOnoitcnufrehtidteS
ammaG.ffOronOnoitcnufammagteS
OSD Function Description (Under VGA Display)

AGM15TK
19
OSD Function Description (Under C-Video, S-Video Display)
metInoitpircseDnoitcnuF
slortnoC -S(divS,)LAP/CSTN(pmCneewtebhctiwsot-ro+sserP
.)AGV(CPro,)oediV
ssenthgirB-V .edomoedivrednussenthgirbehtesaercedroesaercnioT
tsartnoC-V .edomoedivrednutsartnocehtesaercedroesaercnioT
euH-V .edomoedivrednuleveleuhehtesaercedroesaercnioT
noitarutaS-V oedivrednulevelnoitarutasehtesaercedroesaercnioT
.edom

20
User’s Guide
TROUBLESHOOTING
Before sending your LCD monitor for servicing, please check the troubleshooting list
below to see if you can self-diagnose the problem.
smelborPsutatStnerruCydemeR
oN
erutciP
NODEL
•ottsartnocdnassenthgirbtsujda,DSOgnisU .sgnittestluafedriehtotteserromumixam
FFODEL
•.hctiwsrewopehtkcehC
•ylreporpsidrocrewopCAfikcehC.retpadaCAehtotdetcennoc
gniknilBDEL
•ylreporpsielbaclangisoedivfikcehC .rotinomfokcabehttadetcennoc
•.NOsimetsysretupmocotrewopehtfikcehC
lamronbA
erutciP
erutciPelbatsnU
•retpadascihpargfonoitacificepsehtfikcehC ebyamhcihwecnailpmocnisirotinomdna .hctamsimycneuqerflangistupniehtgnisuac
siyalpsiD
retnec,gnissim
llamsootro,tfihs
niegralootro
ezisyalpsid
•yalpsidllitsfi,nottubputeSotuAgnisU ,KCOLCtsujdanehterutciplamronba -VdnaNOITISOP-H,ESAHP-KCOLC .slangisdradnats-nonhtiwNOITISOP
•neercs-llufgnissimfoesacni,DSOgnisU ruoyninoituloserrehtotcelesesaelp,egami ro)TN,89/59swodniW(metsySgnitarepO
.gnimithserferlacitrevrehto
•gnitsujdaretfasdnoceswefaroftiawtsuM rognignahcerofebegamiehtfoeziseht ehtFFOgnirewoprolangisehtgnitcennocsid
.rotinom
For more update information on our monitor
http://www.advancorp.com
Tech Support: 1-888-786-1688
Table of contents
Other Advan Monitor manuals
Advan
Advan AMM240WTD User manual
Advan
Advan AMM15TK3 User manual
Advan
Advan AMM190WTD User manual
Advan
Advan AMM213TD User manual

Advan
Advan AMM215MWTD User manual
Advan
Advan 240-030-970 User manual
Advan
Advan AMM190WTD2 User manual
Advan
Advan AMM215WTTP User manual
Advan
Advan AMM215WTD User manual

Advan
Advan VISION ELECT HDTV User manual

