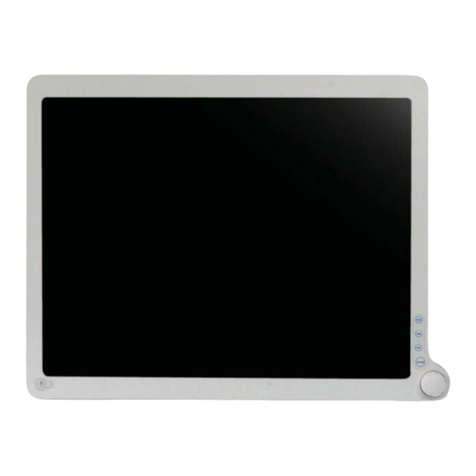
Advan AMM15TK3 User manual

AUTO - SCANNING WITH DIGITAL CONTROL
LCD COLOR MEDICAL MONITOR
AMM15TK3 / AMM15TK3-TE / AMM15TK3-TEW
OperationManual
Forfuturereference, recordtheserial numberofyour display
monitorin thespace below:
SerialNumber
Theserial numberis locatedon theback ofthe monitor


backof themonitor
ADVANINT’LCORP.2007
“ELO” is a Registered trademark of EloTouchSystems, Inc.,
Allother trademarks arethepropertyof theirreference owners.
This document is subject to change without notice.
Advanprovidesthisinformationas reference only.Referencetoothervendor’s
productsdoes not implyanyrecommendation orendorsement.
Revision Control
GNINRAW
fosresuehtmrofniotdesusi"GNINRAW"eltitehT ro,htaed,yrujniehttcilfnidluoctahtsesuacelbissop .stne
itapehtotegamadytreporp
NOITUAC
fosresuehtmrofniotdesusi"NOITUAC"eltitehT hguohtlastneitapehttcilfnidluoctahtsesuacelbissop .sht
aedesuacothguoneerevestonthgimti
ETON
smetifosresuehtmrofniotdesusi"ETON"eltitehT ,noitallatsnifosmretniecnatropmifoerataht hguohtlatnemp
iuqEehtfoecnanetniamro,noitarepo ehtotmrahylidobehttcilfnitonseoderuliafeht .stneitap
etaDnoitpircseD
701150C.veRrebmuntnemucoD
AMM15TK3 1

TABLE OF CONTENTS
ProductDescriptionandIntendedUse......................................................
WarningsandCautions................................................................................
SymbolExplanations....................................................................................
EUDeclarationofConformityforMedicalApplications...........................
SafetyPrecaution.........................................................................................
CleaningYourMonitor..................................................................................
PowerManagementFunction....................................................................
PresetModes..............................................................................................
DDC.............................................................................................................
Installation....................................................................................................
ConnectingthePowerCord......................................................................
Component/RGB/RGBSConnectionInstruction.................................
UserControls..............................................................................................
OSDScreenBasicSection.......................................................................
OSDFunctionDescription.........................................................................
Troubleshooting..........................................................................................
Specificationof(AMM15TK3)..................................................................
Classification..............................................................................................
ElectromagneticCompatibility..................................................................
DimensionDrawing(mm)..........................................................................
Connectors..................................................................................................
DescriptionofWarranty..............................................................................
TounchscreenUser’sManual....................................................................
3
4
7
8
9
9
10
11
12
12
13
14
15
16
19
20
21
22
23
26
27
28
30
2User’s Guide

Product Description and Intended Use
Please check the following items are present when you unpack the box, and save the
packing materials in case you will need to ship or transport the monitor in future.
•AMM15TK3LCDMonitor and twovideo cable(1) DVI-Ato HD15VGA cable*
(1)DVI-D cable* (1)BNC toRCAadapter (1) DVI-Ato BNCFemalecable*
•AC Powercord ***
•AC-Adapter
•CompositeVideo BNC JackCableand Super VideoCable
•UserManual
*Might be optional item, check with local representative
**Touchscreen Data Cable and Floppy Disk (Touchscreen driver) optional
***Might vary pending on region standard
CAUTION
Manufacturer:AultKorea
ModelNo: MW160KA1203F52
*
*
*
AMM15TK3 3

Warnings and Cautions
Please read this manual and follow its instructions carefully. The words warning,
caution,and notecarry special meaningsand shouldbe carefully reviewed:
Warranty is void if any of these warnings are disregarded.
ADVAN Int’l Corp accepts full responsibility for the effects on safety, reliability, and
performanceof theequipment onlyif:
•Re-adjustments, modifications,and/or repairsarecarried outexclusively
byADVAN Int’l Corp.
• The electrical installation of the relevant operating room complies with the
applicableIEC and CErequirements.
Warning Federal law (United States of America) restricts this
device to use by, or on order of a physician.
TheADVAN Int’lCorpAMM15TK3 monitor hasbeen tested underUL60601-1
standardand ULlisted forMedical application.
ADVAN Int’lCorp reservesthe rightto make improvements inthe product(s)
describedherein. Product(s),therefore, maynot agree indetail tothe published
design or specifications.All specifications are subject to change without notice.
Please contactADVAN Int’l Corp directly or phone your localADVAN Int’l Corp sales
representativeor agent forinformationon changes andnewproducts.
ebyamnaicisyhprotneitapehtfoytefaslanosrepehTgninraW nitluserdluocnoitamrofnisihtgnidragersiD.devlovni .naicisyhprotneitapehtotyrujni
ebtsumsnoituacerproserudecorpecivreslaicepSnoituaC .tnemurtsniehtgnigama
ddiovaotdewollof
etoN tnatropmiroreisaeecnanetniamekamotnoitamrofnilaicepS .raelceromnoitamrofni
ehttrela
otdednetnisielgnairtanihtiwkramnoitamalcxenA ecnanetniamdnagnitarepotnatropmifoecneserpehtotresu .tcudorpehtgniynapmoccaerutaretilehtnisnoitcurtsni
ehtfonrawotdednetnisielgnairtanihtiwtlobgninthgilA deziroh
tuaotecivresllarefeR.egatlovsuodrazahfoecneserp .lennosrep
RESUEHTOTYRUJNISUOIRESLAITNETOPDIOVAOTgninra
W,ECIVEDSIHTOTEGAMADRO/DNATNEITAPEHTDNA :TSUMRESUEHT
4User’s Guide

Warnings
1. Read the operating manual thoroughly and be familiar with its contents prior to using
this equipment.
2. Carefully unpack the unit and check if any damage occurred during shipment.
3. Should any solid object or liquid fall into the panel, unplug the unit and have it checked
by qualified personnel before operating it any further.
4. Uplug the unit if it is not to be used for an extended period of time. To disconnect the
cord, pull it out by the plug. Never pull the cord itself.
5. Be a qualified physician, having complete knowledge of the use of this equipment.
6. Test this equipment prior to a medical procedure. This monitor was fully tested at the
factory before shipment.
7. Avoid removing covers on control unit to avoid electric shock.
8. Attempt no internal repairs or adjustments not specifically detailed in this operating
manual.
9. Pay close attention to the care, cleaning instructions in this manual. A deviation may
cause damage (refer to the Cleaning section).
10. DO NOT STERILIZE MONITOR.
11. Read the entire instruction manual before assembling or connecting the camera.
12. Do not place the monitor or any other heavy object on the power cord. Damage to the
cable can cause fire or electirc shock.
13. Monitor with power supply is suitable for use in patient environment.
14. DO NOT stack more than 8 boxes high
This equipment has been tested and found to comply with the limits for medical devices
in IEC 601-1-2:2003. These limits are designed to provide reasonable protection against
harmful interference in a typical medical installation.
This equipment generates, uses and can radiate radio frequency energy and, if not
installed and used in accordance with the instructions, may cause harmful interference to
other devices in the vicinity. However, there is no guarantee that interference will not occur
in a particular installation. If this equipment does cause harmful interference to other
devices, which can be determined by turning the equipment off and on, the user is
encouraged to try to correct the interference by one or more of the following measures:
- Reorient or relocate the receiving device.
- Increase the separation between the equipment.
- Connect the equipment into an outlet on a circuit different from that to which the other
device(s) are connected.
- Consult the manufacturer or field service technician for help.
NOTICES TO USER
This device complies with Part 15 of the FCC Rules. Operation is subject to the following
two conditions:
(1) this device may not cause harmful interference, and (2) this device must accept any
interference received, including interference that may cause undesired operation.
FCCWARNING
This equipement generates or uses radio frequency energy. Changes or modifications to
this equipment may cause harmful interference unless the modifications are expressly
approved in the instruction manual. The user could lose the authority to operate this
equipment if an unauthorized change or modification is made.
AMM15TK3 5

Cautions
1. The AC Adapter must be plugged into a Grounded power outlet.
2. Use only the proprietary AMM15TK3 power supply for theAMM15TK3 monitor. Make a
proper connection by ensuring that the shrink tubing completely secures the connection
between the DC power cord and the extension cord.
3. Turn power off when unit is not in use.
4. Never operate the unit right after having transported from a cold location directly to a
warm location.
5. Do not expose the monitor to moisture or directly apply liquid cleaners directly to the
screen. Spray the cleaning solution into a soft cloth and clean gently.
6. Handle the monitor with care. Do not strike or scratch the screen.
7. Do not block the monitor cooling vents. The monitor is cooled by natural convection
and has no fan.
8. Do not force the monitor past 28 degrees of vertical when adjusting the screen
position. (For monitors equipped with stands only.)
9. Remove the power module and connection when transporting the unit.
10. Save the original carton and associated packing material. They will be useful should
you have to transport or ship the unit.
11. Allow adequate air circulation to prevent internal heat buildup.
12. Do not place the unit on surfaces (rugs, blankets, etc.) or near materials (curtains,
draperies) that may block the ventilation slots.
13. Do not install the unit near sunlight, excessive dust, mechanical vibration or shock.
14. The unit is designed for operation in a horizontal position. Never operate the unit in a
vertical position.
15. Keep the unit away from equipment with strong magnets (i.e. a large loudspeaker.)
16. Do not expose the monitor to moisture or excessive dust.
17. Equipment with SIP/SOP connectors should either comply with IEC 60601-1 and/or
IEC 60601-1-1 harmonized national standard or the combination should be evaluated.
Do not touch the patient with signal input or output connectors.
18. Use only a hospital grade power supply cord.
19. This equipment generates, uses, and can radiate radio frequency energy. If not
installed correctly and or not used in accordance with these instructions, it may cause
harmful interference with other devices. This may be determined by turning the
equipment off and on. The user is encouraged to try to correct the interference through
one or more of the following measures:
• Reorient or relocate the receiving device.
• Increase the separation distance between the equipment.
• Connect the equipment to an outlet on a circuit different from that to which the other
device(s) are connected.
• Consult the manufacturer or field service technican for help.
20. Grounding reliability can only be achieved when the equipment is connected to an
equipment receptacle labeled “Hospital Only” or “Hospital Grade.”
Note To connect to an international power supply, use a an attachment plug
appropriate for the power outlet.
Note Refer to the “Electromagnetic Compatibility” (EMC) section of this manual to
ensure EMC. The AMM15TK3 must be installed and operated according to the EMC
information provided in this manual.
6User’s Guide

Symbol Definitions AMM15TK3 7

EU Declaration of Conformity for MedicalApplications
ADeclaration ofConformity hasbeen filed for this product.Asampleof
thisdocumentmay befound intheaddendum whichaccompaniedthis
manual. Fora copyof the Declarationof Conformitydocument, please
contactADVANInt’l Corp.and request forAMM15TK3DOC.
Prepare for Unpack
Beforeyou unpackyour monitor, prepareasuitableworkspace.You
needa stableand level surfacenear agrounded walloutlet inan area
whichisrelatively freeof glarefromsunlight orother sources ofbright
light.Themonitor iscooledby natural convection(ithas nofan).
Foroptimum performance, donot blockthe coolingvents.
Whileunpackingthe monitor,inspect itand otherpackagecontentsfor
shippingdamage thatcould cause afire orshock hazard.Immediately
reportany shippingdamage to thecarrier ortransportation company
andcontact customerservice for monitorin thefuture orin caseof
return.
Afteryouunpackthe monitor,make surethefollowing itemsare in-
cluded
• Monitor with video cable
• AC adapter with cable
CAUTION:ACAdapter must beplugged intoGroundeda poweroutlet
CAUTION :AC adapter
Manufacturer: Ault korea
Model No: MW160KA1203F52
• Touchscreen cable if monitor has touchscreen option
• This operations manual
Note: Your system provider may offer alternative cords or cables
dependingonthe installationrequirementand localgeography issues.
8User’s Guide

SAFETY PRECAUTION
· Avoid placing the monitor, or any other heavy object, on the power cord to prevent
fire or electrical shock from damage to the power cord.
· Donotexposethe monitor torain, excessivemoisture, or dustto avoidfire or shock
hazard.
· Donotcovertheslotsoropeningsofthe monitor for properheat dissipation.Always
putthe monitorin aplace where thereisadequate ventilation.
· Avoid placing the monitor against a bright background or where sunlight or other
light sources may reflect on the area of the monitor. Place the monitor just below
eyelevel.
· Handlewithcare whentransporting themonitor.
· Refrain from giving the shock or scratch to the screen, as screen is fragile.
CLEANING YOUR MONITOR
No specific liquid or chemical necessary when cleaning this LCD monitor
However,we suggest toclean the monitorwith non-abrasive clothsand cleaning
solutions used in hospitals to clean similar equipment. We recommend using 70%
Isopropylalcohol forthe screensurfaceand warmwater andamild detergentfor all
othersurfaces. Otheracceptable cleaningagents are listedbelow:
• 70% isopropyl alcohol
• 6% aqueous ammonia
• Cidex (2.4% glutaraldehyde solution)
• Sodium Hypochlorite (bleach) 10%
• “Green soap” USP
• 0.5% Chlorhexidine in 70% isopropyl alcohol
• Ovation
• Formula 409
• Fantastic
• Wex Cide
To clean the screen, do not spray liquid cleaners directly on to the unit. Stand away
Form the monitor and spray cleaning solution onto a cloth. Without applying exces-
sivepressure, cleanthe screenwith the slightlydampened rag.
AMM15TK3 9

POWER MANAGEMENT FUNCTION
Themonitorisequippedwiththepowermanagementfunctionwhichautomaticallyreduce
thepower consumption whennotin usein threepowerlevel modes.
•Stand-by Mode
The monitor goes into stand-by mode when the horizontal sync signal is off for
about10seconds. In thismode, thescreen goesoff andthe powerLED blinksfor 1
seconds On and 1 second Off. The screen is displayed after the horizontal sync
signal is restored.
•Suspend Mode
The monitor goes into suspend mode when the vertical sync signal is off for about
10seconds.Thepower consumptionduring thisis less than8W. In thismode, the
screengoes off andthepower LEDblinksfor 1 secondsOnand 1second Off.The
screen is displayed after the vertical sync signal is restored.
•Off Mode
Themonitorgoesintopower-offmodewhen the vertical and horizontalsyncsignals
are off for about 10 seconds. In this mode, the screen goes off and the power LED
blinksfor1 seconds Onand1second Off. Thescreen isdisplayedafterthe vertical
and horizontal sync signals are restored.
Power Management System
TheAMM15TK3MedicalMonitorpower management proposal. Providesfour phases
of power-saving modes by detecting the horizontal sync signal as shown in the table
blow.
When the monitor is power saving mode or detects an incorrect timing, the screen will
be blank and power LED indicator will blink.
edoMrewoPtupnICD )ylnorotinom( rewoptupnICA )retpadaCA.lcnI( sutatSDEL
nO.xamW83.xamW06neerGydaetS
ybdnatS.xamW0
.6.xamW5.7neerGgniknilB
dnepuS.xamW0.6.xamW5.7neerGgniknilB
ffO.xamW0.6.xamW5.7neerGgniknilB
10 User’s Guide

PRESET MODES
edoM)VxH(noituloseR)zHK(.qerF.H)zH(.qerF.V
1053x0465.1307
2053x0469.7358
3004x0469.7358
4053x0275.1307
5004x0279.7358
6084x0465
.1306
7084x0469.7327
8084x0465.7357
9084x0463.3458
01006x0081.5365
11006x0089.7306
21006x0081.8427
31006x0089.6457
41006x0087.3558
51867
x42015.5334
61867x42014.8406
71867x42015.6507
81867x42010657
91867x42017.8658
02468x25115.7657
12069x08210606
224201x08219.3606
32420
1x08219757
*Best resolution 1024 x 768, 60 Hz
AMM15TK3 11

DDC
To make your installation easier, the monitor is able to Plug and Play with your system
if your system also supports DDC protocol. The DDC (Display Data Channel) is a
communicationprotocolthroughwhichthemonitorautomaticallyinformsthehostsystem
aboutitscapabilities,forexample,supportedresolutions and corresponding timing. The
monitorsupportsDDC1and DDC2B standard.
INSTALLATION
To install the monitor to your host system, please follow the steps as given below:
Steps
1. Usethesupplied video cable(DVI,DVI-A->VGA,S-Video, C-Video, DVI-A->BNC
Female) then connect to the host system accordingly.
2. Connectthe DC powerto the DCpowerconnector onthemonitor.
3. ConnectoneendofACpowercordintotheACAdapterand theotherendtoACpower
outlet.
4. Then turn the host system on and then the monitor.
5. If themonitor still doesnot functionproperly, pleaserefer tothe troubleshooting
section to diagnose the problem.
POWER DVI-I
(VGA/COMPONENT) S-V C-V TOUCHSCREEN
(OPTION)
12 User’s Guide

CONNECTING the POWER CORD
* Check first to make sure that the power cord you use is the correct type required for
yourarea.
* Thismonitor has anuniversalAC adapterthatallows operation ineitherAC 100-240
Vac voltagearea. No user-adjustmentis required.
* Plug one end of the power cord to theAC adapter, plug another end to a properAC
outlet.
The cord set should have the appropriate safety approvals for the country in which the
equipmentwill be installedand marked HAR.
For 120 volt Applications, use only UL Listed deachable power cord with NEMA
configuration 5-15P type (parallel blades) plug cap. For 240 volt applications use only
ULListedDetachable powersupply cordwith NEMAconfiguration6-15Ptype (tandem
blades)plug cap.
AMM15TK3 13

Component / RGB / RGBS CONNECTION INSTRUCTION
For Component (YPbPr) Connection
1. Connect DVI-A to BNC Female cable onto the monitor via DVI port.
2. Connect BNC (YPbPr) cables from the video source to the DVI-A to BNC Female
cable. Red (Pr) connect to Red BNC, Green (Y) connect to Green BNC, and
Blue (Pb)connect to Blue BNC.
3.The video sourceshould have componentsoutputon thevideo equipmentfor
components (YPbPr) video out.
4.To select component mode in the monitor, push “Select” button on the monitor
until it reach “Component / RGB” input or can select in the OSD by Push
“UpArrow” button then the OSD Menu will pop-up, Push “UpArrow” or
“DownArrow” button to select “Input Source Select” then push select button to
enter Input Source Select Menu, Push “UpArrow” or “DownArrow” button to
select “Component / RGB” then push select button.
For RGB Connection
1. Connect DVI-A to BNC Female cable onto the monitor via DVI port.
2. Connect BNC (RGB) cables from the video source to the DVI-A to BNC Female
cable. Red (R) connect to Red BNC, Green (G) connect to Green BNC, and
Blue (B)connect to Blue BNC.
3.The video sourceshouldhave RGBoutput onthevideo equipmentfor RGBvideo
out.
4. To select RGB mode in the monitor, push “Select” button on the monitor until it
reach “Component / RGB” input or can select in the OSD by Push “UpArrow”
button then the OSD Menu will pop-up, Push “UpArrow” or “DownArrow” button
to select “Input Source Select” then push select button to enter Input Source
Select Menu, Push “UpArrow” or “DownArrow” button to select “Component/RGB”
then push select button.
For RGBSync Connection
1. Connect DVI-A to BNC Female cable onto the monitor via DVI port.
2. Connect BNC (RGB) cables from the video source to the DVI-A to BNC Female
cable. Red (R) connect to Red BNC, Green (G) connect to Green BNC,
Blue (B)connect to Blue BNC and SYNC (V) connect to White BNC.
3.The videosourceshould have RGBSyncoutput on thevideo equipment for
RGBS video out.
4. To select RGBSync mode in the monitor, push “Select” button on the monitor until
it reach “Component / RGB” input or can select in the OSD by Push “UpArrow”
button then the OSD Menu will pop-up, Push “UpArrow” or “DownArrow” button to
select “Input Source Select” then push select button to enter Input Source Select
Menu, Push “UpArrow” or “DownArrow” button to select “Component / RGB” then
push select button.
14 User’s Guide

USER CONTROLS
Front Panel Controls
1. Power LED : Lights up to indicate the power is turned ON.
2. Power Switch : To turn ON or OFF the power.
3. + : To increase the value of the parameter in the OSD you have selected for
adjustment.
: To increase the contrast directly when OSD menu is not activated.
: To move upward in the OSD menu.
: Execute a function of selected item.
4. - : To decrease the value of the parameter in the OSD you have selected for
adjustment.
: To decrease the brightness directly when OSD menu is not activated.
: To move downward in the OSD menu.
5. Menu : To enter OSD.
6. Select : Enter a sub menu or select a menu item.
If video display option is adopted, switch PC display to Video display and
vice versa by one touch when OSD menu is not activated.
7.Auto Button : One touch Auto adjust or Exit OSD menu.
Standard OSD Operation
1. Press “Menu” button to activate the OSD.
2. Use “+” or “-” button to move through the menu.
Theparameter willbe highlightedwhen selected.
3. Then use “Select” button to enter the sub menu.
Choice the sub menu different options with “Select” button.
3. Then use “+” or “-” to increase or decrease the value of the parameter, or make
selectionbetween different options.
4. To quit the OSD screen at any time during the operation, press “Auto” button.
If no keys are pressed for a time period, the OSD automatically disappears.
AMM15TK3 15

OSD Screen Basic Section
#1 Only available when you using the (VGA) or (Component / RGB) connection
* Follow the Standard OSD Operation.Use “-” or “+” button to adjust
16 User’s Guide
Brightness / Contrast *Frequency / Phase * (#1)
Position *OSD Control *
Color Temperature *Utilities *

OSD Screen Basic Section AMM15TK3 17
Hue and Saturation * (#2) Sharpness * (#2)
Zoom *Input Source Select *
Scale Mode * (#3) Scale Mode * (#4)
#2 Only available when you using the (C-Video) or (S-Video) connection
#3 Only available when you using the (VGA) or (DVI) connection
#4 Only available when you using the (C-Video), (S-Video) or (Component/RGB) connection
* Follow the Standard OSD Operation.Use “-” or “+” button to adjust

OSD Screen Basic Section
18 User’s Guide
AutoAdjust / Factory Reset * (#5) Factory Reset * (#6)
Information (#7)
#5 Only available when you using the (VGA) connection
#6 Only available when you using the (DVI), (C-Video), (S-Video) or (Component/RGB)
connection
#7 Different video input may have different information
* Follow the Standard OSD Operation.Use “-” or “+” button to adjust
This manual suits for next models
2
Table of contents
Other Advan Monitor manuals
Advan
Advan AMM215WTD User manual

Advan
Advan AMM215WTTP User manual
Advan
Advan 240-030-970 User manual
Advan
Advan AMM240WTD User manual
Advan
Advan AMM190WTD2 User manual

Advan
Advan AGM15TK User manual
Advan
Advan AMM213TD User manual
Advan
Advan AMM190WTD User manual

Advan
Advan VISION ELECT HDTV User manual

Advan
Advan AMM215MWTD User manual
