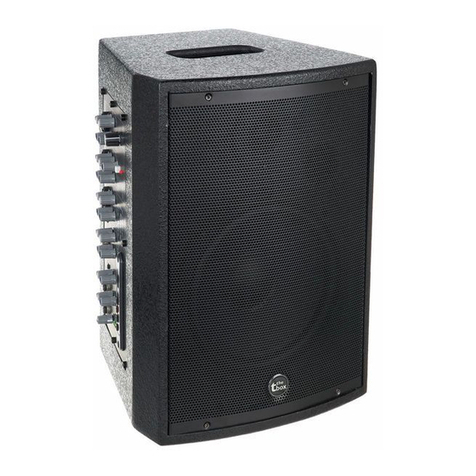
Advance Paris ZENEO ZX Instruction manual

ZENEO ZX
Wireless HiFi speakers
Enceintes HiFi sans l
Kabellose HiFi-Lautsprecher
Altoparlanti HiFi wireless
QuickStart
ADVANCE
PARIS


RECYCLING IN EUROPEAN UNION COUNTRIES
Disposal of your old appliance
This symbol on the product or on its packaging means that
your electrical and electronic equipment should be
disposed at the end of life separately from your household
wastes. There are separate coilection systems for
recycling in EU. For more information, please contact the
local authority or the dealer where you purchased the
product.
Ce symbole figurant sur le produit ou son emballage
signifie que votre équipement électrique et électronique
doit être mis au rebut séparément de vos déchets
ménagers lorsqu’il atteint Ia fin de sa durée de vie.II existe
des systèmes de collecte séparée pour le recyclage dans
l’UE. Pour pius d’informations, veuiliez prendre contact
avec les autorités locales ou lê revendeur à qui vous avez
acheté ce produit.
Das auf dem Produkt oder auf der Verpackung
angebrachte Symbol bedeutet, dass Ihre elektrischen
und elektronischen Geräte nicht mit dem Haushaltsmüll
entsorgt werden sollen. Es existieren separate Recycling-
Sammelsysteme in der EU. Für mehr Informationen
wenden Sie sich bitte an Ihre örtlichen Behörden
oder an den Fachhändier, bei dem Sie das Produkt
erworben haben.
Questo simbolo sul prodotto o sull’imballaggio
indica che 1’apparato elettrico o elettronico alia fine
dei suo periodo di vita dovrebbe essere smaltito
separatamente dai rifiuti domestici. Nell’UE
esistono altri sistemi di raccolta differenziata. Per ulteriori
infor-mazioni, contattare lê autorità locali o il rivenditore
presso il quale è stato acquistato il prodotto.
Este simbolo en el producto o en su embalaje significa que
deberfa deshacerse de su equipo eléctrico o electrônico, al
final de su vida util, de forma separada del resto de los
residuos domésticos. Para estos productos hay sistemas
de recogida selectiva para reciclarlos en la Union Europea.
Para mas informaciôn, rogamos contacte con la autoridad
local o el distribuidor donde adquirio el producto.
Este sîmbolo no produto ou na respectiva embalagem,
significa que o equipamento eléctrico ou electrônico deverà
ser descartado no fim da sua vida util separadamente
do lixo doméstico. Existem diverses sistemas de recolha
separada para reciclagem na Uniào Europeia.Para mais
informaçôes, queira contactar as autoridades locais ou o
revendedor onde adquiriu o produto.
Märkningen av produkter och fôrpackningar med denna
symbol betyder att elektrisk och elektronisk utrustning
maste tasom hand séparât fràn hushàlissopor nàr
utrustningen har förbrukats. EU har sàrskilda
àtervinningsanlàggningar för denna typ av utrustning.
Kontakta de lokala myndigheterna eller àterförsäijaren dàr
produkten har köpts för mer information.
Dette symbol pà produktet eller pâ emballagen betyder,
at dit elektriske og elektroniske udstyr ved afslutningen af
dets levetid ikke skaï bortskaffes sammen med dit
hushoidningsaffald. Derfindes separate
opsamiingssystemer til genbrug i EU. For mere information
bedes du venligst kontakte de lokale myndigheder eller
forhandieren, hvor du har kebt produktet.
Dit symbool op het product of op zijn verpakking betekent
dat uw elektrische of elektronische apparatuur na het
verstrijken van de levensduur gescheiden van het huisvuil
moet worden weggegooid. Er zijn afzonderlijke
ophaalsystemen voor recyclage in de E.U. Voor
meer informatie neemt u contact op met de
plaatselijke overheid of de dealer waar u het
product hebt gekocht.
Dersom produktet eller emballasjen er merket med
dette symbolet, bor ditt elektriske eller elektroniske
utstyr kasseres atskilt fra ditt hushoidningsavfall nàr
det er utsiitt. 1 Norgefinnes det egne
innsamiingssystemer for resirkulering. Venniigst ta
kontakt med lokale myndigheter eller forhandieren hvor du
kjepte produktet for mer informasjon.
Jos tuotteessa tai sen pakkauksessa on tämä symboli, se
tarkoittaa, että kyseiset sähköisetja elektroniset laitteet
pitää hävittää niiden käytön loputtua erillään
kotitalousjätteistä. EU:ssa on erillisiä keräysjärjestelmiä. Jos
haluat lisätietoja, ota yhteyttä paikallisiin viranomaisiin tai
tuotteen myyjään.
Ten symbol na produkcie lub na jego opakowaniu oznacza,
ze. Pahstwa urzadzenie elektryczne lub elektroniczne po
zakohczeniu uzytkowania musi zostac poddane utylizacji
oddzieinie od odpadôw z gospodarstwa domowego. W
Unii Europejskiej istnieja^ oddzieine systemy zbierania
odpadô w poddawanych recykiingowi. Aby uzyskaô wiecej
informacji, proszç skontaktowac sic z lokainymi wtadzami
lub sprzedawca, u ktôrego zakupiono produkt.
English Swedish
Danish
Dutch
Norwegian
Finnish
Polish
French
German
Italian
Spanish
Portuguese
1

2
WARNING ATTENTION WARNUNG ATTENZIONE
ATTENTION: afin de réduire tout risques de chocs électriques ou de feu, ne pas exposer votre
appareil à l’humidité ou à toutes sortes de liquides
WARNING: to reduce the risk of fire or electric shock, do not expose this appliance to rain or
moisture.
WARNUNG: Um die Gefahr eines Brandes oder eines Stromschlags zu mindern, halten Sie das
Gerät von Nässe und Feuchtigkeit fern.
ATTENZIONE: per ridurre il rischio di incendi o scosse elettriche evitare di esporre
l’apparecchio a pioggia o umidità.
AVERTISSEMENT
Pour prévenir tout risques de chocs électriques, ne pas ouvrir l’appareil. Si un problème
apparait, faites réparer votre appareil par un technicien qualifié.
CAUTION: To prevent the risk of electric shock, do not remove cover (or back); no user
serviceable parts inside. Refer servicing to qualified service personnel.
VORSICHT: Um die Gefahr eines Stromschlags zu vermeiden, sollte die Abdeckung (und die
Rückwand) nicht entfernt werden. Das Gerät enthält keine Teile, die vom Benutzer gewartet
werden können. Überlassen Sie die Wartung qualifiziertem Fachpersonal.
AVVERTENZE: Per prevenire il rischio di shock elettrici si fa divieto di aprire sia il coperchio
superiore che quello posteriore dell’apparecchio. Non ci sono parti all’interno riparabili o
sostituibili dal’utente finale. Per problemi fare riferimento a personale qualificato.
LE POINT D’EXCLAMATION vous indiquera la présence d’informations importantes, tant au
niveau utilisation que maintenance de votre appareil.
THE LIGHTNING FLASH with arrow-head symbo is intended to alert the user to the presence of uninsulated «dangerous voltage»
within the product’s enclosure that may be of sufficient magnitude to constitute a risk of electric shock to persons.
Das Blitzsymbol in einem gleichschenkligen Dreieck warnt vor nicht isolierten Komponenten mit gefährlicher Stromspannung, die
zu ernsthaften Personenschäden führen kann.
Das Ausrufungszeichen in einem gleichschenkligen Dreieck kennzeichnet wichtige Hinweise für die Nutzung und Wartung Ihres
Gerätes.
IL PUNTO ESCLAMATIVO evidenzia pericolo di shock elettrici e la presenza di istruzioni importanti nel manuale per la manutenzione
o l’utilizzo dell’apparecchio.
Si vous souhaitez déplacer ou transporter votre appareil, nous vous conseillons dans le cas d’un déménagement, d’un retour pour
réparation, etc...de réemballer dans son emballage d’origine votre appareil.
An appliance and cart combination should be moved with care. Before any transportation, your product must be packed correctly
in order to avoid any damage.
Bei der Beförderung des Gerätes mit Transportwagen ist mit Vorsicht vorzugehen. Vor jeder Art von Transport muss das Produkt
ordnungsgemäß verpackt werden, um Beschädigungen zu vermeiden.
* POUR PREVENIR LES CHOCS ELECTRIQUES NE PAS UTILISER CETTE FICHE POLARISEE AVEC UN
PROLONGATEUR, UNE PRISE DE COURANT OU UNE AUTRE SORTIE DE COURANT, SAUF SI LES LAMES
PEUVENT ETRE INSEREES A FOND SANS EN LAISSER AUCUNE PARTIE A DECOUVERT.
* TO PREVENT ELECTRIC SHOCK, DO NOT USE THIS PLUG WITH AN EXTENSION CORD, RECEPTACLE OR
OTHER OUTLET UNLESS THE BLADES CAN BE FULLY INSERTED TO PREVENT BLADE EXPOSURE.
* UM DIE GEFAHR EINES STROMSCHLAGS ZU VERMEIDEN, VERWENDEN SIE DIESEN STECKER
NUR IN KOMBINATION MIT VERLÄNGERUNGSKABELN, KUPPLUNGEN UND STECKDOSEN,
IN DIE DIE STECKERKONTAKTE VOLLSTÄNDIG EINGEFÜHRT WERDEN KÖNNEN, SO DASS KEINE
SPANNUNGSFÜHRENDEN TEILE FREILIEGEN.
PER EVITARE SHOCK ELETTRICI NON UTILIZZARE LA SPINA IN DOTAZIONE CON UNA PROLUNGA, UNA
PRESA A MURO O ALTRO CHE NON CONSENTA IL COMPLETO INSERIMENTO DELLE LAMELLE, EVITANDO
ANCHE LA MINIMA ESPOSIZIONE.
IMPORTANT

LIRE LES INSTRUCTIONS
Toutes les consignes de sécurité et instructions
quand à l’utilisation de notre produit doivent faire
l’objet d’une lecture attentive.
MEMORISER CES INSTRUCTIONS
Les consignes de sécurité et instructions doivent
être retenues pour un usage futur de votre produit
TENEZ COMPTE DES ALERTES
Les mises en garde inscrites sur votre appareil ou
imprimées dans ce manuel doivent être respectées.
SUIVRE LES INSTRUCTIONS
Toutes les instructions concernant l’utilisation et
le fonctionnement de votre appareil doivent être
suivies.
EAU ET MOISISSURE
Votre appareil ne doit pas être utilisé prés d’un point
d’eau ou dans un environnement trop humide.
VENTILATION
Votre appareil doit être installé de telle façon que
sa ventilation ne soit en aucun cas entravée. Il ne
faut pas l’utiliser sur un lit, un sofa ou une surface
similaire qui obstrurait ses grilles de ventilation. Dans
tous les cas, il convient de vérifier que votre appareil
puisse être ventilé naturellement. Ne pas l’encastrer.
SOURCES DE CHALEUR
Il est conseillé d’éloigner votre appareil d’une source
de chaleur type radiateur ou autres sources
produisant une source de chaleur.
ALIMENTATION ELECTRIQUE
Le branchement de votre appareil doit se faire
en respectant les indications contenues dans ce
manuel. Votre installation électrique doit être en
conformité afin de permettre une utilisation en toute
sécurité de votre appareil.
MASSE ET POLARITÉ
Des précautions doivent être prises afin de respecter
la polarité et la mise à la terre de votre appareil.
PROTECTION DU CORDON SECTEUR
Votre cordon d’alimentation doit être correctement
installée afin qu’il ne soit pas piétiné ou arraché.
NETTOYAGE
Votre appareil doit être néttoyée seulement avec les
produits préconisés par le fabricant. Des produits
trop agressifs contenant des acides peuvent
endommagés les différentes surfaces de votre
appareil.
AUTRES SOURCES D’ALIMENTATION
Dans le cas d’une utilisation d’une antenne externe,
vous devez l’éloigner d’une ligne électrique.
PERIODE D’INUTILISATION
Si vous quittez votre domicile pour une longue
pèriode, nous vous conseillons de débrancher votre
appareil.
PÉNÉTRATION D’OBJETS OU DE LIQUIDE
Des précautions doivent être prises afin d’empécher
la pénétration d’objets ou de liquide à l’intérieur de
votre appareil.
SERVICE
Votre appareil doit être impérativement dépanné par
du personnel compétent et qualifié. Afin de connaitre
la station technique la plus proche, merci de
contacter votre distributeur national.
LEGGERE ATTENTAMENTE TUTTE LE
ISTRUZIONI
sulla sicurezza e sul funzionamento prima di
utilizzare l’apparecchio.
CONSERVARE QUESTE ISTRUZIONI per
consultazioni future.
ATTENERSI ALLE AVVERTENZE E SEGUIRE
TUTTE LE ISTRUZIONI sul funzionamento
dell’apparecchio.
ACQUA E UMIDITÀ – L’apparecchio non deve
essere utilizzato vicino all’acqua, ad es. vasca da
bagno, al lavabo, in un seminterrato umido o vicino
ad una piscina, ecc.
VENTILAZIONE – Posizionare l’apparecchio in
modo che riceva una corretta ventilazione, non su
divani, tappeti o superfici simili, in scaffali o armadi
che impediscano il flusso d’aria.
RISCALDAMENTO ¬- Posizionare l’apparecchio
lontano da fonti di calore, come termosifoni,
radiatori termici, cucine o altri apparecchi (inclusi
amplificatori).
ALIMENTAZIONE – Collegare l’apparecchio
soltanto al tipo di alimentazione descritto nelle
istruzioni di funzionamento o indicato
sull’apparecchio stesso.
Messa a terra e polarizzazione – Assicurarsi che
l’apparecchio sia correttamente ed effettivamente
collegato alla massa di terra e sia osservata la
polarizzazione della spina.
PROTEZIONE DEL CAVO DI ALIMENTAZIONE
– Disporre i cavi di alimentazione in modo che non
vengano calpestati e quindi non sotto oggetti che
possano perforare l’isolante o comunque premerli.
Prestare molta attenzione ai cavi ed alle spine che
fuoriescono direttamente dall’apparecchio.
PULIZIA – L’apparecchio deve essere pulito solo
secondo le raccomandazioni del produttore.
LINEE ELETTRICHE – Montare l’antenna esterna
lontano dalle linee elettriche.
PERIODO DI NON-UTILIZZO – Staccare la spina
dell’apparecchio dalla presa quando non viene
utilizzato per un lungo periodo di tempo.
CADUTA DI OGGETTI E LIQUIDI – Non lasciar
cadere oggetti e non versare liquidi nelle aperture
dello chassis.
DANNI CHE RICHIEDONO MANUTENZIONE –La
manutenzione deve essere effettuata solo da
personale qualificato nei seguenti casi:
• Ilcavodialimentazioneolaspinasono
danneggiati , oppure
• Oggettioliquidisonocadutidentro
l’unità, oppure
• L’unitàèstataespostaapioggia,oppure
• L’unitànonfunzionanormalmenteole
sue prestazioni hanno subito un cambiamento
significativo, oppure
• L’unitàècadutaoilcontenitoreèstato
danneggiato.
MANUTENZIONE – L’utente non deve effettuare
alcuna manutenzione, eccetto quella descritta nelle
istruzioni per il funzionamento. Il resto deve essere
eseguito da personale autorizzato.
CONSIGNES DE SECURITE - ISTRUZIONI DI SICUREZZA
3

4
READ INSTRUCTIONS
All the safety and operating instructions should be read before the appliance is operated.
RETAIN INSTRUCTIONS
The safety anil operating instructions should be retained for future use.
HEED WARNINGS
All warnings on the appliance and in the operating instructions should be adhered to.
FOLLOW INSTRUCTIONS
All operating and use instructions should be followed.
WATER AND MOISTURE
The appliance should not be used near water for example, near a bathtub, washbowl, kitchen sink, laundry tub, in a
wet basement, or near a swimming pool, etc.
VENTILATION
The appliance should be situated so that its location or position does not interfere with its proper ventilation. For
example, the appliance should not be situated on a bed. sofa, rug, or similar surface that may block the ventilation
openings; or, placed in a built-in installation, such as a bookcase or cabinet that may impede the flow of ZENEO ZX
through the ventilation openings.
HEAT
The appliance should be situated away from heat sources such as radiators, heat registers, stoves, or other appliance
(including amplifiers) that produce heat.
POWER SOURCES
The appliance should be connected to a power supply only of the type described in the operating instructions or as
markedon the appliance.
GROUNDING OR POLARIZATION
Precautions should be taken so that the grounding or polarization means of anappliance is not defeated.
POWER-CORD PROTECTION
Power-supply cords should be routed so that they are not likely to be walked on or pinched by paying particular
attention to cords at plugs, convenience receptacles, and the point where they exit from the appliance.
CLEANING
The appliance should be cleaned only as recommended by the manufacturer.
POWER LINES
An outdoor antenna should be located away from power lines.
NON-USE PERIODS
The power cord of the appliance should be unplugged from the outlet when left unused for a long period of time.
OBJECT AND LIQUID ENTRY
Care should be taken so that objects do not fall and liquids are not spilled into the enclosure through openings.
DAMAGE REQUIRING SERVICE
The appliance should be serviced by qualified service personnel when:
•Thepower-supplycordortheplughasbeendamaged;or
•Objectshavefallen,orliquidshavespilledintotheappliance;or
•Theappliancehasbeen.exposedtorain:or
•Theappliancedoesnotappeartooperatenormallyorexhibitsamarkedchangeinperformance;or
•Theappliancehasbeendropped,ortheenclosuredamaged.
SERVICING
The user should not attempt to service the appliance beyond that described in the operating instructions. All other
servicing should be referred to qualified service personnel.
SAFETY INSTRUCTIONS

HINWEISE LESEN
Alle Sicherheits- und Bedienungshinweise
müssen gelesen werden, bevor das Gerät in
Betrieb genommen wird.
HINWEISE AUFBEWAHREN
Die Sicherheitshinweise und die Bedienungsan-
leitung müssen zur späteren Verwendung aufbe-
wahrt werden.
WARNUNGEN BEACHTEN
Alle Warnungen auf dem Gerät und in der
Bedienungsanleitung müssen beachtet werden.
ANWEISUNGEN BEFOLGEN
Alle Anweisungen zur Bedienung und Verwen-
dung müssen befolgt werden.
WASSER UND FEUCHTIGKEIT
Das Gerät darf nicht in der Nähe von Wasser,
z.B. in der Nähe von Badewannen, Wasch-
becken, Spülbecken, Waschwannen, in feuchten
Kellern oder an Swimmingpools, verwendet
werden. Achten Sie bitte darauf, dass keine
Gefäße, die Flüssigkeiten enthalten wie z.B.
Vasen, auf dem Gerät abgestellt werden.
BELÜFTUNG
Das Gerät muss so aufgestellt werden, dass eine
ordnungsgemäße Belüftung gewährleistet ist.
Beispielsweise darf das Gerät nicht auf einem
Sofa, Teppich oder einer ähnlichen Oberfläche
aufgestellt werden, die die Kühlkörper oder
Lüftungsöffnungen versperren könnten, und es
darf nicht in eine umschlossene Umgebung,
etwa in ein Bücherregal oder einen Schrank,
eingebaut werden, die den Luftstrom durch die
Belüftungsöffnungen behindert.
STANDSICHERHEIT
Verwenden Sie bitte ausschließlich Möbel und
andere Geräte zum Anbringen und Draufstellen
der Produkte, die beim Hersteller erhältlich sind
oder von Ihm empfohlen werden. Beachten Sie
bitte, dass fahrbare Tischgeräte oder Regale,
auf denen die Produkte platziert werden, sehr
vorsichtig zu bewegen sind, um Schäden oder
Verletzungen durch ein Umkippen zu vermeiden.
WARNUNG
Dieses Produkt muss auf einer festen, ebenen
Oberfläche aufgestellt werden. Legen Sie das
Gerät nicht auf die Seite, da auf die einzelnen
Seiten eine starke Belastung ausgeübt wird.
Hierdurch kann das Gehäuse beschädigt werden.
Beachten Sie bitte die Abbildung.
WÄRME
Das Gerät ist von Wärmequellen, wie Heiz-
körpern, Heißluftschächten, Öfen und anderen
Wärme erzeugenden Geräten (einschließlich
Verstärkern) entfernt aufzustellen. Setzen Sie das
Gerät nicht direkter Sonneneinstrahlung aus.
STROMQUELLEN
Das Gerät darf nur an Stromnetzen
angeschlossen werden, die in der
Bedienungsanleitung
beschrieben oder auf dem Gerät angegeben
sind.
ERDUNG UND POLUNG
Es ist dafür zu sorgen, dass die Mittel zur
ordnungsgemäßen Erdung und Polung des
Geräts nicht beeinträchtigt werden.
SCHUTZ DER KABEL
Alle Anschlusskabel müssen so verlegt
werden, dass sie nicht betreten oder gequetscht
werden oder auch zu Stolperfallen werden.
Auf das Netzkabel ist besonders an Steckern,
Mehrfachsteckdosen und an der Anschlusstelle
des Gerätes zu achten.
REINIGUNG
Das Gerät sollte nur entsprechend der
Empfehlung des Herstellers gereinigt werden.
ÜBERLANDLEITUNGEN
Eine etwaige Außenantenne darf keinesfalls in
der Nähe von Überlandleitungen installiert
werden.
AUßERBETRIEBNAHME
Der Netzstecker sollte bei Gewitter, oder wenn
das Gerät längere Zeit nicht verwendet wird, aus
der Steckdose entfernt werden.
EINDRINGENDE GEGENSTÄNDE UND
FLÜSSIGKEITEN
Achten Sie darauf, dass in die Öffnungen des
Gehäuses keine Gegenstände fallen und keine
Flüssigkeiten laufen.
VERPACKUNG
Bitte heben Sie die Verpackung für einen
eventuell späteren Transport auf, und halten
Sie die Polybeutel von Kindern fern, da hier bei
unsachgemäßem Umgang ein Erstickungsrisiko
besteht.
REPARATURBEDÜRFTIGE
BESCHÄDIGUNGEN
Das Gerät muss von qualifiziertem Fachper-
sonal gewartet werden, wenn einer der
folgenden Punkte zutrifft:
•DasNetzkabeloderderNetzstecker
beschädigt ist.
•IndasGerätFremdkörperoderFlüssigkeiten
eingedrungen sind.
•DasGerätderNässeausgesetztwurde.
•DasGerätnichtordnungsgemäßfunktioniert
oder Auffälligkeiten hinsichtlich der Leistung
aufweist.
•DasGeräteinemSturzschadenunterlag,oder
das Gehäuse beschädigt ist.
WARTUNG
Eine Wartung des Geräts durch den Benutzer
darf nur in dem in der Bedienungsanleitung
beschriebenen Umfang erfolgen. Alle
weiteren Wartungsarbeiten müssen von
qualifiziertem Fachpersonal durchgeführt
werden.
SICHERHEITSHINWEISE
5

6
Félicitations pour votre achat de notre système HiFi sans fil ZENEO ZX
Congratulations on your purchase of our wireless ZENEO ZX
Herzlichen Glückwunsch zum Kauf unseres drahtlosen HiFi-Systems ZENEO ZX
Congratulazioni per l’acquisto del nostro sistema HiFi wireless ZENEO ZX
Bienvenu !
Nous vous remercions d’avoir choisi un produit Advance Paris. Votre ZENEO ZX vous procurera un réel plaisir musical
pendant de longues années. Ces systèmes HiFi “sans fil“ associe une superbe présentation, à une rigueur technique
exemplaire. Complément idéal de votre iPhone, iPad, iPod, smartphone, tablettes, ordinateur PC ou MAC.
Rien n’a été laissé au hasard, tous les composants sont de type “Audiophile“ transformateur d’alimentation largement
dimensionné, transistors de puissance bipolaires, haut-parleurs de graves à membrane en pulpe de cellulose traitée et
tweeter à dôme traité garantiront des performances élevées. Chaque système est composé de deux enceintes, une enceinte
maitre droite et une enceinte secondaire gauche, les deux enceintes étant amplifiées.
Votre système ZENEO ZX bénéficie d’une garantie de deux ans.
Welcome !
We’re pleased that you’ve chosen an Advance Paris product. Your ZENEO ZX wireless system will give you real musical
pleasure for long time. Those wireless HiFi system combine a superb presentation to perfect technical accuracy
The ZENEO ZX is the ideal complement of your iPhone, iPad, iPod, smartphone, tablet, PC or Mac computer.
With ZENEO ZX, nothing was left to chance, all the components are sound-friendly: it has a high power transformer, bipolar
high current transistors, pulp cellulose cone woofers and special treatment dome tweeter to ensure outstanding performing
ability, as weel as a delicate and subtle rendering of your favorite music.
Each system is made up of two speakers, a right master speaker and a left secondary speaker, both speakers
being amplified. Warranty period is two years.
Willkommen!
Wir freuen uns, dass Sie sich für den Kauf eines Advance Paris Produktes entschieden haben. Ihr kabelloses ZENEO ZX
System garantiert Ihnen einen dauerhaften Musikgenuss
Die Lautsprecher sind der ideale Partner für Ihr iPhone, iPad, iPod, Smartphone, Tablet, PC oder Mac Computer.
Jedes System besteht aus zwei Lautsprechern, einem rechten Hauptlautsprecher und einem linken Sekundärlautsprecher,
wobei beide Lautsprecher verstärkt werden.
Die Gewährleistungsfrist beträgt zwei Jahre.
Benvenuto !
Grazie per aver scelto un prodotto Advance Paris. Il tuo ZENEO ZX ti darà un vero piacere musicale
per molti anni. Questi sistemi HiFi «wireless» combinano una presentazione eccellente con il rigore tecnico.
copia. Complemento ideale per il tuo iPhone, iPad, iPod, smartphone, tablet, PC o computer MAC.
Nulla è stato lasciato al caso, tutti i componenti sono in gran parte del tipo «Audiophile» trasformatore di potenza
transistor bipolari di potenza dimensionati, woofer a membrana in pasta di cellulosa e tweeter ad alta velocità
la cupola trattata garantirà alte prestazioni. Ogni sistema è composto da due altoparlanti, un altoparlante principale destro e
un altoparlante secondario sinistro, entrambi amplificati.
Il tuo sistema ZENEO ZX è coperto da una garanzia di due anni.

ZENEO ZX Speakers pairing
7
CÂBLE SECTEUR / SÉLECTEUR DE TENSION / COMMUTATEUR GÉNÉRAL D’ALIMENTATION
Vous devez vous assurer de la bonne tension secteur de votre pays. Par défaut et par sécurité, le
sélecteur a été configuré pour 230 V. Avant de relier le ZENEO ZX au secteur, vérifiez que le
commutateur général est sur “OFF”.
POWER CORD / VOLTAGE SELECTOR / GENERAL ON OFF SWITCH
You need to be sure about the voltage of your country. In case that you need to use your appliance
in 115V, you need to change the position of the voltage on the rear panel.
Before plugging in the ZENEO ZX, its master power switch must be in the OFF position.
STROMANSCHLUSS / SPANNUNGSSCHALTER / GERÄTESCHALTER
Stellen Sie sicher das der Spannungswahlschalter auf die Spannung eingestellt ist, die in Ihrem Land
Standard ist. Der Hauptschalter muss vor dem Anschließen an das Stromnetz auf OFF stehen.
CAVO DI ALIMENTAZIONE/SELETTORE DI VOLTAGGIO/ INTERRUTTORE GENERALE
In questa collocazione troviamo la presa di alimentazione, il selettore del voltaggio e
l’interruttore di accensione.
Prima di inserire il cavo nella presa attiva, l’interruttore principale deve essere su OFF ed allo stesso
tempo accertarsi della tensione del proprio paese.
e
q
w
e
q
w
e
q
w
r r

8
APPAIRAGE DE L’ENCEINTE DROITE (MASTER) ET GAUCHE (SLAVE)
Pour que l’enceinte droite MASTER et l’enceinte gauche SLAVE communiquent entre elles, elles
doivent être appairées. Connectez vos enceintes, puis allumez d’abord l’enceinte MASTER et
l’enceinte SLAVE immédiatement après. La led de connexion blanche clignote rapidement. Appuyez
sur les boutons PAIR de chaque enceinte pour lancer le jumelage. Après quelques instants, la led se
fixe, l’appairage s’effectue.
Si le haut-parleur ESCLAVE ne s’appaire pas, il passera en mode veille après une minute (voyant
orange allumé). Dans ce cas, appuyez sur le bouton PAIR pour allumer l’enceinte et appuyez à
nouveau sur PAIR pour activer le jumelage.
ASSOCIATION OF THE RIGHT (MASTER) AND LEFT (SLAVE) SPEAKER
In order for the MASTER right speaker and SLAVE left speaker to communicate with each other,
they must be paired. Connect your speakers, then turn on the MASTER speaker first and the SLAVE
speaker immediately after. The white connection leds flashes quickly. Press the PAIR buttons on
each speaker to start pairing. After a few moments, the LEDS are fixed, the pairing is carried out.
If the SLAVE speaker does not pair, it will go into standby mode after one minute (orange LED on).
In this case, press the PAIR button to turn on the speaker and press PAIR again to activate pairing.
VEREIN DES RECHTEN (MASTER) UND LINKEN (SLAVE) LAUTSPRECHERS
Damit der rechte MASTER-Lautsprecher und der linke SLAVE-Lautsprecher miteinander
kommunizieren können, müssen sie gepaart werden. Schließen Sie Ihre Lautsprecher an und
schalten Sie dann zuerst den MASTER-Lautsprecher und unmittelbar danach den SLAVE-
Lautsprecher ein. Die weiße Verbindungs-LED blinkt schnell. Drücken Sie die PAIR-Tasten an jedem
Lautsprecher, um das Pairing zu starten. Nach wenigen Augenblicken wird die LED fixiert, das
Pairing wird durchgeführt.
Wenn der SLAVE-Lautsprecher nicht gekoppelt wird, geht er nach einer Minute in den Standby-
Modus (orange LED leuchtet). Drücken Sie in diesem Fall die PAIR-Taste, um den Lautsprecher
einzuschalten, und drücken Sie erneut PAIR, um die Kopplung zu aktivieren.
ASSOCIAZIONE DEL DIFFUSORE DESTRO (MASTER) E SINISTRO (SLAVE)
Affinché l’altoparlante destro MASTER e l’altoparlante sinistro SLAVE possano comunicare tra loro,
devono essere abbinati. Collega i tuoi altoparlanti, quindi accendi prima l’altoparlante MASTER e
subito dopo l’altoparlante SLAVE. Il led bianco di connessione lampeggia velocemente. Premi i
pulsanti PAIR su ciascun altoparlante per avviare l’associazione. Dopo alcuni istanti, il LED è fisso,
l’abbinamento viene effettuato.
Se l’altoparlante SLAVE non si accoppia, entrerà in modalità standby dopo un minuto (LED
arancione acceso). In questo caso, premere il pulsante PAIR per accendere l’altoparlante e premere
nuovamente PAIR per attivare l’associazione.
ZENEO ZX Speakers pairing
r

9
RÉGLAGES & CONNEXIONS FACE ARRIÈRE
REAR PANEL CONNECTIONS & CONTROLS
RÜCKSEITIGE ANSCHLÜSSE UND EINSTELLUNGEN
CONNESSIONI E COMANDI DEL PANNELLO POSTERIORE
t
yu
i
o
a
s
d

o
a
EVENT D’ACCORD
Pour un résultat optimum, cet évent d’accord ne doit pas être obstrué. Une distance minimum
d’environ 10cm doit être observée.
PORT TUBE
For best results, this tuning vent should not be obstructed. A minimum distance of around 10cm
should be observed.
PORT TUBE
Für beste Ergebnisse sollte diese Abstimmöffnung nicht blockiert werden. Ein Mindestabstand von
ca. 10 cm sollte eingehalten werden.
PORT TUBE
Per ottenere i migliori risultati, questa presa d’aria non dovrebbe essere ostruita. È necessario
rispettare una distanza minima di circa 10 cm.
SORTIE SUBWOOFER / CAISSON DE GRAVE
Permet de connecter un caisson de grave
SUBWOOFER OUTPUT
To connect an active subwoofer
SUBWOOFER OUT
Zu active subwoofer anschließen
SUBWOOFER TERMINALI
Permette di collegare subwoofer
BOUTON DE VOLUME / SELECTEUR DE SOURCES / APPAIRAGE BLUETOOTH
Ce bouton a 3 fonctions. Vous pouvez régler le volume en tournant ce bouton, sélectionner une
source par un appui court sur le bouton ou lancer l’appairage Bluetooth d’un appareil par
un appui long.
VOLUME / INPUT BUTTON / BLUETOOTH PAIRING
This button has 3 functions. You can adjust the volume by turning this knob, select a source
with a short press on the button or start the Bluetooth pairing of a device with a long press.
VOLUME / INPUT-TASTE / BLUETOOTH PAIRING
Diese Taste hat 3 Funktionen. Sie können die Lautstärke durch Drehen dieses Reglers einstellen,
mit einem kurzen Tastendruck eine Quelle auswählen oder mit einem langen Tastendruck die
Bluetooth-Kopplung eines Geräts starten.
TASTO VOLUME / INPUT / ABBINAMENTO BLUETOOTH
Questo pulsante ha 3 funzioni. È possibile regolare il volume ruotando questa manopola, selezionare
una sorgente con una breve pressione sul pulsante o avviare l’accoppiamento Bluetooth di un
dispositivo con una pressione prolungata.
ENTREES AUXILIAIRES:
Vos ZENEO ZX sont équipés de 2 entrées auxiliaires AUX1 et AUX2. L’entrée AUX1 permet la
connexion d’une source standard au niveau de sortie normalisée, mais aussi la connexion d’une
platine disque équipée d’une cellule MM (Moving Magnet). Le sélecteur permet de choisir entre ces
deux types de source, standard ou phono. La prise GND de votre platine disque doit être raccordée
à la prise GND des ZENEO ZX afin d’éviter une boucle de masse.
AUXILIARY INPUTS
Your ZENEO ZX are equipped with 2 auxiliary inputs AUX1 and AUX2. The AUX1 input allows the
connection of a standard source at the standardized output level, but also the connection of a
t
y
s
10

turntable equipped with an MM cartridge (Moving Magnet). The selector allows you to choose
between these two types of source, standard or phono. The GND socket of your phono must be
connected to the GND socket of the ZENEO ZX in order to avoid a ground loop.
AUX EINGÄNGE
Ihr ZENEO ZX ist mit 2 Hilfseingängen AUX1 und AUX2 ausgestattet. Der AUX1-Eingang
ermöglicht den Anschluss einer Standardquelle mit dem standardisierten Ausgangspegel, aber auch
den Anschluss eines mit einer MM-Kassette (Moving Magnet) ausgestatteten Plattenspielers. Mit
dem Selektor können Sie zwischen diesen beiden Quellentypen Standard oder Phono wählen. Die
GND-Buchse Ihres Phonos muss mit der GND-Buchse des ZENEO ZX verbunden sein, um eine
Erdungsschleife zu vermeiden.
INGRESSI AUSILIARI
Il tuo ZENEO ZX è dotato di 2 ingressi ausiliari AUX1 e AUX2. L’ingresso AUX1 consente il
collegamento di una sorgente standard a livello di uscita standardizzato, ma anche il collegamento
di un fono di cartuccia MM (Moving Magnet). Il selettore consente di scegliere tra questi due tipi di
sorgente, standard o fono. La presa GND del vostro fono deve essere collegata alla presa GND
dell’ZENEO ZX per evitare un loop di massa.
ENTRÉES DIGITALES COAXIALES (1), OPTIQUES (1)
Votre ZENEO ZX est équipé de d’une entrée coaxiale et une entrée optique. Vous pouvez
connecter sur ces entrées, la sortie numérique de votre lecteur Cd, MD, etc... et profiter de
l’excellente qualité du convertisseur intégré.
OPTICAL (1), COAXIAL (1) DIGITAL INPUTS
Your ZENEO ZX integrates a DAC (Digital audio converter) with one coaxials inputs and one
optical input. You can connect the digital output of your CD, MD, etc... and use the high quality DAC
converter of your amplifier in order to obtain a better sound result.
OPT., COAX DIGITALEINGÄNGE
Ihr ZENEO ZX enthält einen DAC (Digital Audio Converter) mit einem Koaxialeingang und einem
optische Eingabe. Sie können den digitalen Ausgang Ihrer CD, MD usw. anschließen und den
hochwertigen DAC verwenden
Konverter Ihres Verstärkers, um ein besseres Klangergebnis zu erzielen.
INGRESSI DIGITALI COASSIALE (1) E OTTICO (1)
ZENEO ZX integra un DAC (convertitore audio digitale) con uno ingressi coassiali e uno
ingresso ottico. È possibile collegare l’uscita digitale del proprio CD, MD, ecc. E utilizzare il DAC di
alta qualità convertitore del tuo amplificatore per ottenere un risultato sonoro migliore.
USB B FOR MAC OR PC
Permet la connexion d’un PC ou d’un MAC pour la lecture de votre discothèque musicale
Allows connection of a PC or MAC for playing your music library
Ermöglicht den Anschluss eines PCs oder MACs zum Abspielen Ihrer Musikbibliothek
Consente la connessione di un PC o MAC per riprodurre la tua libreria musicale
u
i
11
RESET FUNCTION
Appuyez 4 sec. sur le bouton Pair de l’enceinte MASTER (right), le niveau de volume sera réglé sur 30%, l’entrée
par défaut sera sur Bluetooth et les graves et aigus sur 0dB.
Press 4 sec. the Pair button of the MASTER speaker (right), the volume level will be set to 30%, the default input
will be on Bluetooth and bass and treble on 0dB.
4 Sek. drücken. die Pair-Taste des MASTER-Lautsprechers (rechts), der Lautstärkepegel wird auf 30% eingestellt,
der Standardeingang ist auf Bluetooth und Bässe und Höhen auf 0dB.
Premere 4 sec. il pulsante Pair dell’altoparlante MASTER (a destra), il livello del volume sarà impostato al 30%,
l’ingresso predefinito sarà su Bluetooth e bassi e alti su 0dB.

UTILISATION DE LA TÉLÉCOMMANDE
USE OF THE REMOTE CONTROL
UTILIZZO DEL TELECOMANDO
VERWENDUNG DER FERNBEDIENUNG
Standby Mode
Mode Standby
Standby/Ein
Standby
Input selector
Sélecteur de sources
Eingangswahlschalter
Selettore di ingresso
Volume adjustment +/-
Réglage du volume +/-
Lautsärkeregelung +/-
Regolazione del volume +/-
Previous track Bluetooth
Morceau précédent Bluetooth
Titelsprung zurück Bluetooth
Traccia precedente Bluetooth
Next track Bluetooth
Morceau suivant Bluetooth
Titelsprung vor Bluetooth
Prossima traccia Bluetooth
Play / Pause Bluetooth
Lecture / Pause Bluetooth
Spielpause Bluetooth
Play / Pausa Bluetooth
Bass adjustment
Réglage des graves
Bassregelung
Regolazione dei bassi
Treble adjustment
Réglages des aigus
Hochtonregelung
Regolazione degli acuti
Linear (reset bass & treble) / BT 3sec (to
pair your Bluetooth input device)
Linear (remise à zéro graves et aigus)
BT 3sec pour appairage source Bluetooth)
Linear (Bass & Höhen zurücksetzen)
BT 3sec (zum Koppeln Ihres Bluetooth-
Geräts)
Lineare (reimposta bassi e acuti) BT
3sec (per accoppiare il tuo dispositivo
Bluetooth)
12
q w
i
r
e
t
y
u
o
a
s
d
q
w
e
u
r
t
y
a
s
i
d
o
Input
LED status

INPUTS
Bluetooth Blue
USB White
Optical Red
Coaxial Purple
Aux1/Phono Green
Aux2/Stream Yellow
(Input LED only on Master speaker)
APPAIRAGE DE VOTRE SOURCE BLUETOOTH
BLUETOOTH DEVICE PAIRING
VERBINDEN DER BLUETOOTH QUELLE
ASSOCIAZIONE DEL DISPOSITIVO BLUETOOTH
VOYANT LED
LED INDICATOR
LED-ANZEIGE
INDICATORE LED
SUIVEZ IMPÉRATIVEMENT CES 3 ÉTAPES POUR APPAIRER VOTRE
PÉRIPHÉRIQUE AUDIO BLUETOOTH
1 - Vérifiez que votre système ZENEO ZX est branché et que l’interrupteur ON/OFF est sur
ON. Appuyez sur la touche Standby de votre télécommande puis appuyez sur la touche
INPUT afin de sélectionner la source Bluetooth. La LED bleu clignote. Appuyer alors pendant
3 secondes sur le bouton de la télécommande.
2 - Allez dans le menu réglage, sous-menu bluetooth, de la source audio (votre smartphone,
tablette, PC, MAC, etc.) que vous souhaitez appairer avec votre système ZENEO ZX. Après
quelques instants, le système ZENEO ZX apparaitra dans la liste de vos périphériques
Bluetooth. Sélectionnez le et valider sa connexion. Au cas où un code PIN vous est
demandé, tapez 0000 ou 1234. Lorsque l’appairage est réalisé, la led bleu devient fixe.
3 - Passer votre périphèrique audio en mode lecture et profitez d’une restitution sonore de
qualité grâce à la technologie Apt-X Bluetooth.
Si vous vous éloignez votre périphèrique audio à une distance hors de portée de votre
système ZENEO ZX, la liaison bluetooth se désactivera et vous devrez répéter l’étape 2
pour vous reconnecter. Si vous souhaitez changer de périphèrique Bluetooth, vous devez
désactiver la connexion du premier et activer la connexion du second via les menus réglages
respectifs.
MUST FOLLOW THESE 3 STEPS TO PAIR ZENEO ZX BLUETOOTH
1 - Check that your ZENEO ZX system is plugged in and that the ON / OFF switch is ON.
Press the Standby button on your remote control then press the INPUT button to select the
Bluetooth source. The blue LED flashes. Then press the button oon the remote control for
o
FR
EN
STATUS
Standby Amber
Pairing mode White LED
flashes
Pairing done White steady
LED

3 seconds.
2 - Go to the settings menu, bluetooth submenu, of the audio source (your smartphone,
tablet, PC, MAC, etc.) that you want to pair with your ZENEO ZX system. After a few
moments, the ZENEO ZX system will appear in the list of your Bluetooth devices. Select it
and validate its connection. If you are asked for a PIN code, enter 0000 or 1234. When the
pairing is completed, the blue LED becomes fixed.
3 - Switch your audio device to playback mode and enjoy quality sound reproduction thanks
to Apt-X Bluetooth technology.
If you move your audio device to a distance beyond the range of your ZENEO ZX system, the
bluetooth connection will be disabled and you will have to repeat step 2 to reconnect. If you
want to change the Bluetooth device, you must deactivate the connection of the first
and activate the connection of the second via the respective settings menus.
MÜSSEN DIESEN 3 SCHRITTEN FOLGEN, UM BLUETOOTH ZU PAAREN
1 - Überprüfen Sie, ob Ihr ZENEO ZX-System angeschlossen ist und der ON/OFF-Schalter
auf ON steht. Drücken Sie die Standby-Taste auf Ihrer Fernbedienung und dann die INPUT-
Taste, um die Bluetooth-Quelle auszuwählen. Die blaue LED blinkt. Drücken Sie dann die
Taste auf der Fernbedienung für 3 Sekunden.
2 - Gehen Sie zum Einstellungsmenü, Bluetooth-Untermenü, der Audioquelle (Ihr
Smartphone, Tablet, PC, MAC usw.), die Sie mit Ihrem ZENEO ZX-System koppeln möchten.
Nach wenigen Augenblicken erscheint das ZENEO ZX-System in der Liste Ihrer Bluetooth-
Geräte. Wählen Sie es aus und bestätigen Sie seine Verbindung. Wenn Sie nach einem
PIN-Code gefragt werden, geben Sie 0000 oder 1234 ein. Wenn die Kopplung
abgeschlossen ist, leuchtet die blaue LED dauerhaft.
3 - Schalten Sie Ihr Audiogerät in den Wiedergabemodus und genießen Sie eine hochwertige
Klangwiedergabe dank der Apt-X Bluetooth-Technologie.
Wenn Sie Ihr Audiogerät außerhalb der Reichweite Ihres ZENEO ZX-Systems aufstellen, wird
die Die Bluetooth-Verbindung wird deaktiviert und Sie müssen Schritt 2 wiederholen, um die
Verbindung wiederherzustellen. Wenn Sie das Bluetooth-Gerät wechseln möchten, müssen
Sie die Verbindung des ersten deaktivieren und aktivieren Sie die Verbindung des zweiten
über die jeweiligen Einstellungsmenüs.
È NECESSARIO SEGUIRE QUESTI 3 PASSAGGI PER ACCOPPIARE IL
BLUETOOTH
1 - Verifica che il tuo sistema ZENEO ZX sia collegato e che l’interruttore ON/OFF sia su ON.
Premi il pulsante Standby sul telecomando, quindi premi il pulsante INPUT per selezionare la
sorgente Bluetooth. Il LED blu lampeggia. Quindi premere il pulsante sul telecomando per 3
secondi.
2 - Vai al menu delle impostazioni, sottomenu bluetooth, della sorgente audio (il tuo
smartphone, tablet, PC, MAC, ecc.) che desideri associare al tuo sistema ZENEO ZX.
Dopo alcuni istanti, il sistema ZENEO ZX apparirà nell’elenco dei tuoi dispositivi Bluetooth.
Selezionalo e convalida la sua connessione. Se viene richiesto un codice PIN,
inserire 0000 o 1234. Al termine dell’associazione, il LED blu diventa fisso.
3 - Passa il tuo dispositivo audio in modalità di riproduzione e goditi una riproduzione del
suono di qualità grazie alla tecnologia Bluetooth Apt-X.
Se si sposta il dispositivo audio a una distanza oltre la portata del sistema ZENEO ZX, il
la connessione bluetooth verrà disattivata e dovrai ripetere il passaggio 2 per riconnetterti.
Se vuoi cambiare dispositivo Bluetooth, devi disattivare la connessione del primo
e attivare la connessione del secondo tramite i rispettivi menu di impostazione.
o
o
DE
IT
14

UNIQUEMENT POUR LES ZENEO ZX BLUETOOTH + WIFI
ONLY FOR ZENEO ZX BLUETOOTH + WIFI
NUR FÜR ZENEO ZX BLUETOOTH + WIFI
SOLO PER ZENEO ZX BLUETOOTH + WIFI
SI vous êtes l’heureux propriétaire d’un système ZENEO ZX Bluetooth + Wifi, un dongle
réseau WTX Microstream est inclus dans le carton. Pour le connecter, rien de plus simple,
brancher le sur l’entrée AUX2/STREAM de votre enceinte master et brancher le fil
d’alimentation entre le WTX Microstream est la prise CC.
If you are the proud owner of an ZENEO ZX Bluetooth + Wifi system, a WTX Microstream
network dongle is included in the box. To connect it, nothing could be simpler, plug it into the
AUX2 / STREAM input of your master speaker and connect the power wire between the
WTX Microstream and the DC socket.
Wenn Sie stolzer Besitzer eines ZENEO ZX Bluetooth + Wifi-Systems sind, ist ein WTX
Microstream-Netzwerkdongle im Lieferumfang enthalten. Um es anzuschließen, könnte
nichts einfacher sein, stecken Sie es in den AUX2 / STREAM-Eingang Ihres Master-
Lautsprechers und schließen Sie das Stromkabel zwischen dem WTX Microstream und der
DC-Buchse an.
Se sei l’orgoglioso proprietario di un sistema ZENEO ZX Bluetooth + Wifi, nella confezione è
incluso un dongle di rete WTX Microstream. Per collegarlo, niente potrebbe essere più
semplice, collegalo all’ingresso AUX2 / STREAM del tuo altoparlante principale e collega
il cavo di alimentazione tra il Microstream WTX e la presa DC.
IMPORTANT
Le branchement du dongle réseau WTX Microstream doit
sefaireuniquementlorsquevosZENEOZXsontsurO.
IMPORTANT
The connection of the WTX Microstream network dongle
mustonlybedonewhenyourZENEOZXisswitchedo.
WICHTIG
Der Anschluss des WTX Microstream-Netzwerkdongles
darf nur erfolgen, wenn Ihr ZENEO ZX ausgeschaltet ist.
IMPORTANTE
La connessione del dongle di rete WTX Microstream
deve essere eseguita solo quando ZENEO ZX è spento.
FR
EN
DE
IT
o
d
o
o
o
d
d
d
15

CONNEXION DU WTX MICROSTREAM
CONNECTING THE WTX MICROSTREAM
ANSCHLUSS DES WTX-MIKROSTREAMS
COLLEGAMENTO DEL MICROSTREAM WTX
DC 5V/1A (CC 3.5*1.35M)
Permet l’alimentation directe de lecteur
réseau WiFi wtx-Microstream
Allows direct power supply to wtx-
Microstream WiFi network player
Ermöglicht die direkte Stromversorgung
des wtx-Microstream
WiFi-Netzwerk-Players
Consente l’alimentazione diretta al lettore di
rete Wi-Fi wtx-Microstream
d
o
AUX2 / DONGLE
Connectez votre dongle WTX-Microstream
aux prises RCA AUX2 / DONGLE
Connect your WTX-Microstream dongle to
the RCA AUX2 / DONGLE sockets
Verbinden Sie Ihren WTX-Microstream
Dongle mit den RCA AUX2 / DONGLE
Buchsen
Collega il dongle WTX-Microstream alle
prese RCA AUX2 / DONGLE
DONGLE DC 5V POWERSUPPLY
Connectez le câble d’alimentation CC du
connecteur au connecteur DC5V du
WTX-Microstream
Connect the DC power cable from
connector dto the DC5V connector
of WTX-Microstream
Verbinden Sie das Gleichstromkabel von
Anschluss dmit dem DC5V-Anschluss
des WTX-Microstream
Collegare il cavo di alimentazione CC dal
connettore dal connettore DC5V
di WTX-Microstream
d
16

QUICKSTART NETWORK AUDIO PLAYER (WIFI INPUT)
QUICKSTART LECTEUR RÉSEAU HIFI (ENTRÉE WIFI)
STEP
1
Download ADVANCE PLAYSTREAM app
- To control your WTX-Microstream, please download the app ADVANCE
PLAYSTREAM on the App Store (if you are using Apple devices) or on Google
Play (if you are using an Android device).
Télécharger l’application ADVANCE PLAYSTREAM
- Pour contrôler votre WTX-Microstream, vous devez télécharger
sur l’App Store (Apple) ou sur Google Play (Android) l’application
Advance Playstream.
Laden Sie die ADVANCE PLAYSTREAM-App herunter
- Um Ihre WTX-Microstream zu steuern, laden Sie bitte die App ADVANCE
PLAYSTREAM im App Store (bei Verwendung von Apple-Geräten) oder bei
Google Play (bei Verwendung eines Android-Geräts) herunter.
Scarica l’app ADVANCE PLAYSTREAM
- Per controllare i tuoi WTX-Microstream, scarica l’app ADVANCE
PLAYSTREAM sull’App Store (se utilizzi dispositivi Apple) o su Google Play
(se utilizzi un dispositivo Android).
EN
FR
DE
IT
STEP
2
Launch the app
- Our Advance Playstream App is working
under iOS for Apple iphones and iPads or
under Android for others smartphones and
tablets.
Lancer l’application
- L’application Advance Playstream
fonctionne sous iOS pour les utilisateurs
d’iPhone et d’iPad (Apple) et sous Android
pour les smartphones et tablettes des autres
marques.
Starten Sie die App
- Unsere Advance Playstream App
funktioniert unter iOS für Apple iPhones
und iPads oder unter Android für andere
Smartphones und Tablets.
Avvia l’app
- La nostra app Advance Playstream
funziona con iOS per iPhone e iPad Apple o
con Android per altri smartphone e tablet.
EN
FR
DE
IT

QUICKSTART NETWORK AUDIO PLAYER (WIFI INPUT)
QUICKSTART LECTEUR RÉSEAU HIFI (ENTRÉE WIFI)
STEP
3a
How to connect your WTX-Microstream with WPS
Connecter votre WTX StreamPro à l’aide du WPS
So verbinden Sie Ihre WTX-Microstream mit WPS
Come collegare i tuoi WTX-Microstream con WPS
EN
FR
DE
IT
Select2,4Gwinetwork
Choisissezleréseauwien2,4G
Wählen Sie ein 2,4-G-WLAN-Netzwerk
Seleziona rete Wi-Fi 2,4G
EN
FR
DE
IT
Enteryourwipasswordifrequired
Entrervotremotdepassewisidemandé
Geben Sie bei Bedarf Ihr WLAN-Passwort ein
Premi il pulsante WPS sui WTX-Microstream
EN
FR
DE
IT
Press the WPS button on the WTX-Microstream
Appuyez puis relacher le bouton WPS du WTX-Microstream
Drücken Sie die WPS-Taste an den WTX-Microstream
Inseriscilatuapasswordwiserichiesta
EN
FR
DE
IT
18
Table of contents
Other Advance Paris Speakers manuals


