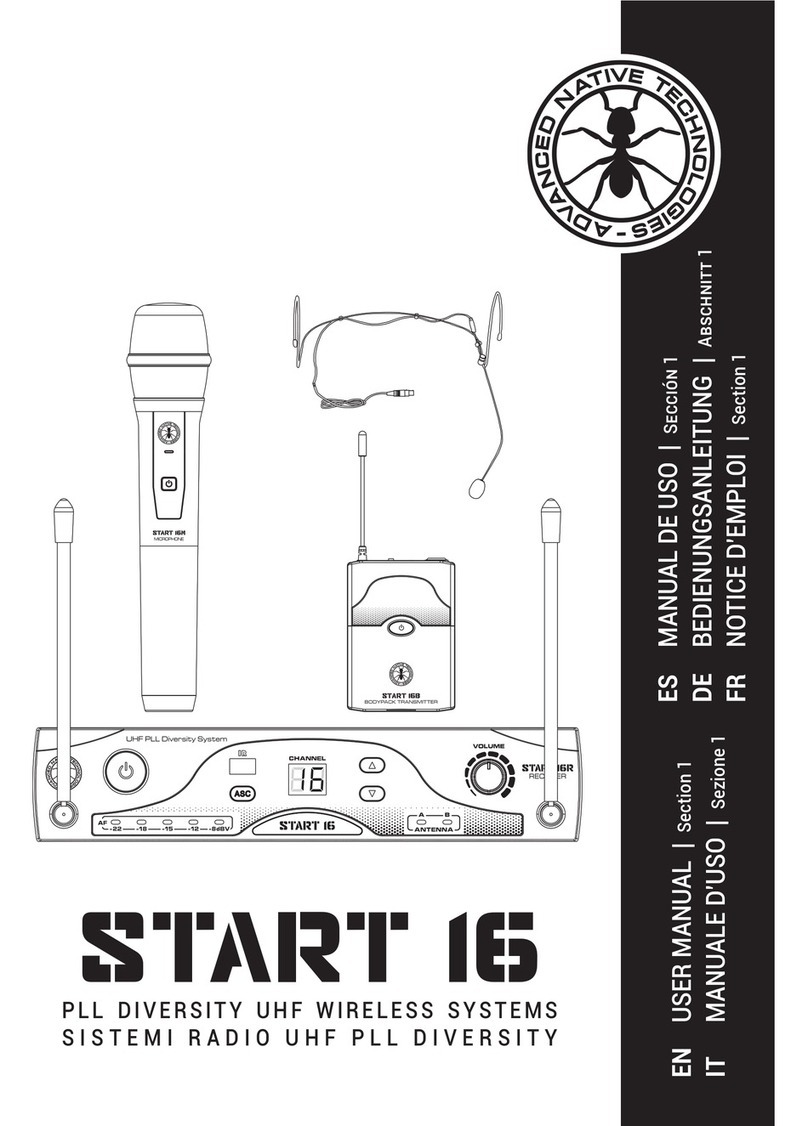
Advanced Native Technologies START 16 Series User manual

PLL DIVERSITY UHF WIRELESS SYSTEMS
SISTEMI RADIO UHF PLL DIVERSITY
PLL DIVERSITY UHF-FUNKSYSTEME
EN USER MANUAL | Section 1
IT MANUALE D’USO | Sezione 1 DE BEDIENUNGSANLEITUNG | KAPITEL 1

ENGLISH
START 16 Series | User manual
2
3
User manual | START 16 Series
Series
CONTENTS
1| Introduction 4
2| Description 4
2.1 | Receiver 5
2.2 | Handheld microphone 6
2.3 | Beltpack transmitter 7
3| Tips to better use the system 8
4| Troubleshooting 9
5| Technical specications 10
6| Notes 32
The warnings in this manual must be observed together with
the “User manual - Section 2”.
PACKAGE CONTENT
START 16 HDM
Version with Handheld mic
• 1x START 16R receiver with built-in antennas - A
• 1x START 16M handheld dynamic microphone - B
• 1x External power adapter - C
• 1x Unbalanced 6,35mm (1/4”) jack audio cable - D
• 2x 1.5 Volts AA batteries - E
• 1x User manual - Section 1
• 1x User manual - Section 2
START 16 BHS
Version with Beltpack Transmitter and Headset mic
• 1x START 16R receiver with built-in antennas - A
• 1x START 16B beltpack transmitter
with built-in antenna - F
• 1x PH-90 ergonomic headset microphone - G
• 1x External power adapter - C
• 1x Unbalanced 6,35mm (1/4”) jack audio cable - D
• 2x 1.5 Volts AA batteries - E
• 1x User manual - Section 1
• 1x User manual - Section 2
A
E
G
B
F
D
C

ENGLISH
START 16 Series | User manual
4
5
User manual | START 16 Series
Series
1| INTRODUCTION
Thank you for choosing a A.N.T – Advanced Native Technologies – product!
In our START 16 “PLL Diversity” wireless systems we have put our passion and
our technological background gained over the years, to offer products that meet
your needs, maintaining the quality over time.
START 16 wireless systems operate in UHF band with 16 channels (frequencies).
You may choose the operating frequency via buttons or via infrared using ASC
feature.
Both versions of START 16R receivers adopt Diversity technology. They are
equipped with two discrete antennas A and B, which are used to select at any
moment the best radio signal. The antennas are fixed on the front panel of the
receiver, but may be placed in an horizontal position by means of a junction
present at their base.
Please,dedicatesomeminutesto readthisinstructionmanualinordertoquickly achieve
the best performances from this product.
For safety precautions, warranty and disposal, please refer to attached Section 2.
For further information about all A.N.T products catalog, please visit our website:
www.ant-intomusic.com
2| DESCRIPTION
1 2 3 74 65 8 9 10
FRONT PANEL
2.1 | RECEIVER - START 16R
1 POWER
Press this button on receiver front panel for 1” to turn ON/OFF the unit.
2 AF LEVEL METER
It shows the audio signal level. Avoid that the red LED (the rightmost one)
remains lit continuously.
3 ASC
Pressthisbuttontoachieveautomaticchannel(frequency)synchronization
via infrared.
4 IR WINDOW
Itallowsthesynchronizationofthechannel(frequency)withthetransmitter.
After pressing the ASC button, place the handheld microphone or beltpack
transmitter close to this window and wait for the selected channel to stop
flashing on the display. After the synchronization, the receiver’s display is
lit steadily on the selected channel (frequency).
5 DISPLAY
It shows the number of the activated channel.
6 UP
Press this button to scroll and select channel number in ascending mode
from 01 to 16.
7 DOWN
Press this button to scroll and select channel number in descending mode
from 16 to 01.
8 ANTENNA A
This LED turns on automatically when the unit is receiving a better signal
from the antenna A.
9 ANTENNA B
This LED turns on automatically when the unit is receiving a better signal
from the antenna B.
10 VOLUME
It adjusts the output audio level.
11 ANTENNAS
Forthe best signal reception,pleaseplacetheantennasinaverticalposition.
11

ENGLISH
START 16 Series | User manual
6
7
User manual | START 16 Series
Series
21 3
REAR PANEL
1“DC 12-18V” POWER SOCKET
Connect to this socket only the supplied power supply.
2UNBAL
Unbalanced audio output with 6,35mm (1/4”) jack. Connect this output into an
unbalanced input of your mixer.
3AF OUTPUT
Balanced audio output with XLR-M socket. Connect this output into a balanced input
of your mixer.
1 GRILLE
It protects the microphone capsule from impacts and/or accidental falls and it
reduces the noise of the plosive.
2.2 | HANDHELD MICROPHONE - START 16M
2.3 | BELTPACK TRANSMITTER - START 16B
23 7 54 6
11 ANTENNA
It allows the transmission of the
signal.
2 ON/OFF
Pressthisbuttonfor 3”toturnON
or OFF the beltpack transmitter.
3 IR WINDOW
It allows the synchronization of
the channel (frequency) with the
receiver.
After pressing the ASC button,
place the beltpack transmitter
close to the IR window of START
16R receiver and wait for the
selectedchanneltostopflashing
on the handset display. After
2 POWER ON AND BATTERY STATUS INDICATOR
GREEN: Transmitter activated (ON), charged batteries.
RED: Immediately replace the batteries.
WARNING: battery life is about 8 hours, but it may vary according to the
usage conditions.
3 ON/OFF
Press this button for 3” to turn on or off the wireless handheld microphone.
4 BATTERIES COMPARTMENT
Toaccessthebatterycompartmentunscrewthelidcounterclockwise,and
screw the lid clockwise to close it. Remove the batteries from the receiver
when not in use for extended periods.
5 IR WINDOW
It allows the synchronization of the channel (frequency) with the receiver.
AfterpressingtheASCbutton,placethebottom ofthewirelessmicrophone
close to the IR window of START 16R receiver and wait for the selected
channelto stopflashingon thehandhelddisplay. Afterthesynchronization,
the receiver’s display is lit steadily on the selected channel (frequency).
21 3 4 5

ENGLISH
START 16 Series | User manual
8
9
User manual | START 16 Series
Series
the synchronization, the receiver’s display is lit steadily on the selected channel
(frequency).
4 MINI XLR-M INPUT
Connected to this input the supplied PH-90 Headset or the signal of other sound
sources.
5 POWER ON AND BATTERY STATUS INDICATOR
GREEN: Transmitter activated (ON), charged batteries.
RED: Immediately replace the batteries.
6 GAIN SELECTOR
There are three different gain settings:
Mic: for supplied headset microphone and other microphones
0 dB: low output level instruments
-10dB: high output level instruments
7 BATTERIES COMPARTMENT
To replace the batteries, lightly press on the sides of the cover and lift forward. Take
out the old batteries, and insert two new batteries (respecting the compartment
icons) then close the lid. Remove the batteries from the receiver when not in use
for extended periods.
WEARING THE BELTPACK RECEIVER:
Clip the receiver to a belt or to the
shoulder strap of your guitar. For better
fastening reliability it’s preferable to
secure it as shown in the gure, then
fasten it in a way that the belt is tight
from the clip.
3| TIPS FOR BETTER USE OF THE SYSTEM
• Aim the transmitter to the receiver to achieve a “direct visual contact” between
devices, without any interposed obstacle.
• Avoid placing the receiver near metal objects/surfaces or close to digital equipment
(CD players, computers, etc.).
• Place the receiver in such a way that is far from a wall and that is at least
1 meter (about 3 feet) above the floor.
• Cell phones, two-way radio equipment or similar devices may disturb
the radio transmission between the transmitter and the receiver, so they
should not be used close to the transmission system.
4| TROUBLESHOOTING
PROBLEM LEDS SOLUTION
No sound or very
low sound level.
Receiver ON/OFF
LED turned off.
Make sure the unit is properly
connected.
Power LED turned off. Make sure the power supply is
properly connected to the receiver.
Receiver RF LED turned on.
Raise the volume.
Raise gain on transmitter.
Check the connections between
receiver and amplier or mixer.
Receiver RF LED turned on.
Transmitter LED turned on.
Don’t place the receiver close to
metallic objects.
Check that the transmission
space (“visual contact”) between
transmitter and receiver is free.
Approached the transmitter to the
receiver.
Make sure the transmitter and
receiver share the same frequency.
Batteries status LED is red. Replace batteries.
Distortion or unwanted
interferences.
Receiver RF LED
turned on.
Remove possible sources of
interference such as CD players,
computers, digital broadcast
sources, etc.
Increasing distortions.
Batteries status
LED is red. Replace batteries.
Great intensity difference
when the same source
is via cable, or in case of
connection with other
guitars or microphones.
Set properly the transmitter gain
selector and the receiver volume.

ENGLISH
START 16 Series | User manual
10
11
User manual | START 16 Series
Series
5| TECHNICAL SPECIFICATIONS
RECEIVER - START 16R
Type Diversity
Modulation FM
Frequencies range 863-865MHz
Channels 16
Antennas x 2, adjustable and xed on front panel
Frequency response 60Hz - 15.000Hz (±3dB)
Transmission optimisation Pilot tone
THD <1%
Audio outputs Balanced XLR, unbalanced 6,35mm (1/4”) jack
Balanced output level + 10dBu
Controls Power, channel up, channel down, ASC, volume
Indicators Channel number, antenna A/B, 5 LEDs level
Dimensions (W x H x D) 212 x 44 x 115 mm (8.34” x 4.52” x 1.73”)
Weight 400 g (0.4 oz.)
BELTPACK TRANSMITTER - START 16B
Modulation FM
Frequencies range 863-865MHz
Channels 16
Input DC powered Mini-XLR for PH-90 Headset
Frequency response 60Hz - 15.000Hz (±3dB)
Output power 10mW
Controls Gain (3 steps), ON / Standby / OFF
Indicators Power and battery status
Power supply 2 AA 1.5 Volts batteries
Operating time >10h with alkaline batteries
Dimensions (W x H x D) 64 x 90 x 23 mm (2.51” x 0.91” x 3.54”)
Weight 80 g (0.08 oz)
HANDHELD MICROPHONE - START 16M
Modulation FM
Frequencies range 863-865MHz
Channels 16
Type Dynamic
Polarity Cardioid
Frequency response 60Hz - 15.000Hz (±3dB)
Output power 10mW
Controls ON/OFF
Indicators Power and battery status
Power supply 2 AA 1.5 Volts batteries
Operating time >10h with alkaline batteries
Length 254 mm (10”)
Max diameter 52.5 mm (2.06”)
Weight 250 g (0.25 oz)

ITALIANO
Serie START 16 | Manuale d’uso
12
13
Manuale d’uso | Serie START 16
Serie
INDICE
1| Introduzione 14
2| Descrizione 14
2.1 | Ricevitore 15
2.2 | Radiomicrofono a mano 16
2.3 | Trasmettitore beltpack 17
3| Consigli per una migliore utilizzazione del sistema 18
4| Soluzione dei problemi 19
5| Caratteristiche tecniche 20
6| Note 32
Le avvertenze nel presente manuale devono essere osservate
congiuntamente al “Manuale d’uso - Sezione 2”.
A
E
G
B
F
D
C
CONTENUTO DELL’IMBALLO
START 16 HDM
Versione con Microfono a mano
• 1x START 16R ricevitore da tavolo con antenne
incorporate - A
• 1x
START 16M radiomicrofono con capsula dinamica
- B
• 1x Alimentatore esterno - C
• 1x Cavo audio jack 6,35mm (1/4”) sbilanciato - D
• 2x Batterie stilo 1.5 Volts AA - E
• 1x User manual - Sezione 1
• 1x User manual - Sezione 2
START 16 BHS
Versione con trasmettitore Beltpack e Microfono
ad archetto
• 1x START 16R ricevitore da tavolo con antenne
incorporate - A
• 1x START 16B trasmettitore beltpack con antenna
incorporata - F
• 1x PH-90 microfono ergonomico ad archetto - G
• 1x Alimentatore esterno - C
• 1x Cavo audio jack 6,35mm (1/4”) sbilanciato- D
• 2x Batterie stilo 1.5 Volts AA - E
• 1x Manuale d’uso - Sezione 1
• 1x Manuale d’uso - Sezione 2

ITALIANO
Serie START 16 | Manuale d’uso
14
15
Manuale d’uso | Serie START 16
Serie
1| INTRODUZIONE
Grazie per aver acquistato un prodotto A.N.T – Advanced Native Technologies!
Nei radiomicrofoni “PLL Diversity” START 16 abbiamo profuso la nostra passione
ed il nostro background maturato nel corso degli anni per offrirvi un prodotto
che soddisfi le vostre esigenze e mantenga la sua qualità nel tempo.
I sistemi radio START 16 operano nella banda UHF e dispongono di 16 canali
(frequenze). Potete scegliere la frequenza con i pulsanti o via infrarosso tramite
il comando ASC.
I ricevitori START 16R di entrambe le versioni adottano la tecnologia Diversity,
cioè sono dotati di due antenne A/B separate che usano per selezionare in ogni
istante il miglior segnale radio. Le antenne sono fisse sul frontalino del ricevitore
ma possono essere collocate nella posizione orizzontale per mezzo di uno snodo
presente alla loro base.
Ritagliatevi qualche minuto per leggere questo manuale di istruzioni in modo tale da
ottenere il massimo delle prestazioni da questo prodotto.
Per ulteriori informazioni su tutti i prodotti del catalogo A.N.T consultate il nostro sito:
www.ant-intomusic.com
2| DESCRIZIONE
1 2 3 74 65 8 9 10
PANNELLO ANTERIORE
2.1 | RICEVITORE - START 16R
1 PULSANTE DI ACCENSIONE
Premete per 1” questo pulsante sul pannello frontale del ricevitore per
accendere o spegnere l’apparecchio.
2 INDICATORE DI LIVELLO AF
Indica il livello del segnale audio in ricezione. Evitate che il led rosso (quello
più a destra) resti acceso in modo continuo.
3 ASC
Premetequestotastoper lasincronizzazioneautomaticatramiteinfrarossi
del canale (frequenza) di ricetrasmissione.
4 FINESTRA IR
Permette la sincronizzazione del canale (frequenza) con il trasmettitore.
Dopo aver premuto il tasto ASC, posizionate il microfono a mano o
trasmettitore tascabile in corrispondenza di questa nestra e attendete
che il canale selezionato smetta di lampeggiare sul display del ricevitore.
A sincronizzazione avvenuta il display del ricevitore si ssa sul canale
(frequenza) selezionato.
5 DISPLAY
Indica il numero del canale attivato.
6 FRECCIA IN SU
Premete questo pulsante per scorrere e selezionare i canali in modo
crescente da 01 a 16.
7 FRECCIA IN GIÙ
Premete questo pulsante per scorrere e selezionare i canali in modo
decrescente da 16 a 01.
8 ANTENNA A
Questo LED si illumina automaticamente quando l’apparecchio riceve un
segnale migliore dall’antenna A.
9 ANTENNA B
Questo LED si illumina automaticamente quando l’apparecchio riceve un
segnale migliore dall’antenna B.
10 VOLUME
Questa manopola permette il controllo del livello audio in uscita.
11

ITALIANO
Serie START 16 | Manuale d’uso
16
17
Manuale d’uso | Serie START 16
Serie
PANNELLO POSTERIORE
21 3
1ALIMENTAZIONE “DC 12-18V”
Collegate a questo ingresso esclusivamente l’alimentatore in dotazione.
2UNBAL
Uscita audio sbilanciata con connettore jack da 6,35mm (1/4”). Collegate questa
uscita ad un ingresso sbilanciato del vostro mixer.
3AF OUTPUT
UscitaaudiobilanciataconconnettoreXLR-M.Collegatequestauscitaaduningresso
bilanciato del vostro mixer.
2 INDICATORE POWER ON E STATO DELLA BATTERIA
VERDE: Trasmettitore acceso (ON), batterie cariche.
ROSSO: Sostituite immediatamente le batterie.
ATTENZIONE: a durata delle batterie è di circa 8h ma varia a seconda
delle condizioni di utilizzo del trasmettitore.
3 ON/OFF
Premetequestopulsanteper3”peraccendereospegnereilradiomicrofono.
4 VANO BATTERIE
Per accedere al vano batterie svitate il coperchio il senso antiorario
e avvitatelo in senso orario per chiuderlo. Rimuovete le batterie dal
trasmettitore in caso di non utilizzo per periodi prolungati.
5 FINESTRA IR
Permette la sincronizzazione del canale (frequenza) con il ricevitore.
Dopo aver premuto il tasto ASC, posizionate il fondo del radiomicrofono
in corrispondenza della nestra IR posta sul ricevitore START 16R e
attendete che il canale selezionato smetta di lampeggiare sul display del
ricevitore.
A sincronizzazione avvenuta il display del ricevitore si ssa sul canale
(frequenza) selezionato.
1 GRIGLIA
Protegge la capsula microfonica da urti e/o cadute accidentali e riduce il rumore
delle labiali..
2.2 | RADIOMICROFONO A MANO - START 16M 2.3 | TRASMETTITORE BELTPACK - START 16
23 7 54 6
11 ANTENNA
Consente la trasmissione del
segnale.
2 ON/OFF
Premete questo pulsante per
3” per accendere o spegnere il
trasmettitore beltpack.
3 FINESTRA IR
Permette la sincronizzazione
del canale (frequenza) con il
ricevitore. Dopo aver premuto
il tasto ASC, posizionate
il trasmettitore tascabile in
corrispondenza della nestra IR
posta sul ricevitore START 16R e
21 3 4 5
11 ANTENNE
Collocate le antenne in posizione verticale per una buona ricezione del segnale.

ITALIANO
Serie START 16 | Manuale d’uso
18
19
Manuale d’uso | Serie START 16
Serie
attendete che il canale selezionato smetta di lampeggiare sul display del ricevitore.
A sincronizzazione avvenuta il display del ricevitore si ssa sul canale (frequenza)
selezionato.
4 INGRESSO MINI XLR-M
Collegate a questo ingresso l’Headset PH-90 in dotazione o il segnale di altre
sorgenti sonore.
5 INDICATORE POWER ON E STATO BATTERIA
VERDE: Trasmettitore acceso (ON), batterie cariche.
ROSSO: Sostituite immediatamente le batterie.
6 SELETTORE DI GUADAGNO
Sono possibili tre impostazioni diverse del guadagno:
Mic: per il microfono ad archetto fornito in dotazione ed altri microfoni
0 dB: strumenti con basso livello di uscita
-10dB: strumenti con forte livello di uscita
7 VANO BATTERIA
Per sostituire le batterie, premete leggermente sui lati del coperchio e sollevate in
avanti. Estraete le batterie scariche ed inseritene due nuove (rispettando la gura
nel comparto) poi chiudete il coperchio. Rimuovete le batterie dal trasmettitore in
caso di non utilizzo per periodi prolungati.
FISSARE IL TRASMETTITORE BELT PACK:
Agganciate il ricevitore ad una cinta
o alla tracolla della chitarra. Per una
migliorestabilitàèpreferibileassicurarlo
come mostrato nella gura, inlandolo
completamenteinmodotalechelacinta
sia stretta dalla clip.
3| CONSIGLI PER UNA MIGLIORE UTILIZZAZIONE DEL SISTEMA
• Orientateil trasmettitoreversoilricevitoreinmodochecisia“contattovisualediretto”
tra i dispositivi, senza alcun ostacolo frapposto.
• Non collocate il ricevitore vicino a oggetti/superci metalliche o vicino ad
apparecchi digitali (lettori CD, computer, ecc.).
• Collocate il ricevitore in modo tale che non stia vicino ad una parete e che
sia ad almeno 1m di altezza dal pavimento.
• Telefoni cellulari, apparecchiature radio bidirezionali o apparecchi simili
possono disturbare il collegamento radio tra il trasmettitore e il ricevitore,
pertanto non devono essere utilizzati vicino al sistema di trasmissione.
4| SOLUZIONE DEI PROBLEMI
PROBLEMA SPIE LUMINOSE SOLUZIONE
Nessun suono
o suono troppo basso.
Spia ON/OFF
del trasmettitore
spenta.
Assicuratevi che l’apparecchio sia
collegato correttamente.
LED Power spento. Assicuratevi che l’alimentatore sia
collegato correttamente al ricevitore.
Spia RF del ricevitore
accesa.
Alzate il volume. Alzate il valore di
guadagno sul trasmettitore.
Controllate i collegamenti tra il
ricevitore e l’amplicatore o il mixer.
Spia RF del ricevitore
accesa.
Trasmettitore con spia
accesa.
Non collocate il ricevitore vicino ad
oggetti metallici. Vericate che lo
spazio di trasmissione (“contatto
visivo”) tra trasmettitore e ricevitore
sia libero. Avvicinate il trasmettitore
al ricevitore. Assicuratevi che
trasmettitore e ricevitore condividano
la stessa frequenza.
Spia rossa dello stato
delle batterie. Replace batteries.
Distorsioni o interferenze
indesiderate.
Spia RF del
ricevitore accesa.
Eliminate possibili fonti di
interferenza come ad esempio lettori
CD, computer, fonti di trasmissione
digitali, ecc.
Distorsioni crescenti.
Spia rossa dello
stato delle batterie. Sostituite le batterie.
Netta differenza di intensità
quando il collegamento
della stessa sorgente
avviene tramite cavo o in
caso di collegamento di
altre chitarre o microfoni.
Impostate il valore di guadagno
sul trasmettitore e il volume del
ricevitore in modo adeguato.

ITALIANO
Serie START 16 | Manuale d’uso
20
21
Manuale d’uso | Serie START 16
Serie
5| CARATTERISTICHE TECNICHE
RICEVITORE - START 16R
Tipo Diversity
Modulazione FM
Gamma di frequenze 863-865MHz
Canali 16
Antenne x 2, snodabili e ssate al telaio frontale
Risposta in frequenza 60Hz - 15.000Hz (±3dB)
Ottimizzazione della trasmissione Tono pilota
THD <1%
Uscite audio Bilanciata XLR, sbilanciata jack da 6,35 mm
Livello uscita bilanciata + 10dBu
Controlli Power, Canale su, Canale giù, ASC, Volume
Indicatori Numero del canale, Antenna A/B, Livello con 5 led
Dimensioni (L x H x P) 212 x 44 x 115 mm
Peso 400 g
TRASMETTITORE BELTPACK - START 16B
Modulazione FM
Gamma di frequenze 863-865MHz
Canali 16
Ingresso Mini-XLR con alimentazione per Headset PH-90
Risposta in frequenza 60Hz - 15.000Hz (±3dB)
Potenza in uscita 10mW
Controlli Gain (3 livelli), ON / STANDBY / OFF
Indicatori Stato e condizione della batteria
Alimentazione 2 batterie AA 1.5 Volt
Durata >10h con batterie alcaline
Dimensioni (L x H x P) 64 x 90 x 23 mm
Peso 80 g
RADIOMICROFONO A MANO - START 16M
Modulazione FM
Gamma di frequenze 863-865MHz
Canali 16
Tipo Dinamico
Ripresa Cardioide
Risposta in frequenza 60Hz - 15.000Hz (±3dB)
Potenza in uscita 10mW
Controlli ON/OFF
Indicatori Stato e condizione della batteria
Alimentazione 2 batterie AA 1.5 Volt
Durata >10h con batterie alcaline
Lunghezza 254 mm
Diametro max 52.5 mm
Peso 250 g

START 16 Serie | Bedienungsanleitung
22
23
Bedienungsanleitung | START 16 Serie
Serie
DEUTSCH
INHALTSVERZEICHNIS
1| EINLEITUNG 24
2| BESCHREIBUNG 24
2.1 | EMPFÄNGER 25
2.2 | HANDMIKROFON 26
2.3 | TASCHENSENDER 27
3| TIPPS ZUR LEISTUNGSSTEIGERUNG 28
4| PROBLEMBEHEBUNG 29
5| TECHNISCHE DATEN 30
6| NOTIZEN 32
A
E
G
B
F
D
C
Die Warnhinweise dieser Bedienungsanleitung sind in
Verbindung mit den Warnhinweisen im angehängten Kapitel 2
zu beachten.
LIEFERUMFANG
START 16 HDM
AUSFÜHRUNG MIT HANDMIKROFON
• 1 x START 16R Empfänger mit eingebauten Antennen - A
• 1 x START 16M dynamisches Handmikrofon - B
• 1 x externes Netzteil - C
• 1 x unsymmetrisches 6,35 mm (1/4”)
Klinken-Audiokabel - D
• 2 x AA-Batterien 1.5 Volt - E
• 1 x Bedienungsanleitung - Kapitel 1
• 1 x Bedienungsanleitung - Kapitel 2
START 16 BHS
AUSFÜHRUNG MIT TASCHENSENDER UND
HEADSET-MIKROFON
• 1 x START 16R Empfänger mit eingebauten Antennen - A
• 1 x START 16B Taschensender
mit eingebauter Antenne - F
• 1 x PH-90 ergonomisches Headset-Mikrofon - G
• 1 x externes Netzteil - C
• 1 x unsymmetrisches 6,35 mm (1/4”)
Klinken-Audiokabel - D
• 2 x AA-Batterien 1.5 Volt - E
• 1 x Bedienungsanleitung - Kapitel 1
• 1 x Bedienungsanleitung - Kapitel 2

START 16 Serie | Bedienungsanleitung
24
25
Bedienungsanleitung | START 16 Serie
Serie
DEUTSCH
1| EINLEITUNG
Vielen Dank, dass Sie sich für ein Produkt von A.N.T. (Advanced Native Technologies)
entschieden haben!
10 pt PLL Diversity-Funksysteme sind entstanden aus unserer Leidenschaft für
Beschallungstechnik,unserembreitemFachwissensowieunsererlangjährigerErfahrung.
Es war unser erklärtes Ziel, ein Produkt zu schaffen, dass über Jahre hinweg bei stets
unverminderterQualitätIhreBedürfnisseerfüllt.START16-FunksystemearbeitenimUHF-
Band mit 16 Kanälen (Frequenzen). Die Betriebsfrequenz können Sie manuell mit Tasten
wählenodermittelsInfrarotvonderASC-Funktionwählenlassen.BeideAusführungender
10pt-EmpfängerverfügenüberdieTrueDiversity-Technologie.Siesindmitzweidiskreten
Antennen A und B ausgestattet, mit denen jederzeit das beste Funksignal ausgewählt
werden kann. Die Antennen sind auf der Vorderseite des Empfängers befestigt, lassen
sich jedoch dank der beweglichen Sockel in eine horizontale Lage bringen.
Bitte nehmen Sie sich ein paar Minuten Zeit, um diese Gebrauchsanweisung zu lesen
damit Sie schnell die besten Ergebnisse mit diesem Produkt erzielen können.
Für Näheres zu den sicherheitstechnischen Vorsichtsmaßnahmen, zur Garantie und zu
Entsorgungsfragen werfen Sie bitte einen Blick in Kapitel 2.
Weitere Informationen zu allen A.N.T-Produkten finden Sie auf unsere Website:
www.ant-intomusic.com
2| BESCHREIBUNG
1 2 3 74 65 8 9 10
FRONTSEITE
11
2.1 | START 16R EMPFÄNGER
1 POWER
DrückenSiedieseTasteaufderVorderseitedesEmpfängersfür1Sekunde,
um das Gerät ein- und auszuschalten.
2 FÜNFTEILIGE AF-PEGELANZEIGE
Diese zeigt den Pegel des Audiosignalsan. Die rote LED am rechten Rand
sollte nicht dauerhaft leuchten.
3 ASC
Drücken Sie diese Taste, um den Kanal (= die Frequenz) automatisch
über Infrarot mit dem Sender zu synchronisieren.
4 IR-FENSTER
Dieses Fenster dient zur Synchronisation des Kanals (= der Frequenz)
mit dem Sender. Nachdem Sie die ASC-Taste gedrückt haben, legen Sie
das Handmikrofon oder den Taschensender in die Nähe dieses Fensters
und warten Sie, bis der ausgewählte Kanal im Display nicht mehr blinkt.
Nachder SynchronisationwirddergewählteKanal(=Frequenz)beständig
leuchtend im Display des Empfängers anzeigt.
5 DISPLAY
Zeigt die Nummer des aktivierten Kanals an.
6 AUFWÄRTS-PFEIL (UP)
Drücken Sie diese Taste, um aufsteigend von 01 bis 16 zu scrollen und
die Kanalnummer auszuwählen.
7 ABWÄRTS-PFEIL (DOWN)
Drücken Sie diese Taste, um absteigend von 16 bis 01 zu scrollen und
die Kanalnummer auszuwählen.
8 ANTENNE A
Diese LED leuchtet automatisch auf, wenn das Gerät ein besseres Signal
von Antenne A empfängt.
9 ANTENNE B
Diese LED leuchtet automatisch auf, wenn das Gerät ein besseres Signal
von Antenne B empfängt.
10 VOLUME
Regelt die Audio-Lautstärke.
11 ANTENNEN
Für einen optimalen Signalempfang stellen Sie die Antennen bitte in eine
senkrechte Position.

START 16 Serie | Bedienungsanleitung
26
27
Bedienungsanleitung | START 16 Serie
Serie
DEUTSCH
RÜCKSEITE
21 3
1 DC 12-18V-STROMVERSORGUNGSBUCHSE
Schließen Sie nur das mitgelieferte Netzteil an diese Buchse an.
2 UNBAL
Unsymmetrischer 6,35 mm (1/4”) Klinken-Audioausgang. Verbinden Sie diesen
Ausgang mit einem unsymmetrischen Eingang Ihres Mischpultes.
3 AF OUTPUT
SymmetrischerXLR-Male-Audioausgang.VerbindenSiediesenAusgangmiteinem
symmetrischen Eingang Ihres Mischpultes.
1 KORB
Der Korb schützt die Mikrofonkapsel bei Stößen oder Stürzen und wirkt Popplauten
entgegen.
2.2 | START 16M DRAHTLOSES HANDMIKROFON
21 3 4 5
2 POWER ON UND BATTERIESTATUSANZEIGE
GRÜN: Sender aktiviert (ON), volle Batterien.
ROT: Batterien umgehend auswechseln.
ACHTUNG: Die Batterielebensdauer beträgt ca. 8 Stunden, kann aber
je nach Einsatzbedingungen unterschiedlich ausfallen.
3 ON/OFF
DrückenSiedieseTastefür3Sekunden,umdasdrahtloseHandmikrofon
ein- oder auszuschalten.
4 BATTERIEFACH
Um das Batteriefach zu öffnen, schrauben Sie den Deckel entgegen dem
Uhrzeigersinn heraus; um es zu schließen, schrauben Sie den Deckel im
Uhrzeigersinn zu. Entfernen Sie die Batterien vom Empfänger, falls Sie
ihn längere Zeit nicht benutzen.
5 IR-FENSTER
Nachdem Sie die ASC-Taste am Empfänger gedrückt haben, legen Sie
das untere Ende des Funkmikrofons in die Nähe des IR-Fensters am
START 16R-Empfänger. Warten Sie, bis der ausgewählte Kanal am
Handmikrofon-Display nicht mehr blinkt. Nach der Synchronisation wird
der gewählte Kanal (= Frequenz) beständig leuchtend im Display des
Empfängers anzeigt.
2.3 | TASCHENSENDER- START 16B
23 7 54 6
11 ANTENNE
Die Antenne wird für die
Übertragung des Signals
benötigt.
2 ON/OFF
Drücken Sie diese Taste für 3
Sekunden,umdenTaschensender
ein- oder auszuschalten.
3 IR-FENSTER
Nachdem Sie die ASC-Taste
gedrückt haben, legen Sie das
untereEndedesTaschensenders
in die Nähe des IR-Fensters am
START16R-Empfänger.Warten
Sie, bis der ausgewählte Kanal
am Taschensender-Display

START 16 Serie | Bedienungsanleitung
28
29
Bedienungsanleitung | START 16 Serie
Serie
DEUTSCH
nicht mehr blinkt. Nach der Synchronisation wird der gewählte Kanal (= Frequenz)
beständig leuchtend im Display des Empfängers anzeigt.
4 MINI-XLR-MALE-EINGANG
Schließen Sie das mitgelieferte PH-90 Headset oder eine andere Signalquelle an
diesen Eingang an.
5 POWER ON UND BATTERIESTATUSANZEIGE
GRÜN: Sender aktiviert (EIN), volle Batterien.
ROT: Batterien umgehend auswechseln.
6 GAIN-WAHLSCHALTER
EsstehendreiEinstellungenfürdieEingangsverstärkung(=Lautstärke)zurVerfügung
Mic: für das mitgelieferte Headset-Mikro und andere Mikrofone
0 dB: für Instrumente mit niedrigem Ausgangspegel
-10 dB: für Instrumente mit hohem Ausgangspegel
7 BATTERIEFACH
Um die Batterien auszutauschen, drücken Sie leicht seitlich auf den Batteriedeckel
und ziehen ihn nach vorne um das Batteriefach zu öffnen. Entfernen Sie die alten
Batterien, legen Sie zwei neue Batterien ein (beachten Sie dabei die Symbole im
Batteriefach) und schließen Sie den Deckel. Falls Sie den Empfänger längere Zeit
nicht benutzen, entfernen Sie bitte die Batterien.
TASCHENEMPFÄNGER ANBRINGEN:
BringenSiedenEmpfängeranIhrenGürteloderGitarrengurtan—zurSicherheitambesten
wieabgebildet komplettnachuntengedrückt damitderGurtvomClipumschlossenwird.
3| TIPPS ZUR LEISTUNGSSTEIGERUNG
• Richten Sie den Sender auf den Empfänger aus, um eine direkte Sichtverbindung
ohne Hindernisse zwischen den Geräten zu herstellen.
• Stellen Sie den Empfänger nicht in der Nähe von Metallgegenständen/-
Oberflächen oder in der Nähe von digitalen Geräten (CD-Player, Computer usw.).
• Positionieren Sie den Empfänger so, dass er nicht unmittelbar vor einer
Wand und mindestens 1 m über dem Boden steht.
• Mobiltelefone, bidirektionale Funkgeräte und ähnliche Geräte können die
Funkverbindung zwischen Sender und Empfänger stören und sollten nicht
in der Nähe der Sendeanlage betrieben werden.
4| PROBLEMBEHEBUNG
PROBLEMA SPIE LUMINOSE LÖSUNG
Kein, oder nur sehr leiser
Sound
Empfänger ON/OFF
LED leuchtet nicht
Vergewissern Sie sich, dass das
Gerät richtig angeschlossen ist.
Power LED leuchtet nicht Stellen Sie sicher, dass das Netzteil
am Empfänger richtig eingesteckt ist.
Empfänger RF LED leuchtet
Lautstärke anheben.
Sender-Eingangsverstärkung (Gain)
anheben.
Überprüfen Sie die Verbindungen
zwischen Empfänger und Verstärker
oder Mischpult.
Empfänger RF LED leuchtet
Transmitter LED leuchtet
Stellen Sie den Empfänger nicht in
der Nähe metallener Objekte.
Überprüfen Sie, ob freier Sichtkontakt
zwischen Sender und Empfänger
herrscht.
Positionieren Sie den Sender näher
am Empfänger.
Vergewissern Sie sich, dass Sender
und Empfänger die gleiche Frequenz
verwenden.
Batteriestatus-LED leuchtet Tauschen Sie die Batterien aus.
Verzerrungen oder
unerwünschte Störungen
Empfänger-RF-LED
leuchtet
Entfernen Sie mögliche Störquellen
wie CD-Player, Computer, digitale
Rundfunkquellen usw.
Verzerrungen zunehmend
Batteriestatus-LED
leuchtet Tauschen Sie die Batterien aus.
Großer
Lautstärkeunterschiede
wenn die gleiche Quelle
über Kabel eingespeist oder
andere Gitarren/Mikrofone
verwendet werden
Stellen Sie den Gain-Wert am Sender
und die Lautstärke am Empfänger
entsprechend ein.

START 16 Serie | Bedienungsanleitung
30
31
Bedienungsanleitung | START 16 Serie
Serie
DEUTSCH
5| TECHNISCHE DATEN
START 16R-EMPFÄNGER
Typ Diversity
Modulation FM
Frequenzbereich 863-865 MHz
Kanäle 16
Antennen x 2, verstellbar und auf Frontplatte montiert
Übertragungsbereich 60 Hz - 15,000 Hz (±3dB)
Übertragungsoptimierung Pilotton
Klirrfaktor <1%
Audio-Ausgänge XLR symmetrisch, 6,35mm (1/4”) Klinke unsymmetrisch
Ausgangspegel symmetrisch + 10 dBu
Bedienelemente Power-, Channel-UP/DOWN-, ASC-Tasten
Anzeigen Kanalnummer, Antenne A/B, LED-Pegel fünfteilig
Abmessungen (BxHxT) 212 x 44 x 115 mm (8,34” x 4,52” x 1,73”)
Gewicht 400 g (0,4 oz.)
START 16M- HANDMIKROFON
Modulation FM
Frequenzbereich 863-865MHz
Kanäle 16
Typ Dynamisch
Richtcharakteristik Niere
Übertragungsbereich 60 Hz - 15,000 Hz (±3dB)
Ausgangsleistung 10mW
Bedienelemente ON/OFF-Schalter
Anzeigen Power und Batteriestatus
Stromversorgung 2x 1,5 Volt AA-Batterien
Betriebsdauer >10 Stunden mit Alkalibatterien
Länge 254 mm (10”)
Max. Durchmesser 52,5 mm (2.06”)
Gewicht 250 g (0,25 oz)
START 16B-TASCHENSENDER
Modulation FM
Frequenzbereich 863-865MHz
Kanäle 16
Eingang DC-gespeiste Mini-XLR für PH-90 Headset
Übertragungsbereich 60 Hz - 15,000 Hz (±3dB)
Ausgangsleistung 10mW
Bedienelemente Gain (3 Stufen), ON / Standby / OFF
Anzeigen Power und Batteriestatus
Stromversorgung 2x 1,5 Volt AA-Batterien
Betriebsdauer >10 Stunden mit Alkalibatterien
Abmessungen (BxHxT) 64 x 90 x 23 mm (2,51” x 0,91” x 3,54”)
Gewicht 80 g (0,08 oz)

32
33
Serie
START 16 Serie START 16 Serie
6 | NOTES | NOTE | NOTIZEN 6 | NOTES | NOTE | NOTIZEN

34
Serie
START 16 Serie
The batteries supplied with the system can be recycled. Please dispose of them as special waste
or return them to your specialist dealer. In order to protect the environment, only dispose of
exhausted batteries.
Le batterie o l’accumulatore in dotazione con il sistema sono riciclabili. Smaltire le batterie nei punti
di raccolta specializzati o presso il rivenditore. Ai ni della tutela ambientale, smaltire unicamente
batterie o accumulatori vuoti.
Die mit dem System gelieferten Batterien können recycelt werden. Bitte entsorgen Sie sie als Sonder-
müll oder senden Sie diese an Ihren Fachhändler. Um die Umwelt zu schützen, entsorgen Sie bitte nur
leere Batterien.
www.ant-intomusic.com
ENG The information contained in this manual have been carefully drawn up and checked.
However no responsibility will be assumed for any incorrectness. This manual cannot cover all
the possible contingencies which may arise during the product installation and use. Should
further information be desired, please contact us or our local distributor. A.E.B. Industriale Srl
can not be considered responsible for damages which may be caused to people and things
when using this product. Specications and features are subject to change without prior notice.
ITA Le informazioni contenute in questo manuale sono state attentamente redatte e
controllate. Tuttavia non si assume alcuna responsabilità per eventuali inesattezze. Questo
manuale non può contenere una risposta a tutti i singoli problemi che possono presentarsi
durante l’installazione e l’uso dell’apparecchio. Siamo a vostra disposizione per fornirvi
eventuali ulteriori informazioni e consigli. A.E.B. Industriale Srl non può essere ritenuta
responsabile per danni o incidenti a cose o persone, causati o connessi all’utilizzazione o
malfunzionamento dell’apparecchio.
6 | NOTES | NOTE | NOTIZEN
Made in China
Prodotto in Cina
Produziert in China
DEU Die Informationen in diesem Handbuch wurden sorgfältig erstellt und überprüft.
Es wird jedoch keine Haftung für Unrichtigkeiten übernommen. Dieses Handbuch kann nicht
alle möglichen Eventualitäten, die während der Produktinstallation und -nutzung auftreten
können, abdecken. Sollten weitere Informationen gewünscht sein, kontaktieren sie uns oder
ihren lokalen Händler. A.E.B. Industriale Srl kann nicht für Schäden verantwortlich gemacht
werden, die beim Benutzen dieses Produktes verursacht werden können. Technische Daten
und Eigenschaften können ohne vorherige Ankündigung geändert werden.

©2017 A.E.B. Industriale Srl | Printed in China | REV 1.0
A.E.B. Industriale Srl - Via Brodolini, 8 - Località Crespellano
40053 Valsamoggia - Bologna (ITALIA)
Tel +39 051 969870 - Fax +39 051 969725
Other manuals for START 16 Series
1
This manual suits for next models
5
Table of contents
Languages:
Other Advanced Native Technologies Microphone System manuals
Popular Microphone System manuals by other brands
AV Department
AV Department Listen Tour Guide quick guide
Panasonic
Panasonic SHFX70 - DVD HOME THEATER WIRELESS SYSTEM operating instructions
Panasonic
Panasonic SH-FX60 - Wireless Audio Delivery System operating instructions
Shure
Shure ULX-D user manual

IDX
IDX CW-1dx instruction manual
FONESTAR
FONESTAR SCT-600 instruction manual
