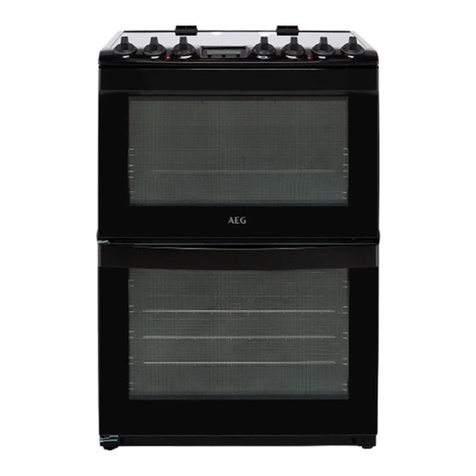
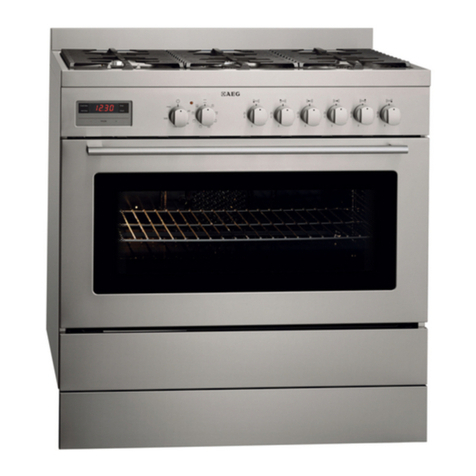
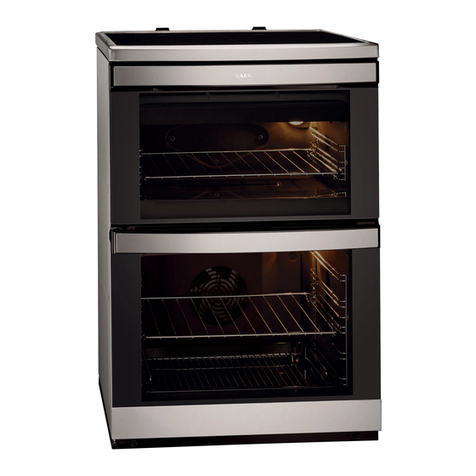
AEG Competence 5211 V User manual

COMPETENCE
5211V
Free
Standing
Slot-in
Electric
Cooker
Operating
Instructions

Thank
you
for
purchasing
an
AEG
appliance,
we
are
confident
you
will
enjoy
using
the
app-
liance
and
also
find
cooking
easier.
|
To
enable
you
to
use
your
appliance
effectively
and
safely,
please
read
this
instruction
book
carefully
before
installing
or
using
the
appliance,
and
retain
for
future
reference.
If
you
require
further
assistance
or
advice,
please
contact
our
customer
care
Department
either
by
letter
or
telephone.
Customer
Care
Department
AEG
Domestic
Appliances
Limited
PO
Box
47
Newbury
Berkshire
RG14
5XL
Tel.:
016385
572700
Fax:
01635
42970
Accessories
The
following
accessories
are
available
as
optional
extras,
please
consult
the
AEG
price
list
or
contact
your
retailer.
Catalytic
Liners
Baking
Sheet
Meat
Tin
Wire
Shelf,
large
Grill
Pan
Grill
Pan
Grid
Grill
Pan
Handle
GUTEK800-2
10/96
UK

IE5201
10/96
UK
For
the
User
important
Safety
Information
Safety
Instructions
Environmental
Information
Description
of
the
appliance
Control
panel
Accessories
Shelf
levels
Fat
filter
Before
use
Setting
the
time
of
day
Pre-cleaning
before
use
Electronic
Clock
Minute
minder
Automatic
switch
off
Automatic
switch
on
and
off
The
hob
Ceramic
cooking
zones
Using
the
cooking
plate
Operating
the
ceramic
hob
The
Ovens
Main
Oven
Functions
Operating
the
Main
Oven
Secondary
Oven
Functions
Operating
the
Secondary
Oven
Cooking
Methods
Baking
Hints
and
Tips
for
baking
Baking
Tables
Roasting
Roasting
Tables
Grilling
Defrosting
Maintenance
and
Cleaning
Cleaning
the
Hob
External
Cleaning
Internal
Cleaning
Care
of
Catalytic
liners
Replace
oven
light
bulb/cleaning
glass
cover
Removing
the
oven
door
Something
Not
Working
Service
Guarantee
Conditions
For
the
Installer
Technical
Data
Safety
Instructions
Electrical
Connection
Adjusting
the
Plinth
35
36/37
38

4
Important
Safety
Instructions
These
warnings
are
provided
in
the
interests
of
your
safety.
Ensure
you
fully
under-
stand
them
before
installing
or
using
the
appliance.
Your
safety
is
of
paramount
importance.
If
you
are
unsure
about
the
meaning
of
these
warnings
contact
the
Customer
Care
Department
for
assistance.
Installation
The
cooker
must
be
installed
according
to
the
instructions
supplied.
Any
electrical
installa-
tion
work
must
be
undertaken
by
a
qualified
electrician/competent
person.
This
cooker
is
heavy,
care
must
be
taken
when
moving
it.
Do
not
try
to
move
the
cooker
by
pulling
the
door
handles.
All
packaging,
both
inside
and
outside
the
cooker
must
be
removed
before
the
cooker
used.
It
is
dangerous
to
alter
the
specifications
or
modify
the
cooker
in
any
way.
After
installation
please
dispose
of
the
packaging
with
due
regard
for
safety
and
the
environment.
Child
Safety
This
cooker
is
designed
to
be
operated
by
adults
and
children
under
supervision.
Young
children
must
not
be
allowed
to
tamper
with
the
controls
or
play
near
or
with
the
cooker.
The
cooker
and
accessible
parts
become
hot
when
the
cooker
is
in
use.
Keep
children
away
until
it
has
cooled.
During
Use
Do
not
use
this
cooker
if
it
is
in
contact
with
water.
Never
operate
it
with
wet
hands.
Take
great
care
when
heating
fats
and
oils
as
they
will
ignite
if
they
become
too
hot.
This
cooker
has
been
designed
for
cooking
edible
foodstuffs
only,
and
must
not
be
used
for
any
other
purposes.
Never
place
plastic
or
any
other
material
which
may
melt
in
or
on
the
cooker.
Fruit
juices
dripping
from
an
cookerdish
may
leave
marks
on
the
enamel,
which
cannot
be
removed.
Use
a
baking
tray
to
protect
the
enamel.
Do
not
leave
the
grill
pan
handle
in
position
when
grilling
and
ensure
cooker
gloves
are
used
to
remove
and
replace
the
handle,
as
it
will
become
hot.
SIB800
10/96
UK-SIB801-3
10/96
UK-SIB802-3
10/96
UK-SIB803-3
10/96
UK

SIB803-3
10/96
UK-SIB804-3
10/96
UK-SIB805-2
10/96
UK
Always
use
cooker
gloves
to
remove
and
replace
food
in
the
cooker.
Ensure
that
all
vents
are
left
unobstructed
to
ensure
ventilation
of
the
cooker
cavity.
Never
line
any
part
of
the
cooker
with
aluminium
foil.
Do
not
allow
heat
proof
cooking
mate-
rial,
e.g.
roasting
bags
to
come
into
contact
with
cooker
elements
because
they
may
catch
fire.
Always
stand
back
from
the
cooker
when
opening
the
cooker
door
to
allow
any
build
up
of
steam
or
heat
to
release.
Stand
clear
when
opening
the
drop
down
cooker
doors.
Support
the
doors
using
the
hand-
les
until
fully
open.
Do
not
place
sealed
cans
or
aerosols
inside
the
cooker.
They
may
explode
if
they
are
he-
ated.
Ensure
that
all
control
knobs
are
in
the
OFF
position
when
not
in
use.
Do
not
stand
on
open
cooker
doors.
Do
not
hang
towels,
dishcloths
or
clothes
from
the
cooker
or
its
handles.
Do
not
use
the
cooker
if
the
ceramic
glass
is
damaged.
Cleaning
and
Maintenance
The
cooker
is
heavy
and
care
must
be
taken
when
moving
it.
This
cooker
should
be
kept
clean
at
all
times.
A
build-up
of
fats
or
other
foodstuffs
could
re-
sult
in
a
fire,
especially
in
the
grill
pan.
Do
not
leave
cookware
containing
foodstuffs,
e.g.
fat
or
oil
in
the
cooker
in
case
it
is
inadvertently
switched
on.
Always
allow
the
cooling
fan
to
cool
the
cooker
down
before
switching
off
at
the
wall
prior
to
Carrying
out
any
cleaning/maintenance
work.
Only
clean
this
cooker
in
accordance
with
the
instructions
given
in
this
book.
Service
Repairs
should
not
be
carried
out
by
inexperienced
persons
as
this
may
cause
injury
or
ser-
ious
malfunction.
This
cooker
should
only
be
serviced
by
an
authorised
AEG
Service
En-
gineer
and
only
genuine
approved
spare
parts
should
be
used.

Environmental
Information
Packaging
AEG
is
an
environmentally
conscious
company,
packaging
materials
are
therefore
kept
to
a
minimum.
All
transit
packaging
materials
are
environmentally
compatible
and
can
be
reused.
Wood
is
untreated.
The
cardboard
boxes
consist
of
between
80-100
%
recycled
paper.
The
sheet-
ing
is
made
out
of
polyethylene
(PE)
and
the
strapping
of
polystyrol
(PS)
which
are
pure
hy-
drocarbon
compounds
and
can
be
recycled.
By
treating
and
re-using
them,
raw
materials
can
be
saved
and
the
volume
of
waste
reduced.
Please
dispose
of
the
packaging
with
due
care
for
the
environment.
Old
appliances
When
disposing
of
your
old
appliance:
Make
the
appliance
unusable
by
cutting
off
the
cable,
and
remove
any
door
catches
to
en-
sure
small
children
cannot
become
trapped
inside.
Help
to
Keep
your
country
tidy
-
use
an
authorised
disposal
site.
EVA800-1
10/96
UK

GB5211_V
7/97
UK
Control
Panel
wav]
B
A
Cooking
method
selector
for
main
oven
B
Pilot
light
(yellow)
is
on
when
the
appliance
is
switched
on
C
Thermostat
control
light
(red)
is
on
when
main
oven
is
heating
D
Temperature
control
for
main
oven
E
Thermostat
control
light
(red)
is
on
when
secondary
oven
is
heating
F
Green
light
is
on
when
the
grill
is
in
use
G
Temperature
control
and
grill
selector
for
secondary
oven
H
Electronic
clock
with
minute
minder
and
auto-timer
for
main
oven
1
Control
Knob
for
plate,
front
left
J
Control
knob
for
plate,
rear
left
K
Control
knob
for
plate,
rear
right
L
Control
knob
for
plate,
front
right
M_
Handles
to
open
oven
doors
The
vapours
from
the
two
ovens
are
vented
from
the
rear
of
the
hob
up
to
a
cooker
hood
above.

Operating
the
control
knobs
The
control
knobs
A,
D,
G,
|,
J,
Kand
L
can
be
turned
clockwise
or
anticlockwise
to
any
po-
sition.
Further
information
to
this
can
be
found
in
the
“hob”
and
“oven”
sections.
However,
the
oven
temperature
control
Knobs
D
and
G
and
also
the
control
for
the
auto-
matic
plate
|
must
be
turned
clockwise
to
switch
on
and
anti-clockwise
to
switch
off.
Oven
Accessories
Wire
Shelf,
large
Meat
Tin
Grill
Pan
Grill
Pan
Grid
GB5211_V
7/97
UK-VBI802
10/96
UK

VBI802
10/96
UK-ESH5201_V
10/96
UK
Grill
Pan
Handle
Shelf
levels
The
ovens
feature
shelf
supports
which
are
removable
for
cleaning.
The
main
oven
has
6
shelf
levels,
whilst
the
secondary
oven
has
5
shelf
levels.
Please
note
that
the
cooking
tables
provided
recommend
the
shelf
positions
in
the
main
oven
and
are
counted
from
the
top
downwards.

10
Anti-tip
The
wire
shelves
and
meat
tray
(optional
extra)
are
fitted
with
an
anti-tip
device,
so
that
they
cannot
be
pulled
out
completely
by
accident.
Ensure
that
these
are
fitted
correctly,
with
the
shelf
stoppers
at
the
rear.
Fat
filter
The
fat
filter
supplied
with
the
appliance
protects
the
fan
in
the
main
oven
against
soiling.
The
filter
must
always
be
used
when:
—
Cooking
meat
in
an
uncovered
container
using
Ventitherm
(fan
cook)
Note
Do
not
use
the
fat
filter
when
baking.
Fitting
the
fat
filter.
Hold
the
fat
filter
by
the
handle
and
fit
both
tabs
downwards
into
the
slots
in
the
back
panel
of
the
oven,
thereby
covering
the
fan
opening.
Please
note
that
the
fat
filter
must
cover
the
fan
opening
completely.
VBI803-1
10/96
UK-FF5211_V
10/96
UK

FF5211_V
10/96
UK-VBI5211_V
10/96
UK
Removing
the
fat
filter.
Hold
the
fat
filter
by
the
handle,
unhook
and
pull
upwards.
For
information
on
cleaning
the
fat
filter,
please
see
the
maintenance
and
cleaning
section.
Before
use
Ensure
all
packaging
inside
the
oven
has
been
removed.
Wipe
down
the
front
of
the
appliance
with
a
damp
cloth.
Do
not
use
caustic
or
abrasive
cleaners,
as
these
will
damage
the
surface
of
the
produce
(See
maintenance
and
cleaning).
Before
using
the
oven
for
the
first
time
the
oven
should
be
pre-cleaned
as
described
later
in
this
section,
however
before
this
cleaning
operation
can
be
carried
out
the
time
of
day
must
be
set
on the
electronic
timer.
Electronic
timer
—
Setting
the
time
of
day
As
soon
as
the
appliance
is
switched
on
at
the
mains
supply
(and
also
after
a
power
cut),
the
clock
display
will
flash.
Before
the
oven
can
be
operated
you
will
need
to
set
the
time
of
day.
!
Se0000
GB5211
V
B
1.
Press
buttons
2[h/]
and
3
simultaneously.
2.
Press
buttons
5
[6]
and
[@]
until
the
correct
time
of
day
shows
in
the
display.
11

12
Pre-cleaning
the
oven
and
hob
before
use
\
oun
+
©eoeceoe
GB5211
V
B
Before
using
the
oven
or
hob
for
the
first
time
all
accessories
(shelf
supports,
wire
shelves
etc)
should
be
washed
with
warm
soapy
water
(warm
water
with
mild
detergent).
The
oven
should
be
heated
empty
for
1
hour
to
burn
off
any
residue
from
the
surfaces.
During
this
operation
an
unpleasant
odour
may
be
emitted,
it
is
therefore
advisable
to
open
a
window
for
ventilation.
Main
Oven
1
Turn
function
selector
A
to
Convention
oven
[=].
2.
Turn
temperature
selector
D
to
250
°C
Secondary
Oven
1.
Turn
temperature
selector
G
to
250
°C.
When
the
oven
has
cooled,
wipe
down
with
warm
soapy
water.
Clean
all
the
accessories
and
shelf
supports
in
the
same
way.
UK
VBI5211_V
10/96

KZ800-1
10/96
UK-BAA5211_V
10/96
UK
Operating
the
Electronic
Clock
To
set
the
Minute
minder
1.
Press
button
1[Q]
and
2.
Press
buttons
5[6]
or
[@]
until
the
display
shows
the
time
required.
When
the
selected
time
has
elapsed
you
will
hear
an
audible
signal
(which
will
switch
off
au-
tomatically
after
approximately
2
minutes).
To
switch
off
the
signal
press
button
1
[Q).
The
display
will
show
the
time
of
day.
Programming
the
main
oven
to
switch
off
automatically
1.
Select
the
required
cooking
function
using
function
selector
A.
2.
Select
the
required
temperature
using
temperature
selector
D.
3.
Press
button
2[h]]
and
enter
the
cooking
time
required
with
buttons
5
[@]
and
{@].
The
“AUTO”
symbol
will
light
up
(Automatic
operation)
and
the
oven
will
switch
off
auto-
matically
when
the
cooking
time
has
elapsed.
At
the
end
of
the
cooking
period,
the
oven
will
switch
off,
the
audible
signal
will
sound
and
the
“AUTO”
symbol
will
flash.
To
switch
off
the
audible
signal
press
button
4
[4].
To
return
the
oven
to
manual
operation
and
switch
off
the
flashing
AUTO
symbol
press
but-
ton
4[8].
Turn
the
cooking
function
and
temperature
selectors
knobs
to
the
off
position.
To
cancel
a
programme
1.
Press
button
2[bI,
and
return
the
length
of
cooking
time
to
zero
using
buttons
5|©]
and
(e].
2.
Press
button
4[i]
to
return
the
cooker
to
manual
function.
13

14
Programming
the
main
oven
to
switch
on
and
off
automatically
1.
Select
the
cooking
function
using
function
selector
A.
2.
Set
the
required
temperature
using
temperature
selector
D.
3.
Press
button
2
|b!)
to
select
the
length
of
cooking
time
required
using
buttons
5
and
|@).
4.
Press
button
344
and
enter
the
required
finish
time
using
buttons
5
[©]
and
[@].
The
|)
symbol
and
the
time
of
day
will
appear
again
in
the
display.
The
oven
is
now
programmed
to
switch
on
and
off
automatically.
When
the
oven
switches
on
the
pilot
light
will
illuminate.
The
thermostat
control
light
will
illuminate
while
the
oven
is
heating,
when
the
set
temperature
is
reached
it
will
cycle
on
and
off
to
show
that
the
tem-
perature
is
being
maintained.
At
the
end
of
the
cooking
period,
the
oven
will
switch
off,
the
audible
signal
will
sound
and
4]
symbol
will
flash.
To
switch
off
the
audible
signal
press
button
4
[i].
To
switch
off
the
flashing
AUTO
symbol
and
return
the
oven
to
manual
operation
press
but-
ton
4[].
Turn
the
temperature
selector
dial
to
the
OFF
position.
To
cancel
a
programme
1.
Press
button
2b],
and
return
the
length
of
cooking
time
to
zero
using
buttons
5
[©]
and
[6].
2.
Press
button
4
[i]
to
return
the
cooker
to
manual
function.
BAA5211_V
10/96
UK

S)
{
2
OD
BL
cs.
oo
2S
D
ue
2
ro)
oe
<s
Nae
os
ra
—
-
i)
Q
c
2
fe
ve)
Of
®
O
om
©
fos
les
$2
o
<
O
O
&
oS
~~“
es
_
nw
O
oO
2&
3
S
oO
&
®
eu
ae
2
Oo
sas
>
Lea
=
a)
ra)
fibres
—
ox
Cc
yw
C
oD)
—
oO
Oo
Cw
2
—
a.
OnDS0O
ey
oO
OO“
OO.
5
—
oon
=
5
£883
s
OQ
w
O
=
O
a
©
)
A
Oo
@
oD
6
Gb:
©
2
=
=
iC
=
Se
=
ODE
ro)
©
©
o
oO
cS
oS
=
”
O
-~
¢
6
=
rab)
®
O
-
030
2
=
S
S=EL58
5
6
~
gRSaSs
D
N
&
6988
OF
O
are]
~@™polcoadc
®
©)
=
Se
Del
Oo
©
=
~
~—
c
fe!
oS
75)
_—
o
O
OUavel@
=
x
a
®
£05309
5
60.6
S
geuo
tas
w
8
o
8
5
£59855
6
&
}
=
Oona
aa
5
==
()
O
x
9
>
SSSESLE
=
Bg
==
|
”
=<
©
£
rs
o
BSEHROO
5
fe)
5)
_
*
mo~
©
OT
eo}
4}
=
“=
©
+
ere
—
&
DO
©
qn)
=
seeetoteteteatee
QO
®
@m
YO
ta
a
fou
ceca
re2
°°.
>
®
)
OY
HOc
re]
®
O
oa
E
Ccoaes
S&S
-
FH
OaOF
O
-—
nN
96/0l
A
LLZSMVE

16
General
-—
the
correct
pans
Good
pans
for
better
results
1
For
best
results
use
good
quality
pans
with
smooth
flat
bases.
Li
The
pan
base
should
be
thick
and
flat.
Pans
with
uneven,
distorted
or
rough
bases
(e.g.,
cast
iron)
should
not
be
used
as
they
extend
the
cooking
times
and
may
cause
damage
to
the
cooking
plates.
LI
Cooking
plates
and
pan
base
should
be
of
the
same
or
similar
diameter.
The
pan
should
be
placed
centrally
on
the
cooking
plate.
C1
Cooking
plates
and
pan
base
must
be
clean
to
prevent
damage
to
the
hob
and
waste
of
energy.
LI
Shiny
and
copper
based
pans
are
unsuitable
for
use
on
halogen
cooking
plates.
These
pans
may
also
damage
the
decor
on
normal
ceramic
hobs
so
do
avoid
using
such
pans
onaceramic
hob.
Copper
base
saucepans
are
also
unsuitable,
they
will
damage
the
hob
surface.
LI
Follow
the
recommendations
of
the
saucepan
manufacturer.
Make
use
of
the
residual
heat
—
switch
the
plates
off
5-10
minutes
before
the
end
of
the
cooking
time.
You
are
wasting
energy
and
prolonging
the
cooking
times
if:
Pan
too
Pan
lid
not
Pan
base
Pan
too
big
small
in
place
uneven
(ceramic)
GA5211_V
10/96
UK

KB5211_V
10/96
UK
After
you
have
switched
on
one
of
the
ceramic
plates
you
will
hear
a
faint
hum
caused
by
the
radiant
heating
elements.
Do
not
place
aluminium
foil
or
plastic
containers
on
the
hot
ceramic
hob.
Do
not
allow
sugar
or
foodstuffs
containing
sugar
to
come
in
contact
with
the
hot
ceramic
hob
-
it
will
damage
the
hob.
Protect
the
cooking
areas
from
damp
to
prevent
them
from
deteriorating;
dry
pan
base
be-
fore
use;
dry
cooking
areas
well
after
cleaning.
Keep
the
cooking
plates
clean
—
soiled
plates
work
less
efficiently
and
damage
may
occur
to
the
hob.
17

Using
the
cooking
plate
Guidelines
for
cooking
plate
To
use
the
cooking
plate
on
a
manual
basis
proceed
as
follows:
Switch
settings
Suggested
uses
9
Fast
frying,
deep
fat
frying,
to
bring
large
quantities
of
liquid
to
the
boil
7-8
Deep
fat
frying,
sealing
of
meat,
fast
frying
of
meat,
pancakes
6-7
Slow
frying
of
eggs,
liver,
preparing
roux,
frying
of
meat,
fish,
Suasages
and
pancakes,
hamburgers
4—5
Cooking
larger
quantities
of
food,
stews
and
soups,
potatoes
3-4
Steaming
vegetables
or
fish
in
own
juice,
pot
roasting
2-3
Re-heating
food,
cooking
rice,
small
amounts
of
potatoes,
vegetables,
simmering
1-2
Holding
warm,
to
prepare
egg
or
cream
sauces,
to
melt
butter,
chocolate
O
Off.
use
of
residual
heat
The
system
relieves
you
of
having
to
turn
the
control
to
9
first
to
heat
pan
and
contents
and
then
reduce
the
heat
by
turning
to
a
lower
setting
as
described
above.
18
KB5211_V2
10/96
UK

EBB5211_V
10/96
UK
Main
Oven
Functions
Oven
Lighting
The
oven
light
will
be
on
when
the
oven
is
in
use,
however
you
may
select
this
function
to
illuminate
the
oven
for
cleaning
purposes.
=
Conventional
Cooking
This
method
of
cooking
uses
the
top
and
bottom
element.
To
ensure
a
uniform
distribution
of
heat,
you
should
cook
on
one
level
only.
C
Ventitherm
fan
cooking
The
main
oven
is
a
fan
oven
only.
A
fan
in
the
rear
of
the
oven
ensures
that
hot
air
is
continu-
ously
circulated
around
the
oven,
allowing
you
to
cook,
bake
and
roast
simultaneously
us-
ing
any
shelf.
This
cooking
method
uses
lower
temperatures
than
conventional
cooking
and
is
therefore
highly
energy
efficient.
A
Rotitherm
roasting
This
cooking
method
combines
the
fan
with
the
grill
element.
It
replaces
the
rotisserie
in
your
oven
and
is
an
excellent
method
of
roasting
meat
and
poultry
on
one
level.
It
is
also
perfect
for
“au
gratin”
dishes.
Pizza
Oven
This
cooking
function
is
suitable
of
dishes
which
require
base
browning
and
crispness,
such
as
pizzas,
quiches,
pies
etc.
The
elements
provides
direct
heat,
while
the
fan
circulates
hot
air,
19

20
's
Speedcook
Several
elements
are
in
operation
at
the
same
time,
the
oven
therefore
reaches
high
tem-
peratures
very
quickly.
It
is
particularly
suitable
for
convenience
foods
such
as
chips,
pizzas
and
ready
made
frozen
meals,
as
this
function
will
save
the
pre-heating
time.
aad
Grilling
The
heat
source
comes
from
the
grill
element
mounted
in
the
oven
ceiling.
This
method
of
cooking
is
particularly
suitable
for
grilling
flat
pieces
of
meat
e.g.
steaks,
Sausages,
fish
or
toast.
To
Operate
the
Main
Oven
1.
Select
the
required
cooking
function
using
function
selector
A.
2.
Select
the
required
temperature
with
temperature
selector
D.
The
pilot
light
B
will
illuminate
when
the
oven
is
switched
on.
The
main
oven
thermostat
control
light
C
will
illuminate
while
the
oven
is
heating
up,
when
the
required
temperature
has
been
reached
it
will
cycle
on
and
off
to
show
that
temperature
is
being
maintained.
Pre-heating
In
general
pre-heating
is
not
necessary
when
using
Ventitherm.
However,
if
pre-heating
is
required
turn
the
cooking
selector
dial
to
Speedcook
[§]
and
then
set
the
required
tem-
perature.
When
the
oven
has
reached
the
pre-selected
temperature
the
thermostat
control
light
C
will
cycle
on
and
off,
and
the
required
cooking
function
e.g.
Ventitherm
cooking
can
be
selected.
Secondary
Oven
Functions
=
Conventional
Oven
This
method
of
cooking
uses
the
top
and
bottom
element.
To
ensure
a
uniform
distribution
of
heat,
you
should
cook
on
one
level
only.
[ver]
Grilling
The
heat
source
comes
from
the
grill
element
mounted
in
the
oven
ceiling.
This
method
of
cooking
is
particular
suitable
for
grilling
flat
pieces
of
meat
e.g.
steaks,
fish,
or
toast.
To
operate
the
Secondary
Oven
1.
Ifusing
the
conventional
select
the
required
temperature
with
temperature
selector
G.
2.
If
using
the
grill
turn
the
control
to
the
grill
symbol
[r*].
Pre-heating
If
pre-heating
is
required
select
the
required
temperature
for
the
oven.
When
the
oven
has
reached
the
pre-selected
temperature
the
thermostat
control
light
E
will
cycle
on
and
off.
EBB5211_V
10/96
UK
Other manuals for Competence 5211 V
2
Table of contents
Other AEG Cooker manuals

AEG
AEG Competence 1020F-W User manual

AEG
AEG 30006VL User manual

AEG
AEG COMPETENCE 3201 F User manual
AEG
AEG COMPETENCE 61016VI User manual

AEG
AEG E 64 D User manual

AEG
AEG CCB6761ACB User manual

AEG
AEG E 64.1 LV User manual

AEG
AEG Competence 5211 V User manual

AEG
AEG DBE5970MM User manual

AEG
AEG COMPETENCE 840E User manual
Popular Cooker manuals by other brands

Westinghouse
Westinghouse WLE522 Series quick start guide

Euromaid
Euromaid CUF54 Installation and operation instructions

Tricity Bendix
Tricity Bendix SIE553 Operating & installation instructions

Mora
Mora PS113MW manual

Mercury
Mercury 1000 Dual Fuel User's guide & installation instructions

Beko
Beko D531 Installation & operating instructions and cooking guidance