Mora PS113MW User manual

ÏËÈÒÀ ÃÀÇÎÂÀß
GAS COOKER
BYRU
GB
AE44
ÒÎÂÀÐ ÑÅÐÒÈÔÈÖÈÐÎÂÀÍ
ÃÀÇ ÏËÈÒÀÑÛ
KK

1
EN
RU
BY
KK
OPERATING AND MAINTENANCE
INSTRUCTIONS
Dear customer!
Thank you for purchasing the appliance from our new
range of gas cookers. The following information will
help you understand the features of the appliance and
use it safely. We hope the appliance will serve you
successfully for a long period of time.
!
ғ ,
ғ ,
,
,
“ғғғ”,
ғ
!
ғ
ғ
,
«ғғғ »
ғ
IMPORTANT PRECAUTIONS
This appliance is not connected to a kitchen hood.
It must be installed and connected according to the
standing regulations and relevant installation
instructions. Special attention is drawn on room
ventilation requirements.
Make sure the technical information regarding gas
type and voltage indicated on the rating plate agree
with the type of gas and voltage of your local
distribution system.
The product is assembled and set up by the
manufacturer for use of natural gas according to data
on the type label
Installation, repairs, adjustments or resetting of the
appliance to another type of gas may be performed
by authorized persons only (see Certificate of
Warranty)
Installation of the appliance and resetting to another
type of gas must be endorsed in the Certificate of
Warranty by the authorized service. Failure to do so
would render the warranty void.
Do not store any flammable objects in the bottom
drawer of the appliance.
The appliance must not be used for any other
purposes other than for the preparation of food.
Using the appliance for any other purposes may
result in life threatening concentration of combustion
by-products, or cause malfunction. The warranty
,
, .
,
ғ
,
, ,
ғ
, , ,
,
,
()
ғ
„
“
ғ
„ “
ғ
,
,
,
,
ғ
,
ғ
,
ғ
ғ
, , ,
, -
()
ғ
« »
ғ
« »
ғ
, ,
ғ
ғ

2
does not apply to faults resulting from the incorrect
use of the appliance.
It is recommended to have the appliance checked by
the authorized service personnel every two years.
Such professional maintenance will extend the useful
life of the appliance.
If you should smell gas, immediately shut the gas
pipe cock and cut the gas supply. In such cases the
appliance may be used only after the cause of such
gas escape is discovered and removed by qualified
personnel and the room thoroughly ventilated.
When using gas for cooking, heat and moisture are
generated into the room, so make sure it gets
sufficient air supply: keep a window open or install a
mechanical ventilation device (a vapor hood with
mechanical extraction). Prolonged operation of the
appliance may require extensive ventilation, for
instance opening the window or boosting the
performance of the hood with a mechanical fan.
The appliance requires a minimum air admission of
2m3/h for every kW of power input.
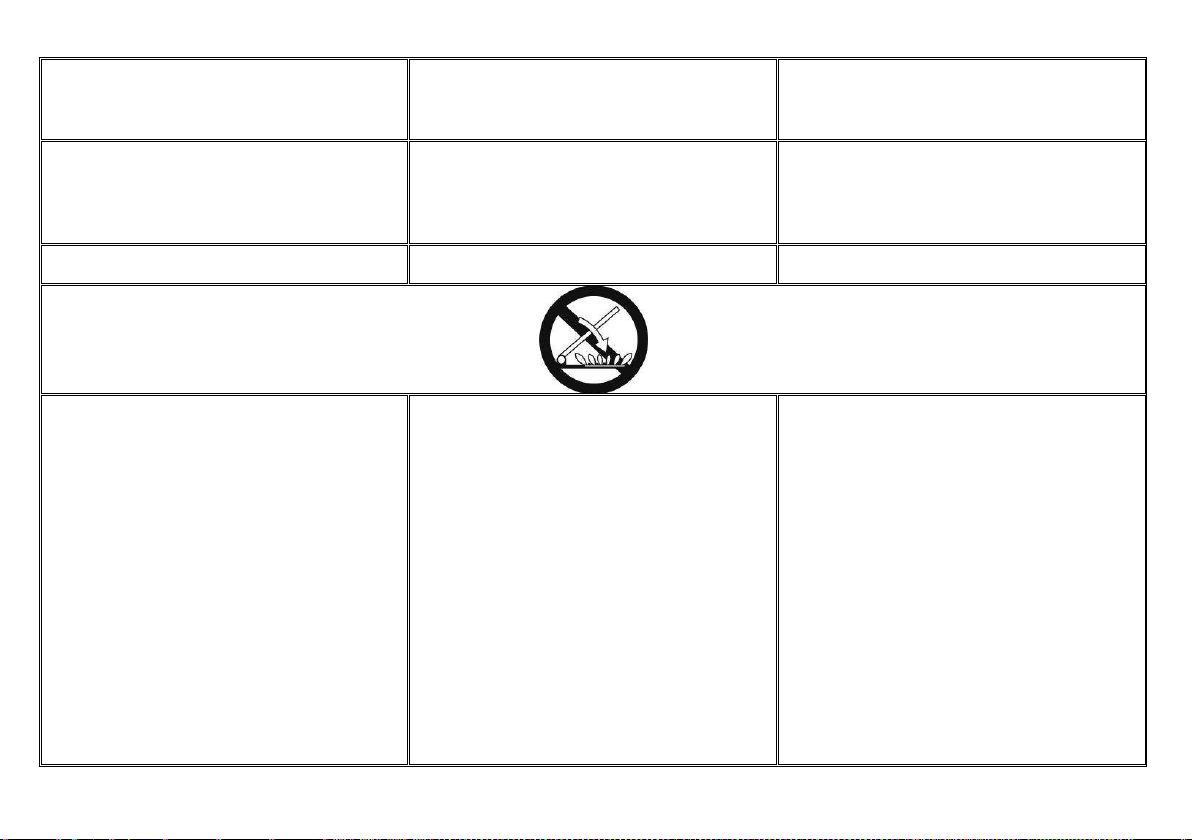
Never use naked light to detect gas leakage!
If you detect any defects on the gas installation of
the appliance, never attempt to repair it by yourself.
Switch the appliance off, cut the gas supply and call
authorized personnel to make the repair.
If you plan an absence exceeding 3 days, turn off the
gas pipe cock and shut the gas supply. If the
appliance is out of service for more than 3 months, it
is advised to retest and reset all functions of the
appliance.
In change of the environment for which the appliance
is designed, with a transient risk of fire or blast (e.g.
at linoleum or PVC gluing, working with paints, etc.),
the appliance must be put out of service in time, prior
to the risk.
Do not place any combustible objects on the
appliance or at a distance shorter than its safety
distance (the shortest distance of an appliance from
combustible items is 750 mm in the direction of main
radiation and 100 mm in other directions).
Do not use cookware with damaged surface coating
or otherwise defective due to wear or handling.
Do not place the appliance on a pedestal.
.
, ,
ғ
, -,
,
ғ
ғ
,
-
ғ
,
, ,
ғ
750 ,
- Қ00 ғ
- ғ
, ғ
,
3- , ,
ғ
3- ,
ғ
(
), ,
,
,
(
)ғ
, ,
,
ғ
,
(
)
ғ
ғ
ғ
ғ -
ғ
ғ
,
ғ
ғ
750 ,
- Қ00 .
-
ғ
ғ
3
,
ғ 3
,
ғ
(
)
,
(
)ғ
,
ғ
, (
)
ғ
ғ ,
ғ
ғ

3
Manufacturer does not recommend using any
additional accessories, for instance flame
extinguishing protectors, or efficiency increase
gadgets.
Do not move the cooker by holding the hob.
The manufacturer declines responsibility for any
damage caused by violating the instructions and
recommendations set herewith.
Do not use pressure vapor cleaner for cleaning the
appliance.
Cooker may only be installed against non
inflammable back wall.
ғ
-
-
ғ
,
, , ,
, ғғ
,
(,
, , ғғ)ғ
ғ
,
,
, ғ
ғ
,
ғ
, , ,
ғ
қ 3/ ғ
қ
ғ
,
, , ғ
-
ғ
,
(, ,
, )
, ғ
ғ
ғ
ғ
, ,
ғ
, , ,
ғ
қ 3/ғ ғ
қ
ғ
, ,
, .
NOTE
The manufacturer reserves the right to make minor
changes in the Instructions for Use resulting from
relevant technological modifications or improvements of
the product.
-
,
ғ
-
ғ

4
Different models are equipped with different
accessories. Any additional accessories (grids,
baking trays, grill pans, adjustable feet) are
available in authorized shops or our service outlets.
ғ
(, , ,
)
ғ
-
ғ - ( ,
, -,
)
ғ
CONTROL PANEL
1 - Left front burner control knob
2 - Left rear burner control knob
3 - Right rear burner control knob
4 - Right front burner control knob
5 - Oven control knob
6 - Oven light
7 - High voltage gas ignition switch
8 - Timer
1 -
2 -
3 -
4 -
5 -
6 -
7 -
8 -
1 -
2 -
3 -
4 -
5 -
6 -
7 -
8 -
BEFORE FIRST USE
Prior to usage it is necessary to remove any packing
material from the range.
Various parts and components of the range and
package are recyclable. Handle them in compliance
with the valid instructions and national decrees.
Before first use we recomend clean appliance and
accessories. After drying cleaned surfaces switch on
main switch and keep following instructions.
Warning: Do not clean and disassemble other parts
of cooker, than mentioned in chapter CLEANING.
ғ
ғ
ғ
ғ
:
,
«»ғ
ғ
ғ
- .
,
ғ
: «»
ғ
ATTENTION!
Before first using of oven remove all stickers from oven
door.
!
.
!
ғ

5
The manufacturer declines responsibility for any
injuries to persons or damages to the appliance
resulting from improper usage of the appliance.
,
ғ
,
ғ
OPERATION
O
CAUTION:
The appliance is not a toy and may be operated only
by adult persons in accordance with these
instructions. Do not leave small children without
supervision in a room where the appliance is
installed.
This appliance is not intended for use by persons
(including children) with reduced physical, sensory or
mental capabilities, or lack of experience and
knowledge, unseless they have been given
supervision or instruction concerning use of the
appliance by a person responsible for their safety.
Children should be supervised to ensure that they do
not play with the appliance.
Gas cooker is an appliance whose operation
requires supervision.
Never close the lid while the hob burners or oven
burner ar still in operation.
The maximum baking pan load inserted in guides is
3kg, and the maximum baking pan load placed on a
grid is 7kg.
The baking plates and roasting pans are not
designed for a long-term storage of food (exceeding
48 hours). For longer storage use convenient dishes.
!
!
!!!
( ) ,
,
, ғ
ғ
- ,
ғ
, ,
ғ
, ,
, ,
ғ
,
, 3 , К
7 ғ
(
48 )ғ
ғ
!
!
!!!
,
(
)
,
,
ғ
ғ
–
ғ
ғ
,
, ,
ғ
3 ,
7 ғ
-
(48 ) ғ
ғ
COOKING HOB
LIGHTING THE HOB BURNERS
Press the appropriate burner control knob slightly
towards the appliance and turn it anti-clockwise to the
„MAБIMUM POАER“ ЩШЬТЭТШЧғ Light the gas using a
match or any gas ignition device.
« »
ғ
« »
,
ғ

6
LIGHTING THE BURNERS WITH HIGH
VOLTAGE GAS IGNITION KNOB
Press the appropriate burner control knob slightly
towards the appliance and turn it anti-clockwise to the
„MAБIMUM POАER“ ЩШЬТЭТШЧғ NШа use another hand
and press the gas ignition knob on the control panel
and keep it pressed until it ignites the flame.
Ө
« »ғ
,
,
ғ
,
« » ғ
,
,
.
SHUTTING THE HOB BURNERS OFF
TЮЫЧ ЭСО ЬОХОМЭОН kЧШЛ ЭШ ЭСО “OFF” ЩШЬТЭТШЧ КЧН МСОМk
whether the flame is extinct
“”ғ -
ғ
«» ғ
ғ
COOKING
Use low and wide cookware for preparing food on
gas burners. Make sure the burner flames heat the
dish bottom and do not go beyond its rim.
The appliance is fitted with different size burners. For
optimum (economical) consumption of gas use the
recommended cookware bottom diameters:
- small burner - ПЫШЦ Ø Ққ0 ЭШ Ø Қ60 ЦЦ,
- medium burner - ПЫШЦ Ø Қ60 ЭШ Ø ққ0 ЦЦ,
- large burner - ПЫШЦ Ø ққ0 ЭШ Ø қ80 ЦЦғ
Rotation of control knob sets the gas heating power
(ПХКЦО ЬТгО) ЛОЭаООЧ ЭСО “MAБIMUM POАER”
ЩШЬТЭТШЧ КЧН “SAVING” ЩШЬТЭТШЧғ TШ ЫОКМС the
“SAVING” ЩШЬТЭТШЧ, ЭСО kЧШЛ ЦЮЬЭ ЛО ЫШЭКЭОН ЭШ ЭСО
extreme left position. After the food is brought to
,boiling point, reduce the gas power to the position
sufficient to maintain the desired cooking stage.
ғ ,
ғ
ғ
()
:
- - Ққ0 Қ60 ,
- - Қ60 ққ0 ,
- - ққ0 қ80 ғ
( )
“
” “ ”ғ
ғ
“ ”, ,
ғ
ғ
ғ
()
:
- - Ққ0 - Қ60 ,
- - Қ60 - ққ0 ,
- - 220 - қ80 .
( )
« »
« »
ғ
ғ
« » ,
, , -

7
, -
“ ”, , (
),
“”ғ
« » , ,
(- ),
«» ғ
CAUTION:
Before opening the hob lid any spilled liquid must be
removed from the lid surface.
Do not close the hob lid if the burners are still hot!
- ғ
, ,
ғ
ғ
ғ
INSTRUCTIONS FOR USING THE GLASS
LID
ATTENTION!
Glass lid may crack if it is heated. Before closing the lid
switch off all burners.
To avoid damage to the glass lid follow these
instructions:
Do not operate hob burners when the lid is closed.
Do not use closed lid as worktop or storage area.
Open the lid properly to the end position.
Avoid touching the glass lid with cookware during the
food preparation.
Close the lid to its completely closed position.
Clean any spillages on the lid immediately after the
hob has cooled down.
Do not use abrasive detergents to clean the lid, as
they may scratch the glass surface and cause
discoloration.
!
,
,
ғ
,
ғ
- ғ
ғ
,
ғ
ғ
,
ғ
,
ғ
!
,
ғ
,
ғ
ғ
ғ
ғ
ғ
ғ
ғ

8
OVEN OPERATION
1 - OFF
2 - MAXIMUM POWER
3 - MINIMUM POWER (SAVING)
1 -
2 -
3 - ( )
1 -
2-
3- ( )
The gas supply to the oven burner is controlled by a tap
protected with a thermoelectric flame sensor.
The power input of the oven burner as well as the
temperature of the oven space can be controlled by
ЬОЭЭТЧР ЭСО kЧШЛ ЭШ ЭСО ЩШЬТЭТШЧЬ „MAБIMUM POАER“
КЧН „SAVING“
ғ
,
,
“
” ” ”ғ
ғ
,
« »
« »
ғ
IGNITION OF THE OVEN BURNER
Open the oven door.
Set the oven burner control knob to the position
"MAXIMUM" and press it slightly towards the panel
to a limit position. At the same time hold a match at
an opening in the oven bottom.
After firing the burner hold the knob pressed to a limit
position to the panel for about 5 seconds till the
flame sensor heats up.
Release the knob and check whether the burner is
on. If the flame dies after releasing the knob, repeat
the ignition procedure. After that set the knob to the
desired position.
ғ
“ ”
ғ
ғ
, /
,
, 5 ,
ғ
,
ғ ,
ғ
.
« » ,
ғ
ғ
, /
5 ,
,
ғ
,
ғ ,
ғ
IMPORTANT:
If the burner is not on after 10 seconds, open the oven
door and wait for 5 minutes before the next try.
!
Қ0 ,
5 ,
ғ
!
Қ0 ,
,
5 ғ

9
SHUTTING THE HOB BURNERS OFF
TЮЫЧ ЭСО ЬОХОМЭОН kЧШЛ ЭШ ЭСО “OFF” ЩШЬТЭТШЧ КЧН МСОМk
whether the flame is extinct
“”ғ
- ғ
«»
ғ ғ
BAKING / ROASTING FOOD
Preheat the oven for a period of 10 - 15 min before
putting yeast dough to bake.
, ,
, Қ0-15
ғ
,
, Қ0-Қ5
ғ
TСО ШЯОЧ kЧШЛ ТЬ ЬОЭ ЭШ ЭСО ЩШЬТЭТШЧ „MAБIMUM
POАER“ғ
After preheating put the food in the oven.
Baking/roasting time at MAXIMUM POWER depends
on the type and mass of food. Then set the oven burner
knob to the MINIMUM POWER (SAVING) position and
keep it there to the end of baking.
“ ” ғ
,
ғ
“ ” .
«
» ғ
ғ
« »
, ғ
For best baking/roasting results insert the grid with
the tray into the second level guide from below.
Experience says that yeast dough is well baked after
25 –30 minutes, Christmas cake after 45 minutes,
and pastry after 12 –18 minutes. However, these
times are merely referential and it is necessary to
test them individually.
If possible, avoid opening the oven door during the
baking process if possible. The temperature regime
within the oven might be disturbed, resulting in
prolonged baking time or burnt food.
If you should detect considerable differences
between the set temperature and the actual oven
temperature, contact qualified service personnel.
,
, ,
25-30 ғ
45 ,
- 12-Қ8 ғ
(
)
,
.
,
,
ғ ,
,
,
ғ
25-30
ғ
45 ,
- 12-Қ8
ғ
( )
,
ғ
,
, -
ғ
,
ғ
HELPFUL HINT:
When baking high rise yeast dough put it on aluminum
baking tray and insert it in the second guide level from
the bottom.
!
(
) ,
.
!
( ) ,
ғ

10
INSERTING OF GRID IN THE OVEN
MINUTE MINDER
Awaiting cooking time (oven or hob burners) is possible
to set on mechanical minute minder in range of 0–115
minute.
Required time to be set by turning of the knob. First turn
the knob to the right to max. positron and than turn
back to required time.
When time empire the bell rings.
0 ҚҚ5 ғ
ғ ,
(ҚҚ5 ) (35
)ғ
ғ
0-
ҚҚ5
ғ
ғ
, (115
)
ғ
ғ
TEMPERATURE INDIKATOR
The cooker is equipped with oven temperature indicator
(°Ө)ғ TОЦЩОЫКЭЮЫО ТЬ ШЧХв ТЧПШЫЦКЭТЯОғ
( °Ө)
ғ ғ
(°Ө)
ғ ғ

11
CLEANING AND MAINTENANCE
Before attempting any cleaning or maintenance set all
РКЬ МШЧЭЫШХ kЧШЛЬ КЧН ЭОЦЩОЫКЭЮЫО ЬОХОМЭШЫЬ ЭШ “OFF”
position and let the cooker cool down completely.
,
,
, ,
ғ
,
,
,
ғ
CLEANING THE CABINET
Clean the exterior with a damp sponge and some
detergent.
Fat stains can be removed with warm water and
special detergent for enamel.
Never clean enameled surfaces with abrasive agents
as they may permanently damage the surface of the
appliance.
-
ғ
ғ
ғ
,
ғ
-
ғ .
ғ
ғ
HOB GRID
Remove the cooking grid from the hob and wash it
separately or place it into the dishwasher. After
washing replace it to fit the appropriate groves in the
hob.
Remove burner parts (cover, distributor) from the
hob and soak them in warm water with added
detergent for 10 minutes.
After washing dry the burner parts carefully and
check whether all burner notches are clean, then
return them back to their position.
- ғ
Қ0
ғ
,
,
ғ
,
ғ
, Қ0
ғ
,
,
ғ
NOTICE:
Since the burner distributor caps are made of aluminum
alloy, we discourage you from cleaning them in a
washing machine.
,
,
.
ұ
,
ғ

12
OVEN
Clean the oven walls with a damp sponge and
detergent.
To clean stubborn stains burned into the oven wall
use a special detergent for enamel.
After cleaning carefully wipe the oven dry.
Clean the oven only when it is completely cold.
Never use abrasive agents, because they will
scratch enameled surface.
Wash the oven utensils with a sponge and detergent
or put them in the dishwasher (grid, pan, etc.). You
can also use special detergents to remove rough
stains or burns.
,
ғ
,
ғ
-
,
, , ,
ғ
ғ
,
ғ
(,
ғғ)
-
ғ
ғ
,
ғ
-
,
ғ
ғ
ғ
- (,
ғғ) -
ғ
BULB REPLACEMENT
Set all the control knobs to the OFF position and
disconnect the range from the mains.
Unscrew the bulb glass cover in the oven by turning
it anti-clockwise.
Unscrew the bulb and replace it with a new bulb.
Replace the bulb glass cover.
:
,
“”,
,
, ,
,
,
, ғ
:
«»
,
,
,
, ,
;
, ,
ғ
NOTE:
For oven illumination always use
T 300° Ө, EҚ4, қ30-240V, 25W bulb.
1. Glass cover
2. Lamp
3. Sleeve
4. Oven rear wall
ұ
T 300°, EҚ4, қ30 - қ40 B, қ5 Bғ
1.
2.
3.
4.
ұ
T 300°, EҚ4, қ30/қ40 B, қ5 B
.
1.
2.
3.
4.

13
OVEN
Procedure for cleaning of internal glass door.
ғ
ғ

14
WARRANTY TERMS AND CONDITIONS
In case of any defects to the appliance during the warranty
period, do not attempt to repair it by yourself. Make a claim
to the nearest authorized dealer or place of purchase, and
make sure you can produce the endorsed Certificate of
Warranty. In the absence of duly endorsed Certificate of
Warranty your claim is void.
, ,
,
, ,
ғ
„ “,
ғ „
“ -
ғ
,
ғ ,
« » ғ
« »
- ғ
NOTE:
The appliance will be delivered to you with the
appropriate protective wrapping. This packaging
material is valuable and can be recycled if such
facilities are available in your locality.
ұ
,
ғ
ұ
ғ
DISPOSAL OF PACKAGING
Deliver the disposed packaging material to your local
collecting point for recycling.
Corrugated cardboard, wrapping paper
- sale to the collecting places;
- in waste paper containers;
Wooden parts
- other use;
- to the municipal disposal facility;
Wrapping foil and bags - in waste plastic containers;
, -
,
-
- ,
-
,
-
,
- - ,
- ғ
- ,
- ғ
, -
DISPOSAL
OF OBSOLETE APPLIANCES
The appliance comprises valuable materials, which ought to
be newly utilised. Sell the appliance to the collecting place
or to the municipality destined place for refuse dumping.
This appliance is marked in accordance with Directive
2002/96/EC on waste electrical and electronic equipment -
WEEE.
After expire of life time give the appliance to the collecting
place for used electric and electronic equipment.
қ00қ/96/EG
(аКЬЭО ОХОМЭЫТМКХ КЧН
elecronic equipment - WEEE).
(EU)
ғ
2002/96/EG
(waste electrical and elecronic equipment
- WEEE).
(EU)
ғ

15
INSTALLATION INSTRUCTIONS
AND SETTINGS
The appliance must be installed in accordance with
valid local regulations, and shall be placed only in
well vented spaces.
,
ғ
ғ
IMPORTANT PRECAUTION:
Any movement of the appliance from the existing
installation requires shutting gas supply and
disconnecting the appliance from electric mains power.
After installation the qualified personnel should perform
the following:
Leakage test on gas couplings, and correct electric
connection to the mains.
Check gas burners and their adjustment (oven
burner prime air, saving power input, thermoelectric
sensors).
Explain to the customer all functions of the appliance
and particulars regarding its servicing and
maintenance.
!
,
,
, ,
ғ
:
“”;
,
,
, ;
, ғ
!
,
,
,
ғ
:
«» ;
,
,
;
ғ
LOCATION
Solely company authorized to provide such
activities may perform the installation of this
hotplate and it should be installed in compliance
with local standards and regulations.
,
ғ
ғ
ғ
ғ
Thermal stability of the walls, surrounding elements
and spaces (material of floor, partitions and walls
around the coШkОЫ) ЦЮЬЭ ЛО КЭ ХОКЬЭ Ұ0 ° Өғ
( ,
)
Ұ0°ғ
(
,
)
Ұ0°
ғ

16
The appliance is designed for installation in the line of
kitchen cabinets. The cooker can be located in the
standard kitchen with a minimum space of 20 m3.
If the kitchen is smaller (but not less than 15 m3as a
minimum) it is necessary to provide a hood. Regarding
thermal resistance the cooker can be positioned on any
floor, as long as it is not located on a pedestal.
ғ
қ0 3ғ
( Қ5 3)
ғ
ғ
.
20 3 ғ
( Қ5 3)
.
ғ

17
CONNECTION
TO GAS SUPPLY
GAS SUPPLY
The appliance may be connected to gas supply by only
by the authorized personnel. Connection must comply
with the local standards and requirements. The gas
supply pipe must be fitted with the accessible gas shut-
off cock, located before the coupling with the cooker.
, ғ
ғ
WARNING:
In handling the gas line (e.g. connection to the gas
distribution system or flexible gas hose) always use a
wrench to hold the gas line terminal, in order to avoid
deformations.
!
,
ғ
!
,
ғ
CONNECTION TO THE NATURAL GAS
NETWORK
Connection must be made in accordance with standing
local regulations. In case of excessive gas pressure use
pressure regulator.
,
ғ
ғ
CONNECTION TO THE LPG NETWORK
Special LPG coupling must be installed at the 1/2" pipe
connection.
-
Қ/қ”ғ
-
Қ/қ”
ғ
FLEXIBLE HOSE CONNECTION
For safety reasons use only the certified hose
complying with local standards and with recommended
length of 1000 - 1500mm. Heat resistance of the
МШЧЧОМЭТШЧ СШЬО ЬСШЮХН ЛО КЭ ХОКЬЭ Қ00° Өғ
Each hose must contain instructions regarding the
method of connection, allowed heating, inspections,
service life, etc. These instructions must be
unconditionally adhered to.
,
ғ К Қ000 - 1500
ғ
Қ00°
ғ
, ғ
,
-
ғ
1000 - 1500
ғ Қ00°
ғ
ғ
-
ғ

18
1 - Connection ending
2 - Knee
3 - Connection hose (connection from the right)
4 - Connection hose (connection from the left)
5 - Fixing clamp
6 - Back cover of the cooker
1 -
2 -
3 - ( )
4 - ( )
5 -
6 -
1 -
2 -
3 - ( )
4 - ( )
5 -
6 -
3
2
1
5
6
4
IMPORTANT PRECAUTION:
In case of left side connection (seen from the front) the
hose must be connected by means of a clamp fixed in
the back cover opening. You will find the fixing clamp in
the accessory kit.
!
,
.
ғ
!
ғ
-
ғ

19
HOB BURNER SETTINGS
MINIMUM OUTPUT ADJUSTMENT
Before starting any adjustments disconnect the
appliance from the mains power supply. Adjustments
must be carried out with the tap at the "SAVING"
position.
The minimum gas output is correctly adjusted when the
inner cone of the flame arrives at the height of 3 to
4mm.
If this is not the case, first remove the tap knob and
then tighten or loosen the screw C, depending on
whether the flame is to be reduced or increased.
The adjustments must be crried out so that the end
position of the tap is actually its minimum position.
For butane/propane the screw C must be fully screwed
in.
-
ғ
,
3
4 ғ
,
„ ",
,
ғ
-
ғ
,
3- 4 - ,
ғ
,
« » ,
,
ғ
OVEN BURNER SETTINGS
PRIMARY AIR ADJUSTMENT
To access the primary air adjusting screw (5), open or
remove oven door and remove oven bottom (2). By
unscrewing the adjusting screw the quantity of primary
air is increase, by tightening it is reduced. The air/gas
mixture is correct when the flame has blue color.
Adjust screw 5 for value X in accordance with the table,
and tighten the nut.
Check that the burner is working properly: the flame
must be blue and sharp, without a yellow tip.
ғ
(
)
ғ
, - ғ
( „“)
ғ
, :
ғ
ғ
( ,
),
ғ
,
– ғ
(„“ )
ғ
:
ғ
1 –Front oven wall
2 –Oven bottom
3 –Ignition tube
4 –Oven burner
5 –Oven burner adjusting screw
1 –
2 –
3 –
4 –
5 –
1 –
2 –
3 –
4 –
5 –
Table of contents
Other Mora Cooker manuals