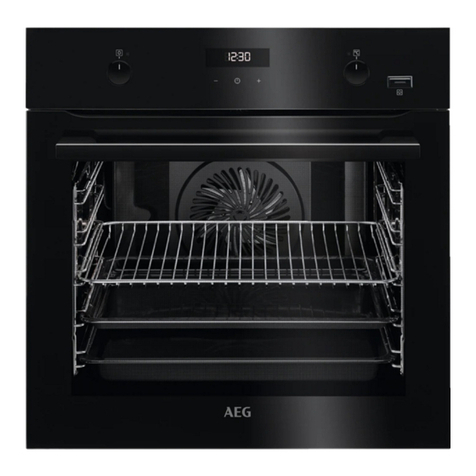
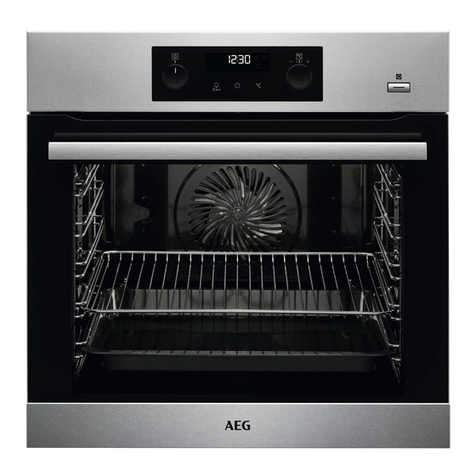
AEG BPK75891PT User manual

USER
MANUAL
EN User Manual
Oven
BPK75891PT

www.aegaustralia.com.au |www.aegnewzealand.co.nz
2
CONTENTS
1. SAFETY INFORMATION .................................................................................... 3
2. CONDITIONS OF USE ...................................................................................... 4
3. SAFETY INSTRUCTIONS ................................................................................. 4
4. PRODUCT DESCRIPTION................................................................................. 7
5. BEFORE FIRST USE ......................................................................................... 9
6. DAILY USE ....................................................................................................... 11
7. ADDITIONAL FUNCTIONS............................................................................... 12
8. COOKING FUNCTIONS ................................................................................... 14
9. FOOD SENSOR ............................................................................................... 17
10. HINTS AND TIPS......................................................................................... 21
11. CONTROL PANEL ....................................................................................... 33
12. CARE AND CLEANING ............................................................................... 37
13. TROUBLESHOOTING................................................................................. 41
14. INSTALLATION............................................................................................ 42
15. ENERGY SAVING ....................................................................................... 47
16. WARRANTY................................................................................................. 48
FOR PERFECT RESULTS
Thank you for choosing this AEG product. We have created it to give you impeccable performance for
many years, with innovative technologies that help make life simpler features you might not nd on ordinary
appliances. Please spend a few minutes reading to get the very best from it. Visit our website for:
Get usage advice, brochures, trouble shooter, service information:
aegaustralia.com.au/support/ | aegnewzealand.co.nz/support/
Register your product for better service:
aegaustralia.com.au/support/product-registration/ | aegnewzealand.co.nz/support/product-registration
Buy accessories, consumables and original spare parts for your appliance
aegaustralia.com.au | www.aegnewzealand.co.nz
CUSTOMER CARE AND SERVICE
Always use original spare parts. When contacting our Authorised Service Centre, ensure that you have
the following data available: Model, PNC, Serial Number. The information can be found on the rating plate.
Important Information that may impact your Manufacturer’s Warranty
Adherence to the directions for use in this manual is extremely important for health
and safety. Failure to strictly adhere to the requirements in this manual may result in
personal injury, property damage and affect your ability to make a claim under the
AEG manufacturer’s warranty provided with your product. Products must be used,
installed and operated in accordance with this manual. You may not be able to claim
on the AEG manufacturer’s warranty in the event that your product fault is due to
failure to adhere this manual.

English 3
1. SAFETY INFORMATION
The symbols you will see in this booklet
have these meanings
Warning / Caution-Safety information
General information and tips
Environmental information
Subject to change without notice.
Before the installation and use of the
appliance, carefully read the supplied
instructions. The manufacturer is not
responsible for any injuries or damages
that are the result of incorrect installation
or usage. Always keep the instructions in
a safe and accessible location for future
reference.
IMPORTANT INFORMATION
Important – check for any damages or
marks.
• If you nd the oven is damaged or
marked, you must report it within 7 days
if you wish to claim for damage/marks
under the manufacturer’s warranty. This
does not affect your statutory rights.
• Discolouration of the enamel has
no effect on the performance of the
appliance.
ENVIRONMENT
Information on disposal for users
• Most of the packing materials are
recyclable. Please dispose of those
materials through your local recycling
depot or by placing them in appropriate
collection containers.
• If you wish to discard this product, please
contact your local authorities and ask for
the correct method of disposal.
1.1 Children and vulnerable people
safety
• This appliance is not intended for use by
persons (including children) with reduced
physical, sensory or mental capabilities,
or lack of experience and knowledge,
unless they have been given supervision
or instruction concerning use of the
appliance by a person responsible for
their safety.
• Do not let children play with the
appliance.
• Keep all packaging away from children
and dispose of it appropriately.
• Keep children and pets away from the
appliance when it operates or when it
cools down. Accessible parts are hot.
• If the appliance has a child safety device,
this should be activated.
• Children shall not carry out cleaning
and user maintenance of the appliance
without supervision.
• Children aged 3 years and under must
be kept away from this appliance when it
is in operation at all times.
1.2 General Safety
• Only a qualied person must install
this appliance and carry out servicing.
(Certicate of Compliance to be
retained).
WARNING! The appliance and
its accessible parts become hot
during use. Care should be taken
to avoid touching heating elements.
Children shall be kept away unless
continuously supervised.
• Always use oven gloves to remove or put
in accessories or ovenware.
• Before carrying out any maintenance,
disconnect the appliance from the power
supply.
• Ensure that the appliance is switched off
before replacing the lamp to avoid the
possibility of electric shock.
• Do not use a steam cleaner to clean the
appliance.

www.aegaustralia.com.au |www.aegnewzealand.co.nz
4
• Do not use harsh abrasive cleaners or
sharp metal scrapers to clean the glass
door since they can scratch the surface,
which may result in shattering of the
glass.
• Excessive spillage must be removed
before the pyrolytic cleaning. Remove all
parts from the oven.
• To remove the shelf supports rst pull
the front of the shelf support and then
the rear end away from the side walls.
Install the shelf supports in the opposite
sequence.
• The means for disconnection must
be incorporated in the xed wiring in
accordance with the wiring rules.
• Use only the food sensor (core
temperature sensor) recommended for
this appliance.
2. CONDITIONS OF USE
This appliance is intended to be used
inhousehold and similar applications
such as:
• Farm houses
• By clients in serviced apartments,
holiday apartments and other residential
type environments.
• Staff kitchen areas in shops, ofces and
other working environments, Bed and
breakfast type environments
3. SAFETY INSTRUCTIONS
3.1 Installation
WARNING! Only a qualied person
must install this appliance and carry
out servicing. (Certicate of
Compliance to be retained)
• Remove all the packaging
• Do not install or use a damaged
appliance.
• Follow the installation instruction
supplied with the appliance.
• Always take care when moving the
appliance as it is heavy. Always use
safety gloves and enclosed footwear.
CAUTION!
Avoid sharp edges during handling.
• Do not pull the appliance by the handle.
• Keep the minimum distance from the
other appliances and units.
• Make sure that the appliance is installed
below and adjacent safe structures.
• Where the appliance is built into a
cabinet, the cabinet material must
be capable of withstanding 70°C. If
adjacent to vinyl-wrapped surfaces, use
installation kit from vinyl wrap supplier.
• The sides of the appliance must stay
adjacent to appliances or to units with
the same height.
• The appliance is equipped with an
electric cooling system. It must be
operated with the electric power supply.
3.2 Electrical connection
WARNING! Risk of re and electrical
shock.
• All electrical connections should be
made by a qualied electrician.
• The appliance must be earthed.
• Make sure that the parameters on the
rating plate are compatible with the
electrical ratings of the mains power
supply.
• Use only correct isolation devices: line
protecting cut-outs, fuses (screw type
fuses removed from the holder), earth
leakage trips and contactors.
• The electrical installation must have
an isolation device which lets you
disconnect the appliance from the
mains. The isolation device must have
a contact opening width of minimum 3
mm.
• A means for disconnection must
be incorporated in xed wiring in
accordance with the wiring rules.
• Switch the appliance off before
removing the oven light glass for globe
replacement
English 5
• 3.3 Use
• WARNING! Risk of injury, burns
and electrical shock or explosion.
• Do not change the specication of this
appliance.
• Make sure that the ventilation openings
are not blocked.
• Do not let the grill operation stay
unattended during operation.
• Deactivate the appliance after each use.
• Be careful when you open the appliance
door while the appliance is in operation.
Hot air can release.
• Do not operate the appliance with wet
hands or when it has contact with water.
• Do not apply pressure on the open door.
• Do not use the appliance as a work
surface or as a storage surface.
• Open the appliance door carefully. The
use of ingredients with alcohol can
cause a mixture of alcohol and air.
• Do not let sparks or open ames to
come in contact with the appliance when
you open the door.
• Do not put ammable products or items
that are wet with ammable products in,
near or on the appliance.
CAUTION!
Risk of damage to the appliance.
• To prevent damage or discoloration to
the enamel:
○do not put ovenware or other objects
in the appliance directly on the base
of the oven.
○do not put aluminium foil directly on
the bottom of cavity of the appliance.
○do not put water directly into the hot
appliance.
○do not keep moist dishes and food
in the appliance after you nish the
cooking.
○be careful when you remove or install
the accessories.
• Discoloration of the enamel or stainless
steel has no effect on the performance of
the appliance.
• Use a deep pan for moist cakes.
Fruit juices cause stains that can be
permanent.
• This appliance is for cooking purposes
only. It must not be used for other
purposes, for example room heating.
• Always cook with the oven door closed.
3.4 Care and cleaning
WARNING! Risk of injury, re, or
damage to the appliance.
• Before maintenance, deactivate the
appliance and disconnect the mains
• Make sure the appliance is cold. There is
the risk that the glass panels can break.
• Care must be taken when wiping exposed
stainless steel edges. They can be sharp!
• Replace immediately the door glass panels
when they are damaged. Contact the
Authorised Service Centre.
• The door glass on this appliance is
made from a tough, durable material that
withstands heating and cooling without
breaking. As a precaution however, do not
put cold water on hot glass.
• Clean regularly the appliance to prevent
the deterioration of the surface material.
• Ensure fats and oils do not accumulate
around elements, burners or fans.
• Clean the appliance with a moist soft cloth.
Only use neutral detergents.
• Do not use any abrasive products,
abrasive cleaning pads, solvents or metal
objects.
• If you use an oven spray, follow the safety
instruction on it’s packaging.
• Always clean the appliance immediately
after any food spills.
3.5 Pyrolytic cleaning
WARNING! Risk of Injury / Fires /
Chemical Emissions (Fumes) in
Pyrolytic Mode.

www.aegaustralia.com.au |www.aegnewzealand.co.nz
6
• Before carrying out a Pyrolytic
selfcleaning function or the First Use
please remove from the oven cavity:
○any excess food residues, oil or
grease spills / deposits.
○any removable objects (including
shelves, food sensor, etc., provided
with the product) particularly any non-
stick pots, pans, trays, utensils etc.
Note: This oven model is designed with
Pyro-proof side racks and slides, so they
may remain in the oven cavity during
pyrolytic cycle, however shelves and dishes
must be removed.
• Read carefully all the instructions for
Pyrolytic cleaning.
• Keep children away from the appliance
while the Pyrolytic cleaning is in
operation. The appliance becomes very
hot and hot air is released from the front
cooling vents.
• Pyrolytic cleaning is a high temperature
operation that can release fumes from
cooking residues and construction
materials, as such consumers are strongly
advised to:
○provide good ventilation during and
after each Pyrolytic cleaning.
○provide good ventilation during
and after the rst use at maximum
temperature operation.
• Unlike all humans, some birds and
reptiles can be extremely sensitive
to potential fumes emitted during the
cleaning process of all Pyrolytic Ovens.
• Remove any pets (especially birds) from
the vicinity of the appliance location
during and after the Pyrolytic cleaning
and rst use maximum temperature
operation to a well ventilated area.
• Small pets can also be highly sensitive
to the localized temperature changes in
the vicinity of all Pyrolytic Ovens when
the Pyrolytic self cleaning program is in
operation.
• Non-stick surfaces on pots, pans, trays,
utensils etc., can be damaged by the
high temperature Pyrolytic cleaning
operation of all Pyrolytic Ovens and can
be also a source for low level harmful
fumes.
• Fumes released from all Pyrolytic Ovens
/ Cooking Residues as described are not
harmful to humans, including infants.
3.6 Internal light
The type of light bulb or halogen lamp used
for this appliance is only for household
appliances Do not use it for house lighting.
WARNING!
Risk of electrical shock.
• Before replacing the lamp, disconnect
the appliance from the power supply.
• Only use lamps with the same
specications.
3.7 Disposal
WARNING!
Risk of injury or suffocation.
• Disconnect the appliance from the mains
supply.
3.8 Service
• To repair the appliance contact an
Authorised Service Centre.
• Use original spare parts only.
• To maintain safe operation, it is
recommended that the product be
inspected every 5 years by an authorised
service person.

English 7
4. PRODUCT DESCRIPTION
4.1 General overview
1Electronic programmer
2Socket for the food temperature sensor
3Heating element
4Lamp
5Fans and heating elements
6Shelf support, removable
7Shelf positions
7
2
5
4
3
2
1
4
5
3
1
6

www.aegaustralia.com.au |www.aegnewzealand.co.nz
8
4.2 Accessories
Wire shelf
For cookware, cake tins, roasts.
Grill shelf
Grill- / Roasting pan
To bake and roast or as a pan to
collect fat.
Grill insert
For roasting and grilling.
Use the grill insert only with the Grill- /
Roasting pan.
Food Sensor
To measure the temperature inside
the food.
Telescopic runners – Pyro proof
2 x Left 2 x Right
For shelves and trays.
Shelf support / Side racks – Pyro proof
Left Right

English 9
5. BEFORE FIRST USE
5.1 Attaching Telescopic runners
1. Obtain left hand side rack and left hand
slide – see image to identify.
2.
1
L = left hand side
R = right hand side
2
CLICK! 3
The shaded wires indicate the wire the
slide can be mounted on. Fit slide rear
clips to the rear of wire at an angle as
shown below.
3.
1
L = left hand side
R = right hand side
2
CLICK! 3
Push slide front clip over wire until
secured
1
L = left hand side
R = right hand side
2
CLICK! 3
5.2 Pyro proof side racks
Insert the rear peg into the rear access hole
provided, ensuring peg is fully inserted.
Then locate the front hole and insert screw.
Tighten with Allen key.
5.3 Fitting the shelves and grill dish
carrier between the side rack wires
The shelves are designed so that they
have maximum extension but cannot be
accidentally pulled right out. The grill dish
carrier is designed the same way and can
slot straight into the side racks. To t a shelf
or grill dish carrier to side racks:
1. Locate the rear edge of the shelf/carrier
in between guide rails of the side rack -
see diagram.
2. Ensure the same rail positions on both
sides of the oven are being engaged.
With the front edge raised, begin to slide
the shelf into the oven.
3. Once the detents have passed the front
edge of the side rack, the shelf can
be pushed completely in. When fully
inserted the shelf/carrier should not
interfere with the closed oven door.

www.aegaustralia.com.au |www.aegnewzealand.co.nz
10
5.4 Positioning the dishes on the
grill dish carrier
9
Installing the side racks
1. Insert the twin pegged side into the rear access holes
provided, ensuring pegs are fully inserted.
2. Then locate the front peg into the front access hole
and push in firmly.
Positioning the dishes on the grill dish carrier
5.5 Fitting the shelves and grill dish
carrier onto telescopic slides
To t a shelf or grill dish carrier to
telescopic slides:
1. With the slides fully pushed in, push
the shelf/carrier along the top of the
slide until it hits the back post.
2. Drop the front of the shelf/carrier
ensuring it sits behind the front post of
the slide (see illustration). When fully
inserted the shelf/carrier should not
interfere with the closed oven door.

English 11
6. DAILY USE
6.1 Conditioning the oven
(to burn off any residue)
New appliances may have a smell and
some residue. For the rst use, it is
recommended to heat your oven with/
without all accessories before cooking to
remove the smell and burn off any residue.
• Select Fan Cooking function.
• Set the temperature to 180˚C and run for
approximately 30 minutes.
Note: the oven may emit odour or smoke
during the heating process, so be sure the
kitchen is well ventilated.
WARNING!
Refer to safety chapters
The touch screen display will display
prompts or messages. It will be necessary
to touch the 'X'
Message
or the middle of the message to respond.
Message
6.2 How to set Cooking Functions
1. Turn ON the oven. The display shows
the default cooking function.
2. Press the symbol of the cooking
function to enter the submenu.
3. Select the cooking function and press:
. The display shows: temperature.
4. Set: temperature. Press:
5. Press: . Food Sensor - you can
plug the sensor at any time before or
during cooking
– press to turn off the cooking function.
6. Turn OFF the oven.
Take a shortcut!
6.3 How to set Assisted Cooking
Every dish in this submenu has a
recommended function and temperature.
You can adjust the time and the
temperature.
For some of the dishes you can also cook
with:
• Manual
• Food Sensor
The degree to which a dish is cooked:
• Rare
• Medium
• Well done
1. Turn on the oven
2. Press: . Select: Settings / Connections
3. Press: . Assisted cooking.
4. Choose a dish or a food type.
5. Press:
Take a shortcut!

www.aegaustralia.com.au |www.aegnewzealand.co.nz
12
6.4 How to set Clock functions
How to set the clock
1. Turn ON
2. Press Menu
3. Go to Settings
4. Press Setup
5. Select: Time of day
6. Set the time. Press:
6.5 How to set cooking time
1. Choose a heating function and set the
temperature.
2. Press
3. Set the time. Press:
Take a shortcut!
8.6 How to choose end option
1. Press
2. Press
3. Select End action from timer
4. Press End action
5. Select preferred option
6. Press: . Repeat the action until the
display shows the main screen.
6.7 How to delay start of cooking
1. Set the heating function and the
temperature.
2. Press
3. Set the cooking time.
4. Press
5. Press: Delayed start.
6. Choose the value.
7. Press: . Repeat the action until the
display shows the main screen.
6.8 How to extend cooking time
When 10% of cooking time is left and
the food seems not to be ready, you can
extend cooking time. You can also change
the heating function.
Press +1min to extend the cooking time.
6.9 How to change timer settings
1. Press
2. Press the timer value.
3. Press:
You can change the set time during cooking
at any time.
7. ADDITIONAL FUNCTIONS
7.1 How to save Favourites
You can save your favourite settings, such
as the heating function, the cooking time,
the temperature or the cleaning function.
You can save 3 favourite settings.
1. Turn on the oven.
2. Select the preferred setting.
3. Press: . Select: Favourites.
4. Select: Save current settings.
5. Press + to add the setting to the list of:
Favourites. Press
– press to reset the setting.
– press to cancel the setting.
7.2 Function lock
This function prevents an accidental change
of the function.
1. Turn on the oven.
2. Select a cooking function.
3. , – press at the same time to turn
on the function lock.
To turn off the function lock repeat step 3.
7.3 Automatic switch off
For safety reasons the oven turns off after
some time, if a heating function works and
you do not change any settings.

English 13
(°c) (h)
30 - 115 12.5
120 - 195 8.5
200 - 245 5.5
250 - maximum 3
The Automatic switch-off does not work with
the functions: Light, Food sensor, End time,
Slow Cooking.
7.5 How to manage error codes
When the software error occurs, the display
shows error message. In this section, you
will nd the list of the problems that you can
handle on your own.
Code and description
Remedy
C2
–
the Food sensor is in the oven cavity
during Pyrolytic Cleaning.
Take out the Food sensor.
C3
–
the door is not fully closed during
Pyrolytic Cleaning.
Close the door.
F111 – Food sensor is not correctly
inserted into the socket. Fully plug Food sensor into the socket.
F240, F439 – the touch elds on the
display do not work properly.
Clean the surface of the display with micro
bre cloth. Make sure there is no dirt on the
touch elds.
F908 – the oven system cannot connect
with the control panel. Turn the oven off and on.
When one of these error messages
continues to appear on the display, it
means a faulty subsystem may have been
disabled. In such a case contact your dealer
or an Authorized Service Centre. If one of
these errors occurs, the rest of the oven
functions will continue to work as usually.
7.4 Cooling fan
When the oven operates, the cooling fan
turns on automatically to keep the surfaces
of the oven cool. If you turn off the oven, the
cooling fan can continue to operate until the
oven cools down.

www.aegaustralia.com.au |www.aegnewzealand.co.nz
14
8. COOKING FUNCTIONS
Symbol Function description
True fan
cooking
Heat comes from the element surrounding the fan. This fan circulates
the hot air around the oven cavity so that you can put your food in
different places in the oven and still cook them at the same time. You
can use the ‘Fan Cooking’ function for multi-shelf cooking, reheating
cooked foods, pastries and complete oven meals. It will cook at a lower
temperature and be faster than baking. Please note that some variation
in browning is normal.
NOTE: Food sensor function can be introduced into this cooking
cycle.
Coventional
cooking
Heat comes from two elements, one above and one below the food.
The bottom element is a clean heat element and is below the oor of the
oven. Both elements are controlled by the thermostat and will turn on
and off to maintain set temperature. You can use the ‘Traditional Bake’
function for single shelf cooking, single trays of biscuits, scones, mufns,
cakes, slices, casseroles, baked puddings, roasts and delicate egg
dishes. This is a general function that can be used for most cooking.
NOTE: Food sensor function can be introduced into this cooking
cycle.
Fan assist
bake
Heat comes from two elements, one above and one below the food. The
fan circulates the hot air around the oven cavity so that you can put the
food in different places in the oven and still cook them at the same time.
You should only use a maximum of two shelves with ‘Fan Assist Bake’.
Do not use the bottom shelf. If the two shelves are used, food on the shelf
in the higher position will cook rst and should then be removed to allow
the food on the lower shelf to nish cooking.
NOTE: Food sensor function can be introduced into this cooking cycle.
Roast The Roast function is designed for roasting meats, poultry and sh by
utilising heat from all elements in combination with the fan to surround the
food. This provides even cooking throughout and enhanced browning.
NOTE: Food sensor function can be introduced into this cooking cycle.
Bottom heat
The ‘Bottom heat’ function is specially designed for food that require
extra browning such as the bases of pastries and pies. Heat comes from
the element below the food. If you choose the default setting, the oven
will heat up to 230°C in order to brown the food.
You should then lower the temperature as required. Cook in the lower
half of the oven when you are using only one shelf.

English 15
Pizza function
The ‘Pizza’ function is a combination of ‘Pastry’ and ‘Fan Assist Bake’
and offers you the combined benets of both functions. Heat switches
between the element surrounding the fan and the clean heat element
below the oven oor. The ‘Pizza’ function is ideal for foods that require
cooking and browning on the base. It is for foods such as pizzas,
quiches, meat pies and fruit pies. Simply place the food in the middle of
the oven and set the desired temperature.
Frozen foods The ‘Frozen foods’ function is ideal for cooking frozen precooked foods
such as savoury pastries, pizzas, mini meals (TV dinners), meat pies and
fruit pies. Heat comes from the element surrounding the fan as well as
elements above the food. Simply place the food in the oven straight from
the freezer and heat. Cook in the upper half of the oven for best results.
Full grill
‘Full grill’ direct radiant heat from two powerful upper elements onto the
food. You can use ‘Full grill’ function for tender cuts of meat, steak, chops,
sausages, sh, cheese toasties and other quick cooking foods.
Grill with the oven door closed.
‘Full grill’ allows you to take full advantage of the large grill dish area.
For best results it is recommended to preheat your grill for three minutes.
This will help seal in the natural juices of steak, chops etc for a better avour.
Place the grill shelf in position 4 with the grill dish below to catch any spills.
Left grill The ‘Left grill’ function directs radiant heat from only one of the powerful
upper elements onto the food. The ‘Left grill’ function is used instead of
‘Full grill’ when only half the amount of heat is needed.
Grill with the oven door closed.
Turbo grilling
‘Turbo grilling’ offers you the benets of both fan assist bake and
traditional grill functions. The grill element turns on and off to maintain
set temperature while the fan circulates the heated oven air. Grill with
the oven door closed. You can use ‘Turbo grilling’ for large cuts of meat,
which gives you a result similar to ‘rotisserie’ cooked meat. Put your food
on a shelf in the second lowest shelf position. Put the grill dish on the
lowest shelf position to catch any spills. When using ‘Turbo grilling’ it is
not necessary to turn the foo over during theh cooking cycle.
SteamBake
Use this function to prepare bread and bread rolls with a very good
professional-like result in terms of crispiness, colour and crust gloss.
Symbol Function description

www.aegaustralia.com.au |www.aegnewzealand.co.nz
16
8.2 Special functions
Symbol Function description
Defrost The ‘Defrost’ function uses low temperature air that is circulated by the
fan. You can defrost (thaw) your food before you cook it. You can also
use ‘defrost’ to raise your yeast dough and to dry fruit, vegetables and
herbs. The ‘Defrost’ function does not have a suggested temperature
but uses the ambient heat in the oven cavity.
Keep warm
The ‘Keep Warm’ function is a low temperature oven function designed to
keep your food at a perfect eating temperature without cooking it further.
Heat comes from the smaller elements above the food and is circulated by
the fan. Use ‘Keep Warm’ to keep your food warm while you prepare the
rest of the meal or afterwards while you wait for the late arrival.
NOTE: After cooking, the oven retains enough heat to continue to cook
food even if the elements are turned off. The ‘Keep warm’ function
recognises this by giving you a warning message. If this happens the
function will not start.
Moist fan
baking
Function designed to save energy during cooking. It operates in
such a way that the temperature in the oven cavity may differ from
the temperature indicated on the display during a cooking cycle
and cooking times may be different from the cooking times in other
programmes. When you use Moist Fan Baking, the lamp automatically
turns off after 30 seconds. You may turn on the lamp again but this
action will reduce the expected energy savings.
Dough proving The Dough Proving function offers ideal humidity and heat which
speeds up and improves the dough proving, prevents surface drying and
keeps the dough elastic.
Slow cooking
The Slow Cooking function is great for gentle and slow cooking of lean
and tender pieces of meat and sh.

English 17
9. FOOD SENSOR
9.1 Using the food sensor
The Food Sensor measures the core
temperature of the food. When the food
reaches the desired set core temperature,
the oven turns off. The Food Sensor has a
core temperature range of 50-99°C.
There are two temperatures to set:
• The oven temperature
• The core temperature of the food
WARNING!
Only use the Food Sensor supplied or the
correct replacement parts.
NOTE: Food must be completely defrosted
when inserting the Food Sensor. If the food
is too cold, the Food Sensor function will not
work.
Put the plug of the Food Sensor into the
socket on the top right hand corner of the
front frame. Ensure the plug is fully inserted
into the socket.
1. Turn on the oven.
2. Set a heating function and, if
necessary, the oven temperature.
3. Insert the Food Sensor.
4. Plug the Food Sensor into the socket
at the front of the oven. The display
shows the current temperature of the
Food Sensor.
5. Press to set the core temperature
of the Sensor.
6.
Target Temperature
22˚C 70˚C
71
7. Press to set the preferred option:
8. Sound alarm – when the food reaches
the core temperature, the signal sounds.
9. Sound alarm and stop cooking – when
food reaches the core temperature, the
signal sounds and the oven stops.
10. Select the option and repeatedly press:
to go to the main screen.
11. Press: When food reaches the set
temperature, the signal sounds. You can
choose to stop or to continue cooking to
make sure the food is well done.
12. Remove the Food Sensor plug from the
socket and remove the dish from the
oven.
WARNING!
There is a risk of burns as the Food Sensor
becomes hot. Be careful when you unplug it
and remove it from the food.
Take a shortcut!
Meat
For large pieces of meat, insert the tip of the
Food Sensor into the centre of the meat, with
at least 75% of the sensor inserted into the
meat.

www.aegaustralia.com.au |www.aegnewzealand.co.nz
18
Fish
For best results, place the whole sh onto
the wire rack and prop it up in the swimming
position (i.e. using half a potato or onion).
Alternatively the sh can be laid at. Insert
the Food Sensor behind the head with at
least 75% of the Sensor inserted into the sh
towards the bones in the middle of the sh.
Poultry
Place the whole poultry on the wire rack
breast side up. Insert the Food Sensor with
at least 75% of the Sensor into the breast of
the poultry. Place the Sensor in a direction
toward the neck end of the poultry.
CAUTION
To prevent the Food Sensor from being
damaged by excessive heat, there must be
a gap of a few centimetres between the grill
element and the Food Sensor. The meat
may expand during the cooking process.
CAUTION
After pre-heating, the front of the oven
will be hot. Care should be taken when
inserting the food sensor plug.
NOTE: The Food Sensor is available for the
following functions
• True fan cooking
• Conventional cooking
• Fan assist bake
• Roast
• Moist fan cooking
• Slow cooking
If you have selected a function that is not
compatible with the Food Sensor, you
will see the message “Food sensor is not
congurable for this program”. In these
functions, sensor will measure the core
temperature but will not turn OFF the oven.

English 19
9.2 Core temperatures of different foods
The temperatures in the table are given as a guide and may vary depending on the
composition of the food.
Food Core temperature in °C
Poultry
Chicken 80-85
Chicken breast 75-80
Duck 80-85
Duck breast, rare to medium rare 55-60
Turkey 80-85
Turkey breast 80-85
Goose 80-90
Pork
Shoulder of pork 85-90
Fillet of pork, rare to medium rare 62-70
Loin of pork, well done 72-80
Beef
Tenderloin or sirloin, rare 45-52
Tenderloin or sirloin, medium rare to medium 55-62
Tenderloin or sirloin, well done 65-75
Veal *
Joint of veal or shoulder, lean 75-80
Joint of veal, shoulder 75-80
knuckle of veal 85-90
Lamb **
Leg of lamb, medium rare 60-65
Leg or lamb, well done 70-80
Saddle of lamb, medium rare 55-60
Fish
Whole sh 65-70
Fish llet 60-65
Miscellaneous
Meat loaf, all kinds 80-90
* Veal core temperatures are for well done.
** Lamb temperatures are for cuts of Lamb with the bone still in. For boneless, cooking times
will be slightly less.
NOTE: The oven temperature needs to be set at least 10° higher than the desired food core
temperature.
The appliance will calculate the approximate end time. The end time is different for different
quantities of food, set oven temperatures and function modes.
NOTE: The estimated end time will be displayed after approximately 30 minutes.

www.aegaustralia.com.au |www.aegnewzealand.co.nz
20
Heating up
STOPSTOP
81°C
95°C
12:3012:30
81°C81°C
STOPSTOP
76°C
80°C
12:3012:30
80°C
Note: The Food Sensor temperature
will not be displayed until the oven is
at the desired temperature. Once the
oven is at the desired temperature,
the Food Sensor temperature will
cycle between the desired food core
temperature and the actual food core
temperature.
Note: All meat/sh/poultry should be rested,
covered for at least 10 minutes.
To change the desired food core
temperature during cooking, press and hold
the and at the same time.
To cancel the Food Sensor operation,
simply unplug the sensor from the socket.
CAUTION
Always check if food is cooked
throughout before eating.
WARNING
After use, always remove the Food
Sensor from the oven cavity.
WARNING
The Food Sensor is hot. There is a risk
of burns. Be careful when you remove
the tip and plug of the Food Sensor.
ENVIRONMENT
To save energy and to help protect the
environment, we recommend these
hints:
Use the oven efciently by cooking
many trays of food at the same time. For
example:
• Cook 2 trays of scones, small cakes or
sausage rolls.
• Cook a roast dinner at the same time as
you cook chips or vegetables.
Table of contents
Other AEG Oven manuals

AEG
AEG BSE578370M User manual

AEG
AEG 6000 STEAMBAKE User manual

AEG
AEG BE3003001M User manual

AEG
AEG BEK230011M User manual

AEG
AEG COMPETENCE 320 B User manual

AEG
AEG COMPETENCE 305 B User manual

AEG
AEG BPK948330B User manual

AEG
AEG BP3203121 User manual

AEG
AEG BSK782220M User manual

AEG
AEG BCK456220B User manual

AEG
AEG BPE556360M User manual

AEG
AEG COMPETENCE 5230B User manual

AEG
AEG BEB331110M User manual

AEG
AEG Competence 30380 B User manual

AEG
AEG BSE576321M User manual

AEG
AEG BSE682020M User manual

AEG
AEG COMPETENCE B1180-4 Operation manual

AEG
AEG BE4003001M User manual

AEG
AEG DEK431010M User manual

AEG
AEG BP861510K User manual