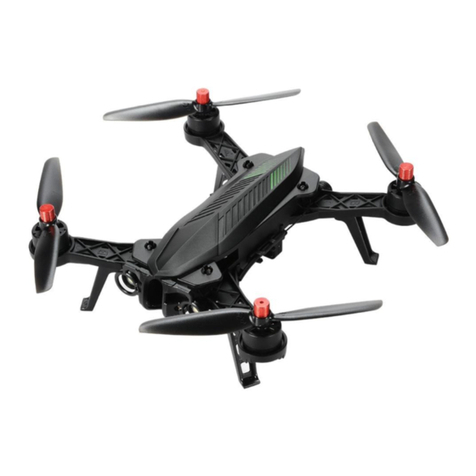
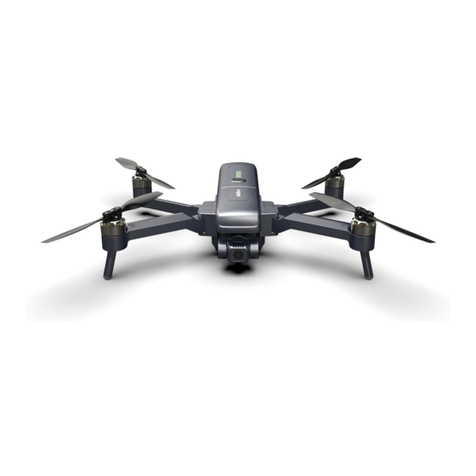
Aerix DaVinci User manual

AGES
Please read and follow all instructions and
warnings in the manual prior to set up or use.
Do not discard the manual.
AERIX
USER MANUAL
DaVinci

Basic Aircraft Specifications
Main Functions
Motors:1306
ESCs:10A
Reciever:AX-DV
Transmitter:AX-DV
Monitor Resolution:272X480
Aircraft Size:90mm
Flying Time:~15 minutes
Flying Environment:Outdoors
Battery:7.4V 1200mAh 20C
Aircraft Weight:230g
Image Resolution:720X1080
R/C Range:~ 300m
Propeller Diameter:100mm
Distance between Shafts:200mm
Dual GPS
Return Home
5.8G FPV
System
Orbit Mode
Altitude Hold Auto Return Home

1
Dear Customers:
Congratulations on your new DaVinci Drone!
We sincerely appreciate your support of our small business in Upstate, New York.
For safety reasons, please read the manual carefully, in its entirety.
Keep the manual for future reference, do not discard.
For additional questions and support, please visit www.AerixDrones.com
1 .WARNING:
This is not a toy. It is a sophisticated hobby product equipped with electronic
and mechanical parts. It must be operated with caution and common sense.
The pilot should take all reasonable steps in order to protect: his/herself, other
people, animals and property. We take no responsibility for accidents which
are caused by incorrect operation, or incorrect installation of parts.
This product is suitable for hobbyists who are over the age of 14 years old.
Please only fly in areas where flying is permitted.
2. Safety Precautions
(1) This is a high-speed product and we recommend always operating it in open
spaces away from people, vehicles and property. Always keep a safe distance
around the drone while it is in operation to avoid collisions or injury.
(2) Accidents (physical injuries or property damages) may be caused by:
incorrect parts installation by customer; damaged aircraft parts; worn or
modified electronic equipment; unfamiliar operation of the aircraft.
Pilot should always pay attention to safety while operating the DaVinci.
Pilot is responsible for all damages, accidents and potential injuries.
3. Know Before You Fly
We have included a quick-start safety card with this drone, additional safety
details and regulations for the USA can be found at KnowBeforeYouFly.org
4. Warranty
Due to the physical nature of this device, only defects in materials and
craftsmanship will be covered under a 90-day warranty. All physical damages
are the pilots responsibility and are NOT covered. Visit our website for parts and
repair services.

2
***PLEASE NOTE***
Before Flying Your DaVinci Drone:
1. Make sure all batteries are fully charged: transmitter, monitor and aircraft.
2. After each flight, unplug the aircraft’s battery and then turn off the transmitter.
Not doing so may cause the aircraft to fly away or lose control.
3. Operate the DaVinci in open spaces away from: obstacles, people,
power lines, high buildings etc. Pay attention to weather conditions –
strong wind, rain and lightning are potential risk factors which can lead to
loss of control, damages and/or injury.
4. Avoid water exposure to this product. Keep all parts dry.
5. Inspect and replace damaged or broken parts of the aircraft prior to flight.
6. Obey local UAV laws and regulations. Piloting requires skill and safety
which should be learned under direct supervision of an experienced adult.
7. Always keep the drone in your line of sight during operation.
8. Do not fly the aircraft while under the influence of alcohol/drugs.
Keep away from the rotating blades (rotating blades may cause bodily
injury, or damage to property).
9. The DaVinci is built with: metal, fiber, plastic and electronic components.
Please keep aircraft away from liquid and heat sources to avoid damage.

2 Installing the Landing Gear
(1)Locate the labeled landing gear struts A & B
Press them into position. Refer to the image.
Landing Gear Removal:
(1) Press the release buttons and gently
pull down the landing gear struts. Refer to the
image.
1.Installing the Propellers
(1)Remove the propeller nut from the motors using the screwdriver supplied.
(2)Fit the clockwise propellers, they are labeled M2 and M4. Tighten
the nuts counter-clockwise.
(3)Fit the counter-clockwise propellers, they are labeled M1 and M3.
Tighten the nuts clockwise.
Clockwise
propeller
Counter-clockwise
propeller
M1M2
M3 M4
RightLeft
Front
Rear
Attention:Improper installation can cause aircraft damage and accidents.
Camera
A B
Press the release buttons and
gently pull the landing gear struts.
1.Assembly Instructions
3

7
6
1
9
8
1. Transmitter battery voltage
2. Signal strength
3. Mode: A (Altitude Hold); B (GPS); C (Orbit Mode)
4. Aircraft battery voltage
5. GPS satellites
6. Speed meters/second
7. Distance (meters)
8. Ascend/descend speed meters/second
9. Height (meters)
2 43 5
2.TRANSMITTER DISPLAYS
4

15
10
12
11
13
10.Pitch
11.Roll
12.Yaw
13.Flight time
14.Latitude
15.Longitude
14
5
(minutes)

5
4
3
10
2
1
6
7
8
9
1315
14
11
12
Throttle/left&right
rotational stick Directional stick:
forward, backward,
left&right side
On/off button
Transmitter aerial
Mode button
Transmitter battery
charge indicator light
(While charging the green
light is on; The light
is off when fully charged)
One touch
return home
(Long press,
red light)
Pictures/Videos
Aux1 (future use)
Aux2 (future use)
2.Transmitter Functions and Settings(Left-handed throttle)
6
FPV monitor
on/off switch
On/Off light
Monitor mount
Channel
button
Charging
port
A- Altitude Hold (short press, green light);
B- GPS (short press, red light);
C- Orbit Mode (long press,
green-yellow light)
Short press to take a picture. Long press
to record/stop recording and save videos (While
recording video the red light is on)
One touch take-off
(long press); short press
allows to see other
OSD information
One touch landing
(long press)

On/off button
One touch return home
Short Press the Power Button, the indicator
lights will power up briefly, displaying battery level.
To power on, press and hold the power button
for 4-6 secs. The indicator lights will power up.
To power off, press and hold the power button
for 4-6 secs. The indicator lights will turn off.
ATTENTION: Be sure to complete the INITIAL BINDING procedure correctly.
INITIAL BINDING:
Install a fully charged battery into the bottom of the aircraft. Press and hold the
Return Home button and turn on the transmitter. “Searching RF signal..” will
appear on the transmitter’s display.
Next, turn on the aircraft’s battery and place the aircraft on a flat surface.
After successful binding the signal strength bars will appear as shown below.
BASIC PAIRING:
Install a fully charged battery into the bottom of the aircraft.
Next, turn on the aircraft’s battery and place the aircraft on a flat surface.
After successful pairing the signal strength bars will appear as shown below.
3.Preperation for Flight
The main interface
Aircraft Battery On/Off Button
Pairing Procedure
On/off button
7
Searching RF signal..
Indicator
lights
Signal strengths bars

Compass Calibration
Accelerometer Calibration
Please note: performing a calibration is highly recommended before every flight.
1. After the aircraft and the transmitter are paired. Place the aircraft on a flat surface
and continously press MODE until the transmitter displays “Rotate Horizontal”
(the green light at the back of the aircraft will flash rapidly). Rotate the aircraft
clockwise 2-3 times until the transmitter displays “Rotate Vertical” (the green light at
the back of the aircraft will start flashing slowly).
2. Hold the aircraft vertically, with NOSE DOWN and tail up. Rotate clockwise 3-5
times until the message “Rotate Vertical” is no longer shown on the transmitter display.
On successful calibration, the transmitter display will return to the main interface.
3. Now place the aircraft on a flat surface. Power off the aircraft battery and turn off the
transmitter. Calibration is now complete. You may re-pair the transmitter with the
aircraft and fly.
4. If the aircraft becomes unstable or unsteady during flight, it may need to be
re-calibrated by repeating the above procedure.
If your aircraft begins to be unstable during flight or drifts quickly to one
direction, please calibrate the accelerometer.
1. Turn on the aircraft/transmitter.
2. Place the aircraft on a flat, level surface.
3. Push the throttle down and hold the position. Move the directional stick
quickly between right and left, until the back light on the aircraft flashes
(red-green-blue). Then release the sticks.
Horizontal ratation 2-3 times Vertical rotation 3-5 times
8

3. Wait until the aircraft’s lights stop flashing rapidly. This is an indication
that the calibration was successful (the back light on the aircraft flashes green).
Arming: after successful pairing, arm the motors by pushing both
sticks at the same time (push the left stick to the bottom-left corner and the
right stick to the bottom-right corner) and hold for 2-5 seconds and the
motors will start spinning. Slowly push the throttle stick up and the aircraft
will ascend.
Disarming: after descending the aircraft, disarm the motors by
pushing both sticks at the same time (push the left stick to the bottom-left
corner and the right stick to the bottom-right corner) and hold for 2-5 seconds,
the motors will stop spinning.
Arming/disarming motors
Attention:the aircraft should be placed on a flat level surface; the back light
of the aircraft should be slowly flashing green。
Attention: the aircraft should be placed on a flat surface; during the
calibration procedure do not move the aircraft.
4.Arming and Disarming Motors
9
Attention: if the back light of the aircraft flashes red-green-blue then
accelerometer calibration is needed.

5.Controlling the Aircraft
Ascend
Descend
Left rotation
Right rotation
Left
Right
Forward
Backward
10

1. MODE A: Altitude Hold Mode (Mode button indicator light is green).
Note: Altitude Hold Mode is the default flight mode.
Altitude Hold Mode allows the aircraft to maintain the same altitude during flight/hover.
After take off, reach desired height and release the throttle (it will automatically hover)
and the aircraft will fly at the same height. Allow sufficient space to fly in this
mode as aircraft’s position can still be affected by wind and other weather conditions.
3.MODE C: Orbit Mode (Mode button indicator light is green-yellow).
NOTE: Requires sufficient distance from objects.
During flight in GPS mode (7+ Satellites), long press the Mode Button, Mode C Displays.
Aircraft will begin to circle around its current location, long press again to deactivate.
Control the radius and speed of aircraft by pushing the directional stick:
Backward will increase the radius, Forward will decrease the radius.
Right will increase the speed, Left will decrease the speed.
Accuracy is dependent upon satellite strength, weather and clouds affect performance.
4.Return Home Function
While in GPS mode (Mode B),long press on the Return Home button and the aircraft
will fly back to the location where it took off and land. Please control altitude as needed.
2.MODE B: GPS Mode (Mode button indicator light is red).
GPS Mode maintains the same altitude AND position, 7 Satellites are Required.
GPS works best in wide open areas with direct view of the sky, avoid buildings and trees.
Pair drone, place on flat level surface and short press mode button, display shows B.
Wait for satellites to show at least 7 connections before taking off.
6.Mode Selection
11
Controlling Circle
Radius
Controlling Circle
Around Speed

7.Charging Batteries
Aircraft Transmitter
Turn off the transmitter and connect it to the charging cable.
Insert the charging cable into a computer USB port or other USB charging port.
When charging, the transmitter’s green indicator light will be on.
Unplug the charger when the light goes off, indicating it is fully charged.
Smart phone chargers and power blocks may also be used (5v 1.5amp Max)
5.8Ghz FPV Monitor
Turn off the monitor and connect it to the charging cable.
Insert the charging cable into a computer USB port or other USB charging port.
When charging, the charging cable’s red indicator light will be on.
Unplug the charger when the light goes off, indicating it is fully charged.
Smart phone chargers and power blocks may also be used (5v 1.5amp Max)
Charging Port
Charging indicator light
12

Aircraft Battery
CAUTION: Only use the supplied charger to charge the aircraft battery.
Power on the battery (press power button for 4-6 secs)
When battery lights are ON, connect the battery to the charger.
Plug the AC adaptor into a power outlet.
After the battery is fully charged (all 4 indicator lights will be on) Disconnect the battery
from the charger and unplug the charger from the power outlet.
Changing Frequency Channels of the Aircraft:
In order to avoid interference of video frequencies, a pilot may change frequency
channels on the aircraft. There are 32 available frequency channels.
1. Press and hold the Return Home button and turn on the transmitter by pressing
the on/off button. The message “Searching RF signal..” will appear on the transmitter’s
display. Turn on aircraft’s battery and place aircraft on a flat surface. The 5.8Ghz
frequency channel will change automatically to the next available channel/frequency.
2. Repeat the above procedure until video frequency is clear and strong.
8. 5.8GHz FPV System
Turn on the 5.8Ghz FPV monitor and the screen will light up. Long
press on the channel button and the monitor will start searching
the corresponding video transmission channel automatically.
Frequency Button
On/off button
Battery Charger
5.8Ghz FPV Monitor
13

10.Troubleshooting
One touch take off
function is not working
Aircraft flips/crashes when
taking off
①Poor GPS signal, make sure you are flying in
place with a clear view of the sky, and away from:
buildings, trees and high voltage lines.
②Re-calibrate the compass.
①Flying Mode C has been chosen. Please switch to
Mode A or B.
②Aircraft battery needs charging.
①Poor GPS signal, make sure you are flying in
place with a clear view of the sky, and away from:
buildings, trees and high voltage lines.
②Poor GPS signal, the minimum number of GPS
satellites required is 7.
③Re-calibrate the compass.
①Check that the propellers have been installed
correctly.
①Poor GPS signal, the minimum number of GPS
satellites required is 7.
9.Box Contents
14
5.8GHz FPV Monitor
Aircraft Transmitter
USB Charger lines(X2)
Landing Gear
Charger
Battery
Propeller nuts wrench
Screwdrivers(X2)
SD card and
SD card reader
Propellers Manual
There is no GPS
satellites connection
Aircraft does not
return home accurately
While in GPS mode
aircraft does not hold
the position
Table of contents
Other Aerix Drone manuals
