Aerospace Audio Atmosphere v2 User manual
INSTRUCTION MANUAL

02
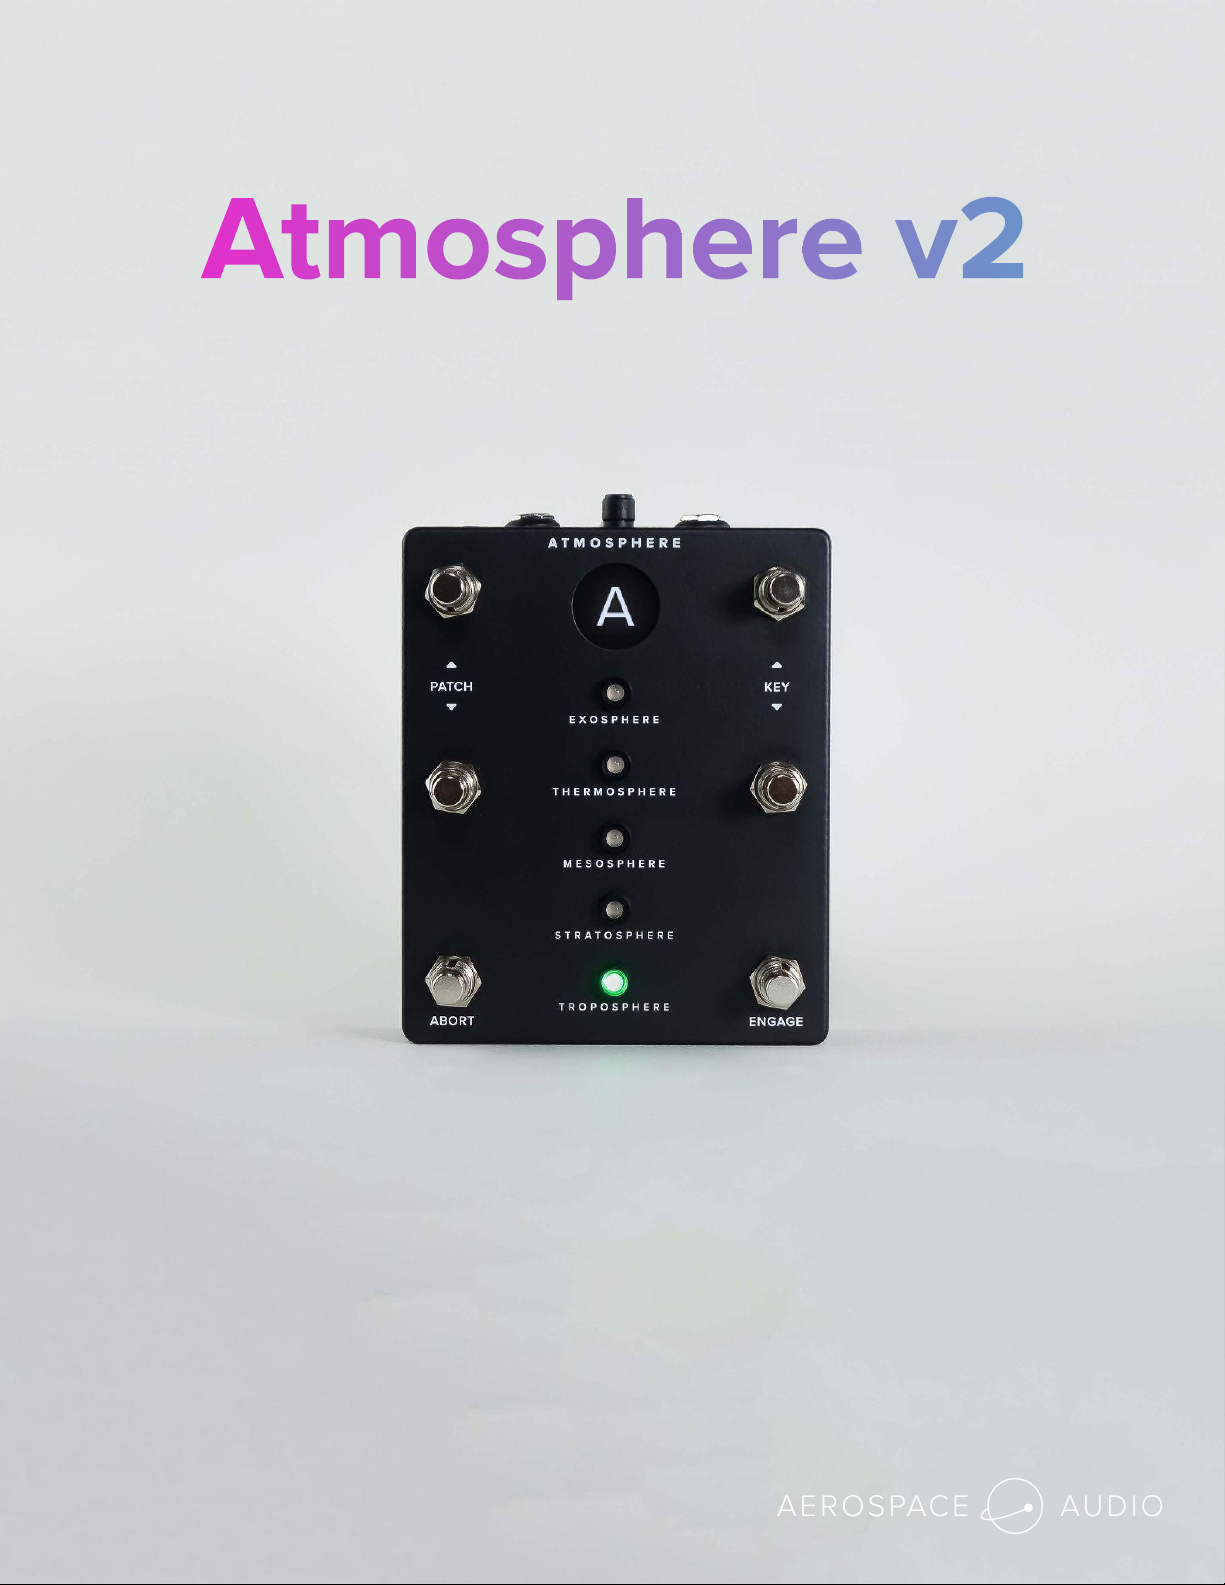
Atmosphere is a plug-and-play foot-controlled instrument for cueing pads
and soundscapes. Cueing pads has never been easier or more inspiring.
Pads establish a tonal centre with harmonic and textural movements that
add dimension and character to your arrangement.
Atmosphere enhances your mix, engages your audience, and equips you
to perform your very best.
Warnings
Power requirements: 9v DC (200mA / 0.2A minimum) center-negative.
Do NOT use a power supply of different specifications (ie. more/less voltage, reverse polarity, less
mA, etc).
Do NOT simultaneously power Atmosphere via a 9v power supply and USB cable. Atmosphere
will be overpowered and damaged as a result.
The use of an isolated power supply is recommended for powering all Aerospace Audio
equipment. Daisy chain power supplies are not recommended, and may introduce undesirable
noise.
The use of Aerospace Audio equipment is an agreement to the Terms of Service found at
aerospaceaudio.com/terms, which are subject to change without notice.
Atmosphere is an output only device, not an “FX pedal.” Never send a signal into Atmosphere’s
output jacks (ie. sending a guitar to Atmosphere).
Contents
02 Warnings & Contents
03 Diagrams
04 Control Descriptions
05 I/O Descriptions
06 Live View & Setlist View
07 Settings
08 Loading New Sounds to Atmosphere
10 Patch Labels & Customizing LEDs
11 Troubleshooting & Contact
Patch Select: Up
Hold to enter Setlist View
Hold to exit Setlist View
Patch Select: Down
Hold to save to Setlist
Abort
Hold for Cut Mode
Back (Settings)
Engage
Enter (Settings)
Key Select: Up
Hold for Settings
Up (Settings & Setlist)
Key Select: Down
Hold to clear Setlist
Down (Settings & Setlist)
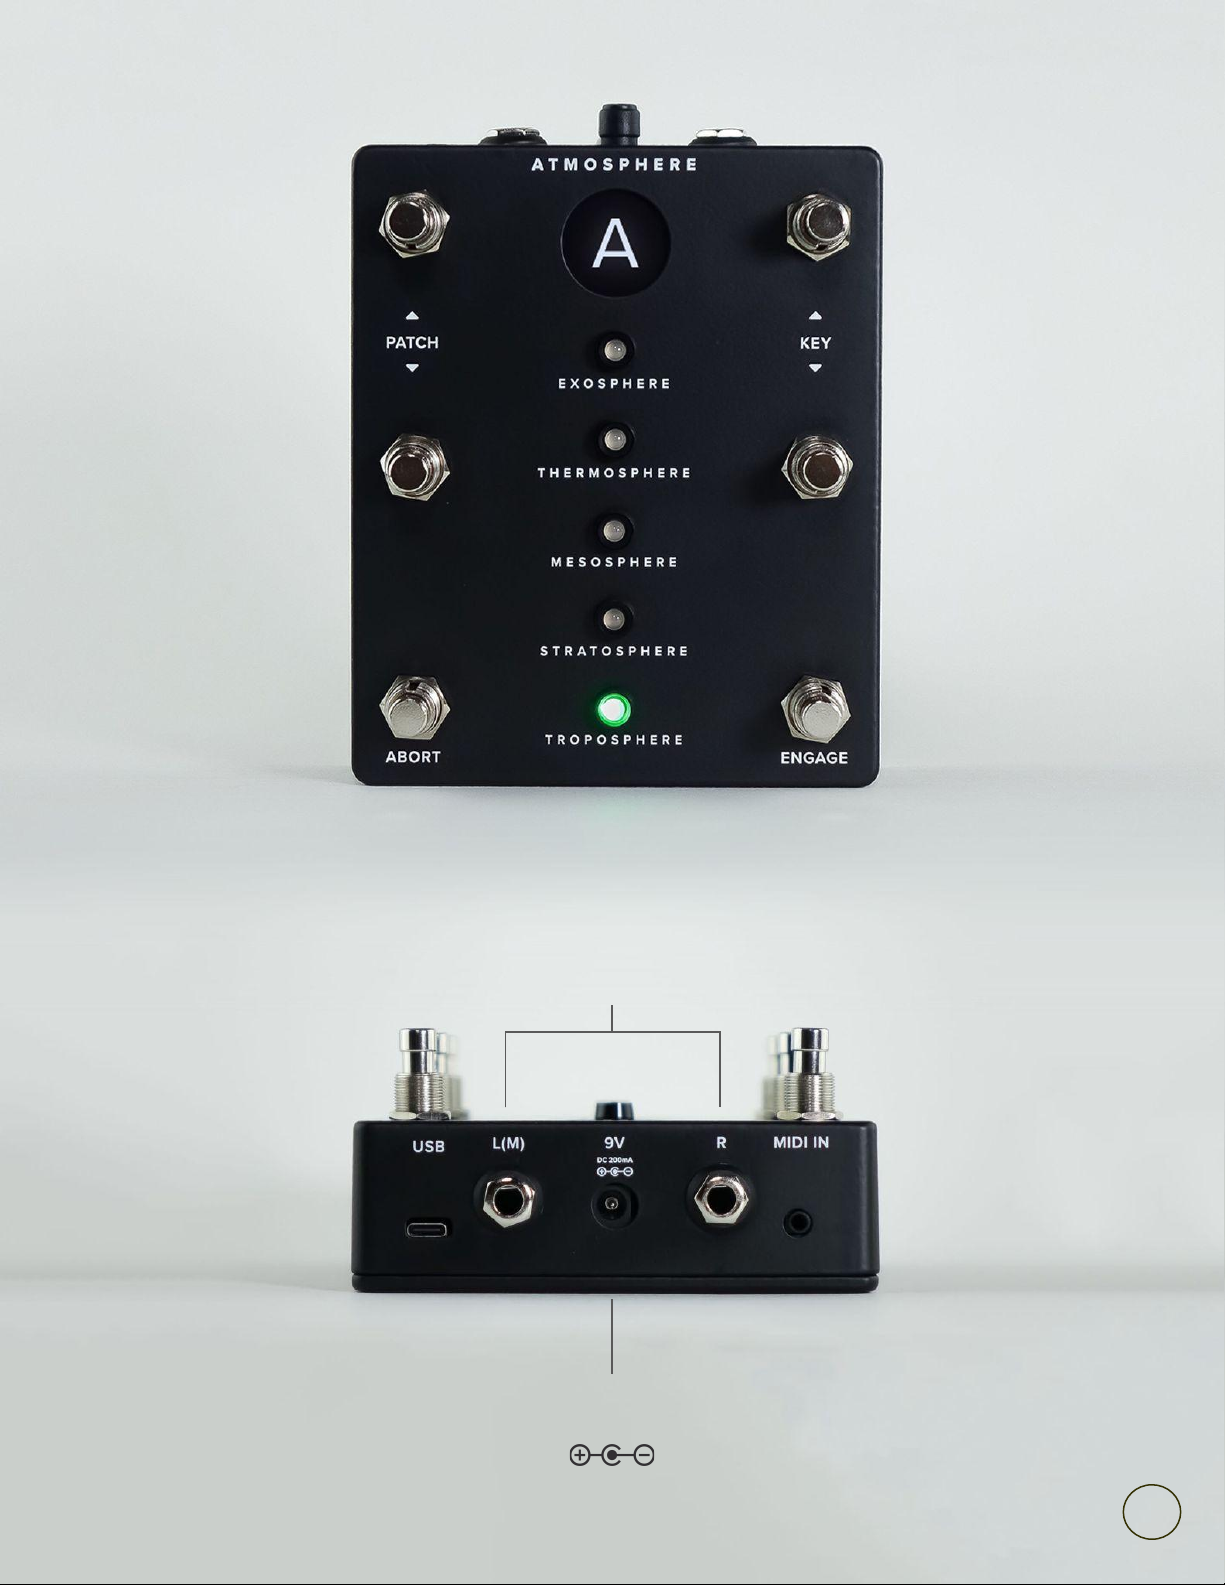
Audio Outputs
USB C
For firmware updates
and loading sounds
9v Power
DC 200mA
03
MIDI IN
MIDI control features
Will be available in a
future firmware update

Control Descriptions
Key Up
Navigates key selection while in Live View.
Navigates setlist while in Setlist View.
Navigates menu while in Settings.
Hold for 3 seconds enter Settings.
Key Down
Navigates key selection while in Live View.
Navigates setlist while in Setlist View.
Navigates menu while in Settings.
Hold for 3 seconds to clear setlist.
Patch Up
Navigates patch selection while in Live View.
Hold for 3 seconds to enter/exit Setlist View.
Patch Down
Navigates patch selection while in Live View.
Hold for 3 seconds to save selection to setlist.
Engage
Engages selected patch Live View.
Engages selected patch Setlist View.
Used as “enter” in Settings.
Abort
Fades out engaged patch in Live View.
Fades out engaged patch in Setlist View.
Used as “back” in Settings.
Hold for 3 seconds to enable/disable Cut Mode
Cut Mode sets the Fade Time to 0ms to make starts, stops, and transitions instant.
Cut Mode is indicated by a dot below the key on the Display.
04

I/O Descriptions
USB C
Used for firmware updates and loading sounds.
L(M)
Left/mono output. Atmosphere detects whether or not a cable is plugged into R. If no cable is
plugged into R, then L(M) will send a mono-summed signal. If a cable is plugged into R, then
Atmosphere will send a split-stereo signal.
R
Right output. Only use when sending stereo (2 cables). When running mono (1 cable), use L(M).
9V
Powering Atmosphere. Power requirements: 9v DC (200mA / 0.2A minimum) center-negative.
Do NOT use a power supply of different specifications (ie. more/less voltage, reverse polarity, less
mA, etc).
Do NOT simultaneously power Atmosphere via a 9v power supply and USB cable. Atmosphere
will be overpowered and damaged as a result.
The use of an isolated power supply is recommended for powering all Aerospace Audio equipment.
Daisy chain power supplies are not recommended, and may introduce undesirable noise.
MIDI IN
Atmosphere be controlled via MIDI from another device. Atmosphere’s MIDI IN is 3.35mm TRS.
5-pin-to-3.35mm adapters and cables can be used for MIDI devices that are 5-pin output.
Atmosphere only has MIDI input, not output.
NOTE: MIDI functionality is not yet available and will be added in a future firmware update.
05
06
Live View
The standard view for using Atmosphere.
1. Select a patch.
2. Select a key.
3. Press Engage.
Seamlessly crossfade between patches and keys by pressing Engage again after cuing up a new
selection.
Press Abort to smoothly fade to silence.
Setlist View
Build build and cue a setlist of presets.
1. In Live View, make a selection of Key and Patch.
2. Hold Patch Down for 3 seconds to lock the selection to a slot within the setlist.
3. After building a setlist, hold Patch Up for 3 seconds to enter/exit Setlist View.
4. While in Setlist View, use Key Up and Key Down to navigate your setlist and Engage and Abort
to play, stop, and transition.
Hold Key Down for 3 seconds in Live View or Setlist View to clear your setlist. Press Engage to
confirm or Abort to cancel.
Setlists are stored on device even after Atmosphere is powered down.
Setlists can be built using patches across multiple Banks.

07
Settings
Hold Key Up for 3 seconds to enter Settings.
Navigating Settings
Key Up = up
Key Down = down
Engage = enter
Abort = back
Description of Settings
Output
Adjusts the output volume of Atmosphere. "0 dB" or "+3 dB" is recommended for most contexts.
Fadetime
Duration of crossfade, fade in, fade out, and loop fading.
Bank
Determines the bank of patches that Atmosphere cues WAV files from. Each bank contains 5
patches. Bank 01 is the preloaded Atmosphere Soundpack while Bank 02 through Bank 10 are
User Banks.
Loop
On = Atmosphere will loop audio until Abort is pressed or a new selection is made.
Off = Atmosphere will stop audio once the WAV file has played all the way through.
Rotate
0° = Default screen rotation for operating in ‘portrait’ orientation.
-90° = Rotates the display 90 degrees counterclockwise for operating in ‘landscape’ orientation.
Reset to Defaults
To reset to default settings, hold Key Up & Key Down immediately after powering on Atmosphere.
Hold both buttons until the Display says “Resetting.”
MIDI
MIDI functionality is not yet available and will be added in a future firmware update.
Firmware Updates
For firmware updates, go to https://www.aerospaceaudio.com/help
08
Loading New Sounds to Atmosphere
About AeroPads
AeroPads are immersive pads and soundscapes inspired by space. They are already pre-formated
for Atmosphere.
AeroPads come in WAV/MP3 format that can also be used in any audio/video editing software.
Step 01: Download AeroPads Soundpacks
Visit https://www.aerospaceaudio.com/aeropads to download new AeroPads Soundpacks.
Step 02: Connect Atmosphere to you computer
Hold Abort while connecting Atmosphere to a computer via USB until Atmosphere displays “USB
MODE”
Warning: do NOT simultaneously use 9V power supply and USB cable.
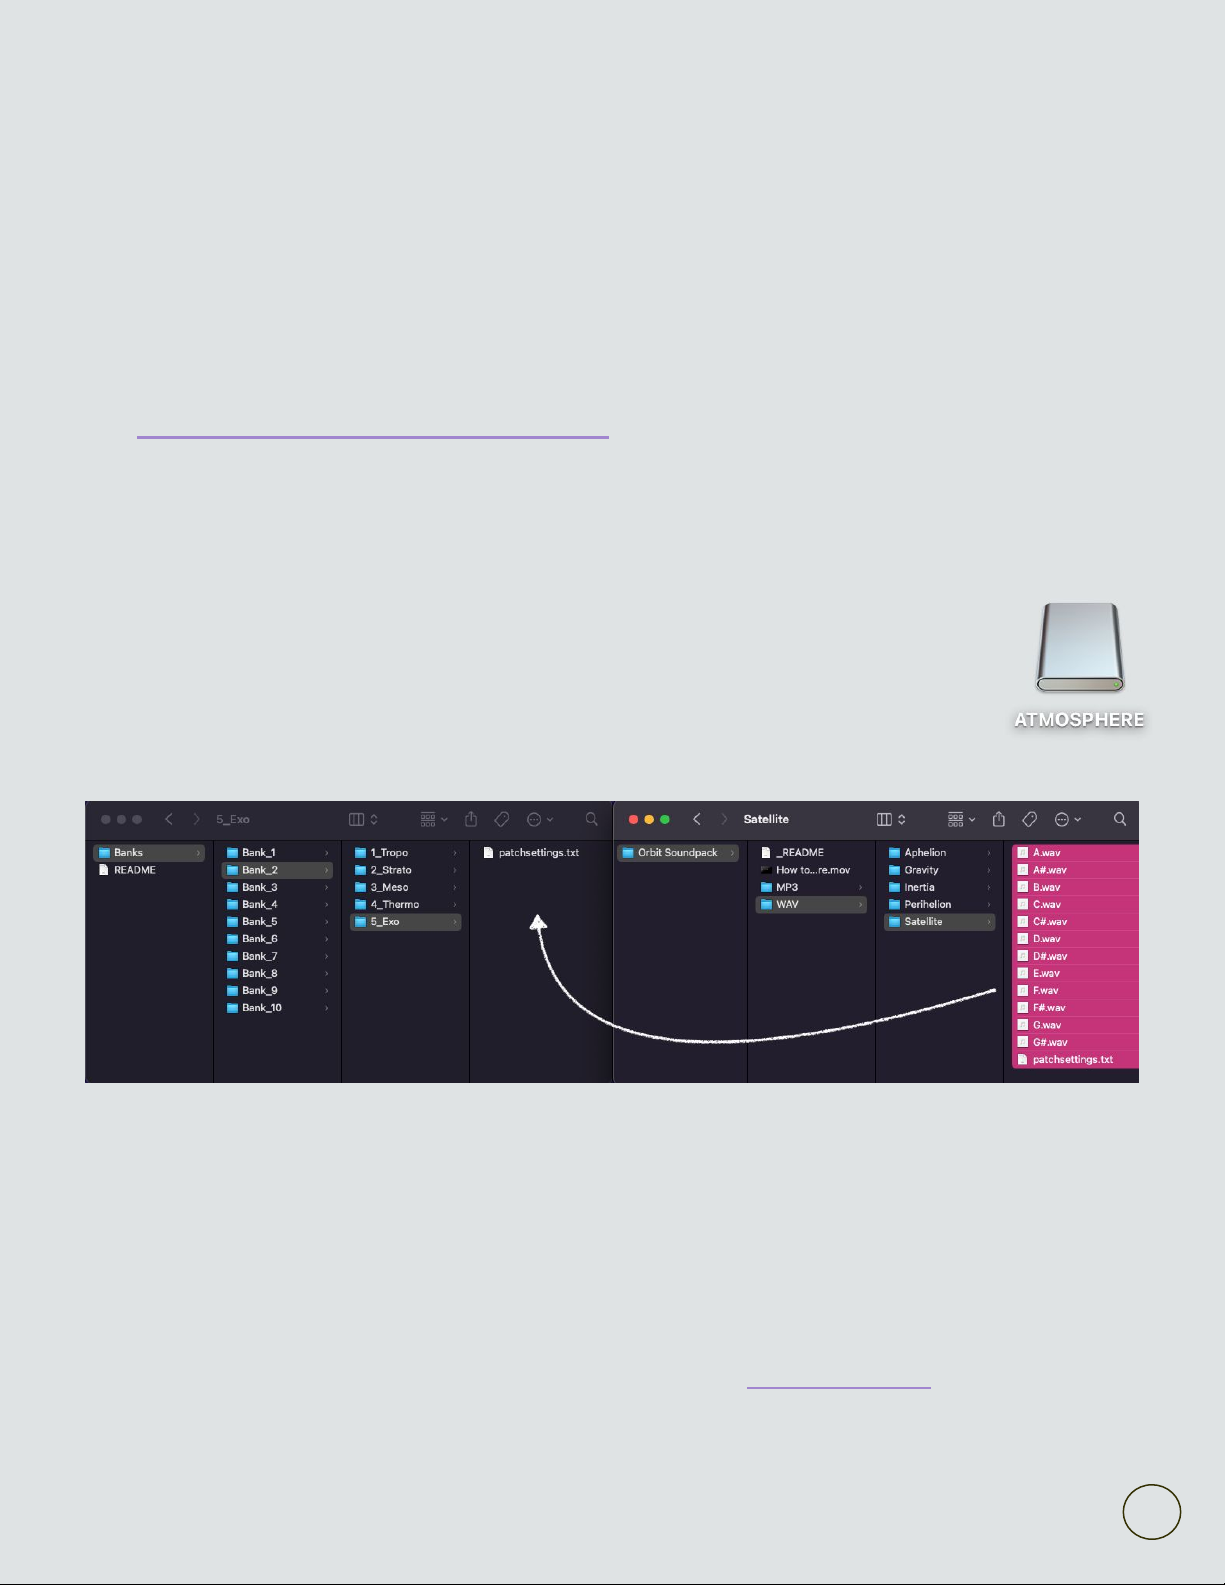
Once in USB MODE, Atmosphere will appear as an external drive on your computer.
Step 03: Transfer Files
In one window, open “ATMOSPHERE.” Under the “Banks” folder, navigate to the bank and patch
folder that you want to load the new sounds to. Atmosphere cues WAV files from these folders.
Example: the Exosphere Patch on Bank 02 corresponds to the folder: “Banks > Bank_2 > 1_Exo”
Note: the Atmosphere Soundpack is preloaded on Bank 1; Banks 2-10 are user banks.
Open a patch folder from an AeroPads Soundpack in another window.
Example: the “Orbit Soundpack > WAV > Satellite” folder in the Orbit Soundpack.
Drag ALL of the files from the new soundpack folder into the desired patch folder of Atmosphere.
You may get a warning that a “patchsettings.txt” file already exists – click “Replace”
Repeat for remaining patches. Disconnect Atmosphere once files are done transferring.

09
Loading Your Own Sounds to Atmosphere
Your own WAV files can also be loaded to following the previous steps.
Accepted File Type
Atmosphere currently only accepts 16 bit 44.1 kHz WAV files.
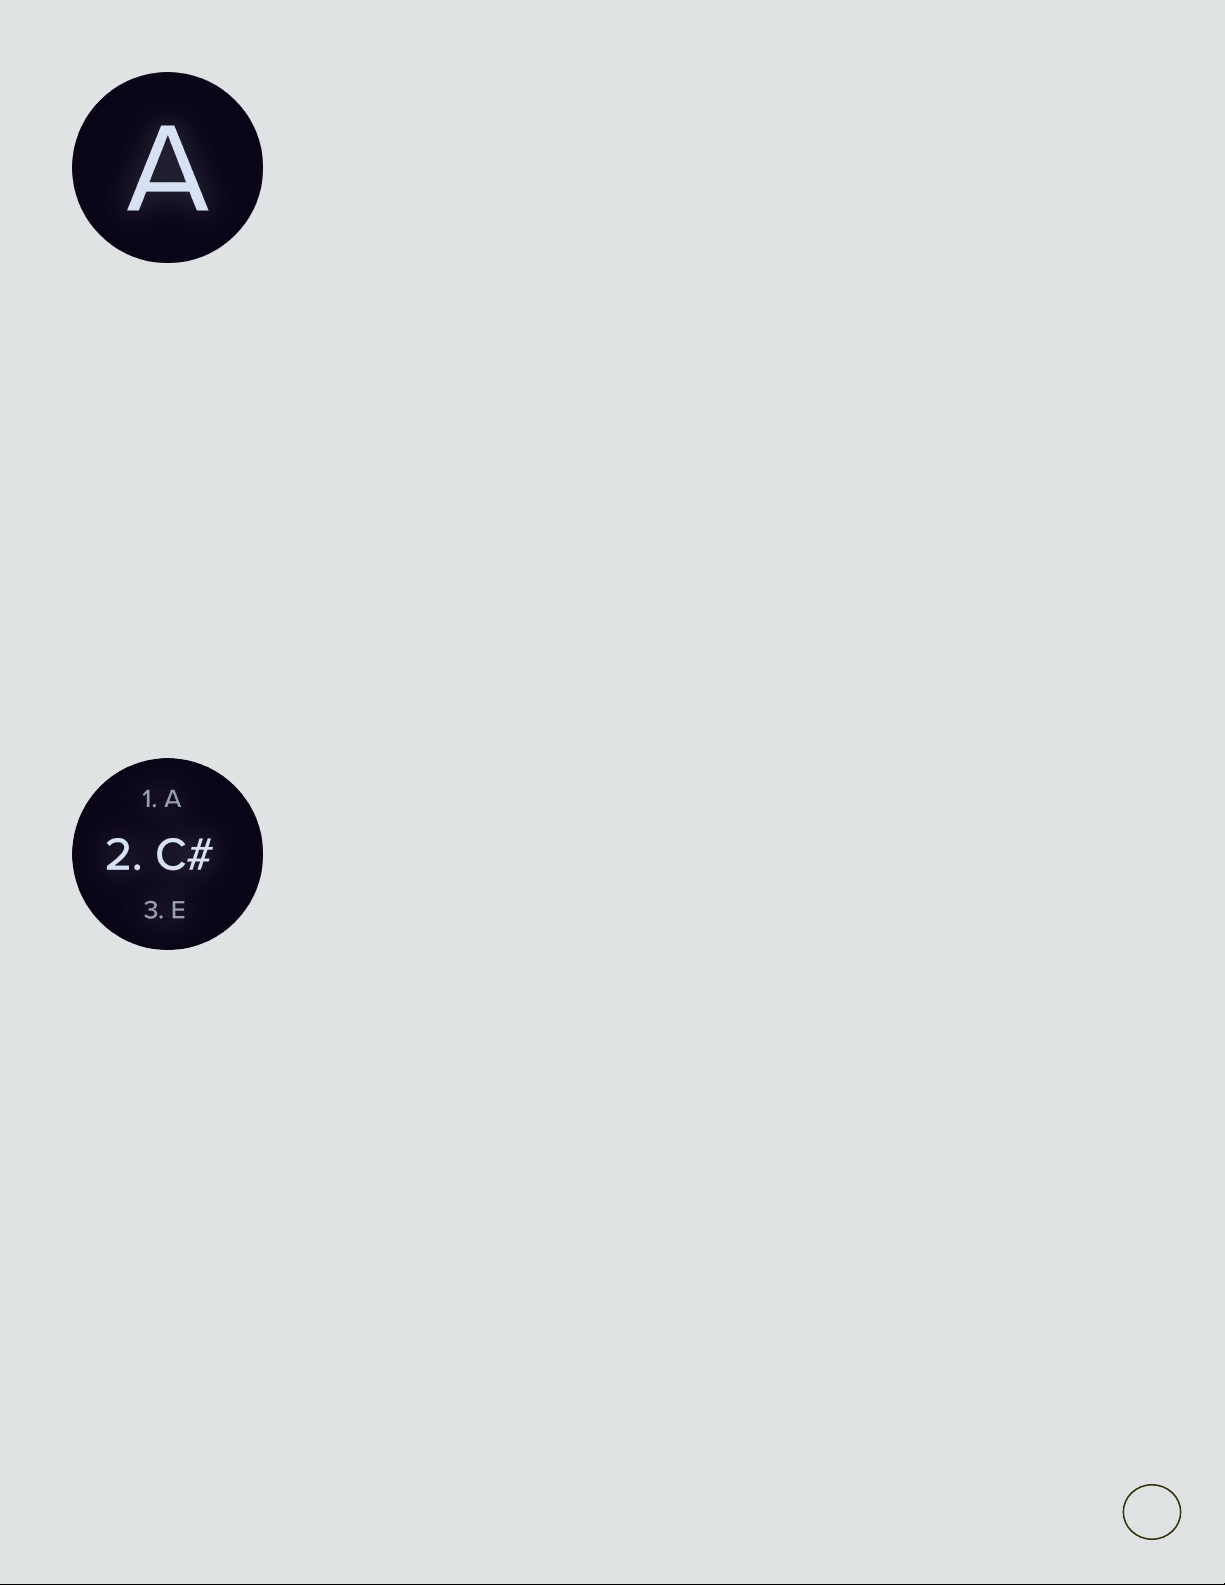
File Naming Structure
Atmosphere requires files to follow a strict naming structure in order to be recognized.
Files should be named "[key/note].wav" with nothing additional. All notes should be labeled as
sharps, not flats.
Examples of correctly named files:
✅ "A.wav"
✅ "C#.wav"
✅ "F#.wav"
Examples of incorrectly named files:
❌ "Bb.wav"
❌ "BrightShimmerPad_D.wav"
❌ "Am.wav"
❌ "Bmajor.wav"
❌ "E.mp3"
❌ "C"
Important: Preparing files for Atmosphere
Atmosphere features the ability to crossfade and loop sounds with adjustable parameters. For this
properly, it's necessary to trim off any pre-existing fades from your WAV files.
It’s typical for pads downloaded/bought from other websites begin and end with a gradual fade. If
that’s the case for your files, you will need to trim off the fades. In order to trim off fades, you will
need an audio editor.
Audacity is a simple and free option that is compatible with Mac and Windows computers.
Trim off the fades in using Audacity:
1. Install and open Audacity.
2. Import your audio file.
3. Select the portion of the file where the fade in takes place and press delete (you'll be able
to visually see the fades in the editor).
4. Select and delete the fade out.
5. Export as WAV and name it "[key/note].wav" (ie. "A.wav" or "C#.wav" etc).
6. Repeat for filles of different keys and patches.
Note
AeroPads are pre-formatted for Atmosphere and don’t require any file converting and prepping.

10
Patch Labels
When navigating patches from User Banks (banks 2-10),
Atmosphere displays Patch Labels.
Patch Labels can be edited to help you navigate user-loaded
sounds within the User Banks.
Editing Patch Labels
Patch labels are edited by modifying the “patchsettings.txt” file located inside each of the patch
folders when accessing Atmosphere in USB Mode via a computer (review the “Connect
Atmosphere to you computer” instructions on page 08 to learn how to connect Atmosphere to your
computer).
Edit a patch label for a specific patch, simply open the “patchsettings.txt” with a text editor.
Change the first line of the file to the name you would like Atmosphere to display when that patch is
selected. Short names work best. Be sure that the file is saved after editing. It is necessary the line
of text modified for your patch label remains the first line of the document.
Important note for Mac users:
It is highly recommended to download the free app Light Notepad to use for editing these txt files.
In recent versions of macOS, Apple’s native text editor (TextEdit) tends to create random temporary
files when editing txt files. These random files can cause issues and confusion with saving edits.
After installing Light Notepad, simply right click the “patchsettings.txt” and click “Open With” and
select Light Notepad (which may be found under “other”). This may be an annoying extra step, but it
makes editing the txt files much easier and less frustrating. It takes less than a few minutes to install.
Customizing LED Colors
On Atmosphere v2, LED colors can be customized by modifying the second line of the
“patchsettings.txt” file. Color code must be in hex format and include the “#”.
It is necessary that this line of text remains as the second line of the document. Due to the nature of
RGB LEDs, the color displayed from the LED may differ from the color displayed on screen when
selecting a color hex code.

11
Troubleshooting
Atmosphere isn't playing any sounds?
It could be a signal flow issue
Most issues with Atmosphere are actually a result of using a bad instrument cable or DI box. Try
swapping those out first.
It could be a problem with the bank settings
If no sound plays on any of the patches, it's likely Atmosphere accidently got switched to an empty
bank. Review Settings instructions on page 07 and try switching Atmosphere back to Bank 01.
It could be a problem with your sound file or how it was loaded
If the preloaded sounds on Bank 01 work; but not the sounds you loaded in another bank, then it's
likely an issue with the file and how it was loaded. Review the Loading New Sounds to Atmosphere
instructions on page 08 and page 07.
It could be your output volume
The recommended output volume is "0 dB."
Atmosphere abruptly starts and stops or doesn’t crossfade.
Cut mode might be enabled
It sounds like Cut Mode might be enabled. When Cut Mode is enabled, it is indicated by a small
white dot in the center of the screen below the displayed key. Cut Mode is enabled and disabled by
holding Abort for 3 seconds in Live View.
It could be that the Crossfade settings are set too low
Review Settings instructions on page 07 and check your Fade time. The recommended settings are
between 750ms and 2000ms.
Sounds fade in properly, but abrupt stop
It sounds like Loop is turned off. Review Settings instructions on page 07 to re-enable it.
How can I get in touch for additional help?
For contact, send an email to [email protected] or a message to @aerospaceaudio on
Instagram, Facebook, or TikTok.
COPYRIGHT © 2021 AEROSPACE AUDIO. ALL RIGHTS RESERVED OCTOBER 2022..
www.aerospaceaudio.com
Other Aerospace Audio Music Equipment manuals


