AGA marvel 15iM User manual

and
Maintenance
Ice Machines
15iM (marvel)
25iM (Marvel)
25OiM (Outdoor)
NOTE
Important Safety Instrucons
Recognize Safety Symbols,
Words, and Labels.
WARNING-
CAUTION-
NOTE-
-
TABLE OF CONTENTS
3
3
3
6
7
7
7
9
9

UNPACKING YOUR ICE MACHINE
Remove Interior Packaging
-
Important
Note to Customer
-
Warranty Registraon
-
Help Prevent Tragedies
3

Select Locaon
-
Outdoor Installaon
-
Winterizing your Outdoor Ice Maker
-
Front Grille
-
Rear
Cabinet Clearance
INSTALLING YOUR ICE MACHINE

NOTE
Leveling Legs
-
• Do not splash or spray water from a hose on the ice ma-
chine! Doing so may cause an electrical shock, which may
result in severe injury or death.
• This unit should not, under any circumstances, be installed
to an un-grounded electrical supply.
Electrical Connecon
-
-
Electrical Extension cords should
not be used. They can be hazard-
ous and cause decient operaon. The wall receptacle should
be located near the product and be a polarized type with
adequate ground protecon. The product must be installed to
your local building codes and ordinances.
-
INSTALLING YOUR ICE MACHINE

NOTE
Water Supply
-
NOTE: DO NOT USE A SELF-PIERCING
TYPE VALVE.-
-
-
Water
Supply
Line
Water supply
inlet
Ice Maker
INSTALLING THE WATER SUPPLY
6
NOTE
Turning on the ice machine
-
-
-
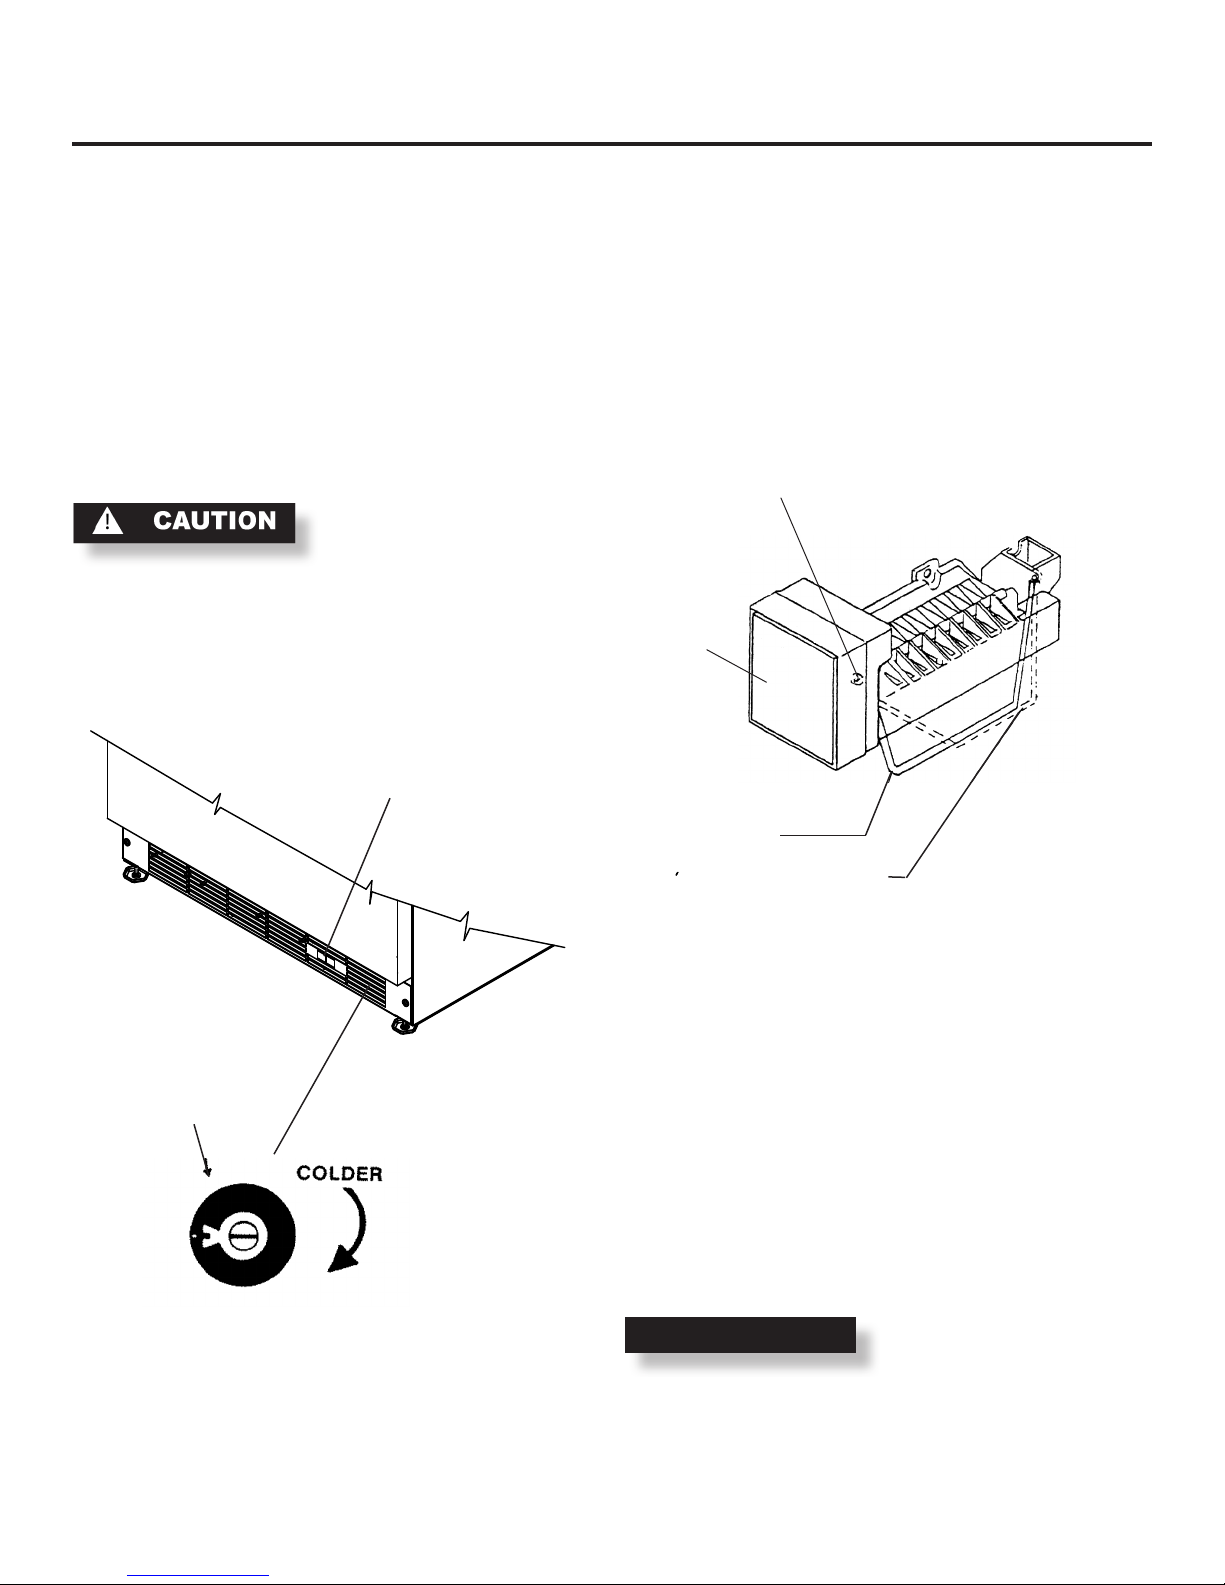
Ice maker operaon
-
Water Fill Adjustment
-
-
-
USING YOUR ICE MACHINE
7
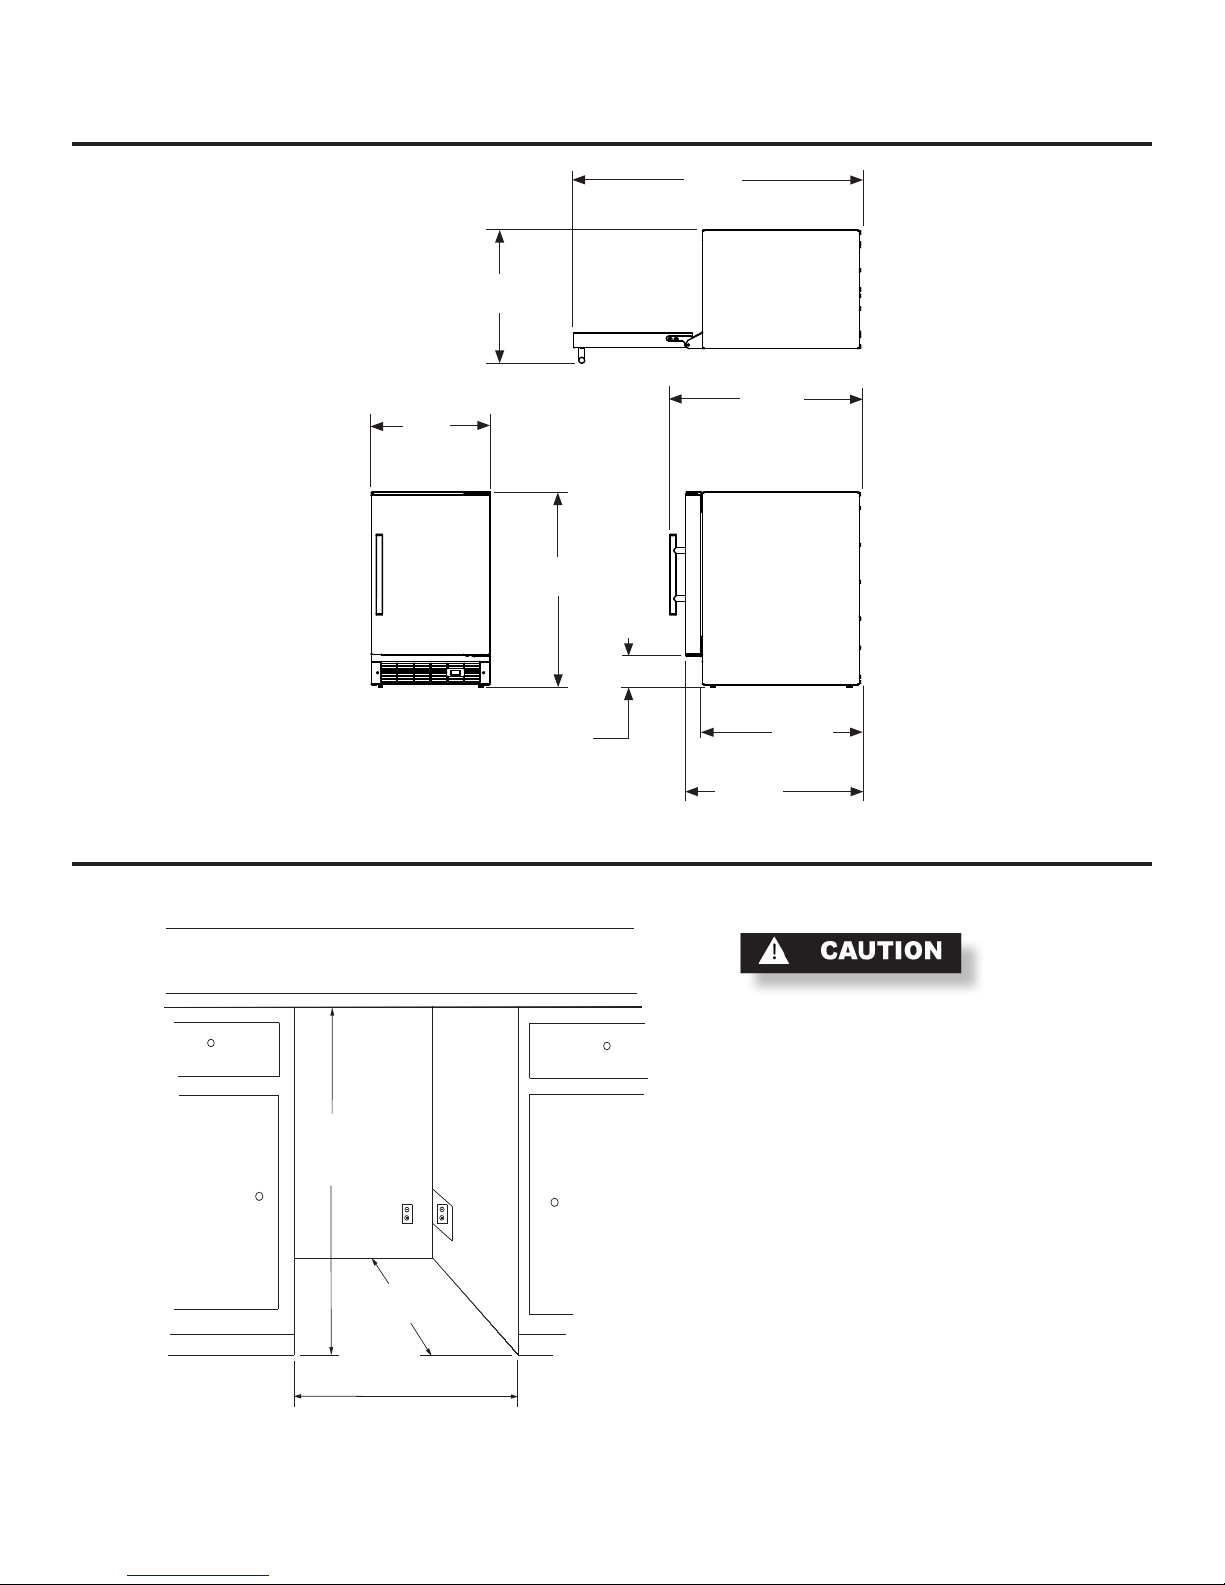
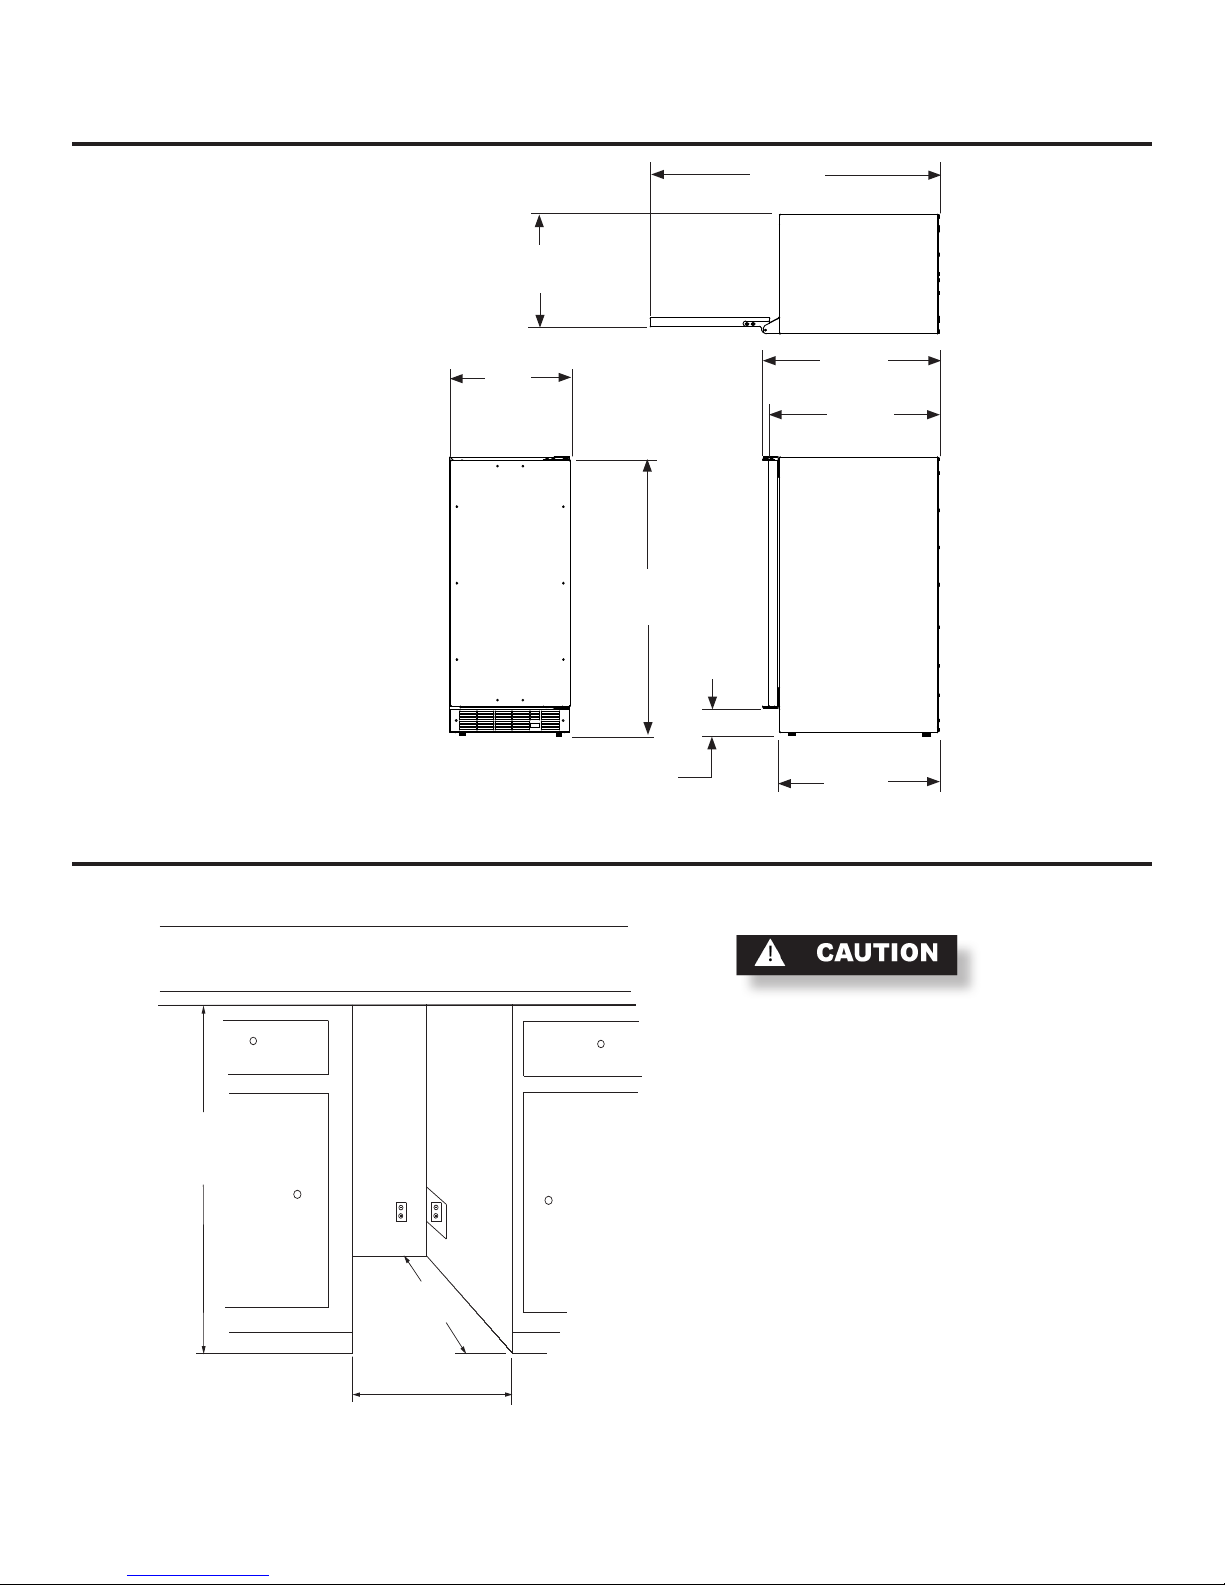
DIMENSIONS FOR MODEL 15IM SOLID DOOR
RECOMMENDED ROUGH IN OPENING DIMENSIONS,15IM SOLID DOOR
standard cabinet

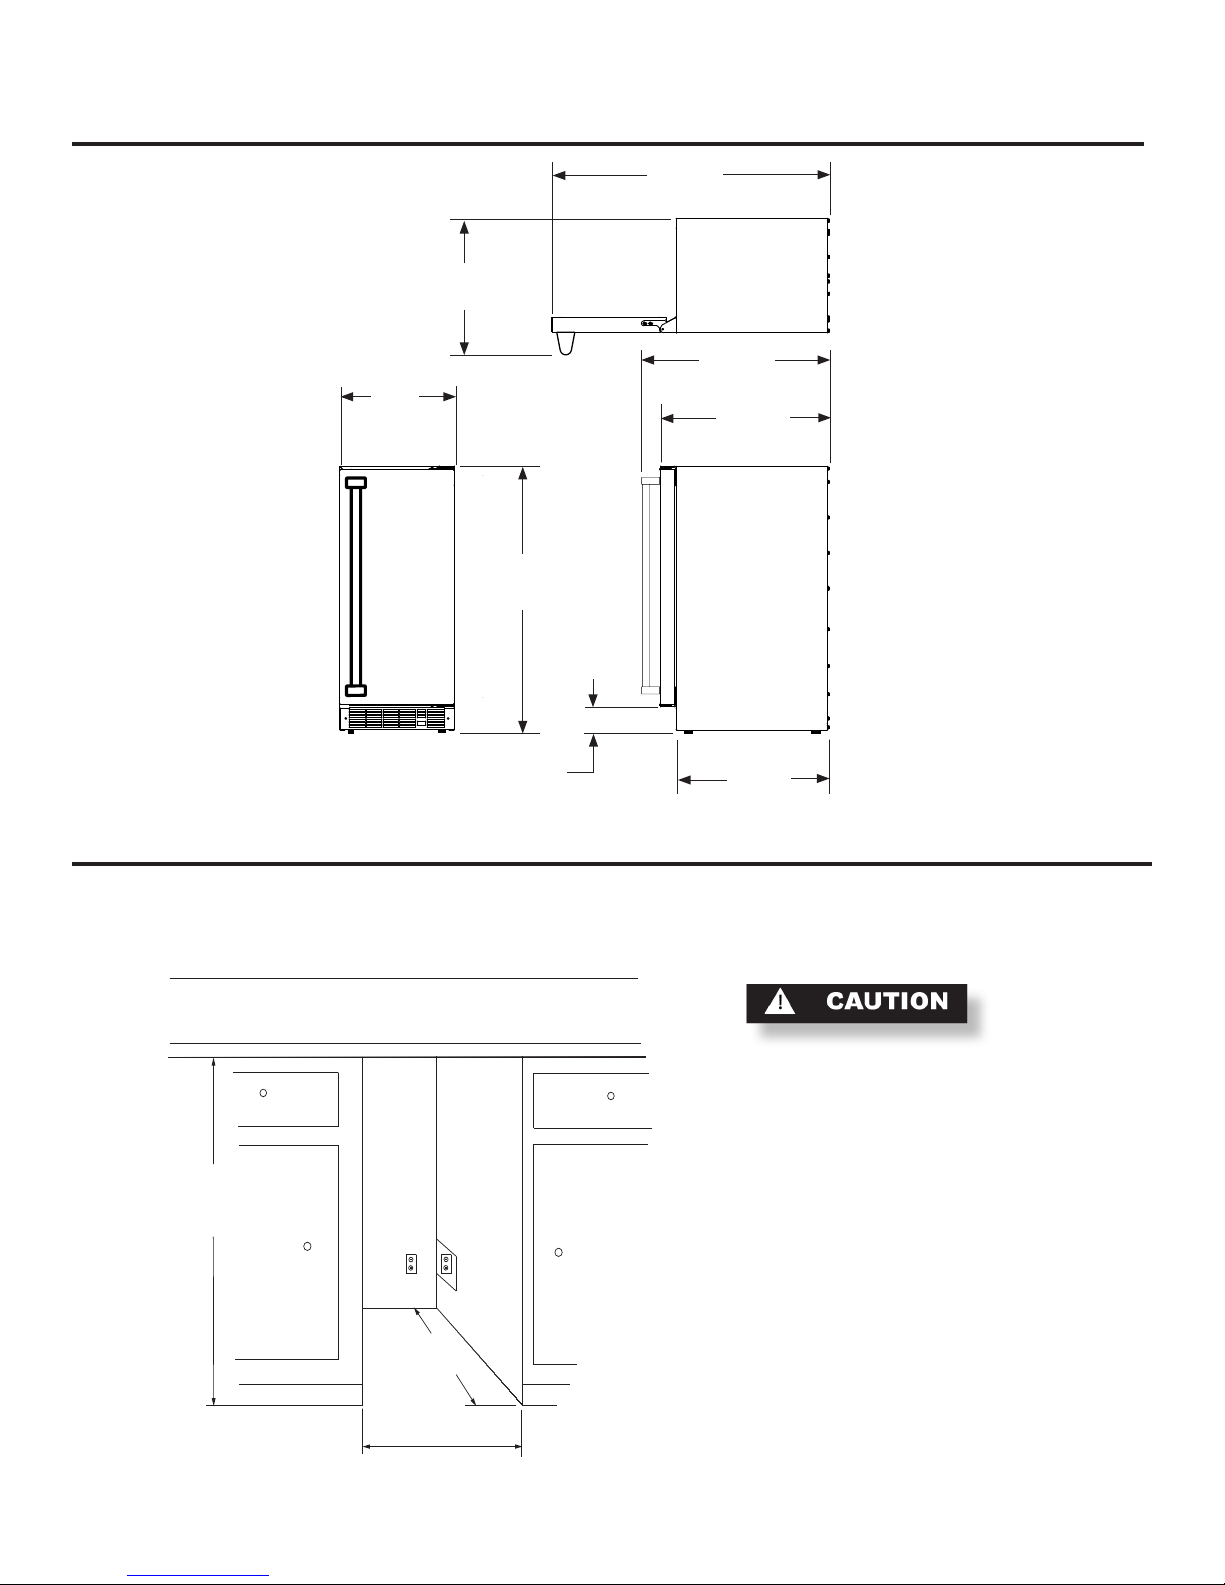
DIMENSIONS FOR MODEL 25IM SOLID DOOR
RECOMMENDED ROUGH IN OPENING DIMENSIONS, 25IM SOLID DOOR
-
standard cabinet
9
DIMENSIONS FOR MODEL 25OIM SOLID DOOR
RECOMMENDED ROUGH IN OPENING DIMENSIONS, 25OIM SOLID DOOR
-
standard cabinet
DIMENSIONS FOR MODEL 25IM SOLID OVERLAY DOOR
RECOMMENDED ROUGH IN OPENING DIMENSIONS, 25IM SOLID OVERLAY DOOR
-
standard cabinet

NOTE
NOTE
Step 1: Verify door alignment
-
-
-
Step 2: Remove door
-
Step 3: Remove gasket
Step 4: Cut overlay panel
panel
Step 5: Drill hinge clearance holes in overlay panel
-
-
-
FULL OVERLAY PANEL INSTALLATION INSTRUCTIONS

NOTE
FULL OVERLAY PANEL INSTALLATION INSTRUCTIONS
Step 6: Drill panel mounng holes
If your ice machine has a door lock proceed to Step 7. If your
ice machine does not have a door lock proceed to Step 9.
Step 7: Mark and drill lock hole.
-
adapter
adapter
panel
Material Type #8 Wood Screw

SECTION A-A
SCALE 1 : 1
LOCK
NUT
BRASS EXTENSION
CAM
PHILLIPS SCREW
13/16 COUNTER
BORE 7/16 DEEP
15/32 HOLE
3/4 INCH
WOOD PANEL
SPRING WASHER
INNER
DOOR
Step 9: Secure overlay panel to the door.
Step 10: Install lock cam (Models with locks only).
-
Step 12: Install the door
-
FULL OVERLAY PANEL INSTALLATION INSTRUCTIONS
Step 8: Assemble the lock parts
adapter
Step 11: Install door gasket

Cabinet
-
Interior
Care of Unit
CARE AND CLEANING
Defrosng Instrucons
-
ENERGY SAVING TIPS
The following suggesons will minimize the cost of
operang your ice machine appliance.
-

Problem Possible Cause Remedy
ice
-
Before You Call for Service
Electrocuon Hazard
TROUBLESHOOTING YOUR ICE MACHINE

Problem Possible Cause Remedy
-
-
-
-
TROUBLESHOOTING YOUR ICE MACHINE
For Your Records
-
-
If Service is Required:
OBTAINING SERVICE
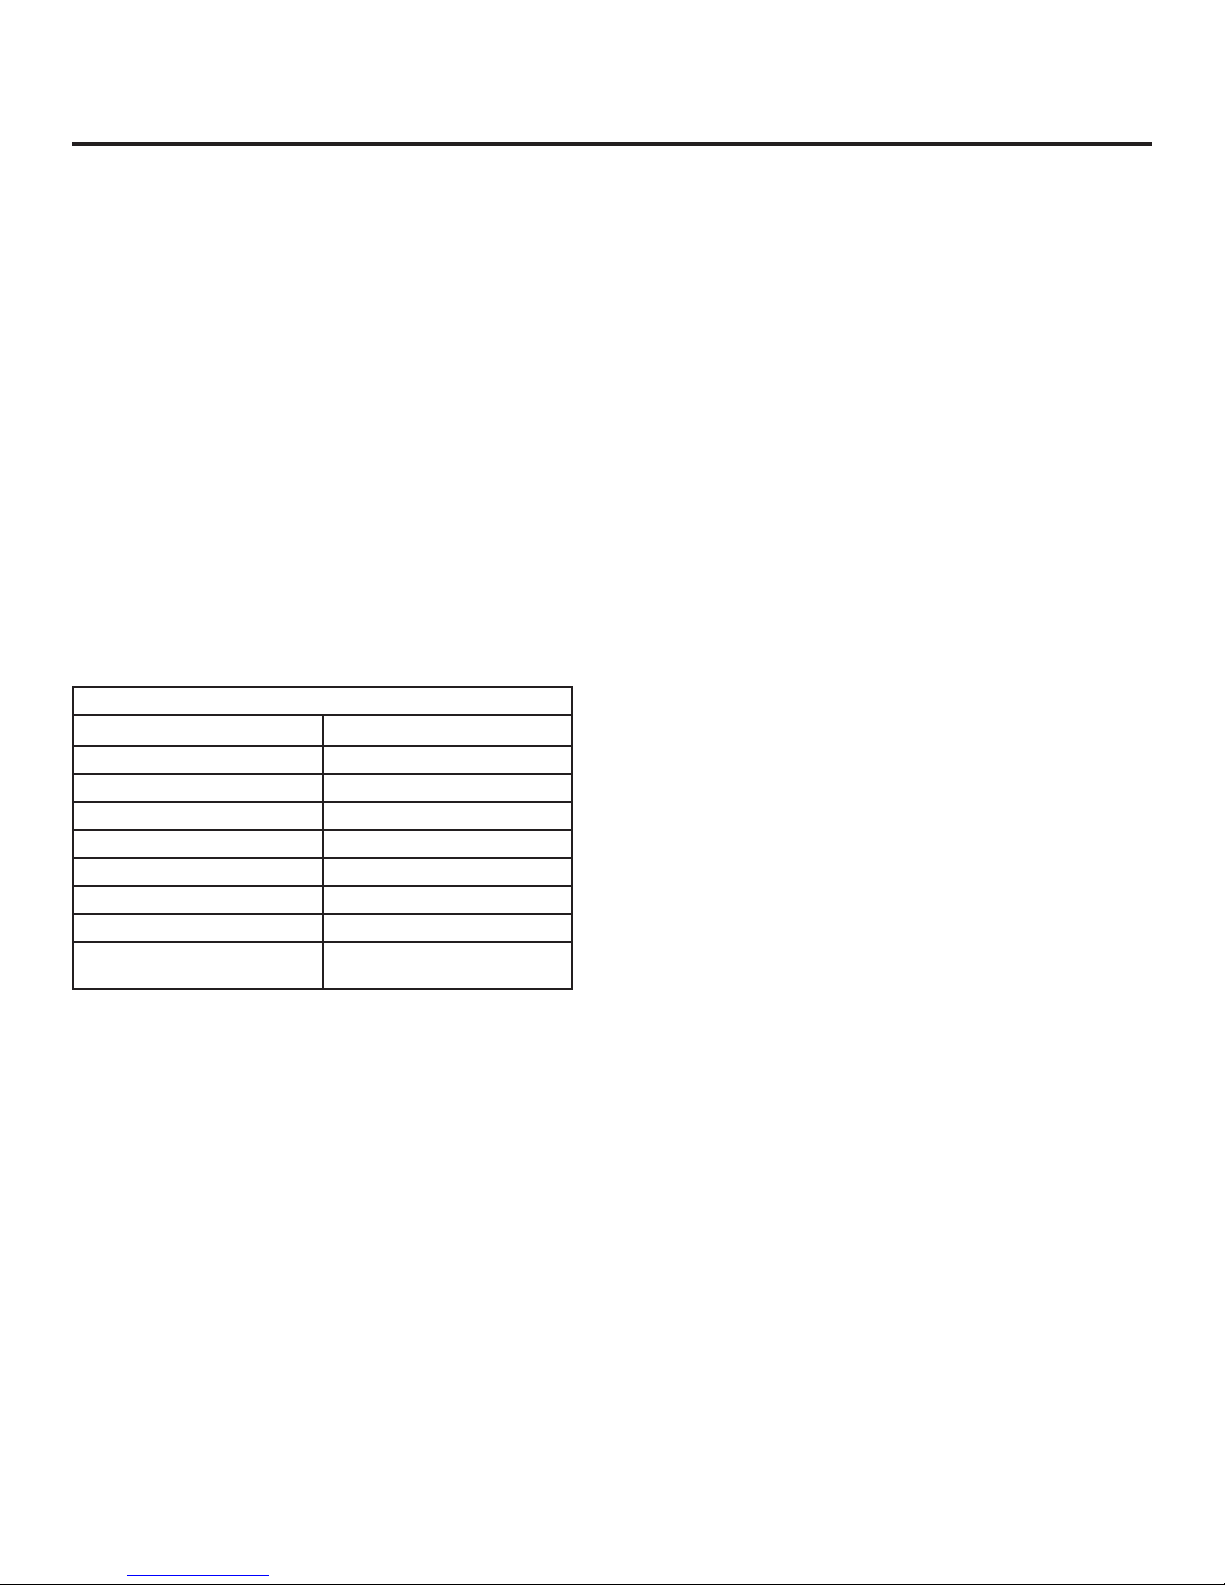
Table B

Parts or Service
Not Supplied or Designated by AGA MARVEL
-
-
-
-
Enre Product
Limited One Year Parts and Labor Warranty
-
Addional Second Through Fih Year
Limited Parts Only Warranty
-
-
-
HOUSEHOLD PRODUCT WARRANTY

This manual suits for next models
2
Table of contents
Languages:
Other AGA marvel Ice Maker manuals

AGA marvel
AGA marvel 15CM Manual

AGA marvel
AGA marvel MA15CRS1RS Manual

AGA marvel
AGA marvel MA15C*S Series Manual

AGA marvel
AGA marvel 3OiMT Manual

AGA marvel
AGA marvel ML15CL Manual

AGA marvel
AGA marvel ML15CRS1XS Manual

AGA marvel
AGA marvel MA15CR Manual

AGA marvel
AGA marvel MA15CRS Manual

AGA marvel
AGA marvel MP15CPG2 series Manual

AGA marvel
AGA marvel MA15CRC Manual


