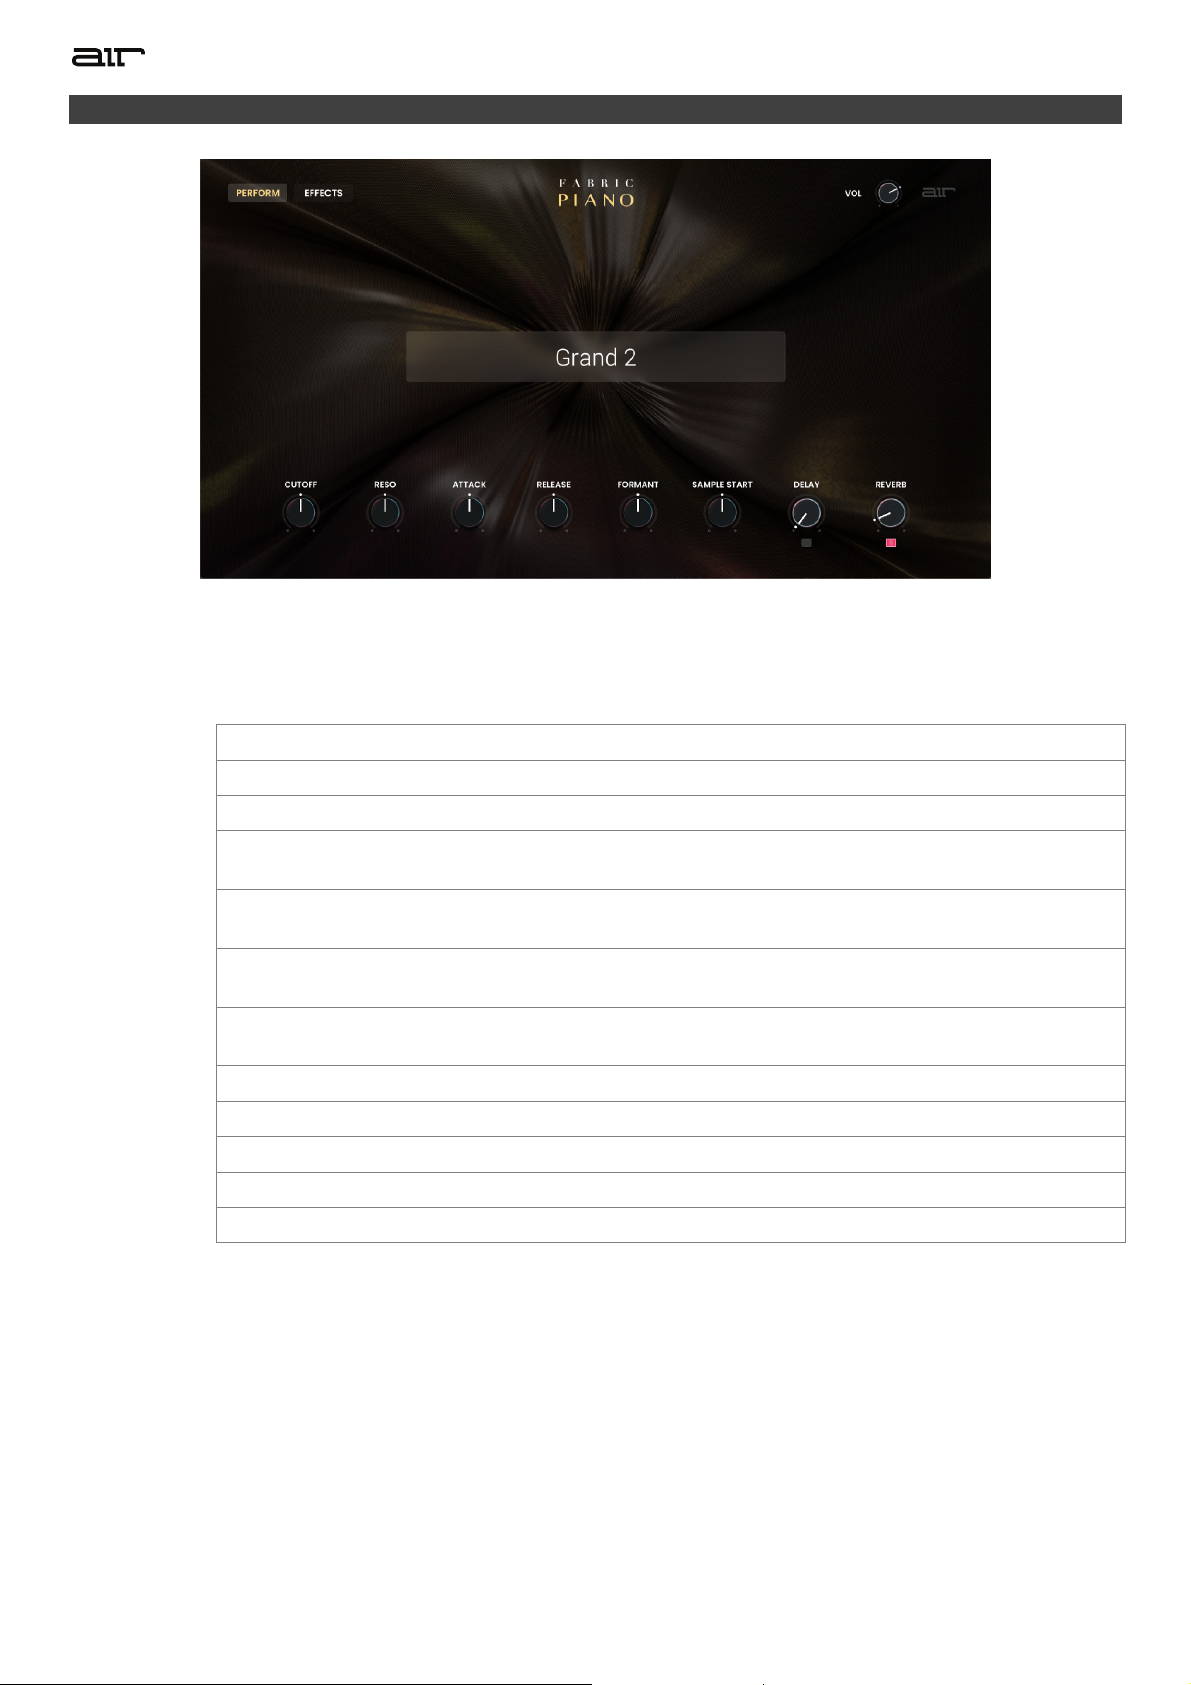
Air Fabric Piano User manual

Fabric Piano
User Guide
English
Manual Version 1.1

2
Introduction
Thank you for purchasing the AIR Fabric Piano plugin instrument. Fabric Piano delivers the sonic characteristics of
the flagship Stage Piano instrument, but in a less CPU-intensive form. It includes a comprehensive set of editing
features and built-in effects, such as the AIR Flavor effect for adding grit for a lo-fi sound.
This user guide explains how to use your plugin instrument. For more information on using other parts of the MPC
software or hardware, please consult the respective MPC Software User Guide and MPC hardware User Guide.
System Requirements & Product Support
For complete system requirements and compatibility information, visit airmusictech.com.
For technical support, visit support.airmusictech.com.
Installation
1. Double-click the .exe (Windows) or .pkg (macOS) file you downloaded. Follow the on-screen instructions to
install the software.
2. Open the plugin application.
3. Click Sign In to sign into your inMusic Brands Profile using your Internet browser. If you do not have an inMusic
Brands Profile yet, you will be prompted to create one.
4. Once you have signed in, click Activate in the plugin window to enter your serial key to unlock the plugin. You
can unlock each plugin on up to three devices at a time.
5. If you do not have a serial key, you can click Try Unlicensed to explore the plugin with intermittent audio alerts.
You can also click 10-Day Trial to initiate a free, fully featured trial of the plugin for 10 days.
If you would like to purchase a serial key, click the link to purchase a license at profile.inmusicbrands.com.

4
Setup Section
1. Keyboard: Click this icon to enable or disable the virtual keyboard. When enabled, you can click these keys to
input notes, or view notes being played on an external MIDI device.
2. Tempo: Displays the current plugin tempo. To change the tempo:
•Click the number and use your keyboard to input a new value.
•Click and drag the tempo value up or down using your cursor.
•Click the Tap button at regular intervals.
3. Settings: Click this icon to open the Settings window, where you can set the following parameters:
•Output: Click this drop-down menu to select an audio hardware driver in your computer system. Click the
Test button to play a test tone for checking your audio output settings. (Careful! You should lower the
volume on your audio system beforehand.)
•Sample Rate: Click this drop-down menu to select the desired sample rate for your project. This depends
on the available sample rates of the type of MPC hardware you are using or of your audio interface (i.e.,
select 96000 Hz only if your interface allows a 96 kHz sample rate).
•Audio Buffer Size: Click this drop-down menu to set your audio system’s latency. Lower values result in a
more immediate playing response but also more CPU consumption. If you are working with larger projects,
this may cause audible clicks and pops. Higher values are more CPU-friendly but can produce more delay
between pressing a pad and hearing the corresponding sound. The ideal audio buffer size also depends on
your computer’s CPU performance. Experiment with this to find the best setting for your system.
•Active MIDI Inputs: Displays available MIDI input devices. To enable a device, check the box next to its
name.
•Bluetooth MIDI: Click this icon to open your system’s Bluetooth settings menu, where you can select a
Bluetooth-enabled MIDI device to control the plugin.
4. Menu: Click this icon to open the menu, where you can find the following options:
•Scale: Click here to select a value to scale the plugin window to a new size.
•Load Preset: Click here to load a saved preset.
•Save Preset: Click here to save the current preset.
•Open User Guide: Click here to open this User Guide.
•About: Click here to view plugin version information.
5. Preset: Click this drop-down menu to view the list of included plugin presets. You can also click the up and
down arrows next to this field to move to the previous or next preset.
1 3
5
2
4

5
Perform
All settings in this view except Delay On/Off and Reverb On/Off are also available in the Effects view.
Parameter Description Value Range
Main Vol Overall level of the plugin. -inf – 0.0 – +6.0 dB
Preset Preset piano sound. Varies
Cutoff Filter cutoff frequency. -100 -
-
- 0 -
-
- +100%
Reso Amount of resonance/emphasis of the filter cutoff
point.
-100 --- 0 --- +100%
Attack Amount of amplitude attack reduced from or added
to the sound.
-100 --- 0 --- +100%
Release Amount of amplitude release reduced from or added
to the sound.
-100 --- 0 --- +100%
Formant Decreases or increases resonant frequencies to
adjust the timbre of the sound.
-100 --- 0 --- +100%
Sample Start Startin
g
point of the sample. -100 -
-
- 0 -
-
- +100%
Delay Enable or disable the delay effect. Off, On
Delay Mix Wet/dry amount of the delay effect. 0–100%
Reverb Enable or disable the reverb effect. Off, On
Reverb Mix Wet/dry amount of the reverb effect. 0–100%

6
Effects
Parameter Description Value Range
Chorus Use the button in the upper-left corner to enable or
disable the chorus effect.
Off, On
Rate Modulation speed of the chorus effect. 0.05 – 20.00 Hz
Mix Wet/dry amount of the chorus effect. 0–100%
Tremolo Use the button in the upper-left corner of this section
to enable or disable the tremolo effect.
Off, On
Rate Modulation speed of the effect. 0.05 – 20.00 Hz
Shape
A
djusts the modulation waveshape. -100 – 0 – +100%
Stereo De
g
ree of stereo spread of the effect. 0–360 de
g
.
Modwheel Enable or disable tremolo control by the modwheel. Off, On
Depth Modulation depth of the tremolo effect. 0–100%
Phaser Use the button in the upper-left corner to enable or
disable the phaser effect.
Off, On
Rate Modulation speed of the effect. 0.05 – 20.00 Hz
Depth
A
mount of modulation applied. 0–100%
Feedback Amount of phaser signal fed back into the phaser
circuit.
0–100%
Stereo Degree of stereo spread of the effect. 0–360 deg.
Cente
r
Center frequency of the phaser filter. 0–100%
Mix Wet/dry mix of the phaser effect. 0–100%

7
Effects (continued)
Parameter Description Value Range
Flavor Use the button in the upper-left corner of this
section to enable or disable the flavor effect.
Off, On
Timbre Selects an emulation type to color the sound.
V
aries
Timbre Depth
A
mount of timbre emulation applied to the sound. 0–100%
Vinyl Distortion Amount of vinyl distortion noise applied to the
si
g
nal.
0–100%
Vinyl Noise Amount of vinyl noise such as clicks and pops
applied to the si
g
nal.
0–100%
Flutte
r
A
mount of speed fluctuation of the sound playback. 0–100%
Monofy Reduces the stereo spread of the sound to mono. 0–100%
EQ Use the button in the upper-left corner of this
section to enable or disable the EQ effect.
Off, On
Low Amount of attenuation or boost applied to the low
frequency band.
-12 – 0 – +12 dB
Low Mid Amount of attenuation or boost applied to the low-
mid frequency band.
-20 – 0 – +20 dB
High Mid Amount of attenuation or boost applied to the high-
mid frequency band.
-20 – 0 – +20 dB
High Amount of attenuation or boost applied to the high
frequency band.
-12 – 0 – +12 dB
Amp | Cab Use the button in the upper-left corner to enable or
disable the amp/cab effect.
Off, On
Cab Model Type of amplifier simulated. D.I., Brit, 1x8”, 1x12”,
2x10”, 2x12”, 4x10”,
4x12”, 1x15” Bass, 4x10”
Bass, Radio
Drive
A
mount of overdrive applied to the amp si
g
nal. 0–100%
Soft Clip Amount of softening applied to the clipped signal to
decrease high-frequency harmonics and add
warmth.
0–100%
Mono/Stereo Determines whether the simulation is mono or
stereo.
Mono, Stereo
High Amount of high-range tone reduction or boost. -100 – 0 – +100%
Mid
A
mount of mid-ran
g
e tone reduction or boost. -100 – 0 – +100%
Bass Amount of bass-range tone reduction or boost. -100 – 0 – +100%
V
olume Output level of the amp si
g
nal. -12.0 – 0.0 – +12.0 dB

8
Effects (continued)
Parameter Description Value Range
Compressor Use the button in the upper-left corner of this
section to enable or disable the compressor.
Off, On
Threshold Signal level after which the compression will be
applied.
-30.0 – 0.0 – +10.0 dB
Ratio Amount of compression applied. 1.0:1 – 20.0:1
A
ttack Len
g
th of time to apply the compression. 10.0 us – 100 ms
Makeup Amount of additional output gain for the
compressed si
g
nal.
-20.0 – 0 – +20.0 dB
Delay Use the button in the upper-left corner of this
section to enable or disable delay.
Off, On
Time Amount of time between the dry signal and the
delayed si
g
nal.
1/16 – 16/4
L/R Ratio
Reduces the delay Time in either the Left or
Right stereo field. This is useful for creating
offset, panned delays.
50:100 – 100:100 – 100:50
Feedback Amount of signal fed back into the delay line. 0–100%
Reso LP Freq Low pass frequency for feedback resonance. 100 – 16000 Hz
Reso Bell Freq Center frequency for feedback resonance. 100 – 16000 Hz
Reso Bell Gain Amount of gain applied to the resonant
frequency.
0–100%
Mix Wet/dry amount of the delay effect. 0–100%
Reverb Use the button in the upper-left corner of this
section to enable or disable reverb.
Off, On
Pre-Delay Length of time between dry signal and
reverberated si
g
nal.
0 – 250 ms
Time Length of reverb tail. 0.3 – 60.00 s
Size Size of the reverberation environment. 0–100%
Shape Shape of the reverberation environment, which
will alter the density of reverb reflections.
At lower settings, the sound of individual
reflections is more present.
A
t hi
g
her settin
g
s, reflections are more uniform.
0–100%
Damp Amount of frequency dampening applied to the
reverberated signal.
100–0%
HPF Freq Center frequency for reverb signal high-pass
filter.
0 – 2000 Hz
Bri
g
ht
A
mount of hi
g
h frequency decay. -100–0%
Mix Wet/dry amount of the reverb effect. 0–100%

9
Trademarks and Licenses
AIR Music Technology is a trademark of inMusic Brands, Inc., registered in the U.S. and other countries.
macOS is a trademark of Apple Inc., registered in the U.S. and other countries.
Windows is a registered trademark of Microsoft Corporation in the United States and other countries.
All other product or company names are trademarks or registered trademarks of their respective owners.
airmusictech.com
Table of contents
Other Air Musical Instrument manuals