manuals.online logo
Brands
  1. Home
  2. •
  3. Brands
  4. •
  5. Alesis
  6. •
  7. Musical Instrument
  8. •
  9. Alesis AHB-1 User manual

Alesis AHB-1 User manual

alesis.com
Manual Version 1.0
A
HB-1 Home Accessory Bundle
A
ssembly Guide (English) Guía de ensamblaje (Espanol)
Guide de montage (Francais) Guida di montaggio (Italiano)
Montageanleitung (Deutsch)
Box Contents
Contenido de la caja
Contenu de la boîte
Contenuti della confezione
Lieferumfang
E (4) F (4)
C (1) D (4)
A
(1) B (1)
Ensamblaje del soporte (Español)
1. Alinee las patas izquierda y derecha (Ay B) con el panel para pedales (C).
2. Inserte los tornillos (D) en los orificios de las patas izquierda y derecha (Ay B) e insértelos
en las tuercas giratorias en la parte trasera del panel para pedales (C).
3. Apriete las tuercas M6x12 (D) (se requiere un destornillador Phillips, no incluido) y cúbralas
con los capuchones plásticos (E).
4. Coloque su teclado sobre las patas izquierda y derecha (Ay B), inserte los tornillos M6x50
(F) en los soportes metálicos pequeños y apriete los tornillos para fijar el teclado al soporte.
5. Conecte el cable de los pedales a la entrada para pedales/interruptor de pie de su teclado.
Montaggio del supporto (Italiano)
1. Allineare le gambe sinistra e destra (Ae B) al pannello del pedale (C).
2. Inserire i dadi da avvitare (D) nei fori a livello della parte posteriore del pannello del pedale
(C).
3. Inserire le viti (E) nei fori presenti a livello delle gambe sinistra e destra (Ae B) e adattarli ai
dadi da avvitare (D).
4. Stringere le viti M6x12 (E) (occorre un cacciavite a stella, non in dotazione) e coprirle con i
tappi di plastica (F).
5. Collocare la tastiera sulle gambe sinistra e destra (Ae B), inserire le viti M6x50 (G) nelle
piccole staffe metalliche per fissare la tastiera al supporto.
6. Collegare il cavo del pedale all'ingresso pedale/interruttore a pedale della tastiera.
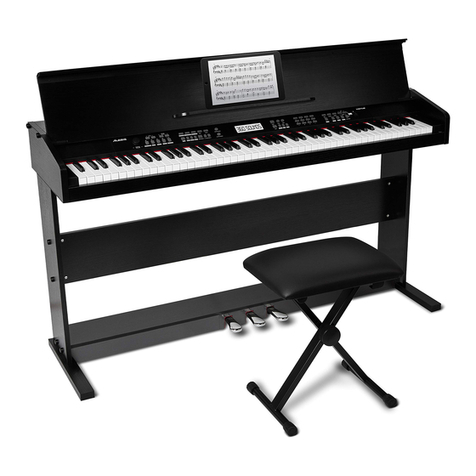
Stand Assembly (English)
1. Align the left and right legs (Aand B) with the pedal panel (C).
2. Insert the screws (D) into the holes in the left and right legs (Aand B) and fit them into the
rotating nuts in the back of the pedal panel (C).
3. Tighten the M6x12 screws (D) (Phillips-head screwdriver required, not included), and cove
r
them with the plastic caps (E).
4. Place your keyboard on top of the left and right legs (Aand B), insert the M6x50 screws (F)
into the small metal brackets, and tighten the screws to secure your keyboard to the stand.
5. Connect the pedal cord to your keyboard's pedal/footswitch input.
Montage du support (Français)
1. Alignez les panneaux gauche et droit (Aet B) avec le panneau pour pédale (C).
2. Insérez les vis (D) dans les orifices des panneaux gauche et droit (Aet B) de manière à les
insérer dans les écrous pivotants sur l'arrière du panneau pour pédale.
3. Serrez les vis M6x12 (D) (tournevis cruciforme requis, non inclus) et recouvrez-les avec les
bouchons en plastique (E).
4. Placez votre clavier sur le dessus des panneaux gauche et droit (Aet B), et insérez les vis
M6x50 (F) dans les petites équerres métalliques, puis serrez les vis afin de fixer votre clavie
r
sur le support.
5. Raccordez le câble pour pédale à l’entrée pédale/commande au pied de votre clavier.
Standmontage (Deutsch)
1. Richten Sie das linke und das rechte Bein (Aund B) auf die Pedalplatte aus (C).
2. Setzen Sie die Schrauben (D) in die Löcher am linken und rechten Bein (Aund B) ein und
verbinden Sie sie mit den Überwurfmuttern auf der Rückseite der Pedalplatte (C).
3. Ziehen Sie die M6x12-Schrauben nun fest (E) (Kreuzschlitzschraubendreher erforderlich,
nicht im Lieferumfang enthalten) und bringen Sie die Kunststoffkappen an (F).
4. Legen Sie das Keyboard auf das rechte und linke Bein (Aund B), setzen die M6x50-
Schrauben (G) in die kleinen Metallbügel und ziehen die Schrauben fest, um das Keyboard
am Ständer zu fixieren.
5. Schließen Sie das Pedalkabel an den Pedal-/Fußschaltereingang Ihres Keyboards an.
3 1
4 2
1
3
4
2
5
2
2
alesis.com
Manual Version 1.0
A
HB-1 Home Accessory Bundle
A
ssembly Guide (English) Guía de ensamblaje (Espanol)
Guide de montage (Francais) Guida di montaggio (Italiano)
Montageanleitung (Deutsch)
Box Contents
Contenido de la caja
Contenu de la boîte
Contenuti della confezione
Lieferumfang
M (1)
K (4)
L (4)
I (1)
J (4)
H (4)
Bench Assembly (English)
1. Insert one leg (H) into a corner of the seat bench (I) so that the leg post passes through the
hole in the corner bracket on the bottom side.
2. Place the flat washer (J) over the leg post.
3. Place the split washer (K) over the flat washer on the leg post.
4. Place the hex nut (L) over the washers on the leg post.
5. Use the included hex wrench (M) to tighten the nut onto the leg post until the leg is secured.
6. Repeat for the remaining three legs.
Ensamblaje del banco (Español)
1. Inserte una pata (H) en una esquina del asiento de banco (I) de manera que el pasador de la
pata atraviese el orificio del soporte de la esquina del lado de abajo.
2. Inserte la arandela plana (J) en el pasador de la pata.
3. Inserte la arandela partida (K) por encima de la arandela plana en el pasador de la pata.
4. Inserte la tuerca hexagonal (L) por encima de las arandelas en el pasador de la pata.
5. Utilice la llave hexagonal incluida (M) para apretar la tuerca sobre el pasador de la pata hasta
que quede firme.
6. Repita el procedimiento para las tres patas restantes.
Montage du banc (Français)
1. Insérez un pied (H) dans un des coins du banc (I) de sorte que la tige filetée du pied passe
à
travers le trou du support en cornière.
2. Placez la rondelle plate (J) sur la tige filetée du pied.
3. Placez la rondelle fendue (K) sur la tige filetée après la rondelle plate.
4. Placez l'écrou hexagonal (L) sur la tige filetée après les rondelles.
5. Utilisez la clé hexagonale fournie (M) pour serrer l'écrou sur la tige filetée jusqu'à ce que le
pied soit bien fixé.
6. Répétez ces étapes pour les trois pieds restants.
Montaggio dello sgabello (Italiano)
1. Inserire una gamba (H) in un angolo del sedile (I) in modo che il montante della gamba stess
a
passi attraverso il foro nella staffa d’angolo nel lato inferiore.
2. Collocare la rondella piatta (J) sul montante della gamba.
3. Collocare la rondella elastica (K) sulla rondella piatta sul montante della gamba.
4. Collocare il dado esagonale (L) sulle rondelle sul montante della gamba.
5. Servirsi della chiave esagonale in dotazione (M) per stringere il dado sul montante della
gamba fino a fissare quest’ultima.
6. Ripetere l’operazione per le altre tre gambe.
Bankmontage (Deutsch)
1. Setzen Sie ein Bein (H) in eine Ecke der Sitzbank (I) ein und achten darauf, dass der Beinstift
durch das Loch in der Eckhalterung auf der Unterseite geführt wird.
2. Bringen Sie die Unterlegscheibe (J) über den Beinstift.
3. Bringen Sie die Spaltscheibe (K) über der Unterlegscheibe am Beinstift an.
4. Platzieren Sie die Sechskantmutter (L) über den Unterlegscheiben am Beinstift.
5. Verwenden Sie den mitgelieferten Sechskantschlüssel (M), um die Mutter am Beinstift
festzuziehen, bis das Bein gesichert ist.
6. Wiederholen Sie diese Schritte für die verbleibenden drei Beine.
4 3
5
2
6
1
6
6

Other Alesis Musical Instrument manuals

Alesis recital pro User manual

Alesis

Alesis recital pro User manual

Alesis VIRTUE AHP-1 User manual

Alesis

Alesis VIRTUE AHP-1 User manual

Alesis Coda Pro User manual

Alesis

Alesis Coda Pro User manual

Alesis DG8 User manual

Alesis

Alesis DG8 User manual

Alesis recital pro User manual

Alesis

Alesis recital pro User manual

Alesis PRESTIGE ARTIST User manual

Alesis

Alesis PRESTIGE ARTIST User manual

Alesis RECITAL 61 User manual

Alesis

Alesis RECITAL 61 User manual

Alesis Surge Ride Cymbal with Choke User manual

Alesis

Alesis Surge Ride Cymbal with Choke User manual

Alesis Coda Pro User manual

Alesis

Alesis Coda Pro User manual

Alesis QX61 User manual

Alesis

Alesis QX61 User manual

Alesis LQSQ User manual

Alesis

Alesis LQSQ User manual

Alesis CONCERT User manual

Alesis

Alesis CONCERT User manual

Alesis Virtue AHP-1BK User manual

Alesis

Alesis Virtue AHP-1BK User manual

Alesis VX 49 User manual

Alesis

Alesis VX 49 User manual

Alesis DM7 Installation guide

Alesis

Alesis DM7 Installation guide

Alesis Vortex Wireless 2 User manual

Alesis

Alesis Vortex Wireless 2 User manual

Alesis Prestige User manual

Alesis

Alesis Prestige User manual

Popular Musical Instrument manuals by other brands

Korg Krome EX Supplementary manual

Korg

Korg Krome EX Supplementary manual

Suzuki HP-97 owner's manual

Suzuki

Suzuki HP-97 owner's manual

Yamaha flute user guide

Yamaha

Yamaha flute user guide

Yamaha PSR-I400 owner's manual

Yamaha

Yamaha PSR-I400 owner's manual

Korg i3 HD owner's manual

Korg

Korg i3 HD owner's manual

Musicmakers Reverie Harp Kit manual

Musicmakers

Musicmakers Reverie Harp Kit manual

Roland HP-3 owner's manual

Roland

Roland HP-3 owner's manual

Wersi Abacus user manual

Wersi

Wersi Abacus user manual

Yamaha Venova YVS-100 owner's manual

Yamaha

Yamaha Venova YVS-100 owner's manual

Yamaha Electone FS-300 owner's manual

Yamaha

Yamaha Electone FS-300 owner's manual

Yamaha BB614 user guide

Yamaha

Yamaha BB614 user guide

KETRON DG100 owner's manual

KETRON

KETRON DG100 owner's manual

Viscount Prestige Series Advanced manual

Viscount

Viscount Prestige Series Advanced manual

Kawai DP1 Service manual

Kawai

Kawai DP1 Service manual

Silent Guitar SLG200N owner's manual

Silent Guitar

Silent Guitar SLG200N owner's manual

Casio Celviano GP-300BK user guide

Casio

Casio Celviano GP-300BK user guide

Roland KR-5 owner's manual

Roland

Roland KR-5 owner's manual

MUSIC STORE professional WERSI SONIC OAX Series Programming manual

MUSIC STORE professional

MUSIC STORE professional WERSI SONIC OAX Series Programming manual

manuals.online logo
manuals.online logoBrands
  • About & Mission
  • Contact us
  • Privacy Policy
  • Terms and Conditions

Copyright 2025 Manuals.Online. All Rights Reserved.