AirCycler SmartExhaust Operation manual

Ventilation Products
SmartExhaust™
Installation & User’s Guide
VENTILATION MADE BREEZY!™
a breeze to install • a breeze to use

2
www.aircycler.com
INTRODUCTION
The SmartExhaust™ is designed to replace bathroom fan and light switches and provide both functions with one easy
operation. By using a microprocessor to monitor and control operation, the SmartExhaust™ delivers a precise amount of
ventilation.
BENEFITS
• Earn LEED and ENERGY STAR points for enhanced exhaust ventilation*
• Make standard bath fans ASHRAE 62.2 compliant*
• Replaces both fan and light switches for one easy operation
• Microprocessor technology provides precise ventilation times
• Programmable DELAY and VENTILATION settings
• Excess manual and/or delay operation is subtracted from the next hour’s programmed ventilation time
• Works with most incandescent, CFL, uorescent and LED lights
• Optional light and fan time out after 60 minutes (Rocker version only)
*When used with ASHRAE 62.2 compliant fans
SAFETY CONSIDERATIONS
Read and follow manufacturer’s instructions carefully. Follow all local electrical codes during installation. All wiring
must conform to local and national electrical codes. Improper wiring or installation may result in personal injury or
product and property damage.
INSTALLATION
1. Do not connect this device to aluminum wire.
2. Use with copper or copper clad wire only.
3. TURN POWER OFF at circuit breaker or fuse panel.
4. Remove cover plate and existing switch from wall box if there is one already installed.
5. Connect the wires in the wall box using the supplied wire nuts.
Wires must have ¾ inch of bare copper exposed. Twist wires together tightly with supplied wire
nuts. Make sure no bare copper is exposed. Secure connections with electrical tape. If a light is not connected, be
sure to attach a wire nut to unused blue wire and secure with electrical tape.
6. Mount SmartExhaust™ switch in to wall box with supplied mounting screws.
7. Set desired DELAY time by turning dial to desired minutes.
8. Set desired VENTILATION time by turning dial to desired minutes per hour.
9. Record settings on face plate with an indelable marker and snap rocker assembly onto face plate.
10. Turn on power at circuit breaker or fuse box.
Note: To fully comply with ASHRAE 62.2 - Attach clear ASHRAE sticker to face of switch plate.

3
www.aircycler.com
WIRING DIAGRAM
OPERATING INSTRUCTIONS
• Move switch up to turn on the fan and light
• Move switch down to turn o the light. The fan will continue to run for a pre-set DELAY time (unless manually can-
celed)
• To cancel DELAY time for the toggle version, turn the switch o and back on again within three seconds. Within
another three seconds, turn the switch o and the fan will shut o canceling the DELAY for that use. For the Rocker
version, simply turn the switch o again after use.
• DELAY will not activate until the light/fan has been on for at least 10 seconds
• The fan will automatically come on once per hour for the pre-set VENTILATION time.
OPERATION
The SmartExhaust™ has a microprocessor in it that reads the two settings dials. If for example the VENTILATION dial is
set to 20 minutes/hour, the micro- processor subtracts 20 minutes from 60 minutes and determines it needs to come
on 40 minutes into the hour and run for the remaining 20 minutes of that hour.
Now if the DELAY dial is set to 10 minutes and someone uses the bathroom for 5 minutes, the microprocessor will keep
track of the 5 minutes of use. Then when the person leaves after 4 minutes and turns the light switch o, the micro-
processor will keep the fan on for 10 more minutes of the DELAY setting. This will add up to 14 minutes of total fan run
time for that hour. The microprocessor will now subtract the 14 minutes of manual and delay time from the required 20
minutes of VENTILATION time and come up with 6 minutes needed to run at the end of the hour. Now 54 minutes into the
hour the fan will come on and run for 6 more minutes. Resulting in 20 minutes of total run time that hour.
Black - Hot
Green - Ground
White - Neutral
Blue - Light hot
Red - Fan Hot
Bathroom Light
Bathroom Fan
White - Neutral
Wiring Diagram

4
www.aircycler.com
Additional SmartExhaust™ Rocker Model Features
Adjustable Dim up/Dim down rates:
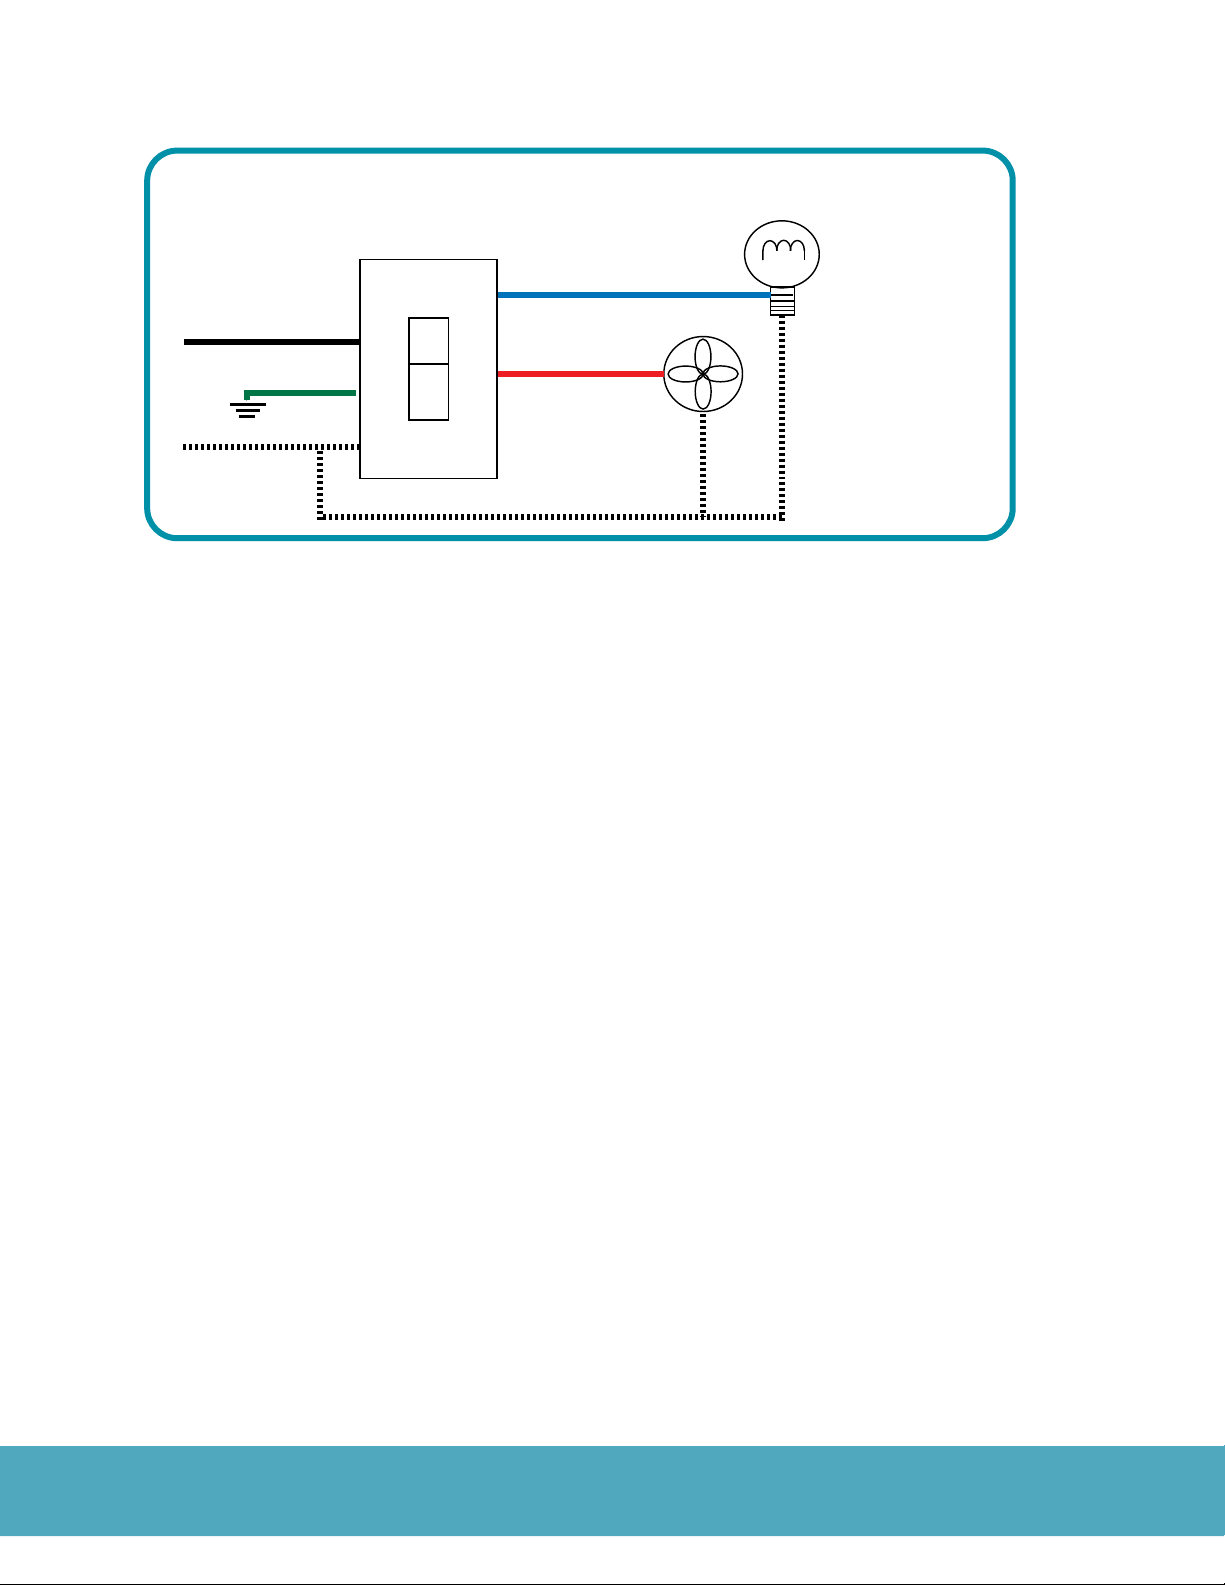
The dimmer function of this switch is designed for use only with permanently installed incandescent lighting xtures.
Do not use dim rates on uorescent lighting, transformer supplied lighting/appliances, motorized appliances or recep-
tacles. The incandescent lighting controlled by this dimmer switch must not exceed a total of 400 watts.
The time required to reach full brightness when turned on or full o when turned o, can be set from 0-6 seconds. Use
the DELAY dial to set the dim up rate and VENTLATION dial to set the dim down rate. For example if you want it to take
5 seconds to reach full brightness and 3 seconds to reach
full o, set DELAY to 5 and VENTILATION to 3.Then pull the
small power button on the lower right corner of the switch
to the o position. Now using the setting tool molded into
the rocker, hold down both push buttons in the center of the
switch and at the same time push in the power cut o button
while continuing to hold in the push buttons. In 5 seconds
the light will dim up to full brightness and then back o
using the settings you just set. Last, return the DELAY and
VENTILATION dials to the required DELAY and VENTILATION
time.
Night light function: (incandescent lights only)
If you have set a dim up rate, anytime you press the on
button again after the initial push, the light will stop at that
brightness level. This is great for late at night visits to the
bathroom when you don’t want or need full brightness of
the light(s). A quick double tap will turn on the light at a low
brightness and stop it there.
Double tap delay cancel:
If after leaving the bathroom you don’t want the fan to run for its set DELAY time, simply tap the bottom of the rocker
again and the delay time will be canceled.
*Double tap - Fan may remain on if doing vent time.
Note: When changing light bulbs, pull power switch up to disable power to light sockets.
Auto off:
Auto off:
This default setting will automatically turn the fan and light off if the light has been left on for more than 60 minutes.
To disable this feature: Pull the power button out, then using the setting tool on the rocker frame, press the BOTTOM
button while pushing the power button back down. The blue LED should come on. Hold the BOTTOM button for 5 seconds.
The bathroom light will flash once to indicate this feature is now disabled.
To re-enable this feature: Pull the power button out. Using the setting tool, hold down the TOP button while pushing the
power button back down. Hold the UP button for 5 seconds until the light flashes twice, indicating AUTO OFF is enabled.

5
www.aircycler.com
TROUBLESHOOTING & FREQUENTLY ASKED QUESTIONS
What if you’re only in the bathroom for a few seconds?
You have to have the switch on for 10 full seconds before the microprocessor will start counting time and enable the
DELAY function. If you turn the switch back o with in 10 seconds, the fan shuts o and no time is counted.
What if you don’t want the DELAY time to run after you use the bathroom?
To cancel DELAY time for the toggle version, turn the switch o and back on again within three seconds. Within anoth-
er three seconds, turn the switch o and the fan will shut o canceling the DELAY for that use. For the rocker version,
simply turn the switch o again after use.
What if manual and DELAY time exceeds VENTILATION time?
The microprocessor will calculate the excess ventilation time and subtract it from the total VENTILATION time for the
next hour.
If you’re SmartExhaust™ is not operating correctly check:
Does the device have power?
Turn the VENTILATION dial to 60 minutes. The fan will come on within 20 seconds if the device is powered. If you have
the rocker version, tap the top of the rocker to turn on both the light and the fan. If you have the toggle version, you
must hear the fan turn on to verify the microprosessor is running.
Is the device wired correctly?
The SmartExhaust™ will not operate correctly if it is not wired correctly.
Technical Support:
Table of contents
Other AirCycler Switch manuals
Popular Switch manuals by other brands

Monacor
Monacor ATT-506PEU quick start guide

Haydon
Haydon HAY-EXT120IRHDMI quick start guide

socomec
socomec ATyS p instruction manual

PureTools
PureTools PT-SW-HD3 user manual

Broadcast Tools
Broadcast Tools DMS-III Installation and operation manual

Pepperl+Fuchs
Pepperl+Fuchs VISOLUX ML7-55 quick start guide