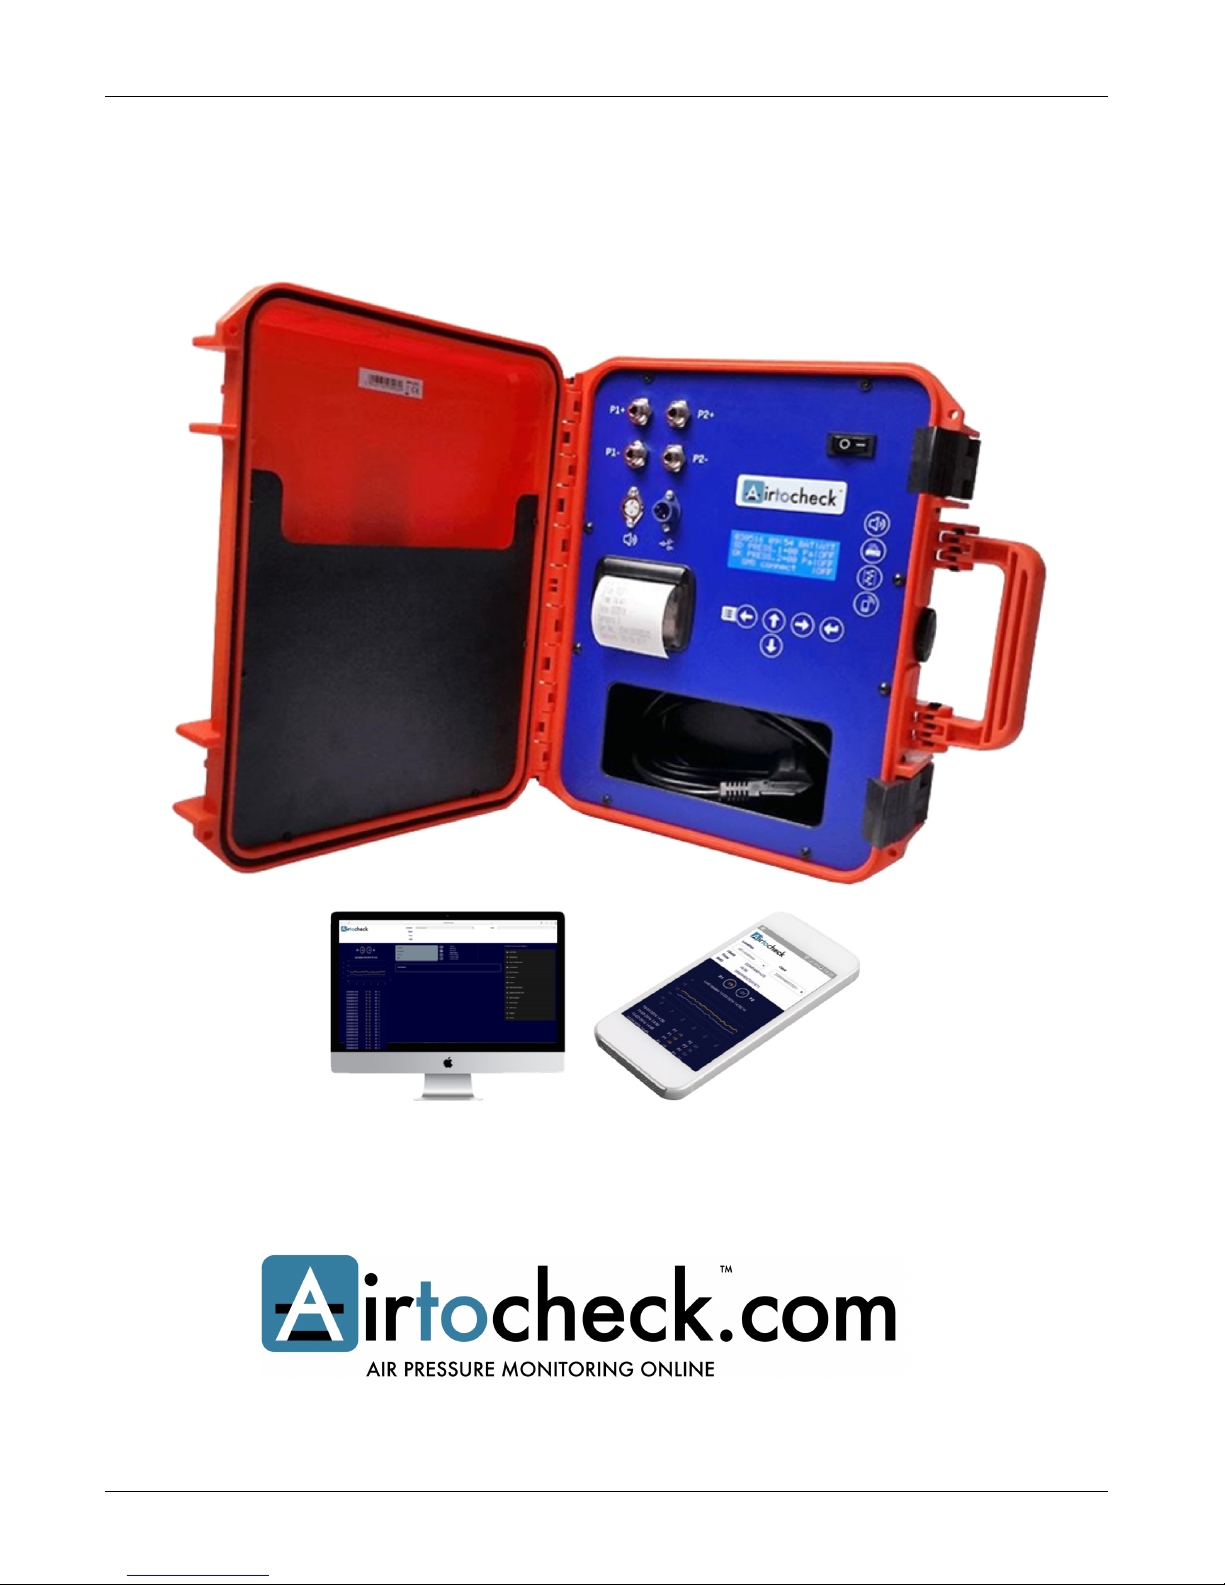
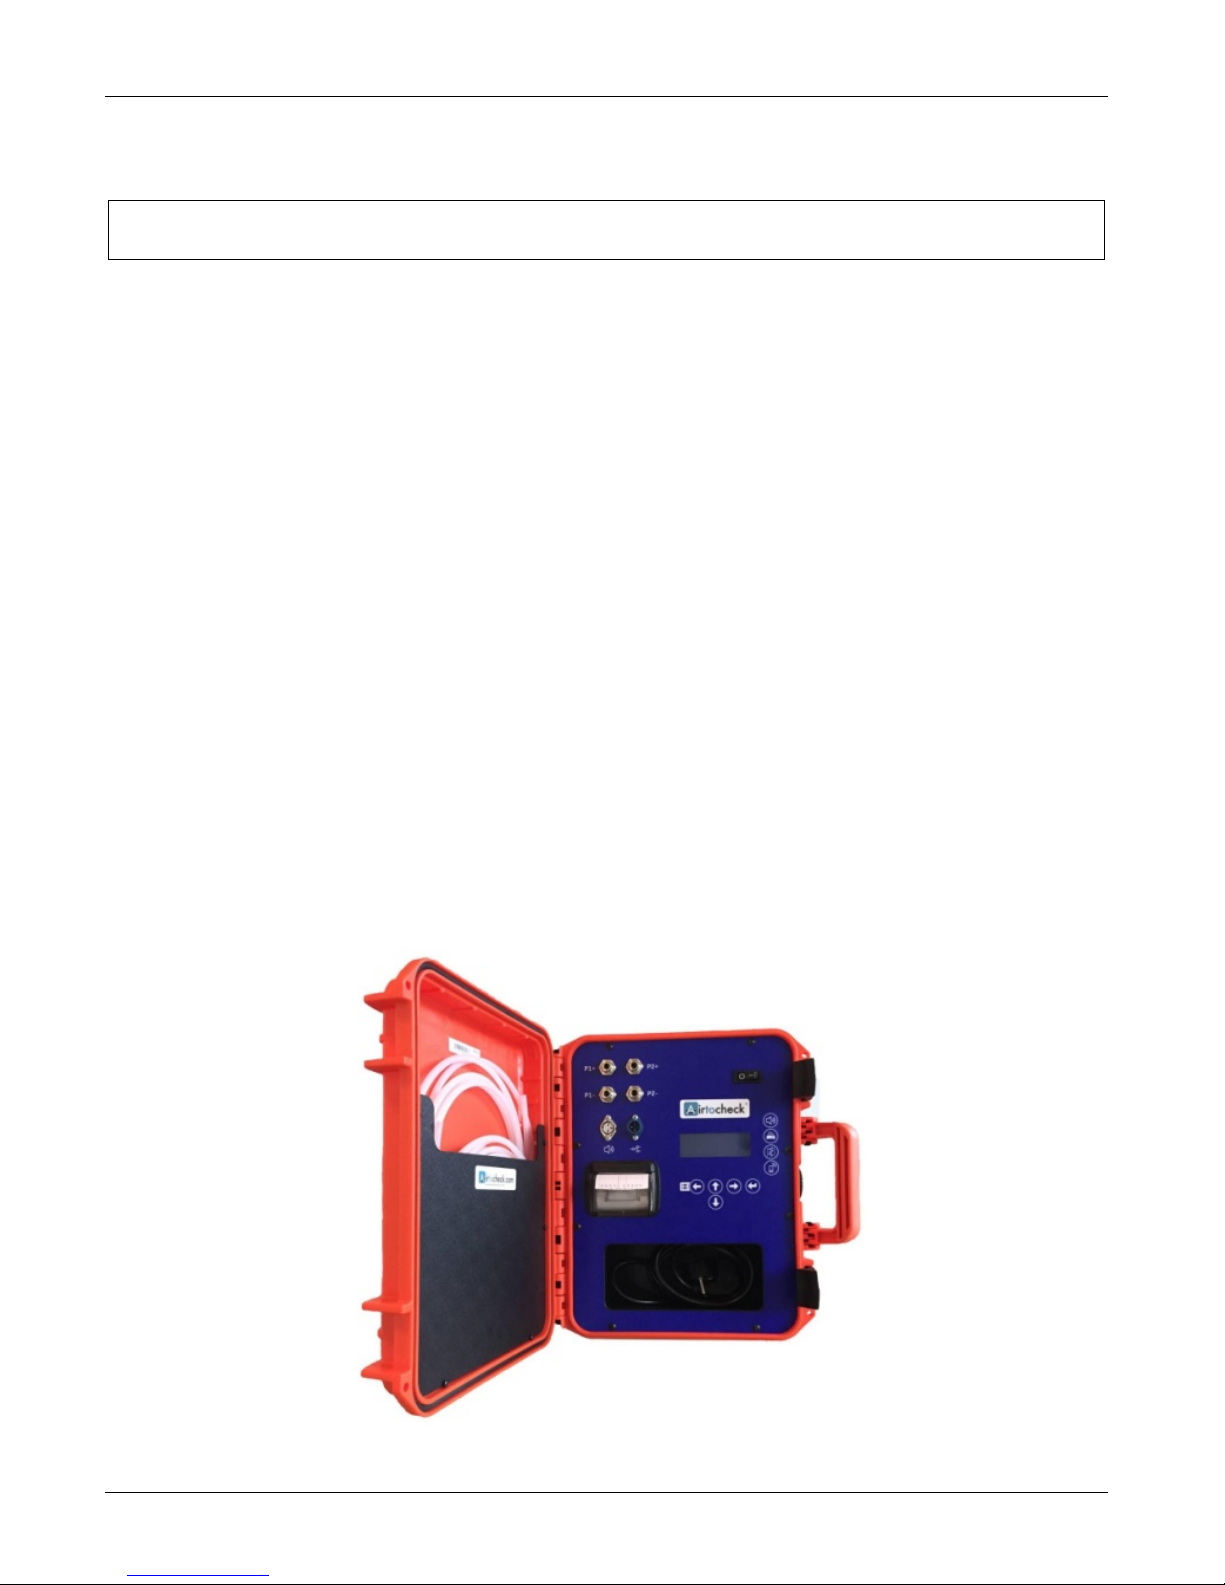
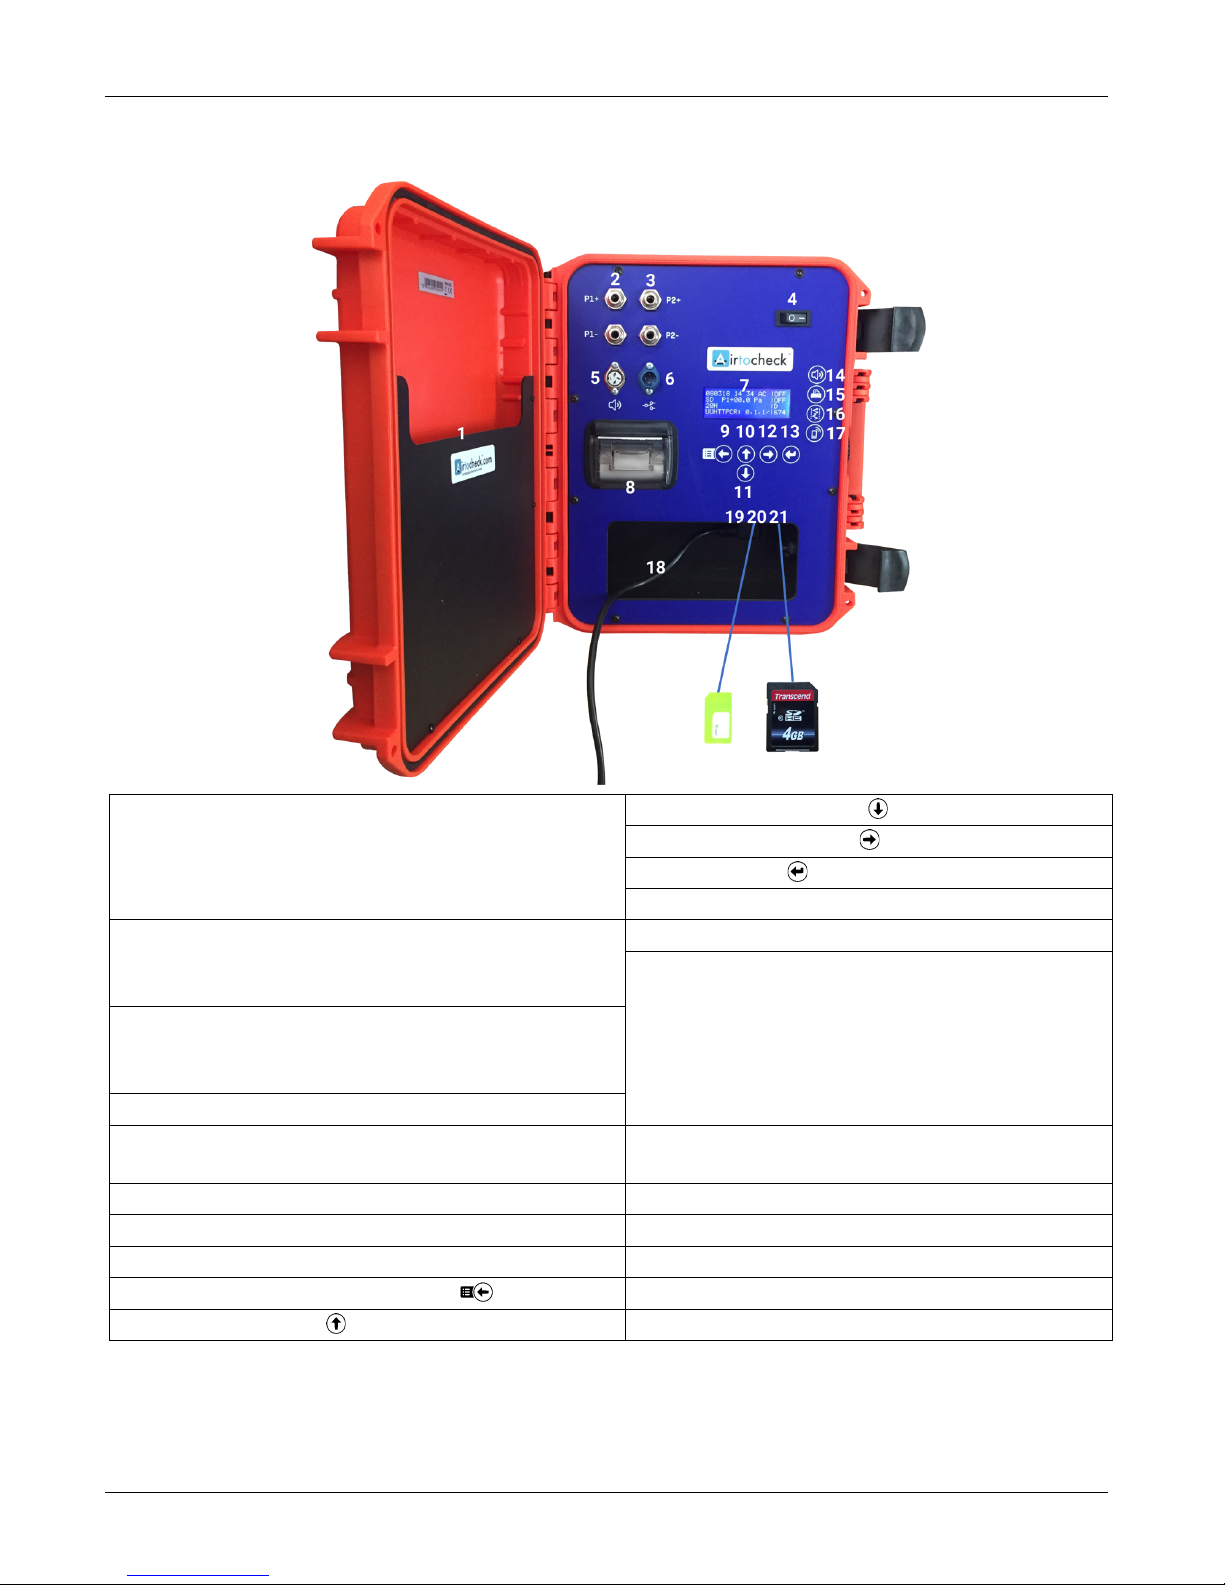
How to handle measurement data
The monitor will start registering measurement data as soon as it is switched on. This data is stored in the monitor's
internal memory. The internal memory has a 30-day capacity if both channels (P1- and P2-) are used, and a 60-day
capacity if only P1- is used. The monitor offers various options for using the obtained measurement results.
Option 1:
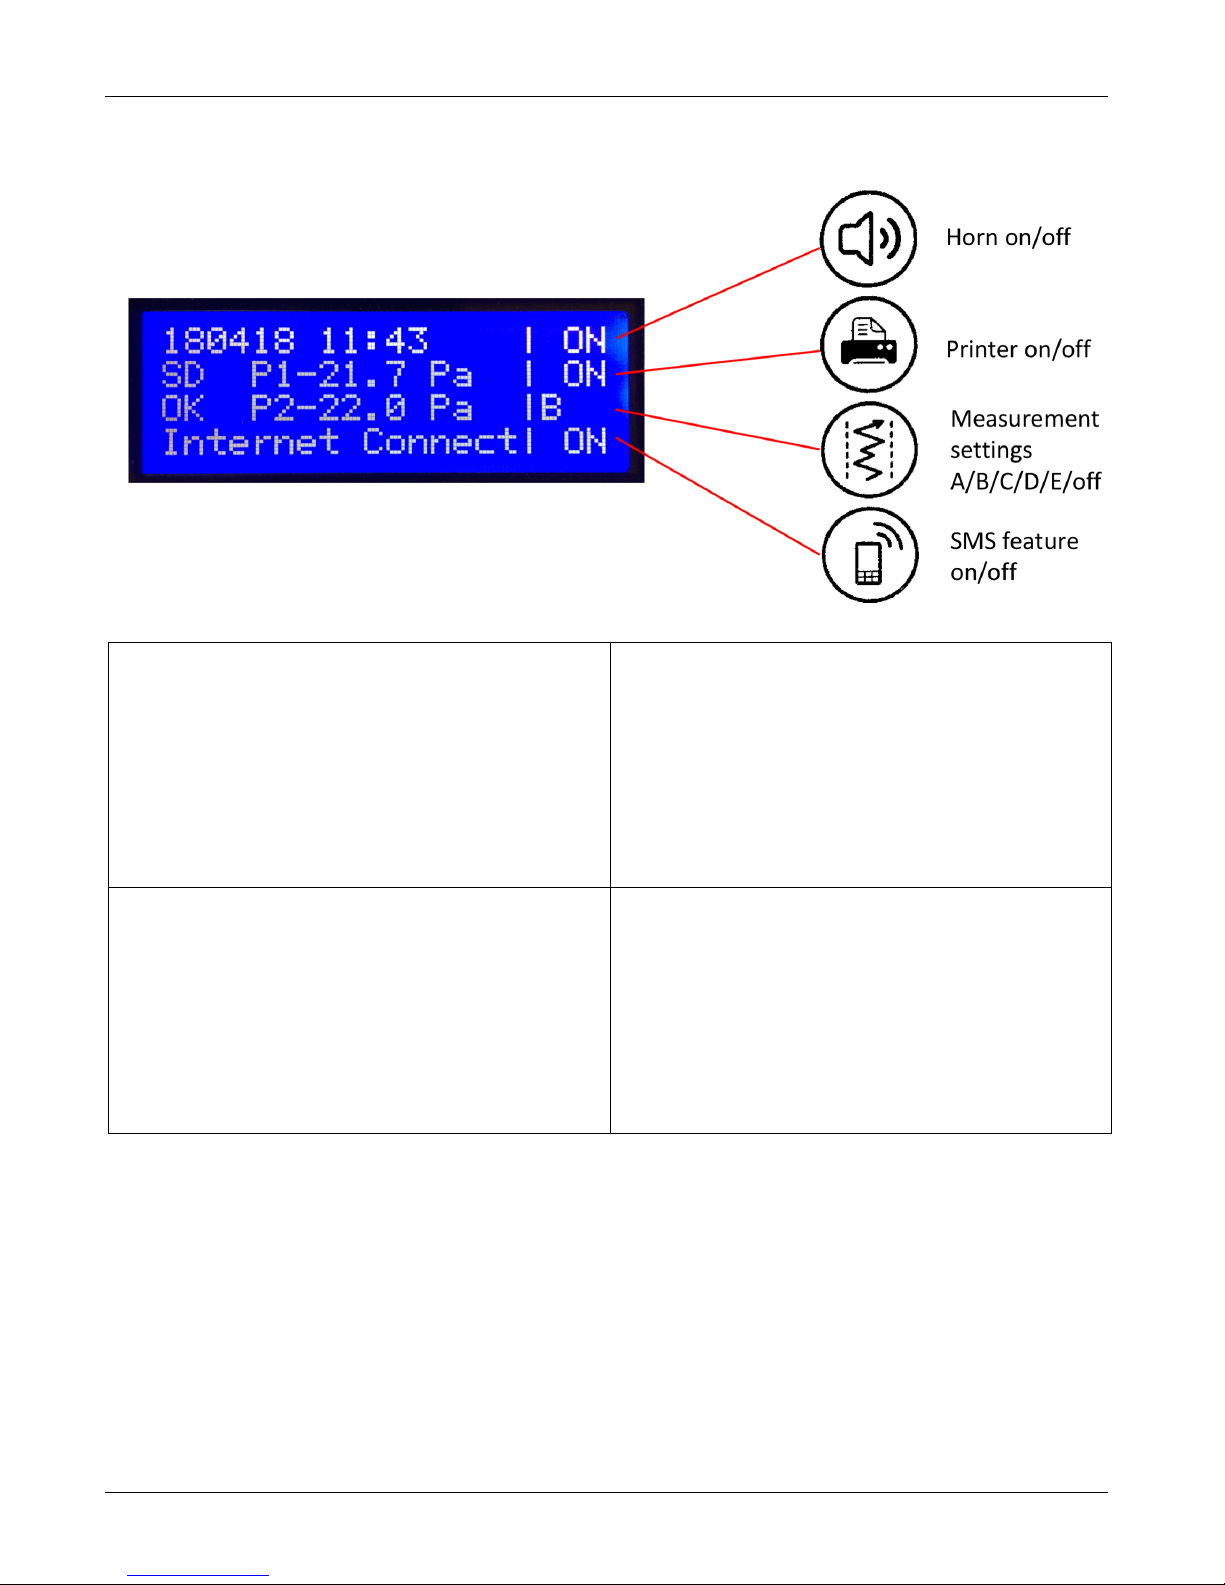
You do not use the supplied SD card. The display will show the percentage of the internal memory that is currently
in use. Before the internal memory is filled up completely (100%), you will need to copy your measurement data
onto the SD card (Menu; RESULTS > Copy memory). Once the internal memory is full, the monitor is no longer able
to store measurement data in this memory! As soon as you have copied the measurement data from the internal
memory to the SD card and checked whether all measurement data has been copied properly, you can delete the
internal memory without any data loss (see Menu; RESULTS > Clear memory).
Option 2:
You do use the supplied SD card. In that case, the monitor will automatically transfer the measurement data from
the internal memory to the supplied SD card every 24 hours. As such, the internal memory will never get full and all
of your measurement data is transferred to the supplied SD card in 24-hour chunks.
The display will show the indicator ‘SD OK’ when you switch it on, after which it will count down from 24 hours to 0
hours; once 0 is reached, the measurement data recorded in the last 24 hours will be transferred from the internal
memory to the SD card.
If you want to transfer data to the SD card in the meantime, you can do so manually (see Menu; RESULTS > Copy
memory). Always do so before copying measurement data to your PC, so that no measurement data is missing.
Install the Notepad++ program to be able to read out the SD card properly; see www.airtocheck.com >
‘support’.
Option 3:
You always have the option of printing out measurement data using the printer in the monitor. You can do so right
away while performing measurements as well as after the fact out of the monitor’s memory.
Web-based version:
If you use a web-based version in combination with an SMS & Data subscription or a Data subscription, your
measurement data will be submitted to the cloud immediately. You can then view the data in real time via the
Airtocheck website or app. Please make sure to check regularly whether the Internet connection is still intact.
If it is disconnected briefly (such as due to a malfunction), the monitor will supplement the missing data as
soon as the Internet connection has been re-established (firmware version 230318 or higher).
Please note! To restore missing measurement details, the monitor must not be switched off in the meantime.
Once you are sure that all measurement values have been submitted by the monitor and received by your
Airtocheck account, you are free to switch off the monitor without any data loss.
Please note! If you intend to use the monitor for longer stretches of time in a location without Internet access,
such as in a basement, make sure you store the measurement data on an SD card or print it.
Please note! You are personally responsible for creating backups and managing all of your measurement data.
Airtocheck cannot be held liable for any direct, indirect, or consequential damage resulting from your use of
the product.