Aito 16 Operating instructions

FI
Made by NARVI Oy Finland
EN
Aito 16 / 20 / 24 / 16 VS / 20 VS / 24 VS
Installation, user and maintenance instructions
version 1.1

Yrittäjäntie 14, FI-27230 Lappi • tel. +358 0207 416 740 • fax +358 0207 416 743 • www.narvi.fi/en
2
EN

Yrittäjäntie 14, FI-27230 Lappi • tel. +358 0207 416 740 • fax +358 0207 416 743 • www.narvi.fi/en Yrittäjäntie 14, FI-27230 Lappi • tel. +358 0207 416 740 • fax +358 0207 416 743 • www.narvi.fi/en 3EN
1.1 Technical data 4
2. Before you install the sauna heater 5
2.1 Steam room 5
2.2 Substrate 5
2.3 Safety clearances 5
2.4 Smoke ue 6
2.5 Ventilation 6
3. Installation and preheating
of the sauna heater 7
3.1 Preheating 7
3.2 Regulation of the height 7
3.3 Connection with the smoke ue 7
3.4 Changing of the opening direction
of the rebox door 7
3.5 Installation of the faucet, models
with a water tank (16 VS, 20 VS, 24 VS) 8
3.6 Sauna heater stones 8
4. Using the sauna heater 9
4.1 Firewood 9
4.2 Heating 9
4.3 Steam water 10
4.4 Removing the ashes 10
4.5 Maintenance of the sauna heater 10
4.6 Disposal 10
5. Soot fire 11
6. Frequently Asked Questions 11
7. Warranty 11
EN Content

Yrittäjäntie 14, FI-27230 Lappi • tel. +358 0207 416 740 • fax +358 0207 416 743 • www.narvi.fi/en
4
EN
Aito
16 / 20 / 24
16 VS / 20 VS / 24 VS
Introduction
Thank you for having chosen our continuous burning Aito
sauna heater. To make the most of your sauna heater
please read the manual carefully before you start installing
and using it and keep the manual for future reference. This
user manual contains technical data of your sauna heater
and installation, use and maintenance instructions.
The product is only meant to be used as a sauna heater
and for heating the sauna. Do not modify the design of
the sauna heater and use only spare parts and accessories
recommended by the manufacturer. The data plate includ-
ed in the delivery of the sauna heater must be glued on the
sauna heater, preferably on the lower part of the cover of
the sauna heater.
Do not heat the sauna heater if you lack sufcient knowl-
edge, if you are not allowed to use sauna because of your
health condition or you are under the inuence of sub-
stances causing intoxication. Sauna heaters must not be
used by underage people. Do not leave children in the
sauna without supervision. A sauna is not meant for drying
clothes.
Aito sauna heater 16 16 VS 20 20 VS 24 24 VS
Height (mm) 760 760 760 760 760 760
Adjustment range ± (mm) 15 15 15 15 15 15
Width (mm) 400 400 480 480 550 550
Depth (mm) 500 660 500 660 500 660
Diameter of the connective flue (mm) 119 119 119 119 119 119
Distance of the bottom edge of the
connective flue from the floor (mm) 555 555 555 555 555 555
Central point of the connection from
the above from the rear edge of the
sauna heater (mm)
115 115 115 115 115 115
Weight (without stones, kg) 59 70 65 77 68 80
Weight of the stones, 10–15 cm (kg) 50 50 60 60 80 80
Volume of the water tank - 19 l - 22 l - 26 l
Size of the steam room (m³) 8–16 8–16 10–20 10–20 12–24 12–24
Thickness of the cover of the furnace
(mm) 10 10 10 10 10 10
1.1 Technical data

Yrittäjäntie 14, FI-27230 Lappi • tel. +358 0207 416 740 • fax +358 0207 416 743 • www.narvi.fi/en Yrittäjäntie 14, FI-27230 Lappi • tel. +358 0207 416 740 • fax +358 0207 416 743 • www.narvi.fi/en 5EN
2. Before you install the
sauna heater
Before installing and using the sauna heater, make sure you
are thoroughly familiar with the requirements for installing
the sauna heater in the steam room. In case of questions
and for additional information do not hesitate to contact
the Rescue Board or a construction supervision authority.
When installing reboxes all local laws have to be followed,
including these referring to local and European standards.
2.1 Steam room
If the walls of a steam room are made of uncovered glass,
brick or concrete add 0.8–1.5 m3 per square meter of such
wall and the nal choice of the heater shall be made based
on the sum of the area. If the heater is installed in a sauna
that is normally not heated or the sauna is made of mas-
sive logs, multiply the sauna area with 1.5 and choose the
heater based on this. The recommended area of a steam
room is indicated in clause 1.1. Please follow the values for
the minimum area stipulated for the steam room.
We recommend choosing a sauna heater with a slightly
bigger power to ensure proper heating of the sauna and to
avoid heating the sauna heater to its upper limit. A slightly
bigger power ensures longer lifetime of the sauna heater
and provides better steam thanks to bigger quantity of
stones.
2.2 Substrate
A rebox must be installed on the oor with sufcient
load-bearing capacity. The durability of the oor must be
checked especially carefully, when the sauna heater is in-
stalled on a wooden oor. The weight of the sauna heater
is shown in clause 1.1.
CONCRETE FLOOR
The sauna heater may be installed directly on a concrete
oor, which is at least 50 mm thick. If underoor heating
cables or pipes are located under the sauna heater, Kota
installation base must be used to protect them from the
thermal radiation of the sauna heater.
FLOOR MADE OF COMBUSTIBLE MATERIAL OR A TILED FLOOR,
UNDERFLOOR HEATING
A Kota installation base must be installed under the sauna
heater, which will protect the oor, moisture barrier and un-
deroor heating pipes or cables from the thermal radiation
of the sauna heater.
2.3 Safety clearances
When installing the sauna heater, safety clearances must
be considered with. Ignorance of safety clearances causes
re hazard. If required, additional information can be ob-
tained from the regional branch of the rescue board.
2.3.1 Structure made of combustible materials
The safety clearances are the minimum allowable dis-
tances between the sauna heater and structures made of
combustible materials. Please observe the stipulated re-
quirements regarding walls, oors, sauna benches, other
inventories and storage areas of rewood!
Structure Safety clearance
Top surface 1270 mm
Front surface 500* mm
Side surface 300 mm
Back surface 200 mm
*We recommend leaving 1000 mm maintenance area in
front of the sauna heater.
The safety clearance with the sides and the back can be re-
duced by 50% when a single protective screen is used and
by 25% when a double protective screen is used. Yet the
gap between the sauna heater and the protective screen
must always be at least 50 mm. The safety clearance be-
tween the sauna heater and the ceiling can be reduced by
a maximum of 300 mm when a single protective screen is
used. It is not permitted to use a double protective screen
in the ceiling.
A single light protective screen can be made of a non-
combustible, bre-reinforced cement plate that is at least
7 mm thick or a metal plate that is at least 1 mm thick,
which is attached to the wall sufciently tight. An air gap
of at least 30 mm must be left between the surface to be
protected and the screen.
A double protective screen can be made of the two
abovementioned boards. Ain air gap of at least 30 mm
must be left between the screens and the wall. There must
be a gap between the protective screeds and the oor and
ceiling so that air can circulate and cool the gaps between
the screens. 120 mm masonry structure in the distance of
30 mm from the surface to be protected corresponds to a
double protective screed. We recommend using of factory-
made double Kota protective screeds.

Yrittäjäntie 14, FI-27230 Lappi • tel. +358 0207 416 740 • fax +358 0207 416 743 • www.narvi.fi/en
6
EN
Protecting a floor made of combustible material
Figure 3. If the sauna heater is installed on a oor made of
combustible materials, an installation base must be used.
A piece of sheet metal must be installed in front of the in-
stallation base, which extends at least 100 mm over the
sides of the heater door and at least 400 mm in front of
the sauna heater. The sheet metal edges facing the sauna
heater must be turned up, so that coal cannot get under
the installation base.
Please observe that the safety clearance of an uninsu-
lated smoke ue from structures made of combustible
materials is 1000 mm or any other distance stipulated in
the manufacturer’s instructions.
2.3.2 Non-combustible structure
If the wall is masonry or other structure classied as non-
combustible, it is sufcient to have a 50 mm air gap be-
tween the upright surfaces and the wall.
2.4 Smoke flue
A smoke ue of the sauna heater must meet the require-
ments of class T600 irrelevant of the material of the smoke
ue. The minimum recommended draft of the smoke ue
is 12 Pa.
A modular smoke ue must meet the requirements of class
T600 and provided with CE-marking. When installing a
modular smoke ue safety clearances stipulated in the in-
stallation manual of the smoke ue shall be followed. The
minimum recommended diameter of a modular smoke ue
is 120 mm. The weight of the smoke ue must not cause
load on the sauna heater. The sauna heater should be con-
nected to a separate smoke ue. A smoke ue made of
bricks must be at least the so-called half-brick smoke ue.
2.5 Ventilation
Ventilation of the steam room should be sufciently ef-
cient and should function so, that fresh incoming air
is routed as close to the sauna heater as possible. Also
proper air circulation has to be provided in the steam room
during using the sauna so that air can exit from under the
sauna bench or from under the door of the washing room
(sufcient gap).
Extraction fans working in the same room as the rebox
may cause problems. Inlets of incoming air should be lo-
cated so that they do not get blocked (for instance because
of snow). A rebox needs combustion air in a volume of
6–10 m3 per kilo of red wood. The diameter of the ventila-
tion opening must be at least 100 mm. Forced air system
should be built according to the design prepared by the
designer of the heating, water and ventilation systems.
There shall be a possibility to ventilate sauna rooms after
using the sauna and to dry the rooms so that air will exit via
the upper part of the steam room.
Figure 3.

Yrittäjäntie 14, FI-27230 Lappi • tel. +358 0207 416 740 • fax +358 0207 416 743 • www.narvi.fi/en Yrittäjäntie 14, FI-27230 Lappi • tel. +358 0207 416 740 • fax +358 0207 416 743 • www.narvi.fi/en 7EN
3. Installation and
preheating of the sauna
heater
3.1 Preheating
Before use and arranging the stones, the sauna heater
must be heated to remove the protective agents. Any pro-
tective lms and stickers must have been removed before.
Preheating shall be carried out on a non-combustible
surface and outside, since paint emits harmful solvent
vapours and smoke during the heating. Use of a connec-
tion pipe included in the delivery of the sauna heater in the
upper joint (see item 1 of the attached drawing) improves
draft during preheating. 1–2 reboxes of wood are suf-
cient for preheating. After preheating and before arranging
the stones loose cover material should be removed from
the stone compartment of the sauna heater with a steel
brush. In case the external surface of the sauna heater is
painted, it should not be rubbed or wiped before the rst
heating. The paint of the sauna heater will achieve suf-
cient strength only after the rst heating. Do not create
steam during the rst heating.
NB! If the sauna heater is equipped with a water tank
please check before preheating that the water tank faucet
and safety plug are installed and that the tank is filled with
clean water.
3.2 Regulation of the height
The legs of the sauna heater are adjustable and can be
used for levelling the sauna heater and for adjusting the
height. There must be an air gap of at least 25 mm between
the sauna heater and the oor. Use a spirit level to check if
the sauna heater is level.
3.3 Connection with the smoke flue
The sauna heater can be connected to the smoke ue from
the back or top of the sauna heater. Seal the unused open-
ing with the supplied cover. The sauna heater comes with
a short smoke ue connection pipe, which can be used to
connect the smoke ue of the sauna heater from the back.
If the connection with the smoke ue is done from the
above, Kota connective ue or Kota smoke ue must be
used. In case of connection from the above, a Kota smoke
ue tank for heating water or a Kota stone basket can be
installed around the connective ue.
Do not push the connective ue too deep in the smoke
ue, because this would hinder the draft. Any leaks in the
connective ue also reduce the draft; therefore, the con-
nections must be sealed with reproof sealing material.
Leakage in the connective flue cause combustion gas-
es formed in the sauna heater to ignite in the flue. The
connection joint of the ue and the sauna heater must be
25 mm. The diameter of the connective ue of the sauna
heater and the height from the oor are shown in clause
1.1.
Please consider with the clearance distance of the modular
smoke ue, see the manufacturer’s instructions.
Item 1. Main connection of the smoke ue
Item 2. Cleaning hatch
Item 3. Stones to be installed under the smoke channel
and central opening
3.4 Changing of the opening direction of the
firebox door
Figure 4. Open the door and raise the hinge pin up (1)
so it comes out of the bottom hinge barrel. Hold onto
the door securely and turn the bottom part of the pin
and turn the bottom end of the pin up enough (2) that
you can pull the pin down (3) and the pin and door
come apart.
Figure 5. On the side of the door with the handle, undo
the fastening screw of the handle so that the handle
comes loose. Turn the handle around and reattach the
locking screw.
Figure 4. Figure 5.

Yrittäjäntie 14, FI-27230 Lappi • tel. +358 0207 416 740 • fax +358 0207 416 743 • www.narvi.fi/en
8
EN
Figure 6. On the inside edge of the door opening, undo the
limiter screw on the hinge side (1). Release the locking pin
(2) on the outer edge of the rebox door on the handle side
(2) with the help of an 8-mm open-end wrench. Remember
the correct sequence of the parts. Attach the locking pin to
the opposite side of the door opening and tighten it with
the open-end wrench. Do not tighten the screw so much
that the bushing of the locking pin locks. Attach the limiter
screw to the opposite inner side of the door opening.
Figure 7. Position the door so that the hinge holes coincide
with the hinge pins. Position the hinge pin so that the lock-
ing tab comes down and push the hinge pin through the
upper hinge hole (1). Push the hinge pin through the hinge
holes in the bottom edge (2) and let it down into place (3)
on top of the locking tab. Carefully open the door. If the
door hits the water tank when it opens, tighten the limiter
screw. You can adjust the opening angle of the door with
the limiter screw. Make sure that the locking pin of the han-
dle is working properly and if necessary adjust it with an
open-ended wrench.
3.5 Installation of the faucet, models with a
water tank (16VS, 20VS, 24VS)
The water tank is in front of the sauna heater and it has
a large opening for lling it. For the water volume, see
clause 1.1. The faucet is installed when the sauna heater
is installed, either on the left or right side of the sauna
heater.
Figure 8.
Place the faucet on the desired side, so that the
threads are visible on the inside of the tank. Place the washer
on the outside of the tank, turn the locking nut into place
with the smooth side against the washer and tighten, turning
Figure 8.
the faucet clockwise and holding the keeper in place with a
wrench.
3.6 Sauna heater stones
We recommend you use Kota olivine-diabase sauna heat-
er stones. Natural stones are not suitable to be used as
sauna heater stones. Before using the stones, they must
be washed to eliminate any impurities. Stack the larger
stones on the bottom with a layer of stones on top that
is sufficiently sparse that it does not hinder the circula-
tion of air through the sauna heater. The stones must
not block air openings and stones must not be stacked
over the top surface of the sauna heater. For the recom-
mended quantity of stones see clause 1.1. Additional
instructions for stacking stones are included in clause
3.3. Use of lightweight stones is forbidden.
Figure 6. Figure 7.

Yrittäjäntie 14, FI-27230 Lappi • tel. +358 0207 416 740 • fax +358 0207 416 743 • www.narvi.fi/en Yrittäjäntie 14, FI-27230 Lappi • tel. +358 0207 416 740 • fax +358 0207 416 743 • www.narvi.fi/en 9EN
4. Using the sauna
heater
4.1 Firewood
Both hardwood and softwood can be used to heat the
sauna heater. The use of chipboard, breboard, painted
or impregnated wood, waste or plastics is prohibited. To
ensure clean burning and the largest possible efciency,
the wood must be dry. The moisture content of the wood
must be less than 20%. Normally good rewood is sticks
of wood the diameter of which is around 5 cm, length
around 33 cm and weight around 0.5 kg.
Use of liquid fuel is strongly forbidden, also during ignition!
4.2 Heating
Before heating, make sure that there is no combustible
material within the safety clearances. Also make sure that
the ash drawer and re grate are clean and if the sauna
heater is provided with a water tank, that it is lled with
clean water. Check if there is sufcient draft in the smoke
ue. If you hesitate regarding the draft, check it by burning
a small quantity of paper in the rebox rst. During heating
the door of the rebox must be closed and the water tank
must be lled with water. The sauna heater must not be
covered with anything.
To start heating pile rewood over a sufciently wide area
and ignite it from above. For ignition you may use birch
bark or paper. Ignition aid should be placed between the
upper rewood and it can be topped with some thinner
wood sticks or rewood (see drawing 9). Igniting from
above reduces pollution and ensures cleaner burning.
The power of the sauna heater can be regulated with the
ash drawer. If the ash drawer is closed, the power of the
sauna heater is at its lowest and the burning time is longer.
If the sauna heater soughs too much, reduce the draft. To
do this close the ash drawer half way or completely. This
way heat reaches better the sauna heater, stones can store
heat and you do not just heat up the ue. A calm ame is
a sign of a correct draft. Avoid heating the sauna heater so
that the channels of the stone basket glow red for a long
time because this will overload the rebox and the service
life of the sauna heater will be reduced. Overheating may
also cause excessive heating of the smoke ue and cause
re hazard. The connective ue pipe must not be glowing
red.
Figure 9. Proper stacking of rewood.
The following table shows the recommended quantities of
rewood for different types of sauna heaters and positions
of the ash drawer. The values shown in the table meet the
values of the nominal power test pursuant to the standard
EN15821. In the test the size of the sauna was determined
based on the maximum area for the given sauna heater and
Aito sauna heater 16 16VS 20 20VS 24 24VS
1. quantity
quantity of rewood (kg) 4 4 3,5 3,5 4,5 4,5
opening of the ash drawer (mm) 20 20 20 20 20 20
1. addition
quantity of rewood (kg) 33333,5 3,5
opening of the ash drawer (mm) 10 10 10 10 10 10
2. addition
quantity of rewood (kg) - - 2,5 2,5 3,5 3,5
opening of the ash drawer (mm) - - 10 10 10 10
max kg/h 66778 8
Heating of the sauna:
Figure 9.
(The cleaved log that is about 5 cm in diameter and about 33 cm long weighs about 0.5 kg)

Yrittäjäntie 14, FI-27230 Lappi • tel. +358 0207 416 740 • fax +358 0207 416 743 • www.narvi.fi/en
10
EN
temperature of 90 °C was achieved in the sauna. During first
times we recommend using less firewood for achieving
the desired temperature than the values presented in the
table. Maximum quantity of firewood per hour (max. kg/h)
indicated in the table must not be exceeded.
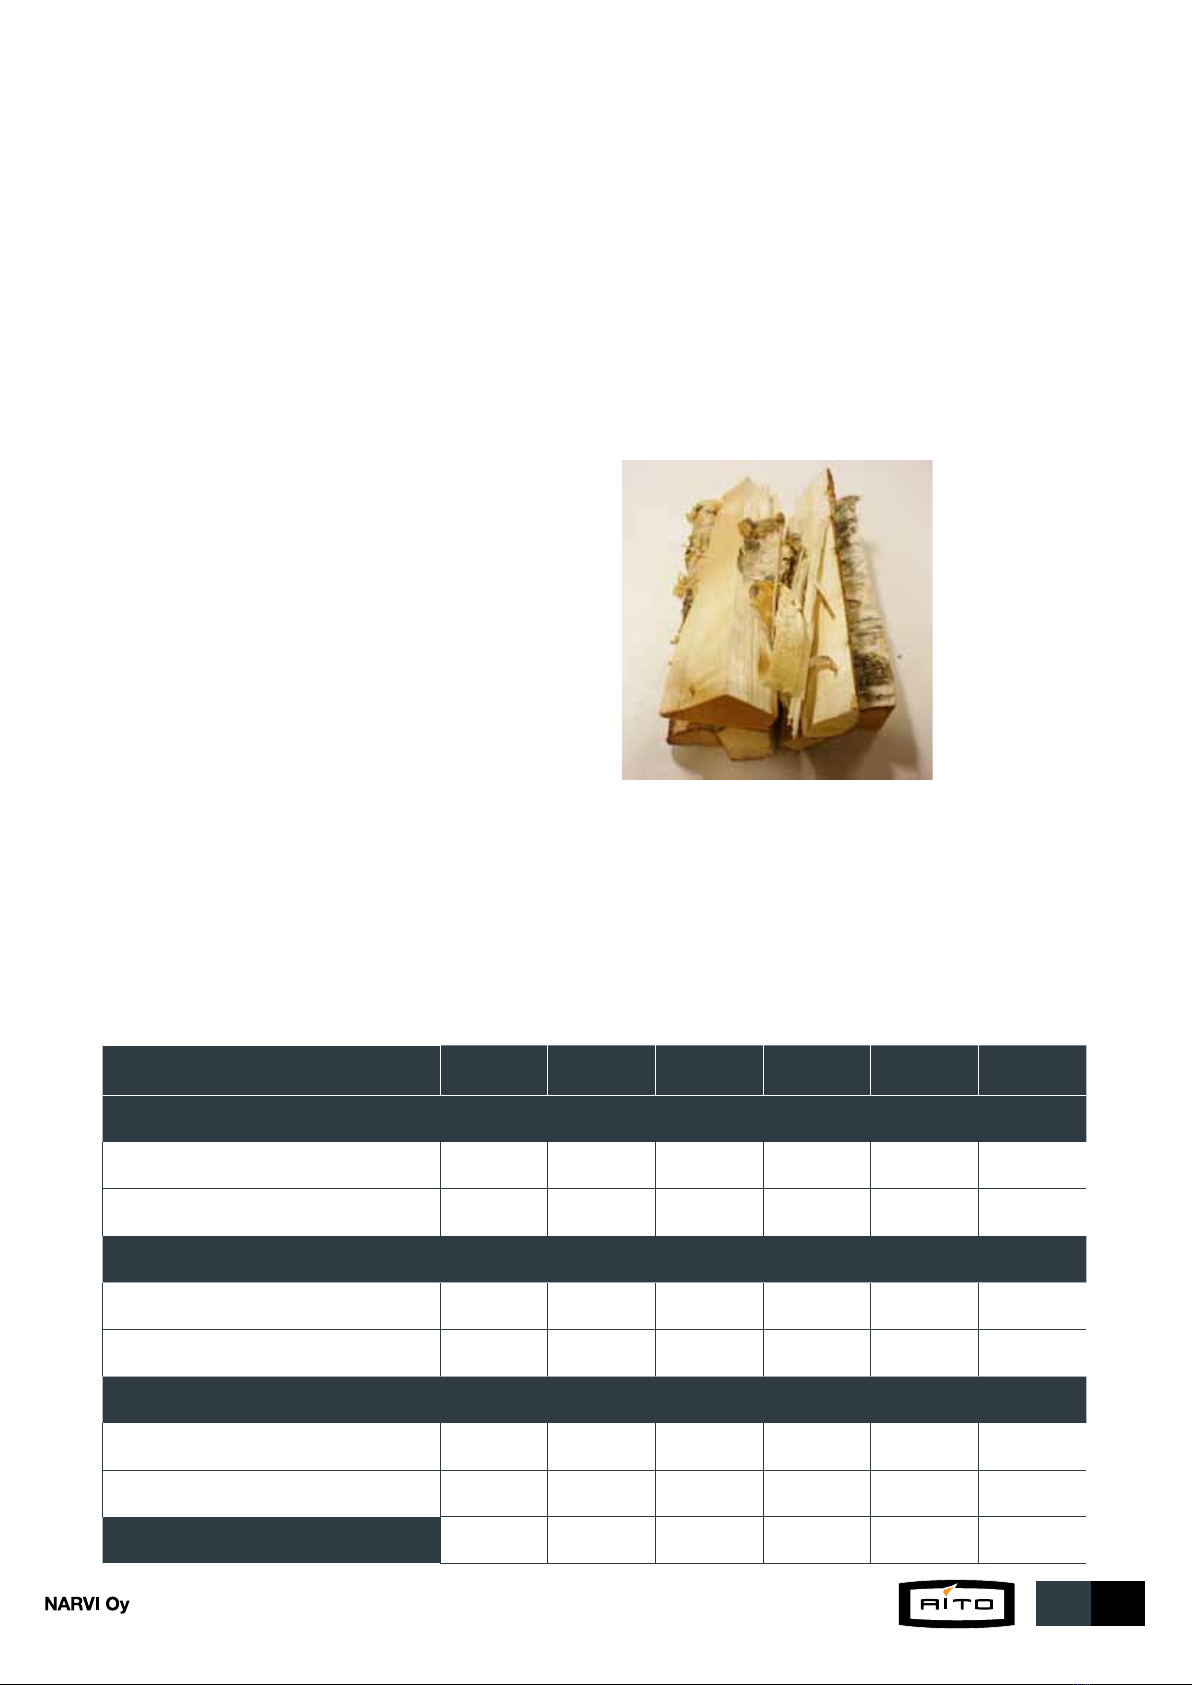
Do not stack rewood in the rebox over 2/3 of its height.
Quantities of rewood are shown in clause 4.1. In the ignition
phase the ash drawer can be kept open by 10 mm more than
indicated in the table. After igniting put the ash drawer back in
the position as shown in the table.
In a sauna heater equipped with a water tank or in a sauna
heater that is heated from another room rewood should
not be burnt in the front part of the rebox / in the extension,
but the rewood must be placed entirely on the grate of the
rebox.
Do not forget that the sauna heater and its part become
very hot during heating. When you need to touch the
parts of the sauna heater, always use protective gloves.
When moving around in the sauna be careful, because
the floor and the ceiling of the sauna may be slippery.
Be careful – water in the water tank of the sauna heater
may be very hot.
One rebox of rewood burns approximately half an hour.
Good time for adding rewood is when there are still some
blue ames on coal in the rebox. Before adding rewood you
may even slightly coal on the grate. If rewood is added in the
ames too early, the temperature of fume gases increases. Do
not use the door to push rewood in the rebox.
In case sauna is used or the sauna heater is heated also after
recommended number of times rewood should be added as
stated in the table, rewood should not be added according
to the quantities mentioned in the table. A proper quantity
for keeping heat is 1-2 logs (approximately 1 kg of rewood)
every half an hour. The ash drawer may be closed a bit. If you
add a big quantity of rewood, the temperature of ue gases
rises and this can damage the smoke ue and cause re haz-
ard. But do not heat continuously over 3 hours. Thereafter, the
sauna heater must be let cool down before the next heating.
In case sauna will not be used any longer and coal is still
glowing without ame, extinguishing can be speeded up by
increasing the draft. For this open the ash drawer by 10-20
mm. There is enough heat accommodated in the stones of
the sauna heater to dry the sauna room.
In ignition phase the closing pan must be fully open. Before
you close the closing pan after heating, check that there is no
glowing coal in the rebox. Otherwise fumes may be released
in the sauna. Carbon monoxide is an odourless and colour-
less toxic gas.
If you have not used the sauna heater and smoke ue for a
longer period or it is cold, please check before use that the
smoke ue is in proper order and that there are no corrosion
damages on the sauna heater. Start heating very slowly and
with small quantity of rewood so that not to damage the
smoke ue.
4.3 Steam water
Use normal domestic water for steam water.
Quality requirements for domestic water:
humus content < 12 mg/l
iron content < 0.2 mg/l
calcium content < 100 mg/l
manganese content < 0.05 mg/l
Do not use sea water or other salty water. Also do not use
water containing chlorine. The warranty of the sauna heater
does not cover damages caused by the use of unsuitable
steam water. Do not throw water on the stones, if you yourself
or somebody else is straight by the sauna heater. Hot water
steam may cause burns.
4.4 Removing the ashes
The ash drawer must be emptied every time before heating
the sauna heater. The ash drawer must be emptied immedi-
ately, if ashes ll more than half of the drawer. Otherwise, the
airow through the rebox grate will be hindered, which will
shorten the life of the grate.
The ash drawer must be emptied in a non-combustible con-
tainer (for instance metal bucket) after ash has cooled down.
Do not leave the ash bucket standing by the wall (for instance
on the terrace). If the smoke ue is equipped with a closing
pan, it should be opened for the time ash is removed. Dust
will escape with the draft.
4.5 Maintenance of the sauna heater
Besides removing the ashes and having the chimney annually
cleaned by a chimney sweep, the sauna heater requires no
other maintenance. To open the cleaning hatch of the sauna
heater, the upper stones have to be removed from the sauna
heater.
The stones of the sauna heater have to be re-arranged once
per year and replaced every other year. Cracking stones col-
lapse and fall lower, some stones will erode. Remove eroded
and broken stones. Due to insufcient maintenance the
sauna heater needs more time for heating, which in its turn
causes load on the structure of the sauna heater. The enamel
surface of the sauna heater should be cleaned regularly with
a damp cloth.
Also the water tank of the sauna heater should be regularly
cleaned. Use only clean water to ll the tank. If there is a dan-
ger that water can freeze, the water tank should be emptied.
4.6 Disposal
For disposal take the sauna heater to the public waste
recycling centre.

Yrittäjäntie 14, FI-27230 Lappi • tel. +358 0207 416 740 • fax +358 0207 416 743 • www.narvi.fi/en Yrittäjäntie 14, FI-27230 Lappi • tel. +358 0207 416 740 • fax +358 0207 416 743 • www.narvi.fi/en 11 EN
5. Soot fire
IN CASE OF SOOT FIRE (ALSO IF IT
HAS ALREADY BEEN EXTINGUISHED)
ALWAYS INFORM THE EMERGENCY
CENTRE!
!
If you detect soot re in the smoke ue, close immediately
the ash drawer and the door of the rebox. After sooth
re and before the next use of the sauna let a chimney-
sweeper check the condition of the smoke ue and the
sauna heater.
6. Frequently Asked
Questions
The sauna heater is drafting poorly
• The sauna heater has not been used in a long time;
the smoke ue and sauna heater are damp.
• The sauna heater is not receiving sufcient air; there is
a downdraft in the sauna caused by ventilation.
• The sauna heater has not been cleaned in a long time.
• The ash drawer is closed or full of ashes.
• Leakage in the connective ue.
The sauna does not heat up properly
• The rewood is damp.
• The sauna heater has insufcient power.
• The sauna heater or smoke ue is drafting poorly.
• The stones of the sauna heater are dirty or crumbling
or stacked too tight.
• There are too many stones or there are too many small
stones.
The sauna heater smells
• The sauna heater has not been properly heated the
rst time it was done.
• The stones of the sauna heater were not washed
before loading.
• Fats or other dirt has accumulated on the stones.
• Steam water is not clean.
7. Warranty
Pursuant to consumer protection legislation Aito sauna
heaters’ warranty period is two years. The warranty
covers normal family use provided use, installation and
maintenance meet the requirements stipulated in the
instructions.
The warranty period starts form the moment that the goods
are delivered to the end user. The supplier is not liable in
any way for the defects within the framework of the war-
ranty or other defects that appear later than two (2) years
after the delivery of the goods to the client.
The supplier may decide to either repair the defective goods
or replace the defective goods at its own direction. The
warranty does not cover possible transport, unloading or
installation costs or other similar costs. A receipt from the
company selling the product serves as proof of warranty.
The client must check the goods immediately after delivery.
The client must submit a written notice of claims to the sup-
plier within two (2) weeks of discovering the defect or the
moment when the defect should have been discovered.
Use only accessories approved by the manufacturer with
this product. Failure to comply with the manual or re safety
regulations can result in a re or damage to the sauna heat-
er. More detailed information about the re safety regula-
tions can be obtained from the regional branch of the rescue
board, for instance.
The product shall be carefully inspected. Improper use of
the product is for instance wrong adjustment of the draft,
too big quantity of rewood burnt in the rebox, too long
heating time, wrong arrangement of stones (too much or too
tight) and use of salty water ( for instance sea water). The
warranty does not cover damages caused by improper use
of the sauna heater.

Yrittäjäntie 14, FI-27230 Lappi • tel. +358 0207 416 740 • fax +358 0207 416 743 • www.narvi.fi/en
12
EN
Narvi Oy
12
EN 15821:2010
Multi-ring sauna stoves red by natural wood logs
for space heating in residential buildings
Aito 16
Fire safety (initiation, risk to adjacent
elements)
Pass
- including declared safety
distances to combustible
materials:
Emission of combustible products
Durability
Surface temperature
Release of dangerous substances
Cleanability
Flue gas temperature
Mechanical resistance
Thermal output and
Energy eciency, as:
- carbon monoxide emission at 13 % O
- total eciency
- ue draught
- refuelling loads
- thermal output
(i.e. nominal space heating output)
Back
Side
Ceiling
200 mm
300 mm
1 200 mm
Pass
Pass
NPD
Pass
Pass (0,40 %)
Pass (69 %)
12 Pa
20 kW
7 kg
Pass
Pass
427 C
Narvi Oy
12
EN 15821:2010
Multi-ring sauna stoves red by natural wood logs
for space heating in residential buildings
Aito 24
Fire safety (initiation, risk to adjacent
elements)
Pass
- including declared safety
distances to combustible
materials:
Emission of combustible products
Durability
Surface temperature
Release of dangerous substances
Cleanability
Flue gas temperature
Mechanical resistance
Thermal output and
Energy eciency, as:
- carbon monoxide emission at 13 % O
- total eciency
- ue draught
- refuelling loads
- thermal output
(i.e. nominal space heating output)
Back
Side
Ceiling
200 mm
300 mm
1 270 mm
Pass
Pass
NPD
Pass
Pass (0,8 %)
Pass (68 %)
12 Pa
22 kW
11.5 kg
Pass
Pass
424 C
Narvi Oy
12
EN 15821:2010
Multi-ring sauna stoves red by natural wood logs
for space heating in residential buildings
Aito 20
Fire safety (initiation, risk to adjacent
elements)
Pass
- including declared safety
distances to combustible
materials:
Emission of combustible products
Durability
Surface temperature
Release of dangerous substances
Cleanability
Flue gas temperature
Mechanical resistance
Thermal output and
Energy eciency, as:
- carbon monoxide emission at 13 % O
- total eciency
- ue draught
- refuelling loads
- thermal output
(i.e. nominal space heating output)
Back
Side
Ceiling
200 mm
300 mm
1 270 mm
Pass
Pass
NPD
Pass
Pass (0,6 %)
Pass (68 %)
12 Pa
21 kW
9.3 kg
Pass
Pass
426 C
NARVI Oy reserves the right to any changes to technical details.
Other manuals for 16
1
This manual suits for next models
5
Table of contents
Popular Plumbing Product manuals by other brands

baliv
baliv WT-363 instruction manual

Symmons
Symmons 0142-01-L/HD-TRM installation guide

KWC
KWC F5 ACST2001 Installation and operating instructions

KWC
KWC ONO 20.152.412 Installation and service instructions

American Standard
American Standard 1660 Specifications

Oxygenics
Oxygenics SkinCare Easy installation instructions

WimTec
WimTec OCEAN U4 Series Assembly and operating instructions

CDA
CDA VSK1 Use and maintenance

American Standard
American Standard Enfield Diverter Trim Kit T373430 parts manual

Signature Hardware
Signature Hardware GREYFIELD 948555 manual

UFactory
UFactory xArm 6 user manual

Spectrum Brands
Spectrum Brands Pfister Contempra LG42-NC00 Quick installation guide