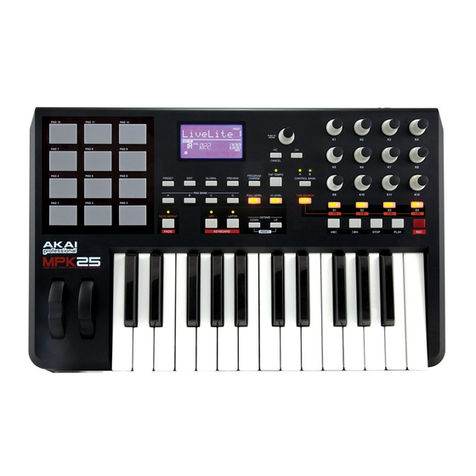
Akai MPK mini MK3 User manual

Confidential Akai Professional Service Manual
Akai Professional
MPK mini MK3 (White)
[AD20W]
Service Manual
v1.0
The information in this document contains privileged and confidential information. It is intended
only for the use of those authorized by Akai Professional. If you are not the authorized, intended
recipient, you are hereby notified that any review, dissemination, distribution or duplication of this
document is strictly prohibited. If you are not authorized, please contact Akai Professional and
destroy all copies of this document. You may contact Akai Professional at support@akaipro.com.
© Copyright Akai Professional
ATTENTION!
This document contains sensitive proprietary information.
All recipients must have a current non-disclosure agreement
on file with Akai Professional.
Do not make illegal copies of this document.

Confidential Akai Professional Service Manual
Preface
This document is intended to assist the service technician in the operation, maintenance and repair
of the Akai Professional device. Together with the User Reference Manual, this document provides
a complete description of the functionality and serviceability of the Device. Any comments or
suggestions you may have pertaining to the document are welcome and encouraged.
Read This!
In addition to any purchase price that Akai Professional may charge as consideration for Akai
Professional selling or otherwise transferring this service manual (“Manual”) to you, if you are not
a service and repair facility (“Service Center”) authorized by Akai Professional in writing to be an
authorized Service Center, Akai Professional sells or transfers the Manual to you on the following
terms and conditions:
Only Service Centers authorized by Akai Professional in writing are authorized to perform service
and repairs covered by an Akai Professional warranty (if any), and transfer of the Manual to you
does not authorize you to be an authorized Service Center. Therefore, if you perform, or if the
Manual is used to perform, any service or repairs on any Akai Professional product or part
thereof, any and all warranties of Akai Professional as to that product and any service
contract with Akai Professional for that product shall be voided and shall no longer apply
for such product, even if your services or repairs were done in accordance with the Manual.
All service or repairs done by you or with reference to the Manual shall be solely your
responsibility, and Akai Professional shall have no liability for any such repairs or service work.
All such service or repairs are performed at the sole risk of the person performing the
service or repairs. You agree that all such work will be performed in a competent, professional
and safe manner at all times and to indemnify and fully hold Akai Professional and its successors
and assigns harmless in the event of any failure to so perform.
Your purchase of the Manual shall be for your own ultimate use and shall not be for purposes of
resale or other transfer.
As the owner of the copyright to the Manual, Akai Professional does not give you the right to
copy the Manual, and you agree not to copy the Manual without the written authorization of Akai
Professional. Akai Professional has no obligation to provide to you any correction of, or
supplement to, the Manual, or any new or superseding version thereof.
Akai Professional shall have the right to refuse to sell or otherwise transfer repair parts or
materials to you in its sole discretion. You shall not use, sell or otherwise transfer spare or
replacement parts supplied by Akai Professional to you (i) to repair or be used in products
manufactured for or by third parties or (ii) to any third parties for any purpose.
You shall not make any warranties or guarantees with respect to the products of Akai
Professional or the use thereof on behalf of Akai Professional or in your own name.
The foregoing describes the entire understanding related to sale or transfer of the Manual to you,
and no other terms shall apply unless in a writing signed by an authorized representative of Akai
Professional.
All Trademarks are property of their respective companies.


Confidential Akai Professional Service Manual
Warnings
TO REDUCE THE RISK OF ELECTRIC SHOCK OR FIRE, DO NOT EXPOSE THIS
PRODUCT TO WATER OR MOISTURE.
The arrowhead symbol on a lightning flash inside a triangle is intended to
alert the user to the presence of uninsulated “dangerous voltage” within the
enclosed product which may be of sufficient magnitude to constitute a risk
of electric shock to persons.

The exclamation point inside a triangle is intended to alert the user to the
presence of important operating, maintenance and servicing instructions in
the literature which accompanies the product.
REPAIR BY ANY PERSON OR ENTITY OTHER THAN AN AUTHORIZED AKAI
PROFESSIONAL SERVICE CENTER WILL VOID THE AKAI PROFESSIONAL
WARRANTY.
PROVISION OF THIS MANUAL DOES NOT AUTHORIZE THE RECIPIENT TO
COMPETE WITH ANY AKAI PROFESSIONAL DISTRIBUTOR OR AUTHORIZED
REPAIR SERVICE CENTER IN THE PROVISION OF REPAIR SERVICES OR TO BE
OR MAKE REPAIRS AS AN AUTHORIZED SERVICE CENTER.
ALL REPAIRS DONE BY ANY ENTITY OTHER THAN AN AUTHORIZED AKAI
PROFESSIONAL SERVICE CENTER SHALL BE SOLELY THE RESPONSIBILITY OF
THAT ENTITY, AND AKAI PROFESSIONAL SHALL HAVE NO LIABILITY TO THAT
ENTITY OR TO ANY OTHER PARTY FOR ANY REPAIRS BY THAT ENTITY.
Regarding the Power Supply Fuse
Caution: The product under service may employ the use of a replaceable
fuse. Danger of fire or electrocution if fuse is incorrectly replaced. Replace
with only the same type or equivalent type recommended by the
equipment manufacturer.
Regarding the Internal Battery
Caution: The product under service may employ the use of a internal
battery. Danger of explosion if battery is incorrectly replaced. Replace only
with the same or equivalent type recommended by the manufacturer.
Dispose of used batteries according to the manufacturer’s instruction.

Confidential Akai Professional Service Manual
Safety Instructions
Carefully read the applicable items of the operating instructions and these safety suggestions
before using this product. Use extra care to follow the warnings written on the product itself and
in the operating instructions. Keep the operating instructions and safety suggestions for
reference in the future.
1. Power Source. The product should only be connected to a power supply which is
described either in the operating instructions or in markings on the product.
2. Power Cord Protection. AC power supply cords should be placed such that no one is likely
to step on the cords and such that nothing will be placed on or against them.
3. Periods of Non-use. If the product is not used for any significant period of time, the
product’s AC power supply cord should be unplugged from the AC outlet.
4. Foreign Objects and Liquids. Take care not to allow liquids to spill or objects to fall into
any openings of the product.
5. Water or Moisture. The product should not be used near any water or in moisture.
6. Heat. Do not place the product near heat sources such as stoves, heat registers, radiators
or other heat producing equipment.
7. Ventilation. When installing the product, make sure that the product has adequate ventilation.
Improperly ventilating the product may cause overheating, which may damage the product.
8. Mounting. The product should only be used with a rack which the manufacturer
recommends. The combination of the product and rack should be moved carefully. Quick
movements, excessive force or uneven surfaces may overturn the combination which may
damage the product and rack combination.
9. Cleaning. The product should only be cleaned as the manufacturer recommends.
10. Service. The user should only attempt the limited service or upkeep specifically described in
the operating instructions for the user. For any other service required, the product should be
taken to an authorized service center as described in the operating instructions.
11. Damage to the Product. Qualified service personnel should service the unit in certain
situations including without limitation when:
a. Liquid has spilled or objects have fallen into the product,
b. The product is exposed to water or excessive moisture,
c. The AC power supply plug or cord is damaged,
d. The product shows an inappropriate change in performance or does not operate
normally, or
e. The enclosure of the product has been damaged.

SPECIFICATIONS
Note Keys
Note KeysNote Keys
Note Keys
25 velocity-sensitive keys; 10-octave range with octave up/down buttons
Pads
Pads Pads
Pads
8 assignable backlit pads, velocity- and pressure-sensitive; 2 banks
Knobs
KnobsKnobs
Knobs
8 assignable 3 0º knobs
X
XX
X-
--
-Y Controller
Y Controller Y Controller
Y Controller
1 configurable thumbstick with 3 modes
Inputs / Outputs
Inputs / OutputsInputs / Outputs
Inputs / Outputs
1 USB port
1 1/4" ( .35mm) TS input for sustain pedal
Power
Power Power
Power
USB-bus-powered
Dimensions
DimensionsDimensions
Dimensions
12.5" x 7.13" x 1.75"
(width x depth x height)
(width x depth x height)(width x depth x height)
(width x depth x height)
31.8 cm x 18.1 cm x 4.4 cm
Weight .65 lbs.
Weight .65 lbs.Weight .65 lbs.
Weight .65 lbs.
0.75 kg
SERVICE MANUAL
MODEL:
MPKMINI3W

DISASSEMBLY PROCEDURES
1.
DISASSEMBLE THE BOTTOM PANEL.
(A) REMOVE 20 PCS SCREW FROM THE BOTTOM PANEL.
(Fig1)
2.
DISASSEMBLE THE KEYBOARD.
(A)REMOVE 2 PCS SCREW FROM THE KEYBOARD.
(Fig2)

3.
DISASSEMBLE THE JOYSTICK PCB ASS’Y AND MAIN PCB ASS’Y.
(A)REMOVE 6 PCS KNOB FROM THE TOP PANEL.
(B)REMOVE 1 PC RUBBER PLUG , 1 PC SCREW AND 1 PC STICK FROM THE TOP PANEL.
(C)REMOVE 2 PCS SCREW FROM THE JOYSTICK PCB ASS’Y.
(D)REMOVE 12 PCS SCREW FROM THE TOP PANEL.
(Fig3)

WIRING DIAGRAM
(US)

PACKING DIAGRAM
(US)

EXPLODE DIAGRAM
(US)
EQUENCIAL NO EXPLODE DIAGRAM WILL BE MARKED ON REF.COLUMM OF BOM LIST

LEVEL
P/N DESCRIPTION QTY REF
0 AD20WAKA01 MPKMINI3W WHITE USB USA 0
1 AA821535X USB 2.0 Cable 1m A/B Type Black 1
1 BASJ5012B Rubber Stand 4 12
1 EVA15044116 EVA 1 10
1 EVA1504452 EVA 1 19
1 FSR08KEY-AD20 FSR 8KEY 775KΩ117
1 KB25WM02AKA01 MINI 25Key(White) Assembly 1 9
2 FFC1610001501 FFC 16Pin Pitch:1.0mm Length:150mm 1
2 GELBERULUBFR16 Grease 1
2 LAC62AKA596 Serial Number Label 1
2 NM1504490 Velvet Carpet 1
2 NM1504491 Velvet Carpet 1
2 PT15106339 Long Keys(mini-3)(Black) 2
3 PM-757GJ08 Black Resin 0.044
2 PT15106340 Long Keys(mini-4)(Black) 2
3 PM-757GJ08 Black Resin 0.054
2 PT15106341 Long Keys(C8)(Black) 1
3 PM-757GJ08 Black Resin 0.007
2 PT15106342 short Keys(mini-5)(White) 2
3 PMTN6097B Powder(ABS 707) 0.042
4 PM-PA-707 ABS(PA-707) 0.042
2 PT1530364 keyboard Base 1
3 PM-PA-707 ABS(PA-707) 0.071
3 PMP005-100 Powder 0.001
2 RU1510677 Rubber Switch Button 1
2 RU1510687 Rubber Switch Button 1
2 SC2608PBBI Screw 6
2 SP1504309 keyboard Spring 25
2 TWPC19A01201 AD20 25-key PCB overall Assembly 1
3 TWPC19A01201M AD20 25-key PCB DIP Assembly 1 -
4 FCN2R1001602 FCN Dual Touch 90°Pitch=1.0mm 16P 1 TE1
3 TWPC19A01201T AD20 25-key PCB AI Assembly 1 -
4 DIN4148 Switch Diode 1N4148 SOD27 50 D1~D50
4 JW5206T Jumping Wire 2 J1,J2
4 PC19A012 AD10 25-KEY PCB 1 Layer CEM-1 291×36mm 1 -
1.6t ENIG
1 LAC22AKA592 Serial Number Label 1
1 LAC57AKA603 Safety Label 1
1 LAC62AKA593 Bar Code Label(CODE 39) 0.25
1 LAC62AKA594 Bar Code Label(GTIN14) 0.25
1 LAC67MAR681 Label(Circle Limpid) 2
1 LAC67YAH261 Label φ8mm Green 0.25
1 NM1504427 Flet 1 5
1 NM1504492 Wool felt(spring) 1
1 NP215AKA102 OLED Name Plate 1 13
1 PAD20WAKA01 Packing Assembly 1
2 AL7-51-1300-H Safety Manual 1
2 CGAD20W306AKA01 Gift box 1
2 CTAD20W510AKA01 Shipping Carton 0.25
2 GEAKA43 Software Download Card 1
2 OPAD20AKA02 Instruction Page 1
2 PE230370404B09 Pe Bag 1
2 PE230440404B09 PE Bag 1
AD20WAKA01 BOM

2 PLAD2001 POLY FOAM(L) 1
2 PLAD2002 POLY FOAM(R) 1
1 PT15106258 Stick(Black) 1 3
1 PT1510631404 Button(6)(Laser etched) 1 6
2 PT15106314 Knob 1
3 PMPA758 0.013
1 PT1510631504 Button(4)(Laser etched) 1 15
2 PT15106315 Knob 1
3 PMPA758 0.011
1 PT15106333 KNOB 8 14
1 PT153008301 TOP Housing(PRINTING+PAINTING) 1 4
2 PT1530083 TOP Housing(White) 1
3 PMTN6097B Powder(ABS 707) 0.141
4 PM-PA-707 ABS(PA-707) 0.141
1 PT1530371 Bottom Housing(Black) 1 11
2 PM-757GJ08 Black Resin 0.238
1 RU1504408 Rubber(Black) 1 1
1 RU1510678 RUBBER PAD(CO-MOLD) 1 16
1 SC2310FBBI Screw M2.3*10 PFB Tapping 1 2
1 SC2608PBBI Screw 33 8
1 TWPC19A00801 Main PCB overall assembly 1
2 OTEO012832DWPP OLED 30*11.5*1.4mm 128*32 Dots white (No 1 (J1)
Distinguish)
2 PT15044129 OLED Holder 1 (J1)
2 TWPC19A00801T Main PCB SMT/AI overall assembly 1 -
3 PC19A008 Main PCB 2-Layer FR-4 306x75.2mm 1.6t 1 -
ENIG
3 TWPC19A008A01T Main PCB SMT/AI assembly 1 -
4 AA822748X Diode BAV99 1 D2
4 AL2-51-4401 Transistor 2N4401 NPN SOT-23 (Transistor 1 Q4
MMBT4401LT1 NPN SOT-23)
4 AL2-51-4403 Transistor 2N4403 PNP SOT-23 1 Q2
4 CS101J5003NPO CCAP SMD 100pF/50V 5% 0603 NPO 40 C55~C58,C60~C64,C66~C68,C71~C98
4 CS102K5003X7R CCAP SMD 1nF/50V 10% 0603 X7R 3 C13,C14,C15
4 CS103K5003X7R CCAP SMD 0.01uF/50V 10% 0603 X7R 3 C11,C12,C35
4 CS104K5003X7R CCAP SMD 0.1uF/50V 10% 0603 X7R 18 C2,C4~C10,C24,C29~C33,C37,C44~C46
4 CS105K1603X5R CCAP SMD 1uF/16V 10% 0603 X5R 5 C3,C18,C21,C22,C23
4 CS180J5003NPO CCAP SMD 18pF/50V 5% 0603 NPO 2 C26,C28
4 CS225K1603X5R CCAP SMD 2.2uF/16V 10% 0603 X5R 2 C25,C27
4 CS471J5003NPO CCAP SMD 470pF/50V 5% 0603 NPO 3 C34,C50,C52
4 DIEN1N4148WSM HF Diode 1N4148 SOD123 SMD 11 D4~D14
4 DITVSNUP2201SM Transient Voltage Suppressol Diode 1 D1
1MR6 TSOP-6
4 ECS22616B Capacitor Electrolytic 22uF/16V B type 1 EC2
MD
4 ECS47606B ECAP 47uF/6.3V 4*5.3mm SMD 1 EC1
4 FCN1T0501502 FCN Down Touch ZIF SMD Pitch:0.5mm 15P 1 J1
4 FCN2T1001601 FCN Dual Touch 180°SMD Pitch:1.0mm 16P 1 FCN1
4 ICCD74HC4051PWR IC CD74HC4051PWR TSSOP-16 3 IC4,IC5,IC6
4 ICLMV321IDCKR IC LMV321IDCKR Operational Amplifiers 1 IC3
SOT-23-5
4 ICTLV75733PDBVR IC LDO TLV75733PDBVR SOT-23-5 1 IC1
4 ICU74HC595AGS16 IC U74HC595AG-S16-R SOP-16 3 IC7,IC8,IC9
4 ICYH108M07 IC(ICSTM32F070RBT6+Program) LQFP 1 IC2
5 ICSTM32F070RBT6 IC STM32F070RBT6 LQFP-64 1 (IC2)
4 LDB1911USD-20D Liquid-emitting Diode Red SMD 0603 angle 17 LD1~LD14,LD17~LD19
120°

4 LDRT-0606HR8GT Liquid-emitting Diode Red/Green SMD 0603 1 LD15
4 RS000010J03 RES 0Ω5% SMD 0603 8 R55~R61,R70
4 RS001K10F03 RES 1K 1% SMD 0603 3 R27,R32,R52
4 RS001M10F03 RES 1M 1% SMD 0603 2 R7,R25
4 RS004710F03 RES 47Ω1% SMD 0603 3 R8,R9,R13
4 RS010010F03 RES 100Ω1% SMD 0603 5 R20,R21,R22,R53,R54
4 RS010K10F03 RES 10K 1% SMD 0603 15 R10,R11,R12,R19,R23,R26,R30,R62~R69
4 RS012K10F03 RES 12K 1% SMD 0603 1 R29
4 RS022010F03 RES 220Ω1% SMD 0603 8 R33~R37,R44~R46
4 RS047K10F03 RES 47K 1% SMD 0603 2 R17,R18
4 RS04K710F03 RES 4.7K 1% SMD 0603 1 R28
4 RS056010F03 RES 560Ω1% SMD 0603 11 R38~R43,R47~R51
4 RS086610F03 RES 866Ω1% SMD 0603 3 R1,R2,R4
4 RS100K10F03 RES 100K 1% SMD 0603 1 R31
4 RS392K10F03 RES 392K 1% SMD 0603 1 R24
4 RS47K510F03 RES 47.5K 1% SMD 0603 2 R5,R6
4 SWEVQPLHA15 Switch Tact Stem Height:1.5mm Operating 10 SW1~SW10
force 160gf Horizontal SMD
4 TRDMP3099L
MOSFET DMP3099L P-CHAN 30V 3.8A SOT-23
2 Q1,Q3
4 UH160808T-600Y BEAD 60Ω@100MHz 3A ±25% 0603 1 L1
4 UHACM2012900-2P Chock 90Ω0.4A 2.0X1.2mm 1 L2
4 UHBLM18PG121SN1 Bead 120Ω±25% 2A 0603 5 L3~L7
4 XTM08000X8 Crystal 8MHz S3225A SMD Fundamental 1 X1
3 TWPC19A008B01T Joysitck PCB SMT/AI assembly 1 -
4 CS103K5003X7R CCAP SMD 0.01uF/50V 10% 0603 X7R 2 C65,C69
4 CS104K5003X7R CCAP SMD 0.1uF/50V 10% 0603 X7R 2 C59,C70
2 TWPC19A008A01 Main PCB DIP assembly 1 18
3 AL4-08-0402 Con USB 4-Pin Female PC-MNT Horizontal 1 USB1
3 CN0420000705 Flat Cable Multicolored 4P Pitch 2.0mm 1 (TE2)
Dual Row Length 70mm Line/Line
3 JKK6J62AL6E2KY TRS Jack 7P 90°Female 1 J2
3 TE812000411 Terminal 1 TE2
3 VRR25201503 Potentiometer Rotary Volume 2.5KB Shaft 8 VR1~VR8
Length 15mm 360°
2 TWPC19A008B01 Joystick PCB DIP assembly 1 7
3 OT10K-N1B10K05N Pitch/MOD STICK VR 1 VR9
3 TE812000411 Terminal 1 TE3

AD20 TEST PROCEDURE
Creation Date:2019/9/26
Version 0.2
AD20 Test Procedure
Subject
AD20 TEST PROCEDURE
Creation Date
26 Sep. 2019
Last Updated
4 Oct. 2019
Version
v0.2

AD20 TEST PROCEDURE
Creation Date:2019/9/26
Version 0.2
2
Table of Contents
1. Introduction ........................................................................................................... 3
1.1 Confidentiality .............................................................................................. 3
1.2 Test software description .............................................................................. 3
2. Component Test ...................................................................................................... 5
2.1 Button Test ................................................................................................... 5
2.2 Keybed Test .................................................................................................. 5
2.3 VR Knob Test ................................................................................................. 5
2.4 OLED Test ..................................................................................................... 6
2.5 Pedal Test ..................................................................................................... 6
2.6 Joystick Test.................................................................................................. 6
2.7 PAD Test ....................................................................................................... 6
2.8 Finished test ................................................................................................. 6

AD20 TEST PROCEDURE
Creation Date:2019/9/26
Version 0.2
3
1. Introduction
This document describes QC tests for AD20
1.1 Confidentiality
This specification is submitted by to subcontractors on the understanding that its
contents will not be transmitted to any third party without prior written consent from
1.2 Test software description
During the test, the red graphic control element indicates that the test has not be en
performed.
Yellow and green graphic control elements indicate that the test is in progress .
The blue graphic control element indicates that the test is correct .

AD20 TEST PROCEDURE
Creation Date:2019/9/26
Version 0.2
4
1.2.1 Enter test mode:
Hold and press [PAD BANK] + [PROG SELECT], and plug in USB cable to enter test mode.
1.2.2 Connection status and version confirmation
If the “Connect Status”is green, the connection to the AD20 device is successful, and the
version will be displayed in “Version”below. Example version is v0.13, which will display
“0x00, 0x00, 0x01, 0x03”.

AD20 TEST PROCEDURE
Creation Date:2019/9/26
Version 0.2
5
2. Component Test
2.1 Button Test
Red Button:Indicates that the test has not been performed.
Green Button:Indicates that the button has been “pressed”
Blue Button:Indicates that the button has been “released”The button completes the
test.
The corresponding LED will also light up, press once to turn on, then press off.
BANK clicks bright green, then clicks bright red.
OP needs to visually check whether all LEDs are lighting normally.
2.2 Keybed Test
When pressed, it will light green.
Pass When released, it will light blue, indicating that the key is tested for Pass.
2.3 VR Knob Test
Red:Indicates that the test has not been performed.
Red to Green:Indicates Knob rotates counterclockwise to the minimum value.
Red to Yellow:Indicates Knob rotates clockwise to the maximum value.
Blue Knob:Indicates that Knob has completed the forward and reverse rotation to the
operation The knob completed the test.

AD20 TEST PROCEDURE
Creation Date:2019/9/26
Version 0.2
6
2.4 OLED Test
OP operation combo key [OCTAVE DOWN] + [OCTAVE UP], OLED will switch to display full
light and border. OP needs visual inspection:
Whether there are light, dark spots, uneven brightness, skewed borders, etc.
2.5 Pedal Test
Insert the foot pedal, press the foot pedal, the bottom will be displayed in green, and then
released to show blue, indicating that the test is completed.
2.6 Joystick Test
Turn the Joystick once, it will show blue if tested in both directions
2.7 PAD Test
When the pressing pressure reaches the set value, it will be displayed in yellow.
When released, it will light blue, indicating that the Pad has completed the test
If the pressure is released before reaching the set value, it will be displayed in green .
The corresponding LED will also light up.
2.8 Test completed
If all tests are completed without problems, the app will display Complete

AD20 TEST PROCEDURE
Creation Date:2019/9/26
Version 0.2
7
Other manuals for MPK mini MK3
4
This manual suits for next models
1
Table of contents
Other Akai Electronic Keyboard manuals

Akai
Akai MPK49 Instruction manual

Akai
Akai Professional LPK25 User manual

Akai
Akai MPK88 User manual

Akai
Akai MPK 49 Installation guide

Akai
Akai MPK 49 User manual

Akai
Akai MPKMINI User manual

Akai
Akai MPK Road 88 User manual

Akai
Akai Professional MPK261 User manual

Akai
Akai Professional MAX49 User manual

Akai
Akai DPS 16 Installation and operating instructions