manuals.online logo
Brands
  1. Home
  2. •
  3. Brands
  4. •
  5. Akai
  6. •
  7. Electronic Keyboard
  8. •
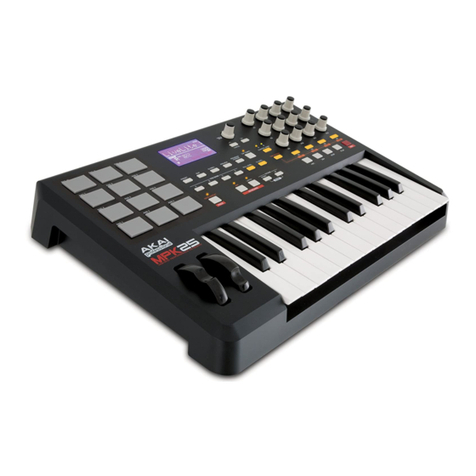
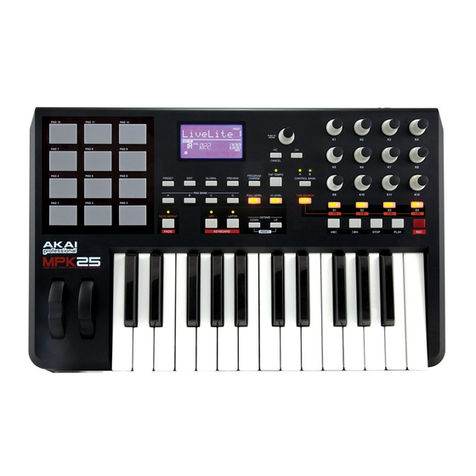
  9. Akai MPK25 User manual

Akai MPK25 User manual

WWW.AKAIPRO.COM
FACTORY PRESET
DOCUMENTATION
1
MPK25 FACTORY PRESET LISTINGS
PRESET # PROGRAM DESCRIPTION
1 LiveLite This preset is designed to be used with the Ableton Live Lite
software DAW, included with the MPK25.
2 Reason
This preset supports the Reason Remote protocol with supplied
codec files. To use Reason with the Remote protocol, you will
need to install the supplied Reason codec files. Each module in
Reason will automatically map itself to the MPK25’s controllers.
This is extremely powerful as it allows you to use a single
MPK25 preset to control all of the modules in Reason. See
“Using the MPK25 with Reason” section for information on
installing the Reason Remote codecs and mappings.
3 Cubase For use with Steinberg’s Cubase DAW. See “Using the MPK25
with Cubase” for information on preset mappings.
4 FLStudio For use with FL Studio 8. See “Using the MPK25 with FL
Studio” for more information.
5 Sonar For use with Cakewalk Sonar DAW.
6 ApplidAc For use with Applied Acoustics’ String Studio and Ultra Analog.
7 Arturia
For use with Arturia software synth modules, such as Arp2600V,
CS80V, Moog Modular V, and Minimoog V. See “Using the
MPK25 with Arturia Synths” for information on preset mappings.
8 Arkaos For use with ArKaos GrandVJ and ArKaos VJ MIDI. See “Using
the MPK25 with ArKaos” for more information.
9 FxPanGUR For use with FXpansion’s GURU. See “Using the MPK25 with
FXpansion’s GURU” for information on preset mappings.
10 MPC500 This preset is identical to the Generic preset except for the drum
mappings, which are the same as the Akai MPC500.
11 PPG 2.V For use with Waldorf's PPG 2.V synth. See “Using the MPK25
with PPG 2.V” for information on preset mappings.
12 RobPapen
For use with Rob Papen synths, such as ConcreteFX's Blue and
Predator. See “Using the MPK25 with Rob Papen Synths” for
information on preset mappings.
13 Stylus For use with Spectrasonics’ Stylus RMX. See “Using the
MPK25 with Stylus RMX” for information on preset mappings.
14 Virsyn For use with Virsyn synths, such as Tera 3. See “Using the
MPK25 with Virsyn Synths” for information on preset mappings.
17 - 30 Generic
The presets included are only intended to be a starting point for your use. All of these software programs allow incredible
amounts of control, and by using multiple MIDI channels, controllers, and program changes, you can easily create some
incredible music.
Enjoy!
2
USING THE MPK25 WITH REASON
Reason is a software program that allows for vast control of its parameters. The
problem with having a lot of controllable items is the limit of physical space and the
cost of building hardware controllers that can accommodate hundreds or thousands
of controllers. The people at Propellerheads have developed a way to remap a single
control surface to each of the modules in Reason. This protocol is called Reason
Remote.
We have included all the files necessary to enable Reason to find the MPK25 and map its controls to whatever module
you have selected in the sequencer.
To begin using the MPK25 with Reason, you will need to make sure that you have version 3.0.5 or greater for the Mac or
version 3.0.4 or later for the PC. Please note that the MPK25 is also compatible with Reason 4.
1. To install the Reason Remote codecs and remote maps, run the Reason Remote installer for your particular
computer and it will auto-install the folders into the right locations.
2. After you have installed the Reason Remote codecs, select Preset number 2 – “Reason” – on your MPK25.
Press the [VALUE] dial to load the preset.
!
If you have edited MPK25’s presets and are unable to load the Reason preset, use the supplied Vyzex
Editor to load the Factory Preset Bank and “PUT” or download the factory preset bank into the MPK25.
3. Start up Reason and the software will automatically find the
MPK25 controller. Within Reason, click on [Preferences]
and look under [Control Surfaces and Keyboards]. You
should see the Akai MPK25 icon with a green check mark.
If it is not checked, click the “Use with Reason” button.
3
The Vyzex Editor included on the CD is a great way to customize or restore presets to their factory condition!
The MPK25 preset for Reason makes use of pad banks A, B and C for playing notes. With these three pad banks you get
a 3-octave range of pitch control.
Pad bank D is configured to be used as a control bank. This pad bank allows you to use the pads as switches for certain
features.
The mapped parameters are shown in the graphic above.
EXAMPLES:
When you are controlling Redrum or Matrix, pads D1-D4 correspond to the Bank A, B, C, D buttons in the pattern
section. Pads D9-12 will allow you to select between patterns 1-4 and pads D5-8 allow you to select between
patterns 5-8.
Switches S7 and S8 are always assigned to target the next or previous sequence track. This allows you to
remotely select which module you are controlling.
The next few pages feature a full table of the mapping functions. Please refer to this table for information on how the
MPK25 controls map to each individual module in Reason. You can always change how controllers are mapped by
modifying the “MPK25.remotemap” file. This will allow you to customize how Reason and your MPK25 work.
4
AKAI MPK25 PRESET MAPPINGS
::: GLOBAL CONTROLLERS ::: ::: MASTER KEYBOARD :::
MPK25 CONTROL REASON FUNCTION MPK25 CONTROL REASON FUNCTION
Stop Stop Keyboard Keyboard
Play Play Pitch Bend Pitch Bend
Record Record Mod Wheel Mod Wheel
Rewind Rewind Channel Pressure Channel Pressure
Fast Forward Fast Forward Expression Expression
Switch 1 Select Previous Patch for Target Device Damper Pedal Damper Pedal
Switch 2 Select Next Patch for Target Device
Switch 3 Target Previous Track
Switch 4 Target Next Track
Switch 5 Select Previous Keyboard Shortcut Variation
Switch 6 Select Next Keyboard Shortcut Variation
BANK
RV 7000
REVERB
SCREAM 4
DISTORTION
MCLASS
EQUALIZER
MCLASS
IMAGER
M CLASS
COMPRESSOR
M CLASS
MAXIMIZER
RV-7
REVERB
Knob 1 A Decay Damage Control Low Shelf Frequency Low Width Input Gain Input Gain Algorithm
Knob 2 A HF Damp Damage Type Parametric 1 Frequency X-Over Frequency Threshold Attack Speed Size
Knob 3 A Hi EQ Parameter 1 Parametric 2 Frequency High Width Ratio Release Speed Decay
Knob 4 A Dry/Wet Parameter 2 Hi Shelf Frequency Solo Mode Output Gain Output Gain Damping
Knob 5 A Soft Knob 1 Cut Lo Low Shelf Gain Attack Soft Clip Amount
Knob 6 A Soft Knob 2 Cut Mid Parametric 1 Gain Release
Knob 7 A Soft Knob 3 Cut Hi Parametric 2 Gain
Knob 8 A Soft Knob 4 Master Level Hi Shelf Gain
Knob 9 A Soft Knob 5 Body Resonance Low Shelf Q
Knob 10 A Soft Knob 6 Body Scale Parametric 1 Q
Knob 11 A Soft Knob 7 Body Auto Parametric 2 Q
Knob 12 A Soft Knob 8 Body Type Hi Shelf Q Dry/Wet
Switch 1 A
Switch 2 A
Switch 3 A
Switch 4 A
Switch 5 B
Switch 6 B
Switch 7 B EQ On/Off Damage On/Off Parametric 1 Enable Low Band Active Sidechain Solo Soft Clip Enable
Switch 8 B Gate On/Off Cut On/Off Parametric 2 Enable High Band Active Sidechain Active Output Level Meter Mode
BANK
DDL-1
DELAY
D-11
DISTORTION
ECF-42
FILTER
CF-101
CHORUS
PH-90
PHASER
UN-16
UNISON
COMP-
01 PEQ-2
Knob 1 A DelayTime (steps) Amount Frequency Delay Frequency Voice Count Ratio Filter A Freq
Knob 2 A DelayTime (ms) Feedback Resonance Feedback Split Detune Threshold Filter A Q
Knob 3 A Feedback Mode Rate Width Attack Filter A Gain
Knob 4 A Pan Env Amount Modulation Amount Rate Release
Knob 5 A Attack Frequency Modulation Filter B Freq
Knob 6 A Decay Feedback Filter B Q
Knob 7 A Sustain Filter B Gain
Knob 8 A Release
Knob 9 A
Knob 10 A
Knob 11 A
Knob 12 A Dry/Wet Balance Velocity Dry/Wet Gain
Switch 1 A
Switch 2 A
Switch 3 A
Switch 4 A
Switch 5 B
Switch 6 B
Switch 7 B Unit LFO Sync Enable
Switch 8 B Step Length Trigger Send/Insert Mode LFO Sync Enable Filter B On/Off
5
AKAI MPK25 PRESET MAPPINGS
MIXER 14:2
BANK
KEYBOARD
SHORTCUT
VARIATION 1
KEYBOARD
SHORTCUT
VARIATION 2
KEYBOARD
SHORTCUT
VARIATION 3
KEYBOARD
SHORTCUT
VARIATION 4
LINE MIXER 6:2 SUBTRACTOR
Knob 1 A Channel 1 Aux 1 Channel 9 Aux 1 Send Channel 1 Treble Channel 9 Treble Channel 1 Aux Send Filter Fre
q
Knob 2 A Channel 2 Aux 1 Channel 10 Aux 1 Channel 2 Treble Channel 10 Treble Channel 2 Aux Send Filter Res
Knob 3 A Channel 3 Aux 1 Channel 11 Aux 1 Channel 3 Treble Channel 11 Treble Channel 3 Aux Send Filter Type
Knob 4 A Channel 4 Aux 1 Channel 12 Aux 1 Channel 4 Treble Channel 12 Treble Channel 4 Aux Send Filter Env Amount
Knob 5 A Channel 1 Pan Channel 9 Pan Channel 1 Bass Amount Channel 9 Bass Amount Channel 1 Pan Filter2 Freq
Knob 6 A Channel 2 Pan Channel 10 Pan Channel 2 Bass Amount Channel 10 Bass Channel 2 Pan Filter2 Res
Knob 7 A Channel 3 Pan Channel 11 Pan Channel 3 Bass Amount Channel 11 Bass Channel 3 Pan Filter Kbd Track
Knob 8 A Channel 4 Pan Channel 12 Pan Channel 4 Bass Amount Channel 12 Bass Channel 4 Pan Filter Env Vel Amount
Knob 9 A Channel 1 Level Channel 9 Level Channel 1 Level Channel 9 Level Channel 1 Level Filter Env Attack
Knob 10 A Channel 2 Level Channel 10 Level Channel 2 Level Channel 10 Level Channel 2 Level Filter Env Decay
Knob 11 A Channel 3 Level Channel 11 Level Channel 3 Level Channel 11 Level Channel 3 Level Filter Env Sustain
Knob 12 A Channel 4 Level Channel 12 Level Channel 4 Level Channel 12 Level Channel 4 Level Filter Env Release
Knob 13 B Channel 5 Aux 1 Channel 13 Aux 1 Channel 5 Treble Channel 13 Bass Channel 5 Aux Send Oscl Wave
Knob 14 B Channel 6 Aux 1 Channel 14 Aux 1 Channel 6 Treble Channel 14 Bass Channel 6 Aux Send Oscl Octave
Knob 15 B Channel 7 Aux 1 Channel 7 Treble Oscl Semitone
Knob 16 B Channel 8 Aux 1 Aux 1 Return Level Channel 8 Treble Aux 2 Return Level Aux Return Level FM Amount
Knob 17 B Channel 5 Pan Channel 13 Pan Channel 5 Bass Amount Channel 13 Bass Channel 5 Pan Osc2 Wave
Knob 18 B Channel 6 Pan Channel 14 Pan Channel 6 Bass Amount Channel 14 Bass Channel 6 Pan Osc2 Octave
Knob 19 B Channel 7 Pan Channel 7 Bass Amount Osc2 Semitone
Knob 20 B Channel 8 Pan Aux 2 Return Level Channel 4 Bass Amount Aux 1 Return Level Osc Mix
Knob 21 B Channel 5 Level Channel 13 Level Channel 5 Level Channel 13 Level Channel 5 Level Amp Env Attack
Knob 22 B Channel 6 Level Channel 14 Level Channel 6 Level Channel 14 Level Channel 6 Level Amp Env Decay
Knob 23 B Channel 7 Level Channel 7 Level Amp Env Sustain
Knob 24 B Channel 8 Level Master Level Channel 8 Level Master Level Master Level Amp Env Release
Switch 1 A
Switch 2 A
Switch 3 A
Switch 4 A
Switch 5 B
Switch 6 B
Switch 7 B
Switch 8 B
MALSTROM THOR
BANK COMBINATOR GLOBAL KEYBOARD SHORTCUT
VARIATION 1
KEYBOARD SHORTCUT
VARIATION 2
KEYBOARD SHORTCUT
VARIATION 1
KEYBOARD SHORTCUT
VARIATION 2
KEYBOARD SHORTCUT
VARIATION 3
Knob 1 A Rotary 1 Filter A Freq Filter A Freq Filter 1 Freq Filter 1 Freq Osc 1 Type
Knob 2 A Rotary 2 Filter A Resonance Filter A Resonance Filter 1 Res Filter 2 Freq Osc 1 Oct
Knob 3 A Rotary 3 Filter B Freq Filter B Freq Filter 1 Drive Filter 3 Freq Osc 1 Semi
Knob 4 A Rotary 4 Filter B Resonance Filter B Resonance Filter 1 Env Amount Shaper Drive Osc 1 Mod
Knob 5 A Oscillator A Motion Filter Env Attack Filter 2 Freq Osc 1 And 2 Balance Osc 2 Type
Knob 6 A Oscillator A Shift Filter Env Decay Filter 2 Res Osc 1 And 2 Level Osc 2 Oct
Knob 7 A Oscillator A Index Filter Env Sustain Filter 2 Drive Osc 3 Level Osc 2 Semi
Knob 8 A Oscillator A Gain Filter Env Release Filter 2 Env Amount LFO 1 Rate Osc 2 Mod
Knob 9 A Oscillator B Motion Filter Env Amount Filter 3 Freq Osc 1 AM From Osc 2 Osc 3 Type
Knob 10 A Oscillator B Shift Filter A Mode Filter 3 Res Osc 2 Sync BW Osc 3 Oct
Knob 11 A Oscillator B Index Filter B Mode Filter 3 Drive Osc 3 Sync BW Osc 3 Semi
Knob 12 A Oscillator B Gain Shaper Amount Filter 3 Global Env
At
LFO 2 Rate Osc 3 Mod
Knob 13 B Oscillator A Attack Oscillator A Attack Filter Env Attack Global Env Attack LFO 1 Rate
Knob 14 B Oscillator A Decay Oscillator A Decay Filter Env Decay Global Env Decay LFO 1 Waveform
Knob 15 B Oscillator A Sustain Oscillator A Sustain Filter Env Sustain Global Env Sustain LFO 1 Delay
Knob 16 B Oscillator A Release Oscillator A Release Filter Env Release Global Env Release LFO 1 KbdFollow
Knob 17 B Oscillator B Attack Oscillator B Attack Amp Env Attack Mod Env Delay LFO 2 Rate
Knob 18 B Oscillator B Decay Oscillator B Decay Amp Env Decay Mod Env Attack LFO 2 Waveform
Knob 19 B Oscillator B Sustain Oscillator B Sustain Amp Env Sustain Mod Env Decay LFO 2 Delay
Knob 20 B Oscillator B Release Oscillator B Release Amp Env Release Mod Env Release LFO 2 KbdFollow
Knob 21 B Modulator A Rate Rotary 1
Knob 22 B Modulator B Rate Rotary 2
Knob 23 B Portamento Portamento
Knob 24 B Master Level Master Level
Switch 1 A
Switch 2 A
Switch 3 A
Switch 4 A
Switch 5 B
Switch 6 B
Switch 7 B Shaper ON/OFF Button 1
Switch 8 B Filter B ON/OFF Button 2
6
AKAI MPK25 PRESET MAPPINGS
REDRUM BV512 VOCODER
BANK GLOBAL
KEYBOARD
SHORTCUT
VARIATION 1
KEYBOARD
SHORTCUT
VARIATION 2
GLOBAL
KEYBOARD
SHORTCUT
VARIATION 1
KEYBOARD
SHORTCUT
VARIATION 2
KEYBOARD
SHORTCUT
VARIATION 3
KEYBOARD
SHORTCUT
VARIATION 4
MATRIX
Knob 1 A Drum 1 Level Drum 1 Pitch Band Count Pattern Select in Bank
Knob 2 A Drum 2 Level Drum 2 Pitch Shift Bank Select
Knob 3 A Drum 3 Level Drum 3 Pitch Attack Resolution
Knob 4 A Drum 4 Level Drum 4 Pitch Decay
Knob 5 A Drum 5 Level Drum 5 Pitch HF Emphasis
Knob 6 A Drum 6 Level Drum 6 Pitch
Knob 7 A Drum 7 Level Drum 7 Pitch
Knob 8 A Drum 8 Level Drum 8 Pitch Dr
y
/Wet
Knob 9 A Drum 9 Level Drum 9 Pitch Band Level 1 Band Level 17 Mod Level 1 Mod Level 17
Knob 10 A Drum 10 Level Drum 10 Pitch Band Level 2 Band Level 18 Mod Level 2 Mod Level 18
Knob 11 A Band Level 3 Band Level 19 Mod Level 3 Mod Level 19
Knob 12 A Band Level 4 Band Level 20 Mod Level 4 Mod Level 20
Knob 13 B Drum 1 Pan Drum 1 Length Band Level 5 Band Level 21 Mod Level 5 Mod Level 21
Knob 14 B Drum 2 Pan Drum 2 Length Band Level 6 Band Level 22 Mod Level 6 Mod Level 22
Knob 15 B Drum 3 Pan Drum 3 Length Band Level 7 Band Level 23 Mod Level 7 Mod Level 23
Knob 16 B Drum 4 Pan Drum 4 Length Band Level 8 Band Level 24 Mod Level 8 Mod Level 24
Knob 17 B Drum 5 Pan Drum 5 Length Band Level 9 Band Level 25 Mod Level 9 Mod Level 25
Knob 18 B Drum 6 Pan Drum 6 Length Band Level 10 Band Level 26 Mod Level 10 Mod Level 26
Knob 19 B Drum 7 Pan Drum 7 Length Band Level 11 Band Level 27 Mod Level 11 Mod Level 27
Knob 20 B Drum 8 Pan Drum 8 Length Band Level 12 Band Level 28 Mod Level 12 Mod Level 28
Knob 21 B Drum 9 Pan Drum 9 Length Band Level 13 Band Level 29 Mod Level 13 Mod Level 29
Knob 22 B Drum 10 Pan Drum 10 Length Band Level 14 Band Level 30 Mod Level 14 Mod Level 30
K
nob 23 B Band Level 15 Band Level 31 Mod Level 15 Mod Level 31
Knob 24 B Master Level Band Level 16 Band Level 32 Mod Level 16 Mod Level 32
Switch 1 A
Switch 2 A
Switch 3 A
Switch 4 A
Switch 5 B
Switch 6 B
Switch 7 B Vocoder/Equalizer Run
Switch 8 B Hold Pattern Enable
Pad D1 D Bank D Bank D
Pad D2 D Pattern 4 Pattern 4
Pad D3 D Pattern 8 Pattern 8
Pad D4 D Bank C Bank C
Pad D5 D Pattern 3 Pattern 3
Pad D6 D Pattern 7 Pattern 7
Pad D7 D Bank B Bank B
Pad D8 D Pattern 2 Pattern 2
Pad D9 D Pattern 6 Pattern 6
Pad D10 D Bank A Bank A
Pad D11 D Pattern 1 Pattern 1
Pad D12 D Pattern 5 Pattern 5
BANK NN19 NNXT RPG-8 DR. REX
Knob 1 A Filter Freq Filter Freq Rate Filter Freq
Knob 2 A Filter Res Filter Res Mode Filter Res
Knob 3 A Filter Mode Octave Filter Mode
Knob 4 A Filter Env Amount Insert Filter Env Amount
Knob 5 A Filter Env Attack Amp Env Attack Velocity/Manual Filter Env Attack
Knob 6 A Filter Env Decay Amp Env Decay Gate Length Filter Env Decay
Knob 7 A Filter Env Sustain Amp Env Release Filter Env Sustain
Knob 8 A Filter Env Release Mod Env Decay Filter Env Release
Knob 9 A Amp Env Attack Amp Env Attack
Knob 10 A Amp Env Decay Amp Env Decay
Knob 11 A Amp Env Sustain Amp Env Sustain
Knob 12 A Amp Env Release Master Volume Amp Env Release
Knob 13 B Osc Octave LFO1 Rate
Knob 14 B Osc Semitone LFO1 Amount
Knob 15 B Osc Fine Tune LFO1 Wave
Knob 16 B Osc Env Amount LFO1 Dest
Knob 17 B LFO Rate Osc Octave
Knob 18 B LFO Amount Osc Fine Tune
Knob 19 B LFO Wave Osc Env Amount
Knob 20 B LFO Dest Transpose
Knob 21 B Sample Start Filter Freq Mod Wheel Amount
Knob 22 B Spread Filter Res Mod Wheel Amount
Knob 23 B Portamento Filter Decay Mod Wheel
At
Knob 24 B Master Level Master Level
Switch 1 A
Switch 2 A
Switch 3 A
Switch 4 A
Switch 5 B
Switch 6 B
Switch 7 B Filter On/Off Hold Select Next Loop
Switch 8 B Filter Env Insert Arpeggiator Enable Select Previous Loop
7
USING THE MPK25 WITH CUBASE
The included .xml file is a generic remote to be used with Steinberg Cubase 4. This
remote contains mappings for the Cubase Mixer and all of the included Steinberg
plugins.
To install this remote, follow these steps:
1. Go to the Devices Menu and Choose Device Setup.
2. The Device Setup window will appear as shown below.
3. Click on the "+" symbol (as indicated by the circle below), and choose "Generic Remote".
4. Next, click on the Import button (as indicated by the red circle below):
5. Choose the file "MPK25.xml" from the \Software Preset Files\Cubase directory.
6. To open the Generic Remote, go to the Device Menu, and choose "Generic Remote."
7. Select the plugin you want to automate from the drop-down menu.
Below is a list of MPK25 controller assignments. Remember, these can be reconfigured to whatever you wish. This is
just a starting point.
8
AKAI MPK25 PRESET MAPPINGS
MIXER
BANK A BANK B
K1 K2 K3 K4 K13 K14 K15 K16
Track 1
Volume
Track 2
Volume
Track 3
Volume
Track 4
Volume Track 1
Pan
Track 2
Pan
Track 3
Pan
Track 4
Pan
K5 K6 K7 K8 K17 K18 K19 K20
Track 5
Volume
Track 6
Volume
Track 7
Volume
Track 8
Volume Track 5
Pan
Track 6
Pan
Track 7
Pan
Track 8
Pan
K9 K10 K11 K12 K21 K22 K23 K24
Track 9
Volume Track 10
Volume Track 11
Volume Track 12
Volume Track 9
Pan Track 10
Pan Track 11
Pan Track 12
Pan
S1 S2 S3 S4 S5 S6 S7 S8
Open VST
Instruments
Window
Open Mixer Select Prev
Quantize
Select Next
Quantize Copy Paste Delete Undo
MONOLOGUE
BANK A BANK B
K1 K2 K3 K4 K13 K14 K15 K16
Cutoff Resonance Mod depth a Mod depth b Osc 1
waveform
Osc 1
semitone
Osc 1
cent
Osc 1
mod depth
K5 K6 K7 K8 K17 K18 K19 K20
Mod attack Mod decay Mod sustain Mod release Osc 2
waveform
Osc 2
semitone
Osc 2
cent
Osc 2
mod depth
K9 K10 K11 K12 K21 K22 K23 K24
Amp attack Amp decay Amp sustain Amp release Osc 1
volume Osc 2
volume Noise volume Master
volume
S1 S2 S3 S4 S5 S6 S7 S8
Env trigger
mode
9
AKAI MPK25 PRESET MAPPINGS
EMBRACER
BANK A BANK B
K1 K2 K3 K4 K13 K14 K15 K16
Sample A Width Tone Attack Sample b Width Tone Attack
K5 K6 K7 K8 K17 K18 K19 K20
Level Vel>level Vel>tone Vel>attack
K9 K10 K11 K12 K21 K22 K23 K24
Key>tone Lfo surround
mode Lfo width Lfo release Key>tone Coarse Tune Fine Tune Volume
S1 S2 S3 S4 S5 S6 S7 S8
Bypass
MYSTIC
BANK A BANK B
K1 K2 K3 K4 K13 K14 K15 K16
Q1 Spectrum Q2 Morph Q3 Detune Q4 Attack
K5 K6 K7 K8 K17 K18 K19 K20
Q5 Release Q6 LFO Freq Q7 LFO
Level Q8 FX - Mix
K9 K10 K11 K12 K21 K22 K23 K24
S1 S2 S3 S4 S5 S6 S7 S8
10
AKAI MPK25 PRESET MAPPINGS
PROLOGUE
BANK A BANK B
K1 K2 K3 K4 K13 K14 K15 K16
Q1 cutoff Q2 reso Q3 drive Q4 Attack
K5 K6 K7 K8 K17 K18 K19 K20
Q5 Release Q6 LFO Freq Q7 LFO
Level Q8 FX - Mix
K9 K10 K11 K12 K21 K22 K23 K24
S1 S2 S3 S4 S5 S6 S7 S8
SPECTOR
BANK A BANK B
K1 K2 K3 K4 K13 K14 K15 K16
Q1 Spectrum Q2 Morph Q3 Detune Q4 Attack
K5 K6 K7 K8 K17 K18 K19 K20
Q5 Release Q6 LFO Freq Q7 LFO
Level Q8 FX - Mix
K9 K10 K11 K12 K21 K22 K23 K24
S1 S2 S3 S4 S5 S6 S7 S8
11
AKAI MPK25 PRESET MAPPINGS
HALION ONE
BANK A BANK B
K1 K2 K3 K4 K13 K14 K15 K16
Cutoff Resonance DCF Amount DCA Amount
K5 K6 K7 K8 K17 K18 K19 K20
DCA Attack DCA Decay DCA Sustain DCA Release
K9 K10 K11 K12 K21 K22 K23 K24
S1 S2 S3 S4 S5 S6 S7 S8
Bypass
12
USING THE MPK25 WITH FL STUDIO 8
The FL Studio template has a sampler channel dedicated to each pad:
Pad Bank A will play each channel at its true pitch.
Pad Bank B will mute the corresponding pad.
Pad Bank C will select the corresponding channel, allowing for each channel to be played chromatically with the
keyboard.
Pad bank D will play the sample loaded on the selected track in semitones.
Buttons S1-8 will select additional tracks beyond the first twelve, for easily selecting generators, VST plugin channels, etc.
Set up FL Studio as follows:
1. Copy the MPK25 folder contained on the CD into the following directory:
C:\Program Files\Image-Line\FL Studio 8\Data\Projects\Templates\Hardware
2. Open FL Studio.
3. Press F10, or go to Options / MIDI Settings.
4. For Input and Output, select "USB Audio Device."
Make sure to select "Send Master Sync for Output"
and "Enable" for Input.
5. For Omni preview MIDI channel, choose Channel
16.
6. For Generator muting MIDI channel, choose
Channel 15
7. Select "Record to step sequencer."
The FL Studio preset is configured to take advantage of FL
Studio's Step Sequencer. For working with the Piano Roll,
use one of the MPK25's generic templates.
13
USING THE MPK25 WITH SONAR
This Preset designed for use with Sonar. By using different MIDI Ports, it allows use of both MIDI Machine Control from the MPK25's
transports, and also provides a good amount of controls for use with Sonar's ACT Midi Controller.
To use the MPK25 transport controls in sonar, do the following:
1. Select Options / Control Surfaces.
2. Press the Add New Control Surface button
3. Choose MMC for control surface, and choose USB AUDIO DEVICE for in and out ports.
4. Press the Add New Control Surface button
5. Choose ACT MIDI Controller, and choose USB AUDIO DEVICE [2] for in and out ports.
6. Press OK.
With this preset, controls from the MPK25's knobs will be sent on port B, and the keyboard, mod wheel etc, will be sent on port A,
allowing you to simultaneously record midi keyboard performances and automation with the Sonar ACT MIDI Controller. Knobs 9-12 in
banks A and B send standard midi controllers to Port A for use with Non-ACT Compatible Plugins.
For More information on mapping controllers and using the ACT MIDI Controller, please consult the Cakewalk Help file.
14
USING THE MPK25 WITH ARTURIA SYNTHS
Each Arturia synth has its own MIDI Map file that will automatically assign the functions within that
synth. This file is named controlMIDI. We have made a template file for most of the popular
Arturia synths that all work in conjunction with the Arturia Preset on the MPK25.
Each synth’s controlMIDI file needs to be copied to the following folder so that the mapping will work. Be aware that
writing over the existing controlMIDI file will change any custom MIDI learn mappings you have made.
AKAI MPK25 PRESET MAPPINGS
ARP2600V
Mac – Library/Preferences/arp2600v/save/
PC – C:\Program Files\Arturia\arp2600v\save\
BANK A BANK B
K1 K2 K3 K4 K13 K14 K15 K16
VCF
Cutoff
VCF
Resonance
VCF
Control In 1
VCF
Control In 2 VCO
Coarse Tune 1
VCO
Coarse Tune 2
VCO
Coarse Tune 3 Noise Gen Freq
K5 K6 K7 K8 K17 K18 K19 K20
ADSR Attack ADSR Decay ADSR Sustain ADSR Release AR Attack AR Release VCF
Input 1
VCF
Control In 3
K9 K10 K11 K12 K21 K22 K23 K24
VCF
Input 2
VCF
Input 3
VCF
Input 4
VCF
Input 5 Final Mix
Volume
Reverb Rt&Lf
Amount Pan Global Volume
S1 S2 S3 S4 S5 S6 S7 S8
Port On/Off Seq Start Seq Stop Seq Reset Hold Seq MIDI Sync S/H MIDI Sync LFO MIDI Sync
15
AKAI MPK25 PRESET MAPPINGS
CS80V
Mac – Library/Preferences/Cs80V/save/
PC – C:\Program Files\Arturia\Cs80V\save\
BANK A BANK B
K1 K2 K3 K4 K13 K14 K15 K16
HPF Cutoff I HPF Reso I LPF Cutoff I LPF Reso I HPF Cutoff II HPF Reso II LPF Cutoff II LPF Reso II
K5 K6 K7 K8 K17 K18 K19 K20
VCF
Attack Level I
VCF
Attack I
VCF
Decay
VCF
Release I VCF
Attack Level II
VCF
Attack II
VCF
Decay II
VCF
Release II
K9 K10 K11 K12 K21 K22 K23 K24
VCA Attack I VCA Decay I VCA Sustain I VCA Release I VCA Attack II VCA Decay II VCA Sustain II VCA Release II
S1 S2 S3 S4 S5 S6 S7 S8
Arp Play Arp Hold Chorus Enable Delay Enable Exp Enable Exp Wah
Enable
Port Pedal
On/Off Port/Gliss
MOOG MODULAR V
Mac – Library/Preferences/MoogModularV2/save/
PC – C:\Program Files\Arturia\MoogModularV2\save\
BANK A BANK B
K1 K2 K3 K4 K13 K14 K15 K16
Filter 1 Cutoff Filter 1 Res. Filter 1 Mod 2 Filter 1 Mod 3 2D pad A – X 2D pad A – Y 2D pad B – X 2D pad B – Y
K5 K6 K7 K8 K17 K18 K19 K20
Filter 2 Cutoff Filter 2 Res. Filter 2 Mod 2 Filter 2 Mod 3 VCA1 Attack VCA1 Decay VCA1 Sustain VCA1 Release
K9 K10 K11 K12 K21 K22 K23 K24
Filter 3 Cutoff Filter 3 Res. Filter 3 Mod 2 Filter 3 Mod 3 VCA2 Attack VCA2 Decay VCA2 Sustain VCA2 Release
S1 S2 S3 S4 S5 S6 S7 S8
Seq On Seq Off Fixed Filter
On/Off Delay On/Off Legato On/Off Retrigger
On/Off Glide On/Off Seq Fwd/Rev
16
AKAI MPK25 PRESET MAPPINGS
MINIMOOG V
Mac – Library/Preferences/minimoog v/save/
PC – C:\Program Files\Arturia\minimoog V\save\
BANK A BANK B
K1 K2 K3 K4 K13 K14 K15 K16
VCF Cutoff VCF Emphasis VCF Env
Amount Glide OSC Range 1 Noise Volume OSC Wave 1 OSC Vol. 1
K5 K6 K7 K8 K17 K18 K19 K20
VCF ENV
Attack
VCF ENV
Decay
VCF ENV
Sustain Mod Mix OSC Range 2 OSC 2 Coarse
Tune OSC Wave 2 OSC Vol. 2
K9 K10 K11 K12 K21 K22 K23 K24
VCA ENV
Attack
VCA ENV
Decay
VCA ENV
Sustain Volume OSC Range 3 OSC 3 Coarse
Tune OSC Wave 3 OSC Vol. 3
S1 S2 S3 S4 S5 S6 S7 S8
OSC Mod Filter Mod Key Mod 1 Key Mod 2 OSC Sync
On/Off OSC On/Off 2 Noise On/Off OSC On/Off 3
17
USING THE MPK25 WITH ARKAOS
ArKaos GrandVJ is a visual effects program that allows you to trigger
video, still and flash clips from a MIDI source. The MPK25 supports
this software as well as ArKaos VJ MIDI. These programs and other
VJ applications are very well suited for using the MPK25.
This preset is not specific to ArKaos but is designed to allow you to quickly customize your ArKaos presets.
Keyboard – The keyboard is set to the COMMON MIDI channel and has a range from C1 – to C5. The keyboard is well suited for
momentarily triggering video clips or effects. You can use the keyboards ARPEGGIATOR and LATCH function to automatically have it
cycle through a range of clips.
Pads – The pads have been programmed to be latched or toggled on and off. This allows you to assign backgrounds, overlay clips or fx
that will run until you hit the pad a second time to turn it off. You can use the NOTE REPEAT function to retrigger your video at timed
intervals. By playing with the GATE TIME on NOTE REPEAT you can set how long the note stays on before retriggering. By setting a
short GATE TIME the clip or effect will flash on and then off quickly. With a long GATE TIME of 99, the note off and note on are very
close so it looks like the clip is looping.
Controllers – the controllers are set from 1 – 72. They are numbered left to right, top to bottom. i.e. Controller Bank A Knobs 1-8 are =
MIDI CC 1-8, the sliders are 9-16, the switches are 17-24.
The MPK25 makes a great VJ controller. Dig in and discover the possibilities.
18
USING THE MPK25 WITH FXPANSION GURU
FXpansion’s GURU software is a very flexible and creative tool for making all kinds of beats and grooves.
Guru comes preset with default MIDI note and controller note mappings that serve a bunch of different purposes.
Notes can be set to trigger sounds, map a sound chromatically and play it from a keyboard, trigger different patterns and
trigger different scenes.
There are 8 MIDI controllers that are set up for using with the individual voice engines called Pad Groups, and 8 more that
are setup to be used with any of the the FX Group.
Reference the Guru manual to see how to assign these functions to the different parameters.
We have supplied a preset that makes use of the most used functions of Guru. This preset is meant to be used with GURU’s GENERIC
CONTROLLER map in the OPTIONS menu.
KEYBOARD –The keyboard is set to trigger pads from middle C up 16 notes. The default is set to control ENGINE 1 on MIDI Channel 1. By
editing the keyboard MIDI channel, you can select which voice engine you are controlling. We set middle C to be the pads so that if you have
“Pattern keys play selected pad chromatically” in the OPTIONS/MIDI page, you will then hear the currently selected pad played chromatically
on the bottom two octaves of the keyboard. If you press the OCTAVE UP button twice, the drum pads will play on the lowest 16 notes of the
keyboard and the notes from middle C up will trigger different SCENES.
TRANSPORT Controls – GURU makes use of MMC for its transport controls. If you have the latest version of GURU it will automatically make
use of MMC messages. GURU makes use of the << REW command and assigns it to the COMMIT function and the >> FF command and
assigns it to the UNDO function.
MIDI Controllers – We have created 2 different options for continuous controller mapping with GURU. Since the MIDI controllers are color
coded in Guru they are mapped as follows:
BANK A BANK B
K1 K2 K3 K4 K13 K14 K15 K16
Pad CC
Red
Pad CC
Orange
Pad CC
Yellow
Pad CC
Green Mix CC
Red
Mix CC
Orange
Mix CC
Yellow
Mix CC
Green
K5 K6 K7 K8 K17 K18 K19 K20
Pad CC
LtBlue
Pad CC
Blue
Pad CC
Purple
Pad CC
Grey Mix CC
LtBlue
Mix CC
Blue
Mix CC
Purple
Mix CC
Grey
K9 K10 K11 K12 K21 K22 K23 K24
Master Tune
Master
Groove
S1 S2 S3 S4 S5 S6 S7 S8
PADS – We have purposely left the pad mapping to be chromatic. The pads can be customized for so many uses in GURU that we didn’t want
to make them too specialized. Currently the 12 pads in bank A and Pads 1-4 in bank B will normally play the GURU pads. We left these set to
the COMMON channel so that you could quickly change them to different voice engines by changing the COMMON channel in the GLOBAL
menu. But depending on how you are using GURU you may want to change the pad note and channel mappings. For instance:
Recording Patterns: You may want to leave the way they are. This will allow you to play your drum sounds and allow you to shift
engines via changing the Common channel.
Playing Live: You may want to assign the pads to different MIDI channels and notes so as to trigger SCENES or PATTERNS in a
real-time DJ style work flow.
19
USING THE MPK25 WITH PPG 2.V
AKAI MPK25 PRESET MAPPINGS
BANK A BANK B
K1 K2 K3 K4 K13 K14 K15 K16
Cutoff Emphasis OSC-Waves SUB-Waves ENV1-VCF RNV2-VCA ENVA1-
Waves
K5 K6 K7 K8 K17 K18 K19 K20
ENV1-Attack ENV1-Decay ENV1-Sustain ENV1-Release LFO-Delay LFO-Wave LFO-Rate Basis
K9 K10 K11 K12 K21 K22 K23 K24
ENV2-Attack ENV2-Decay ENV2-Sustain ENV2-Release ENV3-Attack ENV3-Decay ENV3-Att Volume
S1 S2 S3 S4 S5 S6 S7 S8
LFO Sync True PPG Out 3/4 LFO Sync True PPG Out 3/4

Other manuals for MPK25

4

Other Akai Electronic Keyboard manuals

Akai MPK mini MK3 User manual

Akai

Akai MPK mini MK3 User manual

Akai MPD 32 User manual

Akai

Akai MPD 32 User manual

Akai MPC KEY 61 User manual

Akai

Akai MPC KEY 61 User manual

Akai MPK 49 How to use

Akai

Akai MPK 49 How to use

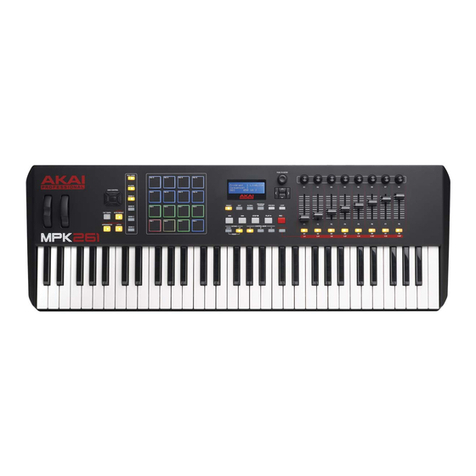
Akai Professional MPK261 User manual

Akai

Akai Professional MPK261 User manual

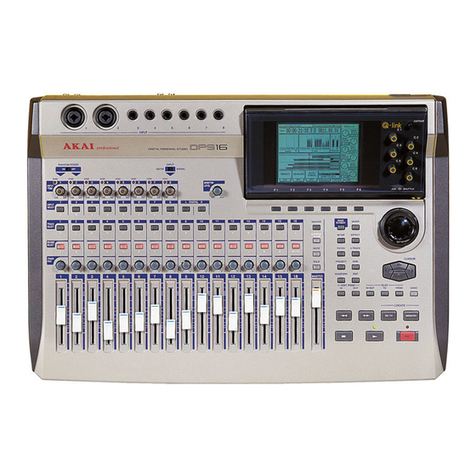
Akai DPS 16 Installation and operating instructions

Akai

Akai DPS 16 Installation and operating instructions

Akai MPKMINI User manual

Akai

Akai MPKMINI User manual

Akai MPKMINI User manual

Akai

Akai MPKMINI User manual

Akai MPK25 User manual

Akai

Akai MPK25 User manual

Akai MPK25 User manual

Akai

Akai MPK25 User manual

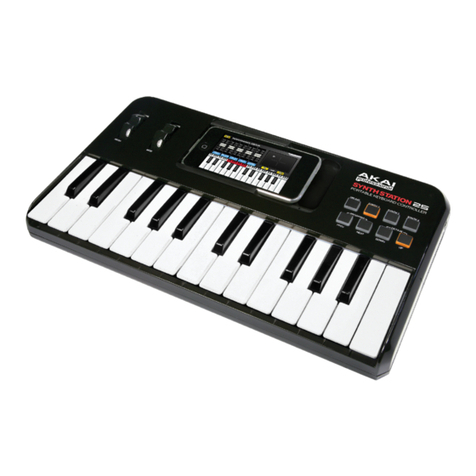
Akai Synth Station 25 User manual

Akai

Akai Synth Station 25 User manual

Akai MPK88 User manual

Akai

Akai MPK88 User manual

Akai MPK 49 User manual

Akai

Akai MPK 49 User manual

Akai MPK Road 88 User manual

Akai

Akai MPK Road 88 User manual

Akai MPK25 User manual

Akai

Akai MPK25 User manual

Akai MPK 61 User manual

Akai

Akai MPK 61 User manual

Akai MPK 49 Installation guide

Akai

Akai MPK 49 Installation guide

Akai Professional LPK25 User manual

Akai

Akai Professional LPK25 User manual

Akai X7000 User manual

Akai

Akai X7000 User manual

Akai MPK MINI User manual

Akai

Akai MPK MINI User manual

Akai MPK49 Instruction manual

Akai

Akai MPK49 Instruction manual

Akai MPK Road 88 User manual

Akai

Akai MPK Road 88 User manual

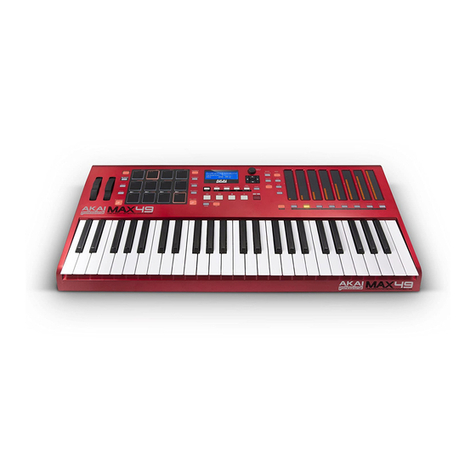
Akai Professional MAX49 User manual

Akai

Akai Professional MAX49 User manual

Akai MPK 49 Quick start guide

Akai

Akai MPK 49 Quick start guide

Popular Electronic Keyboard manuals by other brands

Yamaha PortaTone PSR-3 Guia del proprietario

Yamaha

Yamaha PortaTone PSR-3 Guia del proprietario

ARP Instruments 2600 Service manual

ARP Instruments

ARP Instruments 2600 Service manual

Yamaha NU1 Operations

Yamaha

Yamaha NU1 Operations

midiplus X mini user manual

midiplus

midiplus X mini user manual

Yamaha PortaTone EZ-20 owner's manual

Yamaha

Yamaha PortaTone EZ-20 owner's manual

Roland Juno-Stage user guide

Roland

Roland Juno-Stage user guide

Sega MIRACLE user guide

Sega

Sega MIRACLE user guide

Yamaha Symphonic Ensemble SK30 Service manual

Yamaha

Yamaha Symphonic Ensemble SK30 Service manual

Gear4music VISION KEY-10 user manual

Gear4music

Gear4music VISION KEY-10 user manual

Roland JD-Xi owner's manual

Roland

Roland JD-Xi owner's manual

Samsung SCC-3100A Quick setup guide

Samsung

Samsung SCC-3100A Quick setup guide

Casio CTK-620L Service manual

Casio

Casio CTK-620L Service manual

Casio WK-3300 user guide

Casio

Casio WK-3300 user guide

Casio WK-3200 user guide

Casio

Casio WK-3200 user guide

Casio Cosmo CZ-1 Service manual and spare parts list

Casio

Casio Cosmo CZ-1 Service manual and spare parts list

Roland BK-5 owner's manual

Roland

Roland BK-5 owner's manual

Electron Analog Keys Getting started guide

Electron

Electron Analog Keys Getting started guide

Yamaha YPT-240 owner's manual

Yamaha

Yamaha YPT-240 owner's manual

manuals.online logo
manuals.online logoBrands
  • About & Mission
  • Contact us
  • Privacy Policy
  • Terms and Conditions

Copyright 2025 Manuals.Online. All Rights Reserved.