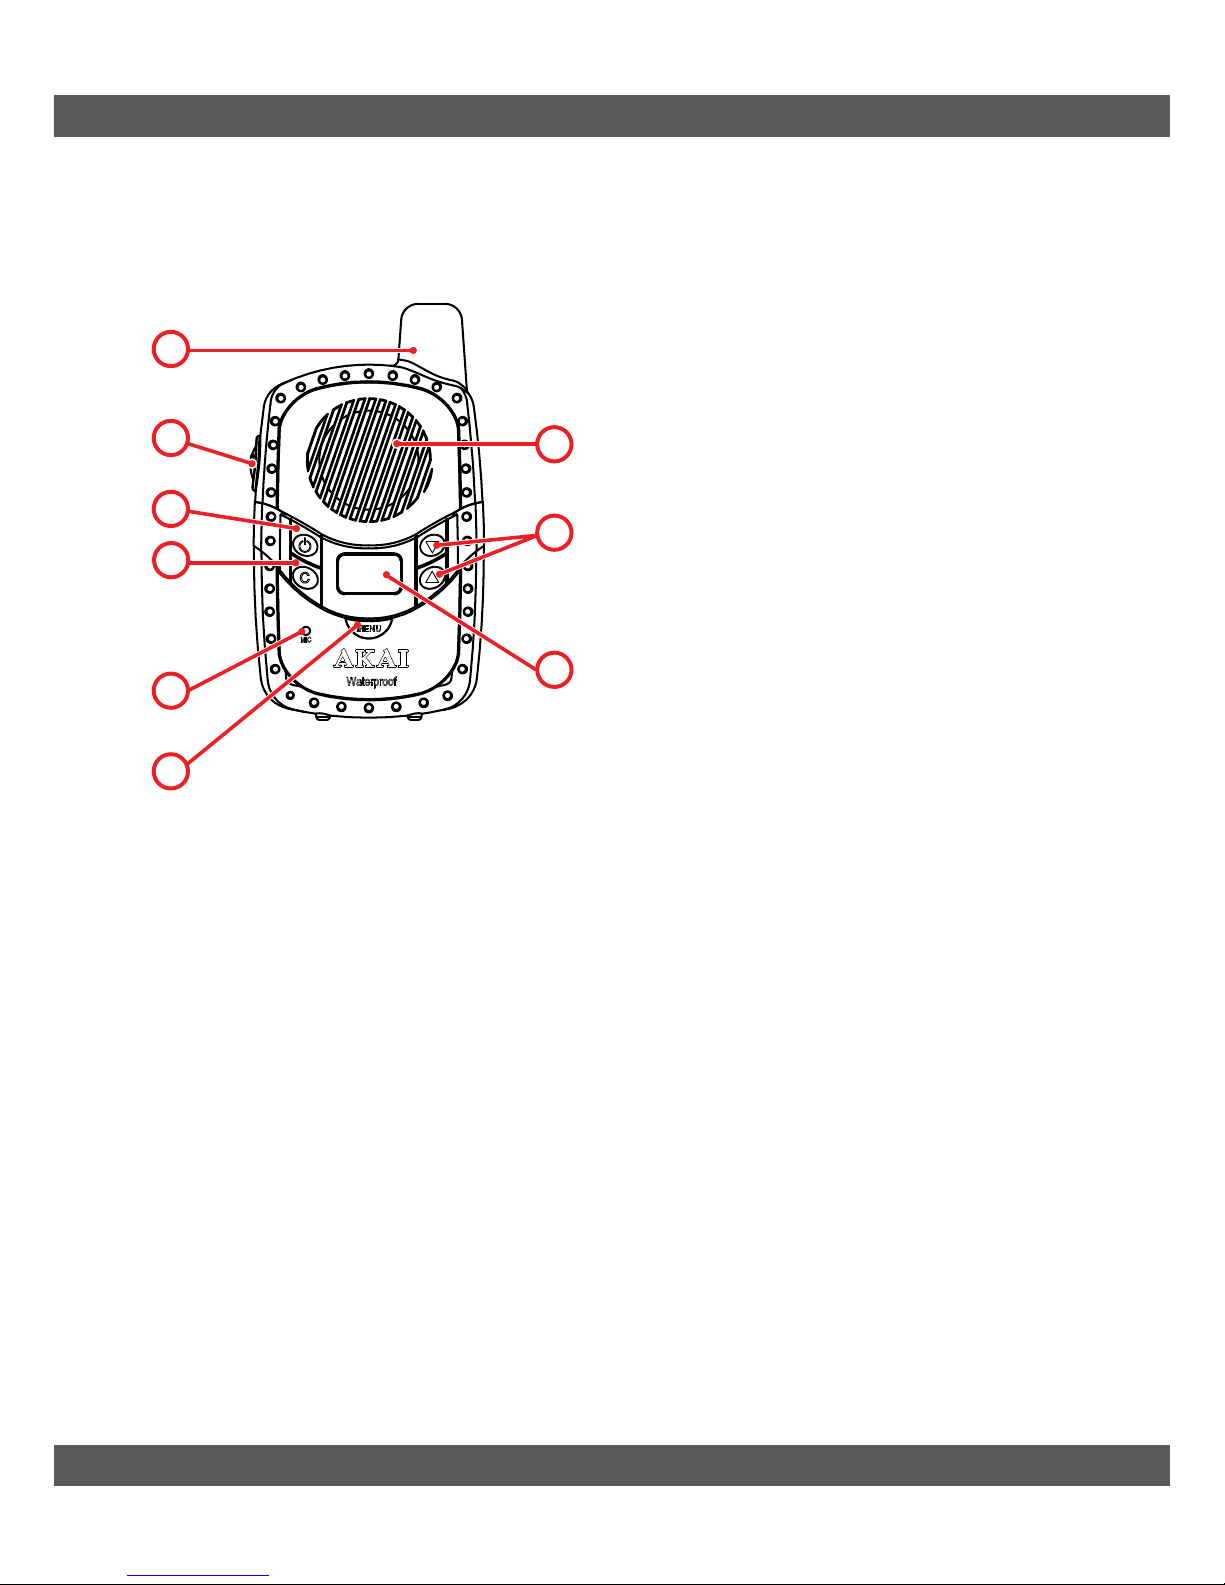
Akai APMP300 User manual

Walkie Talkie
APMP300
User manual

2
Table of contents
Copyright noce
Safety
Preparaons for use
Funcons
Operaon
Cleaning and maintenance
Technical data
Disposal of used electrical and
electronic equipment
1. 1
2. 2
3. 7
4. 8
5. 12
6. 12
7. 13
Turning the device on and o
Unpacking
Intended use
4.1 8
2.1 4
1.1 3
Selecng a channel
Charge the baery
4.3 9
2.3 6
Transming4.7 9
Call-Ringtone4.11 11
Key lock4.15 11
Adjusng the volume
Package contents
Labels in this manual
4.2 8
2.2 5
1.2 3
Insert baeries2.4 6
Receiving4.6 9
Monitor4.8 10
Auto Channel Scan4.10 10
Roger Beep4.12 11
Design and specicaons are subject to change without noce.

APMP300
3
8
4
3
9
6
9
11
11
8
5
3
6
9
10
10
11
Safety
Intended use
Labels in this manual
1.1
1.2
The APMP300 is intended for sending voice messages and signals to
other APMP users.
Read the manual carefully before the rst use.
CAUTION
A cauon means that damage to the equipment is pos-
sible.
A note gives addional informaon, e.g. for a procedure.
1.

4
Unpacking2.1
We recommend that you retain the original carton and
packing materials in case it ever becomes necessary to
return your product for service. This is the only way to
safely protect the product against damage in transit. If you
do dispose of the carton and the packing materials, please
remember to recycle with due care to the environment.
2. Preparaons for use
• Unpack the appliance carefully.
• Check the package contents as described below. If any item is miss-
ing, please contact your reseller.
• Remove the labels from the front panel carefully if present.

APMP300
5
If any item is missing, please contact your reseller.
APMP300
Rechargeable baeries
Lader
Adapter
Quick start guide
2
6
1
1
1
Package contents2.2
The following items are included in the received package:

6
Charge the baeries
Insert baeries
2.3
2.4
Insert the baeries matching the (+) and (-) polarity
markings.
Insert the baeries matching the (+) and (-) polarity mark-
ings.
min. 10h
a b c d

APMP300
7
3. Funcons
Antenna
MENU key
Push to talk (PTT)
Loudspeaker
POWER key
CALL key
UP and DOWN keys
Microphone (MIC)
Display
1
6
2
7
3
4
8
5
9
1
2
4
6
7
9
3
5
8

8
4. Operaon
Turning the device on and o
Adjusng the volume
4.1
4.2
• Keep the POWER key (3) pressed down.
You will hear a beep.
The display (9) lights up.
The device has now been turned on.
• Press the UP or DOWN key (8) to adjust the vol-
ume.
9
3
8

APMP300
9
Selecng a channel4.3
• Press the MENU key once (6).
• The current channel starts ashing on the
display (9).
• Use the UP and DOWN keys (8) to make your
selecon.
• Press the MENU key (6) to store your sengs.
The APMP300 has eight channels. In order to communicate with other
APMP300 users, all devices must be set to the same channel.
Receiving
Transming
4.4
4.5
Once the device has been turned on, you can start receiving signals.
• Keep the PTT key (2) pressed down in order to send a message.
• Release the PTT key when you have nished talking.
6
9
8
2
5 cm

10
Monitor4.6
• Keep the MENU and the UP key (6 + 10) pressed
down at the same me.
• Press the MENU key (6) to stop the Monitor
funcon.
You can use the Monitor funcon to search for weak signals on the
channel you have selected.
Auto Channel Scan4.7
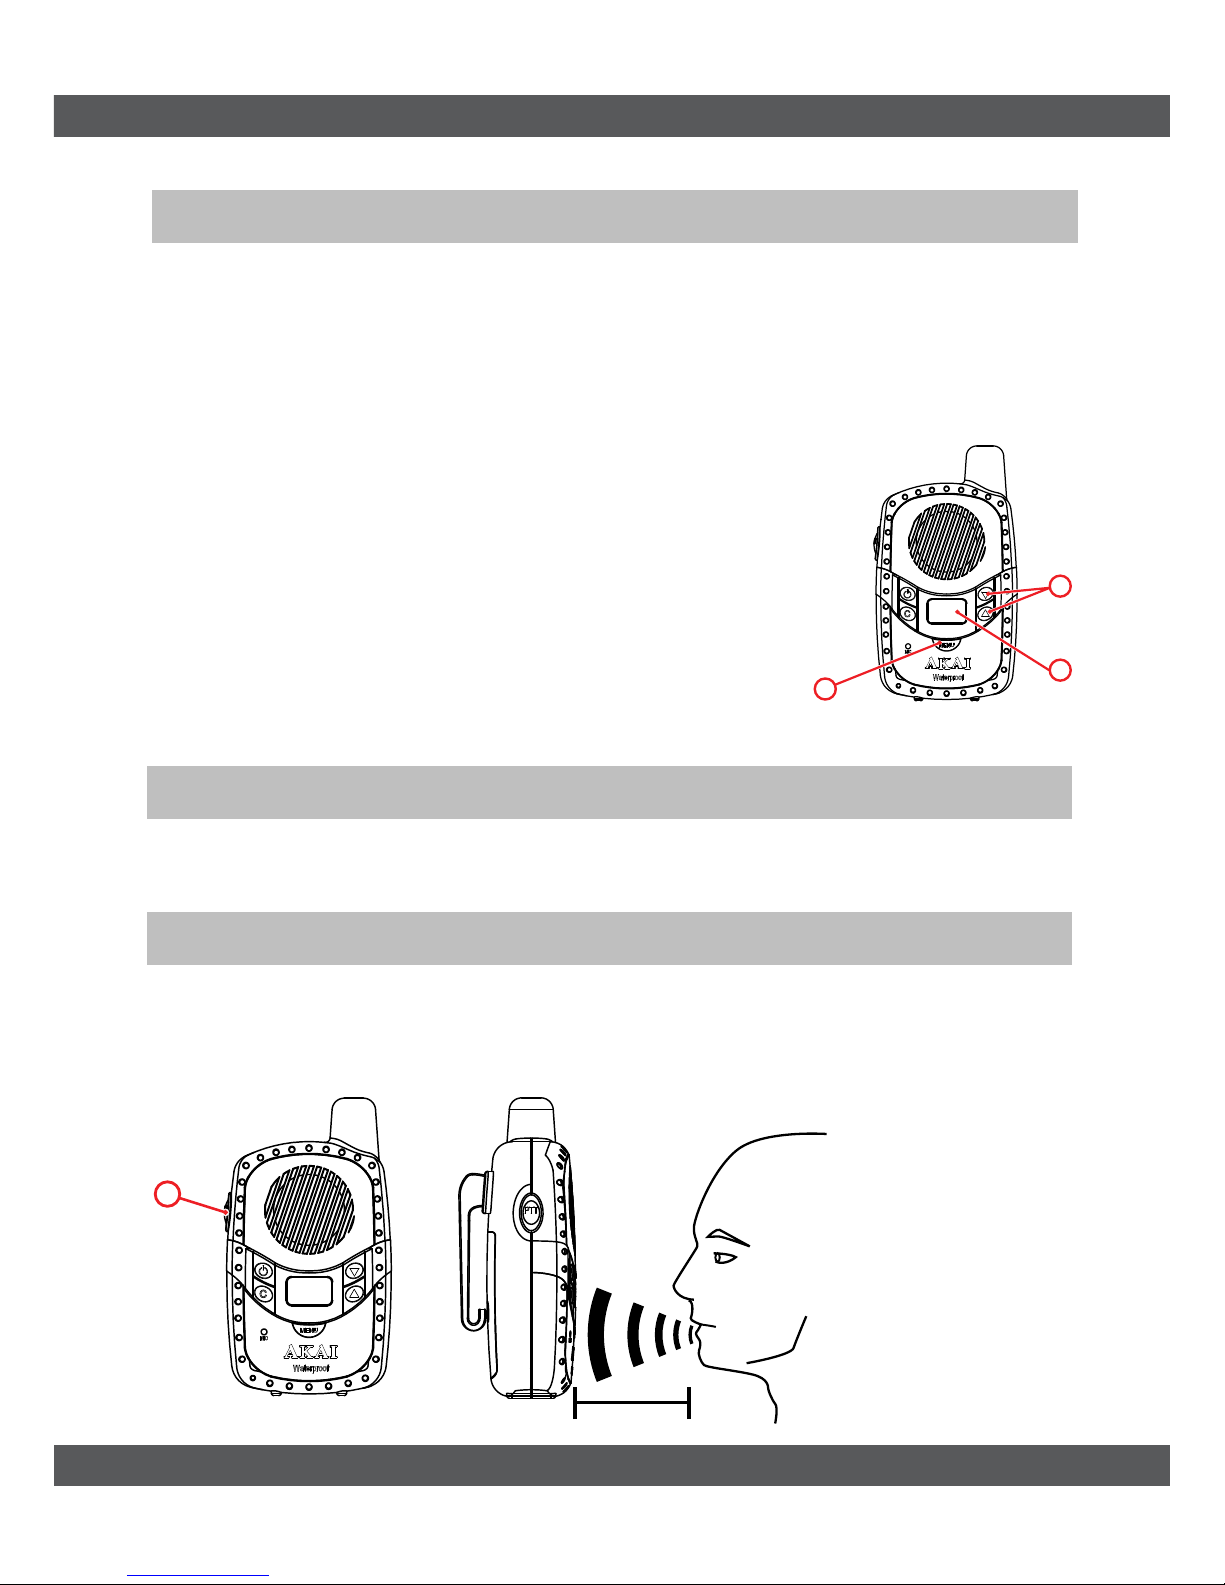
• Keep the UP and the DOWN key (10 + 11) pressed down at the same
me.
Scan Channel
On the display (9) you will see the channel number change quickly.
When the APMP300 detects a signal it
will automacally pause.
• Press the PTT key (2) to store your
sengs.
• Press the “Up” and “Down” keys
(10 + 11) to start the scan.
• Press the MENU key (6) to stop the
scan funcon.
Channel Scan searches for signals on all 8 channels.
6
10
2
6
9
10
11

APMP300
11
Call-Ringtone
Roger Beep
4.8
4.9
You can use the Call Ringtone to nofy other APMP300 users on your
channel that you wish to send them a message.
The Roger Beep is a tone that is automacally transmied when the
PTT key (2) is released.
• To do this, press the CALL key (4).
This way the receiver knows that the message has been completed.
Key lock4.10
The key lock funcon has now been enabled.
The key lock funcon locks the following keys UP, DOWN, MENU.
• Keep the MENU key (6) pressed down unl the
key symbol appears on the display (9).
• Keep the MENU key (6) pressed down once more
in order to disable the key lock.
4
6
9

12
5.
6.
Cleaning and maintenance
Technical data
• Clean the outside of the appliance with a so cloth. When the
appliance is very dirty, dampen the cloth slightly with water and a
neutral soluon.
Number of channels 8
Frequency band 446Mhz
Transming power 500mW
Coverage max 3 km
Digital volume control
Roger Beep; conversaon conrmaon tone
Channel scan funcon
Call signal
Water resistant up to 1 meter
Accessories
Rechargeable baeries with charger staon
Can be used without a licence in, for instance, the Benelux.
This device may be used in the following countries:
Austria
Belgium
Bulgaria
Croaa
Cyprus
Czech
Denmark
Estonia
Finland
France
Germany
Greece
Hungary
Iceland
Ireland
Italy
Latvia
Liechtenstein
Luxemburg
The Netherlands
Norway
Poland
Portugal
Slovenia
Spain
Sweden
Switzerland
Turkey
UK
Romania

APMP300
13
The meaning of the symbol on the material, its accessory or packaging
indicates that this product shall not be treated as household waste.
Please, dispose of this equipment at your applicable collecon point for
the recycling of electrical and electronic equipments waste. In the Eu-
ropean Union and Other European countries which there are separate
collecon systems for used electrical and electronic product. By ensur-
ing the correct disposal of this product, you will help prevent poten-
ally hazardous to the environment and to human health, which could
otherwise be caused by unsuitable waste handling of this product. The
recycling of materials will help conserve natural resources. Please do
not therefore dispose of your old electrical and electronic equipment
with your household waste.
For more detailed informaon about recycling of this product, please
contact your local city oce, your household waste disposal service or
the shop where you purchased the product.
For more informaon and warranty condions, please visit:
www.akai.eu.
7. Disposal of used electrical and
electronic equipment
Table of contents
Other Akai Two-way Radio manuals