Connecting Now
2%
Make sure your phone and device
are as close to your router as possible.
Searching for Device
Registering device to the cloud
Initializing your Device
Cancel
Way 2: Add device by SmartConfig - Mobile phone will broadcast the net-pairing
information, device will connect the router when it receives the information.
Note: When the device is powered on, the indicator light will be on. After the beep is
heard, the device indicator light flashes red quickly.
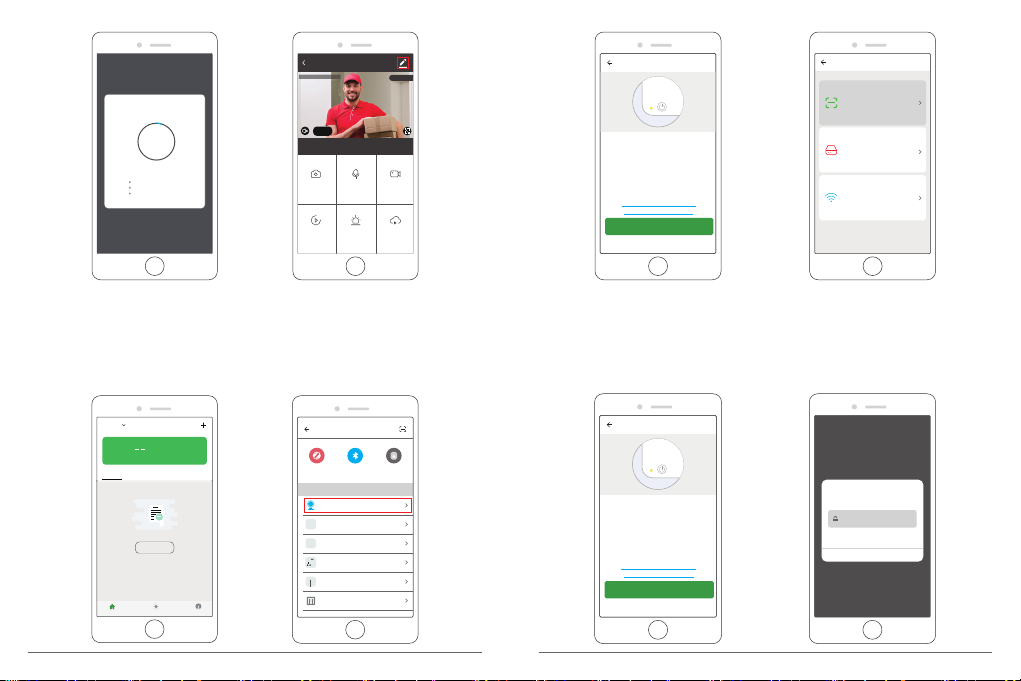
Select Device Type
Zigbee
Security Camera
ZigBee Gateway
T&H Sensor
Wall Socket(ZigBee)
Wall Switch(ZigBee)
Curtain Switch
Bluetooth All
Frequently Added
Gunnar
84.3°F High H...
Outdoor Temp Outdoor AQL Outdoor Humid...
All Devices Living Room Bedroom Setting
Add Device
Nodevices yet
My Home Smart Scenes Profile
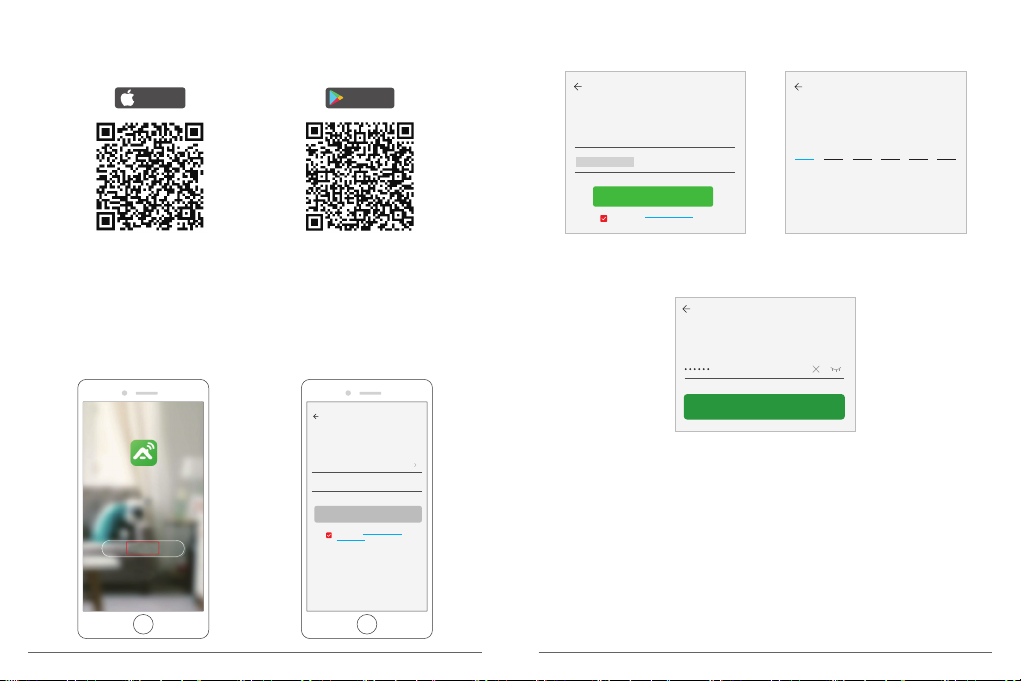
① Click “Add Device → Security Camera → Otherwise → SmartConfig”.
Add Device Otherwise
Power the device on and make
sure the indicator is flashing
quickly or a prompt tone is heard
How to set the indicator to flash
quickly or with a prompt tone
next step
Select a method
QR Code
Use camera to sacn the QR code
on the mobile phone which contains
net-pairing info.
AP Code
Mobile phone transmit the net-
pairing info by connecting camera's
hotspot.
SmartConfig
Mobile phone will broadcast the
net-pairing information, device
will connect the router when it
receives the info.
② After confirming that the device indicator is flashing red quickly, click "Next → Enter
Wi-Fi Password → Confirm”. The device indicator starts flashing blue quickly, then the
blue light is always on. The mobile app starts counting seconds and is searching for
devices waiting for a connection. After the APP prompts that the device has been
searched, click "Done". Click Camera icon to preview camera.
Add Device Otherwise
Power the device on and make
sure the indicator is flashing
quickly or a prompt tone is heard
How to set the indicator to flash
quickly or with a prompt tone
next step
Cancel
This app is supported only on 2.4GHz Wi-Fi
channels.
Enter Wi-Fi Password
Wi-Fi: AKASO_WiFi Change Network
Confirm
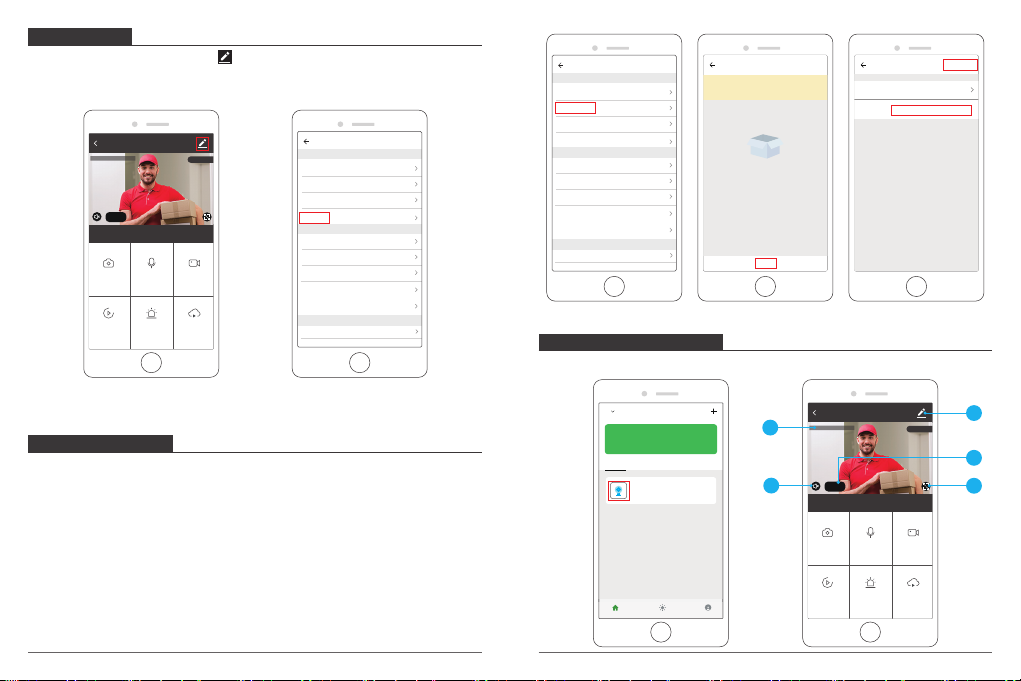
07 08
B60
Alarm
Screenshot
Cloud storage
Speak
Playback
SD
2019-01-09 13:51:48
Record
Back
Signal: 91%