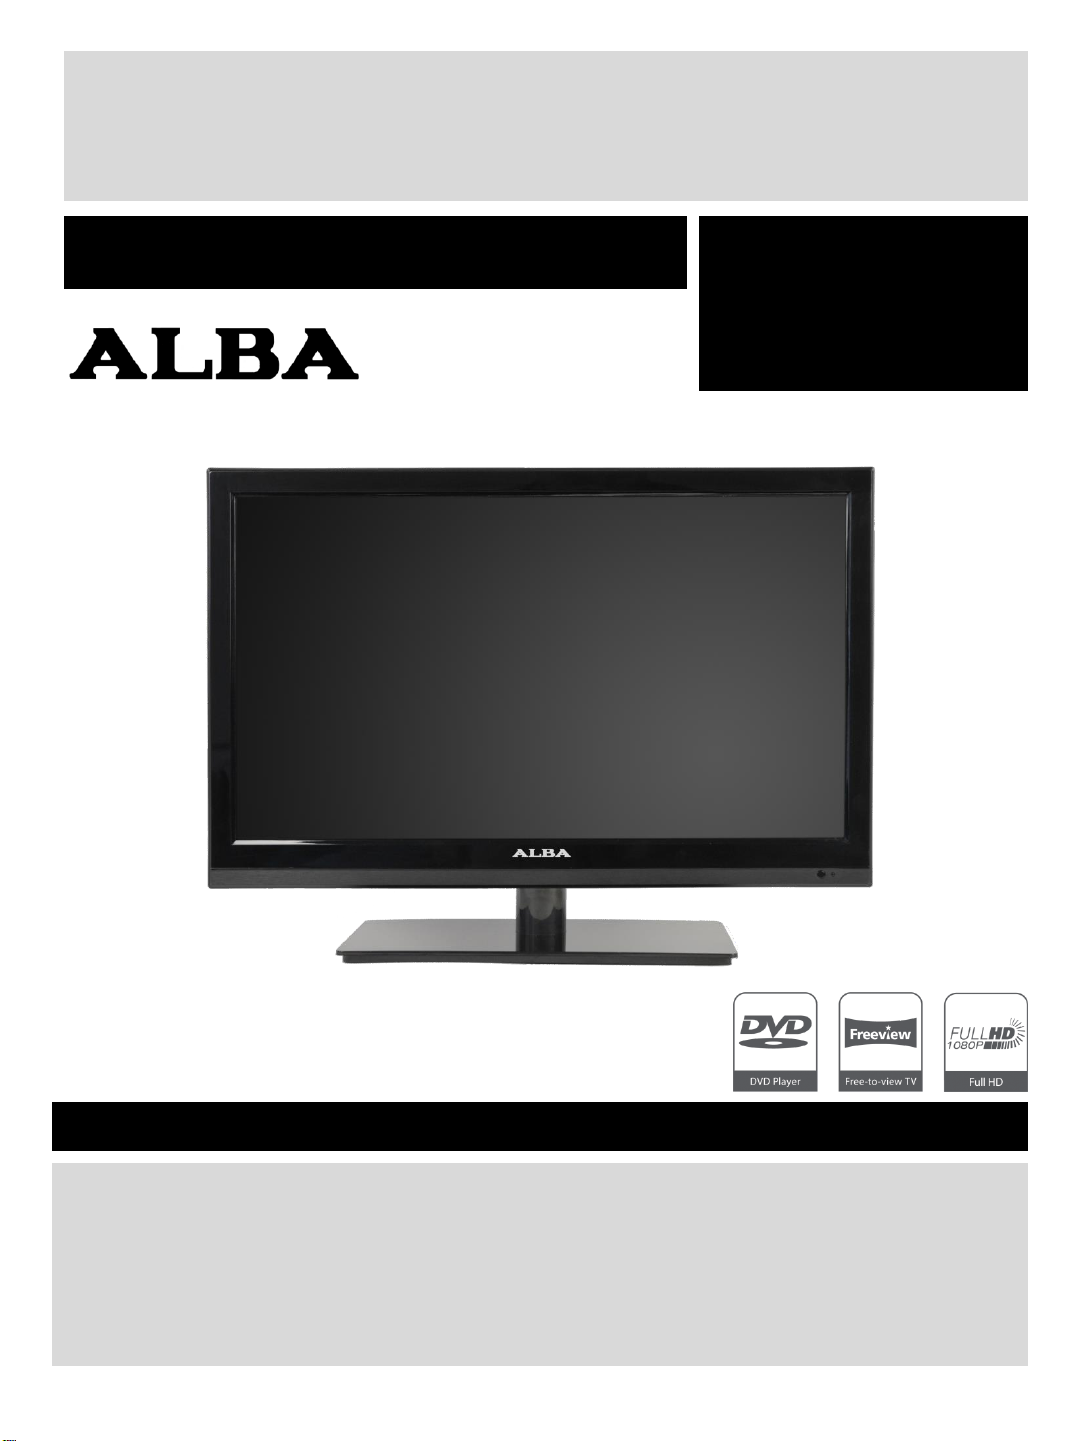
Alba AMKDVD22 Manual

22” Full HD Digital LED TV
with integrated DVD Player
Installation & Operating Instructions
Please keep safe for future reference
114/9173 AMKDVD22
138/2947 AMKDVD22S
128/8120 AMKDVD22PK
114/6468 AMKDVD22R
122/8180 AMKDVD22W
109/7586 AMKDVD22NB
These instructions contain important information which will help you get the best from
your television and ensure safe and correct installation and operation.
For any help concerning setup and use of your TV please call the
Customer Helpline: 0845 604 0105
Lines open: 9am –8pm Monday to Saturday and 10am –4pm Sunday
Important –Please read these instructions before installing or operating

Contents
Safety Information 2-3
Basic Features (TV) 12-18
Basic Features (DVD) 21
Advanced Operation (TV) 18-21
Helpline Information 4
TV Features 5
DVD Features 5
Accessories 5
Remote Control 6
Remote Control Battery Installation 7
TV/DVD User Button location 8
User Input Connections 8
Typical Connections 9
Initial Setup 10
LCD Menu 12
Picture Menu 12
Sound Menu 12
Tuning Menu 13
Channel Manager 13
Tuning Favourites Manager 13
Favourites Selection 14
Digital Installation 14
Auto Search 14
Manual Search 14
LCN ( Local Channel Numbering) 15
Renaming Stations 15
Features Menu 15
•Child Lock 15
•Parental Lock 15
•Key Lock 16
•Password and Pin Change 16
•Language 16
•Clock 17
•OAD 17
•Auto Scart 17
•CI Module 17
•Auto Standby 17
Setup Menu 17
•OSD Timer 17
•Sleep Timer 18
•Aspect Ratio 18
•First Time Installation 18
Teletext 18
CI Slot (Cam Module) 19
EPG (Electronic Programme Guide) 20
Digital Radio 21
DVD / CD Operation 21
Playing a Disc 21
Advanced Features (DVD) 22–25
DVD/CD Operation 22
Playing a Disc 22
Play/Pause 22
Stop 22
Fast Reverse 22
Fast Forward 22
Previous Page/Up 22
Next Page/Down 22
Repeat 22
A-B Repeat 22
Language 22
Subtitles 22
Setup 22
DVD Menu 22
Title 22
Zoom 22
Program 22
Goto 22
Angle 23
Picture Play 23
JPEG Picture Play 23
Audio CD 24
DVD Setup 24
•TV Display 24
•OSD Language 24
•Screen Saver 24
•Last Memory 24
•Audio Setup 25
•Password Setup 25
•TV System 25
•Audio 25
•Subtitles 25
•Disc Menu 25
•Parental 25
•Password 25
Disc Care 25
Product Support 26
Regional Management 26
Titles, Chapters and Tracks 26
Copyright 26
DVD Media Types 26
Troubleshooting Guide 27
Specifications 28
Base Fitting Guide 29
Wall Mounting Guide 29
Argos Warranty 30
For any help concerning setup and use of your TV please call the Customer Help Line: 0845 604 0105
Getting Started 4-10

Safety Information
Important - Please read these instructions fully before installing or operating
The lightning flash with an arrowhead within
a triangle alerts you to uninsulated
dangerous voltages within the product’s
enclosure that could cause an electric shock
The exclamation mark within a triangle
alerts you to the presence of important
operating, maintenance and servicing
instructions in this user manual
DANGER OF EXPLOSION IF BATTERY IS INCORRECTLY REPLACED. REPLACE
ONLY WITH THE SAME OR EQUIVALENT TYPE. DO NOT MIX OLD AND NEW OR
DIFFERENT TYPES OF BATTERY. IF THE PRODUCT IS NOT TO BE USED FOR A
PROLONGED TIME; REMOVE THE BATTERIES AS ELECTROLYTE LEAKAGE WILL
DAMAGE TO PRODUCT AND WILL INVALIDATE THE WARRANTY
CAUTION:
This product contains a
low power laser device
The symbol for Class II
(double insulation)
Correct disposal of this Product
Waste Electrical & Electronic Equipment (WEEE)
The crossed out wheelie bin is intended to show that this appliance must not be placed with
ordinary household waste at the end of its useful life. To prevent possible harm to the
environment or human health from uncontrolled waste disposal, please keep separate from
other household waste and recycle it responsibly to promote the sustainable reuse of
material resources.
Household users should contact either the retailer where you purchased the product, or their
local government office for details of where and how you can take this item for
environmentally safe recycling.
Do not place used batteries in domestic waste.
You may return to any Argos store for safe disposal.
This symbol means that the unit complies with European Safety and electrical interference
directives
2
For any help concerning setup and use of your TV please call the Customer Help Line: 0845 604 0105

Safety Instructions
Ventilation and Heat Sources. Do not place
material over the ventilation slots, this will cause
the TV to overheat and fail. Do not place the TV in
direct sunlight or near heat sources such as
radiators or fires.
Ventilation slots. Do not allow objects to be
dropped inside the ventilation slots, this could
cause a short circuit and a possible fire. Do not
allow chains to be dangled into the TV. A serious
electrical shock my occur.
Candles and open flames. Do not place lighted
candles (such as tealights) on the top or at the sides
of the TV, or any other naked flame near the TV
cabinet.
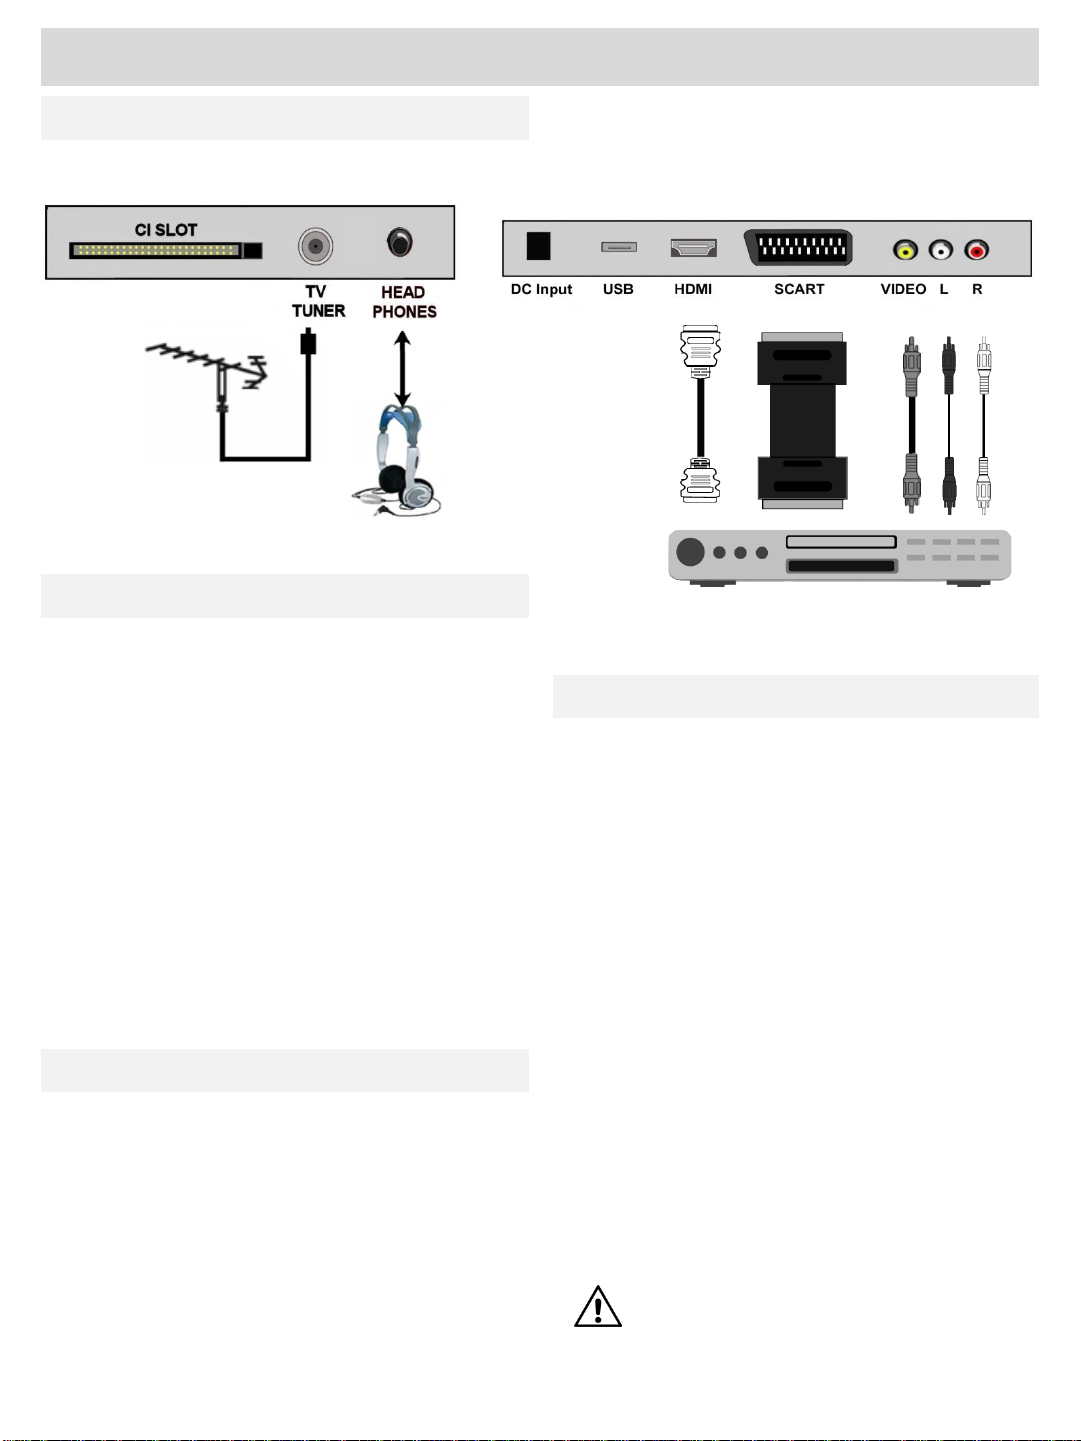
Connections. When connecting the TV to external
sources and the mains supply, do not place wires
that can be tripped over. Do not trap or place heavy
objects on the mains lead.
Class Two. The mains adaptor has Double
Insulation and is a Class Two device and must
not be earthed.
Disconnection Device. Where the MAINS plug
or appliance connector is used as the
Disconnection device, the disconnect device
shall remain operable and MUST be accessible
at all times. To be completely disconnected
from the mains supply, the plug must be
removed completely.
Moisture. Do not place the TV in wet or damp
conditions, such as steamy kitchens, basements
or other damp places. Do not allow water or
other fluids to enter the TV. Do not touch the
Mains plug or adaptor with wet hands. Should
moisture enter the TV, disconnect from the
supply and call the customer help line.
Cleaning. Use a soft dry cloth, for stubborn
stains use a soft moist cloth with a dilute mild
detergent. Do NOT use petrol based fluids or
abrasive materials.
LCD Screen. Do not hit or cause impact to the
LCD screen. The screen consists of many
individual pixels and is easily damaged. Bright
or dark dots may occur and are not covered by
warranty.
Lightning. During a thunderstorm or when
leaving the appliance for long periods such as
holidays, disconnect the aerial input (if external
aerial) and remove the mains plug; this is to
prevent power surges damaging the apparatus.
Headphone use. When using headphones do
not use for long periods. Loud music can
permanently damage your hearing.
3
Unpacking and Handling. Open the carton carefully
and remove the card packing. Carefully lift the TV
and place onto a firm stable surface. Lift off the Poly
bag and retain all packaging for future use. Keep all
packaging away from small children and animals.
Remove Energy efficiency label from the screen,
this should peel easily… DO NOT Use any tool to
remove this label
Base fitting. This TV is supplied with a separate
base for ease of shipment. See page 29. If wall
mounting see page 29.
Placing TV. The TV should be placed on a firm table
or shelf. If placing in a cabinet ensure there is
sufficient spacing for air flow; 10 cm above and
20cm at each side.
For any help concerning setup and use of your TV please call the Customer Help Line: 0845 604 0105

Getting Started
4
Technical experts are available 7 days a week.
•Simple help and advice on setting up your digital
equipment.
•Guidance on connecting other devices to your
television such as a DVD player, Sky, home cinema
system or a games console.
•Order spare parts, including that lost remote control.
•Any other technical issues you may need assistance
with.
Call us today: 0845 604 0105
Call charges apply*
Lines open 9am–8pm Monday to Saturday and 10am–4pm Sunday
*Calls to Argos enquiry lines may attract a charge and set up fee from residential
lines depending on your call plan/tariff. Mobile and other providers costs may vary
see www.bt.com/pricing for details.
For security and training purposes telephone calls to and from customer service
centres maybe recorded and monitored. Calls from Republic of Ireland will attract
international call charges.
The Argos Technical Helpline is here to help

TV Features DVD Features
•Remote controlled colour LED TV
•Fully integrated digital TV (DVB-T)
•HDMI socket with HDCP decoding
•7-Day Electronic Programme Guide (EPG)
•Stereo Speakers
•Multi-Language On-Screen Display (OSD):
English, French, Spanish, Italian, Portuguese,
German
•SCART socket for external devices (such as
video, video games, DVD player, etc)
•Video (CVBS) input. RCA/Phono for external
devices (such as video games, camcorders)
•Digital Teletext
•Digital Subtitles
•Headphone connection (3.5mm)
•Automatic Set Up & Tuning
•Manual Tuning Search
•Sleep timer
•Child lock
•DVD / CD / CDR / CD-RW / JPEG / MPEG
playback
•NTSC / PAL playback (according to disc content)
•Multi-audio (up to 8) support (according to disc
content)
•Multi-subtitle (up to 32) support (according to
disc content)
•Multi-angle (up to 9) support (according to disc
content)
•8-Level Parental Control
•Fast forward and rewind: 5 different speeds
2X, 4X, 8X, 16X, 32X
•Picture Zoom: 4 different levels
Normal, 2X, 3X, 4X
•Picture shrink: 4 different levels
Normal, ½, 1/3, ¼
•Search mode
•Repeat
Accessories Included
Getting Started
5 For any help concerning setup and use of your TV please call the Customer Help Line: 0845 604 0105
•Instruction Book
•Quick Start Guide
•Mains Power Adaptor
•Remote Control
•Batteries: 2 x AAA
•Mounting base and screws (x3)
•Base stem and screws (x3)

1. STANDBY/ON. Switches TV
to ON and Standby.
2. 0-9. Numeric buttons for
direct channel selection or
track/chapter numbers.
3. EPG. Selects Electronic
Programme Guide.
4. VOL- Volume decrease
5. OK. Confirmation button and
station list.
6. LEFT. Navigation button.
7. DOWN. Navigation button.
8. CH- Channel DOWN select.
9. A-B/FREEZE. A-B sets
section of DVD to be repeated.
Freeze, freezes picture in DTV
mode.
10. TXT/REPEAT. Select
Teletext. Repeat sets the repeat
mode in DVD/CD playback.
11. DVD MENU. Display the
contents of the DVD disc
playing.
12. SETUP. Enter the DVD
player setup menu.
13. GREEN/GOTO. Green fast
text mode. GOTO, DVD Mode.
14. RED/PROGRAM. Red fast
text mode button and RED
button. Program DVD Mode
15. STOP/LIST. Stop DVD
playback. LIST displays DTV
station list.
16. PLAY/PAUSE. Plays and
Pauses DVD playback.
17. EJECT. Eject disc from
player
18. P MODE. Select picture
mode. S MODE. Select sound
mode.
19. MUTE. Press to mute sound,
press again to restore sound.
20. INFO. Display TV settings
and channel being viewed.
21. SLEEP. Set sleep timer,
sets from 10 minutes to 4 hours
22. MENU. Enters Setup menu.
23. RECALL. Recall previous
channel viewed.
24. SOURCE. Select between
inputs.
25. VOL+ Volume increase
26. UP. Navigation button
27. RIGHT. Navigation button
28. CH+Channel UP select.
29. LANGUAGE. Select
language track on DVD
playback.
30. SUBTITLE. Displays
subtitles in DVD and DTV
operation.
31. TITLE. Shows title of DVD
32. EXIT/CANCEL/ZOOM. Exit
/Cancel exits setup menus.
Zoom magnifies screen in DVD
playback.
33. YELLOW/ANGLE. Yellow
fast text mode. Angle selects
angle function in DVD mode.
34. BLUE/D.DIS. Blue fast text
mode. D.Dis displays DVD
information about playing time.
35. REWIND/DTV/RADIO.
Selects fast rewind in DVD
mode. Selects TV or radio in
DTV mode.
36. FAST FORWARD/FAV.
Selects fast forward in DVD
mode. FAV. displays favourite
DTV program listing.
37. PREV/PAGE UP. Prev
selects previous DVD/CD track
or chapter. Page UP selects
next page in menu operation.
38. NEXT/PAGE DOWN. Next
selects next DVD / CD track or
chapter. Page down selects
previous page in menu
operation.
39. AUDIO In DTV mode
selects different soundtracks if
transmitted. ASPECT. Selects
different picture size modes.
Remote Control
Getting Started
6
For any help concerning setup and use of your TV please call the Customer Help Line: 0845 604 0105

Remote Control
Battery Fitting
•Open the battery cover
•Fit two AAA batteries. Ensure the battery
polarities are correct (oto o-to -)
•Replace the battery cover
Using the remote control
•Point the remote control at the Remote
Sensor on the TV.
•Bright sunlight shining onto the remote
control sensor may cause the TV not to
respond correctly.
•The recommended operating distance is
up to 3 metres (10 feet).
Do not place used batteries in domestic waste.
You may return to any Argos store for safe disposal.
Getting Started
7 For any help concerning setup and use of your TV please call the Customer Help Line: 0845 604 0105
Battery Safety & Disposal
To prevent injury, do not break open or throw exhausted batteries in a fire.
Do not mix batteries, old and new, Carbon or Alkaline.
Do not use rechargeable batteries.
Remove batteries if not using the remote control for long periods to prevent leakage.
If the batteries do leak, clean the compartment with soapy water and scrape any residue from the contacts. Do
NOT touch or ingest battery residue.
Should you swallow chemicals leaked from a battery, please URGENTLY consult a medical adviser.

TV Control Buttons
CH+: Increases channel selection by 1 with
each press.
CH- : Reduces channel selection by 1 with
each press.
VOL+: Increases volume level. In menu mode
increases values.
VOL- : Reduces volume level. In menu mode
decreases values.
MENU: Select the MENU function. If in a sub
menu, will revert to previous level of menu.
SOURCE: Select input source
POWER: Turn TV on from standby. Also return
TV to standby
Input Connections (right side)
Input Connections (under side)
CI SLOT: Common Interface slot, for optional
Conditional Access Module. (Top Up TV)
TV TUNER: TV coaxial antenna input.
HEADPHONES: Stereo output to headphones
(3.5mm)
POWER INPUT:Power connection to mains
adaptor (use only adaptor supplied)
USB: Service Input Only. Not for Consumer use.
HDMI: Input from High Definition source.
SCART: Video/Audio input and output
VIDEO & L/R: Video/Audio input (1vPP 75 Ω)
Right side
Under side
Getting Started
8
For any help concerning setup and use of your TV please call the Customer Help Line: 0845 604 0105

Getting Started
Typical connections
Blu-ray Player, VCR,
Games Console, etc.
To view digital Freeview TV channels a signal must
be received from one of the following sources.
•An indoor or outdoor antenna
•RF output from a compatible cable system
NOTE: For receiving over-the-air TV broadcasts, we
recommend that an outdoor antenna is used.
If using an indoor antenna, you must ensure that the
antenna is designed to work in a weak signal area.
Only when in close proximity to a TV transmitter will
an indoor antenna be able to reproduce a signal as
strong as a roof antenna.
Should the picture “freeze” or break-up on any
channel, this is most likely due to poor signal
reception.
Connecting a TV antenna
Connecting to other apparatus
HDMI: Connect high definition equipment, such as
games consoles or Blu-ray players, using and
HDMI cable(not supplied). Select HDMI in the
Source menu to view.
SCART: This is the connector to choose for general
quality picture and sound. VCRs, set-top boxes and
some older games consoles. Select SCART in the
Source Menu.
Video and sound output is also available from this
connector. Note: Only DTV signals may be viewed
from this output.
VIDEO & L/R: For connecting products that do not
have SCART or HDMI outputs. Select AV in the
Source Menu
Headphones: You may connect personal
headphones to this TV. Reduce the volume level
before connecting. Inserting the headphone jack
(3.5mm) will cause the internal speakers to be
muted.
Connecting to other apparatus
Connect the TV to other products such as VCR,
Blu-ray Player, games consoles, etc.
NOTE: Do not connect two leads to one apparatus,
only connect one lead to one apparatus at any one
time, signal quality may be impaired.
9
Antenna
or cable
For any help concerning setup and use of your TV please call the Customer Help Line: 0845 604 0105
Warning: Listening to loud music for prolonged
periods may damage your hearing.

Getting Started
Initial Setup Fig 1
Fig 2
Fig 4
Fig 3
Fig 5
Use the ▲▼►◄ buttons to select a desired
language and press OK to confirm (English is
default). Fig 2
Use the ▲▼►◄ buttons to select a desired
country and press OK to confirm (UK is default).
Fig 3
Press OK to start Auto Tune. Fig 5
Connect a suitable antenna or signal source, and
plug into a mains supply. Use the POWER button
on the remote control or the POWER button on the
TV. The screen will display the ALBA splash
screen and then Fig 1. Press OK to continue.
Follow the screen prompts as below to begin the
tuning process
Fig 6 will show the progress of tuning and the
number of channels received. Allow the tuning to
complete.
If you wish to terminate the search, press EXIT.
Any stations found will be stored in the memory.
10
Fig 6
Use the ▲▼ buttons to select a Home or Shop
Mode (Home mode is default).
Fig 4
NOTE: Shop mode should be selected if
displaying the TV in a showroom or display area.
For any help concerning setup and use of your TV please call the Customer Help Line: 0845 604 0105

Getting Started
Initial Setup
When the tuning is nearly complete, a message as
Fig 7 will be shown.
With the introduction of digital TV the user is
required to select the TV region the TV is located.
This enables you to watch the local region
programmes associated with your area.
Press OK to accept GBR (Great Britain) as the
required location.
Fig 7
Fig 8
Fig 10
Fig 9
Fig 8 will now be displayed. If in a border region,
such as Wales or Scotland, you may be required to
select the “Country”. Use the ▲▼ to select the
correct one and press OK.
Fig 9 will now be displayed. If in a border region
between two local TV areas, Use the ▲▼ to select
the correct one and press OK.
If after completing the tuning sequence and Fig 10
is shown several options are open to you.
Check the aerial connections, and check the
antenna is in the correct position.
If possible, use another TV to show that the signal
is present from the antenna.
If no signal is found, contact your local aerial
installer.
If a signal is shown but is either breaking up or
pixelating, consult your local aerial dealer for
advice.
If signal is present and is of good quality, telephone
the numbers shown in the Help Information.
Fig 11
Channel List. (Fig 11). When tuning has been
completed, a list of received stations may be viewed
by pressing the OK Button. To view the station, use
the ▲▼ buttons to select and press OK.
11 For any help concerning setup and use of your TV please call the Customer Help Line: 0845 604 0105

Basic Features (TV)
LCD Menu (General)
Sound Menu
Press the MENU button to display the main menu, Fig 12
will be displayed.
To select the other menus press the ▲▼ button and the
highlight bar at the left of the menu will move upwards or
downwards. To enter each menu press the ►button.
To exit any sub menu press the MENU button. To exit the
menus totally press the EXIT button.
Picture Menu
Fig 12
Picture Menu (Fig 12)
To change the picture settings use the ▲▼ buttons to select the feature and then use the ◄► buttons to
change the levels.
Picture Mode: Select from Standard, Vivid, Soft, Optimal and User.
Standard: This is set as the average picture setting.
Vivid: Optimised for viewing film material
Soft: Adjusts the overall picture to give a warmer effect.
Optimal: Adjusts for optimal viewing settings.
User: Enables the user to set the picture settings manually.
Also available via the Remote Control P Mode Button
Brightness: Adjusts the overall picture brightness.
Contrast: Adjusts the ratio of dark to light.
Sharpness: Adjusts the clarity of the picture.
Saturation: Adjusts the colour saturation (colour depth).
Tint: Only available when using NTSC sourced material from the AV inputs.
Colour Temperature: This sets the overall picture dynamics. You may select from Standard, Warm and Cool.
Standard is a natural overall setting, Warm has a red tint and Cool has a blue tint.
Sound Menu (Fig 13)
Press the MENU button to display the main menu, Fig 12 will be displayed.
Use the ▲▼ buttons to select Sound (Fig 13).
To change the sound settings use the ▲▼ buttons to select the feature and then use the ◄► buttons to change
the levels.
Sound Mode: Select from: Standard, Movie, Music,
Speech and User.
Standard: Used for general viewing.
Movie: Suitable for films, DVD and large productions.
Music: Selected for enhanced music appreciation.
Speech: Selected for news and voice based programmes.
User: Adjust for your personal listening.
Also available via the Remote Control S Mode Button
Bass: Adjusts lower register frequencies.
Treble: Adjusts higher register frequencies.
Balance: Adjusts the level of the left and right speaker.
AVL: This is used to average the volume levels when adverts are shown, these may be rather louder than the TV
programme you are watching. Select On or Off.
Fig 13
12
For any help concerning setup and use of your TV please call the Customer Help Line: 0845 604 0105

Basic Features (TV)
Tuning Menu
Channel Manager (Fig 15)
Lock: To lock any programme to prevent unauthorised viewing
use the ▲▼ buttons to select the required channel and press the
RED button to add a tick in the Lock column. To unlock the channel
press the RED button again.
Del: To delete any channel use the ▲▼ buttons to select the required channel and press the GREEN button
to add a tick in the Xcolumn. When you exit the menu you will be asked to confirm the deletion, if you select
Yes, the channels selected will be deleted permanently from the listing. To restore the deleted channel you
must either perform an auto or manual search.
Skip: To set the Skip function use the ▲▼ buttons to select the required channel and press the YELLOW
button to add a tick in the Skip column. When set, using the P+ / P- buttons
on the remote control the station selected will be skipped.
You may still select the skipped channels using the 0 –9 numeric
buttons on the remote control.
To unset the Skip function, select the channel number and press
the YELLOW button again.
Move: It may be necessary to change channel order.
Use the ▲▼ buttons to select the required channel.
Press the BLUE button and the selected channel will start to flash.
Use the ▲▼ buttons to select the required new location and
press OK. To restore the channel to its original location, simply
reverse the operation.
Tuning Favourites Manager (Fig 16)
Use the ▲▼ buttons to select Favourite Manager and then press OK.
Use the ▲▼ buttons to select the programme you wish to add to your favourite selection.
There are four different favourite memories so that different members of your family may have their own
favourite selection.
To enter channels into FAV 1 press the RED button.
To enter channels into FAV 2 press the GREEN button.
To enter channels into FAV 3 press the YELLOW button.
To enter channels into FAV 4 press the BLUE button.
To remove any programme, select the programme name you
wish to remove from your favourite selection and press the correct
coloured button.
Tuning Menu (Fig 14)
Press the MENU button to display the main menu, Fig 12 will be
displayed.
Use the ▲▼ buttons to select Tuning (Fig 14).
To enter the menu press ►and to select the required function
use the ▲▼ buttons to select the feature, then press OK to
enter the various sub menus.
To exit the menu press EXIT
Fig 14
Fig 16
Fig 15
13 For any help concerning setup and use of your TV please call the Customer Help Line: 0845 604 0105

Auto Search (Fig 18)
After initial installation it may be necessary to reinstall all the
stations especially if new stations have been added.
Use the ▲▼ buttons to select Auto Search and then press OK.
The sub menu (Fig 18) will be shown. Use the ▼button to
select Start. You must confirm your selection, use the ◄button
to select Yes and press OK to start auto search.
A display will show progress (Fig 19).
When tuning is complete the TV will display Fig 7 see Page 11.
You must set the local region as described on Page 11.
When complete the TV will display the first channel on the
channel list, this is normally BBC 1
Basic Features (TV)
Tuning Menu Fig 17
Fig 18
Fig 19
Fig 20
Digital Installation
Should you move to another location you may need to reinstall
the DTV channels. Press the MENU button and using the ▲▼
buttons Select Setup and select First Time Installation.
Press OK and the TV will enter the installation sequence. See
Page 10
Favourite Selection (Fig 17)
To select your favourite channels once the memories have been set,
press the FAV. button on the remote control. Use the ◄► buttons to
select which favourite memory is required. Use the ▲▼ buttons to
select which favourite channel is required and press OK. The TV will
now switch to that programme.
To exit the menu press EXIT or wait for OSD to timeout.
Manual Search (Fig 20)
It may be necessary to add more digital channels as they are
provided by the programme providers or manually tune stations
for reasons (above).
Use the ▲▼ buttons to select Manual Search and then press
OK. The sub menu (Fig 19) will be shown.
Use the ▲▼ buttons to select START and press OK. Using
the ▲▼ buttons select Tuning and use the ◄► buttons to
select the correct channel number. Press OK to show Fig 18.
The correct channel numbers are available from the website
www.dtg.org.uk, and select transmitters. If you do not know
which region you are in, go to website www.digitaluk.co.uk and
insert your postcode, you will then be shown which region you
are in.
At the bottom of the menu you will see two bar scales, one
showing the quality of the signals and one the signal strength.
If you need to refresh or add a station, select Start. A display as
in Fig 19, will show how many stations are received, and the TV
will revert back to the first station in that group.
14
For any help concerning setup and use of your TV please call the Customer Help Line: 0845 604 0105

Basic Features (TV)
Tuning Menu
LCN (Logical Channel Numbering)
In the UK this must always be turned On. If turned Off, then
when tuning, the channels will be in received order, and not in
station order (default is on).
Renaming Stations
Fig 21
Fig 22
Fig 23
Fig 24
It may be necessary to rename a TV station. Press MENU
and select the Tuning menu. Press OK to enter the menu and
▲▼ buttons to select Channel Manager and then press OK.
Press OK to select Rename. See Fig 21.
If the channel is already named, press the YELLOW button to
delete any text. Use the ▲▼◄► buttons to move around the
alphanumeric keyboard and press OK to insert each
character.
The RED button inserts spaces, the GREEN selects caps
and the YELLOW button deletes. Up to 39 characters and
spaces may be inserted.
When completed press EXIT to exit and save the data.
A message asking you to confirm the data is displayed. To
select Yes press ◄and OK to store the data (Fig 22).
Features Menu
Feature Menu (Fig 23)
To enter the Feature menu press MENU and select
Feature. Press ►to enter the menu and ▲▼
buttons to select the feature required and then
press OK.
Child Lock (Fig 24). This feature allows parental
control when absent. Press ►to enter the menu
and ▲▼ buttons to select the feature required and
then press OK.
Child Lock. When turned on any channels that
were locked in the Channel Manager (see Fig 15,
page 13) will be locked out. A message will be
shown asking for the PIN number (0000). If this is
not inserted correctly the channel will not be
selected. Only unlocked stations may be viewed. To
turn On and Off use the ►button.
Parental Lock. This feature allows censorship of
channels that may transmit material considered not
suitable for children. This may be set from Off to 18.
The programme providers transmit a code that
inhibits the TV from showing that programme if the
TV is set for that age limit.
15 For any help concerning setup and use of your TV please call the Customer Help Line: 0845 604 0105

Basic Features (TV)
Features Menu
Key Lock. When set on the user control buttons
are inoperative (except for the power button). The
TV will come out of standby, but will be locked on
the channel last viewed. If you wish that you do not
want the TV changed from that setting, it is wise to
hide the remote control, this would stop
unauthorised use of other channels or features.
NOTE: If you have no button operation check
the lock settings before calling the helpline.
Password. (Fig 25)
Use the numeric keys to enter the password. The
factory default number is “0000”
Change Pin Code. (Fig 26). When the TV is used
for the first time the PIN Code is set at “0000”
factory default. To gain maximum security you
may change the PIN code to another 4 digit
number. Make a note of this number and keep
securely. If you lose this number there is a override
password see page 27 Troubleshooting Guide.
Fig 25
Fig 26
Fig 27
Language. (Fig 27) To select Language use the
▲▼ buttons and ►or OK.
OSD Language. Use the ▲▼ buttons to select
OSD Language and ◄► buttons to change the
language. Languages available are: English
(default), Italian, Spanish, Portuguese, French,
German and Dutch.
Preferred Subtitle. Use the ▲▼ buttons to select
Preferred Subtitle. There are 16 other languages
(default English). Use the ◄► buttons to change
the language. Other languages available are,
including: Italian, Spanish, Portuguese, French,
German and Dutch. Note: Only English is
transmitted by the TV service in the UK.
Preferred Audio. Use the ▲▼ buttons to select
Preferred Audio. There are 14 other languages
(default English). Use the ◄► buttons to change
the language. Other languages available are,
including: Italian, Spanish, Portuguese, French,
German and Dutch. Note: Only English is
transmitted by the TV service in the UK.
16
For any help concerning setup and use of your TV please call the Customer Help Line: 0845 604 0105

Features Menu
Clock: (Fig 28) To select Clock use the ▲▼ buttons and ►
or OK.
•Date: Use the ▲▼ buttons to select Date. This window
is for information only; the data displayed is taken from
the digital TV transmission.
•Time: Use the ▲▼ buttons to select Time. This window
is for information only. The data displayed is taken from
the digital TV transmission.
•Time Zone: Use the ▲▼ buttons to select Time Zone
and press OK to enter the function. Use the ▲▼ buttons
to select the required time and press OK to store the
time.
•DST: (Daylight Saving Time). This is set On and will
automatically update when daylight saving is required.
OAD (Over Air Download): This option allows any
firmware upgrade via the aerial. It should be normally set
on as default. Should you receive a firmware upgrade, you
will receive a message asking if you wish to upgrade, select
Yes or No as required (Yes is recommended).
Auto Scart: (Fig 29) Use the ▲▼ buttons to select Auto
Scart and press OK to enter the menu. This feature allows
automatic SCART switching, so that when an external
appliance (such as VCR) is connected, the TV will
automatically switch to the SCART source, when it is
powered on. To return to TV Mode, turn the external
appliance off.
This function may be disabled by switching Off.
CI Info: Use the ▲▼ buttons to select CI Info and press
OK to enter the menu. For further details see Page 19.
Auto Standby: This feature switches the TV to standby,
when no button or function has been used on the TV or
remote control. This may be set to 1 hour, 2 hours, 4 hours
or Off (default is Off).
Fig 28
Fig 29
17
Basic Features (TV)
Setup Menu
Fig 30
SETUP (Fig 30)
OSD Timer: Use the ▲▼ buttons to select OSD
Time and press OK to enter the sub menu. Use the
▲▼ buttons to select the time and press OK to
confirm. The default setting is 15 seconds. Elderly
users may require a longer time setting to allow
better understanding.
For any help concerning setup and use of your TV please call the Customer Help Line: 0845 604 0105

Basic Features (TV)
Setup Menu
Sleep Timer: Use the ▲▼ buttons to select Sleep
Timer and press OK to enter the sub-menu. Use the
▲▼ buttons to select the time and press OK to
confirm. The default setting is Off. You can select
from 15, 30, 45, 60, 75, 90, 105 and 120 minutes.
If the sleep timer is set, the TV will display a
message that the TV is going to sleep mode in 60
seconds. You may cancel at this time, by pressing
any button on the remote control.
Aspect Ratio: Use the ▲▼ buttons to select
Aspect Ratio and press OK to enter the sub-menu.
Use the ▲▼ buttons to select the required aspect
ratio and press OK to confirm.
The aspect ratios available are: Auto, 4:3, 16:9,
Panorama, Zoom.
•Auto. This automatically sets the aspect ratio
from data transmitted with the material viewed.
In some circumstances this may look incorrect
and you may wish to set another picture size.
•4:3. Older films may be in 4:3 aspect ratio, to
view these as they were intended, select 4:3.
•16:9. This is the modern format used for
widescreen films.
•Panorama. Use this format for widescreen films.
•Zoom. Increases the picture size in both
directions.
Blue Screen: If there is a loss of signal or input, a
blue screen will be displayed. If turned off, a
grey/black screen will be shown (default is On).
Fig 31
Reset to Default: Use the ▲▼ buttons to select
Reset to Default and press OK . You will be asked if
you want to reset, select Yes or No as required.
Fig 31. If yes is selected, all the settings will
revert to factory default settings, this includes
all station tuning information.
Advanced Operation (TV)
Teletext
Teletext is provided in the digital TV service and operates differently from
analogue TV
To enter TELETEXT, press the TEXT or RED button. (Fig 32)
Use the ▲▼ buttons to select the category you require and press OK to
enter. In each category there will be sub pages. Use the ▲▼ buttons and OK
button to select.
To exit Teletext. Press the TEXT button.
NOTE: Not all TV stations provide a Teletext service.
Fig 32
18
First Time Installation: If you move to a different
area, or you are advised by your local TV service
that a retune is necessary, it is advisable to select
this function, rather than Auto Search or Manual
Search. The First Time Installation function clears
all tuning data and resets the TV to allow a new
installation. Press OK and the TV will start the
installation process as seen on Page 10.
Setup Menu
For any help concerning setup and use of your TV please call the Customer Help Line: 0845 604 0105
Home Mode: Switch between Home and Shop
modes (Shop Mode increases screen brightness)

Advanced Operation (TV)
Fig 33
C I Slot (Cam Module)
Using a CAM (Conditional Access Module) (CI Slot).
This feature allows the user to access digital terrestrial pay-per-
view channels. To use this facility a conditional access module
(CAM) and viewing card need to be obtained by subscribing to a
pay channel company.
Before inserting the module ensure the TV is fully disconnected
from the power source.
Insert the CAM into the CI slot with the label facing the rear of
the TV (Fig 33). A positive stop should be felt if correctly fitted.
DO NOT force the module.
To remove the CAM grasp the module firmly between the fingers
and pull gently, do not twist.
Reconnect the TV and switch on.
Insert your pay-per-view card. Do NOT touch the gold
contacts.
Press the MENU button and select the Features Menu. Select CI
Info and press OK.
If everything is working normally you will see Fig 34, press OK.
If things are working, you should see the information as in Fig
35.
To check the module is working use the ▼button to select
Module Information and press OK, you should now see the
information as in Fig 36
To check the card is working select Smart Card Information and
press OK. Again if everything is normal you will see a list as in
Fig 37. If the information is not present, remove the card reverse
and reinsert. This information should now be seen.
Exit the menus by pressing MENU or EXIT and you are ready to
view pay-per-view channels.
To obtain the CAM and pay-per-view card, please contact the
service provider.
Fig 34
Fig 35
Fig 36
Fig 37
19 For any help concerning setup and use of your TV please call the Customer Help Line: 0845 604 0105
This manual suits for next models
11
Table of contents
Other Alba LED TV manuals