01
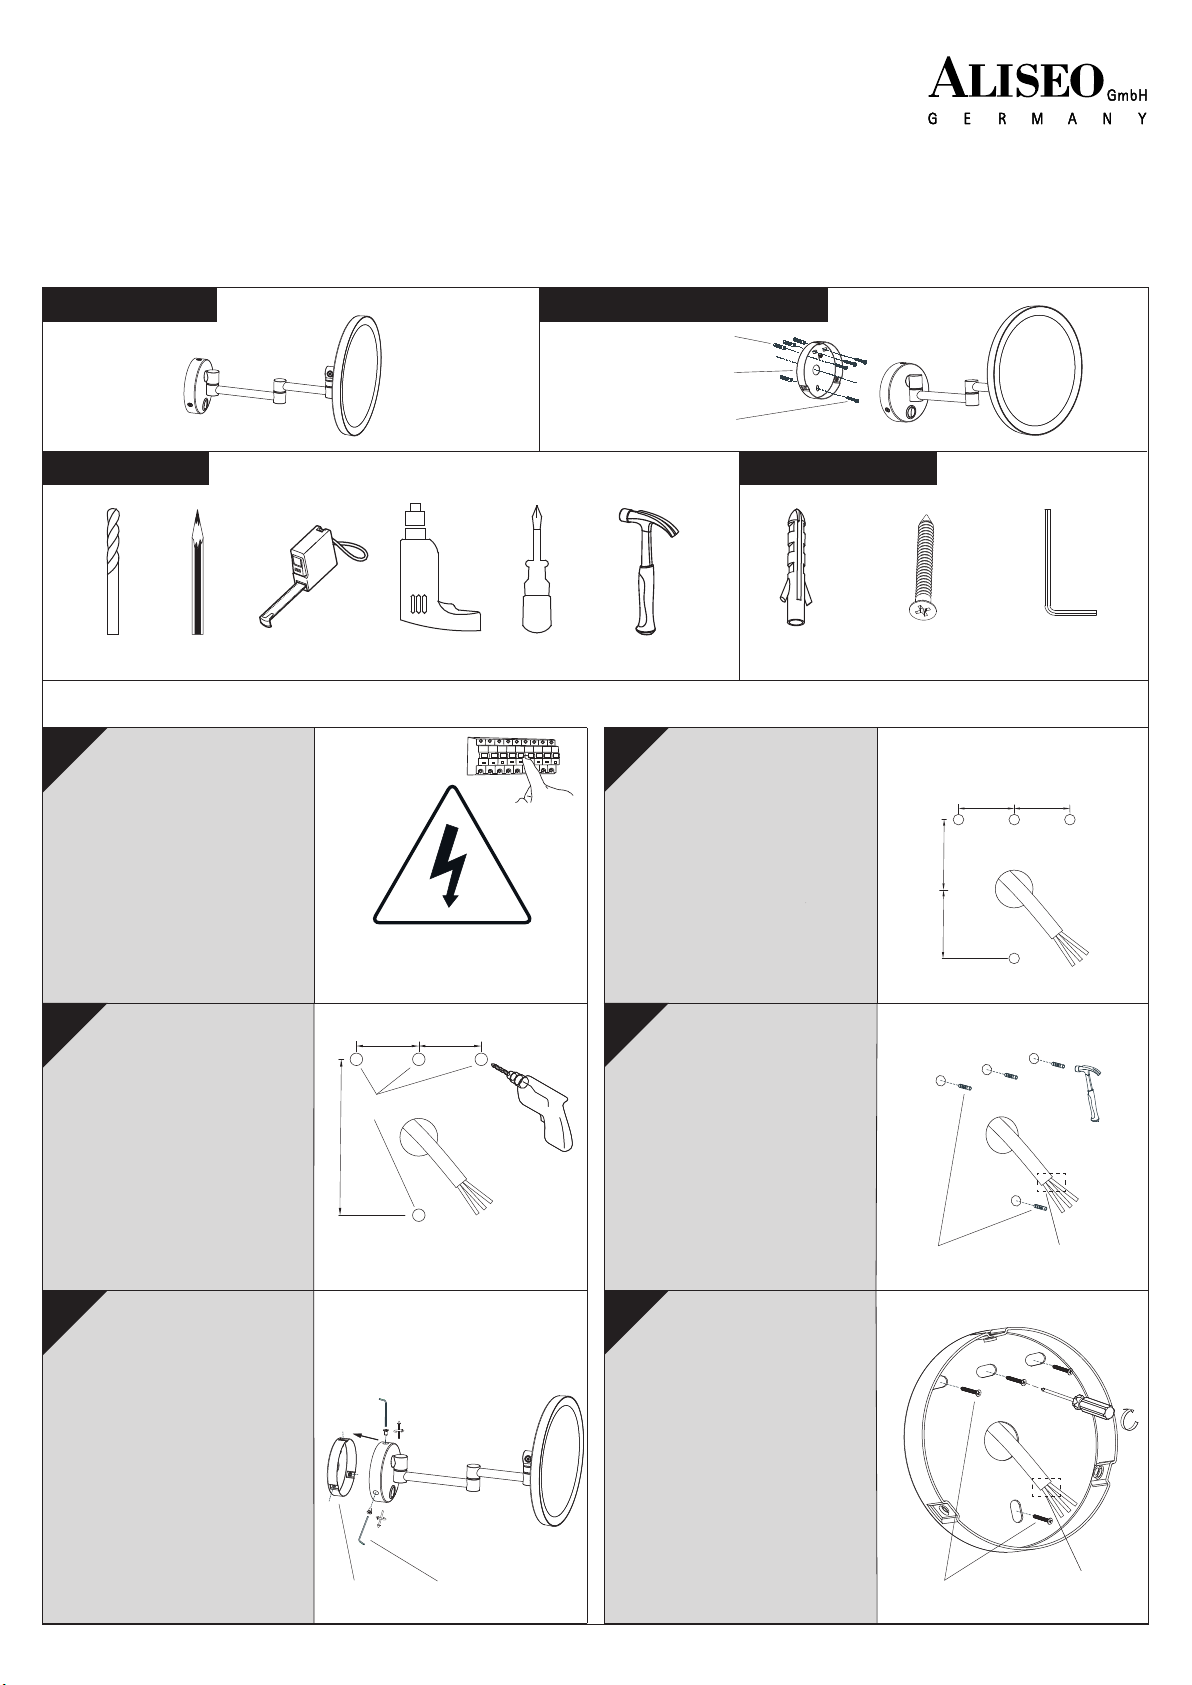
Installation steps
1 2
3 4
5 6
①
①
②
25
30
60
25
25 25
30
Product specification
Applicable product model:020844
Product drawing Detailed installation drawing
Expansion rubber plug
Fixed seat
Self tapping screw
Installation tools Accessory box parts
Electric drill
6mm drill bit pencil Tape measure bolt driver Claw hammer Self tapping
screw x4
Expansion
rubber plug x4 2mm hex wrench
1. Make sure the power supply is
disconnected before wiring.
2. Only personnel with national
professional qualification electrician
grade certificate are allowed to carry out
electrical installation and commission-
ing;
3. Ground wire, live wire and zero wire
must be connected in strict accordance
with the wiring mode shown in the
figure;
4. First connect the ground wire with the
product ground wire, and then connect
the zero wire and live wire of the
product.
Disconnect the
power supply
The position of outlet hole
shall be reserved on the wall,
Drill holes according to the
dimensions given.
Opening dimension drawing
Input wire: zero wire,
live wire and ground wire.
Input wire: zero wire,
live wire and ground wire.
As shown in the figure, use
6mm drill bit to drill holes on
the wall surface, and reserve
holes on the right φ 17 power
supply three core wire hole.
4- φ 6 depth 50mm
Take out 4 expansion rubber
plugs from the accessory box.
Insert the expansion rubber
plug into the hole and fully
enter it with a sheep horn
hammer. The expansion
rubber plug cannot be exposed
to the wall. Expansion
rubber plug
Take out the mirror lamp from
the packing box and place it
in a flat place. Be careful not
to scratch.
① Take out a 2mm hex wrench
from the accessory box and
loosen the M4 screws on the
wall seat counterclockwise as
shown in the figure;
② Take out the fixing seat and
place the removed screws in a
safe place for standby. Fixed seat 2mm hex wrench
Take out the fixing seat
Take out 4 self tapping screws
from the accessory box.
Put 4 screws through the fixing
seat, then install the fixing seat
on the wall with a cross
screwdriver, adjust the direction
of the fixing seat and tighten it.
Install the fixing seat
Self tapping
screw
ALISEO GmbH
Leutkirchstraße 63
77723 Gengenbach
Germany
Tel. +49 (0) 7803 - 60279-0
Fax +49 (0) 7803 - 60279-30
www.aliseo.de


