ITEM #0082876
MODEL #YIC-555
VASE FOUNTAIN
Brand Name® is a registered trademark
of LF, LLC. All Rights Reserved.
Français p. 5
Español p. 9
1
4
3
PACKAGE CONTENTS
2
SAFETY INFORMATION
Please read and understand this entire manual before attempting to assemble, operate or install the
product. If you have any questions regarding the product, please call customer service at
1-866-439-9800, 8 a.m. - 8 p.m., EST, Monday - Friday.
WARNING
• The National Electrical Code requires that a Ground Fault Circuit Interrupter (GFCI), be used in
pumps for Fountains or other water related equipment. See your electrical parts distributor for
this product.
• Make sure the cord curves under the electrical outlet to prevent water from entering the electrical
outlet.
• Always disconnect the pump from the outlet before cleaning or making adjustments.
• Do not remove the grounding pin from the plug.
• Do not connect to any voltage other than shown on pump.
• Do not pump flammable liquids.
• Risk of electrical shock. This pump is supplied with a grounding conductor and grounding type
attachment plug. To reduce electrical shock be certain that it is connected only to a properly
grounded, grounding-type receptacle.
CAUTION
• While the fountains are designed to operate without splashing water, it’s inevitable that some water
will splash a little. Put your fountain in a place that will not be damaged if the water splashes.
• Select an appropriate place for your fountain.
• Always disconnect from electrical outlet before handling the pump.
• Do not let the pump run dry; in order to get best results operate the pump completely submerged.
Keep water level above the minimum water level at ALL TIMES.
• Do not lift pump by the power cord.
• Operate in freshwater only.
• Do not pump heated liquids.
• Do not use with water above 87ºF (30ºC).
1. Insert instruction text here. Each diagram may
have only one accompanying step.
Insert instruction text here.
PART DESCRIPTION QUANTITY
A Fountain Urn 1
B Basin with Stand Pipe 1
C Pump with Electrical Cord 1
D Water Feature Tube 1
AB
D
C
K
H
1
Questions, problems, missing parts? Before returning to your retailer, call our customer
service department at 1-XXX-XXX-XXXX, X a.m.-X p.m., EST, Monday-Friday. Include
e-mail address if applicable.
ATTACH YOUR RECEIPT HERE
Purchase Date
Water feature Tube from
pump to fountain
Fountain
Urn
Electrical
Cord
Basin
Pump
Water feature Tube from
pump to fountain
Fountain
Urn
Stand
Pipe
Electrical
Cord
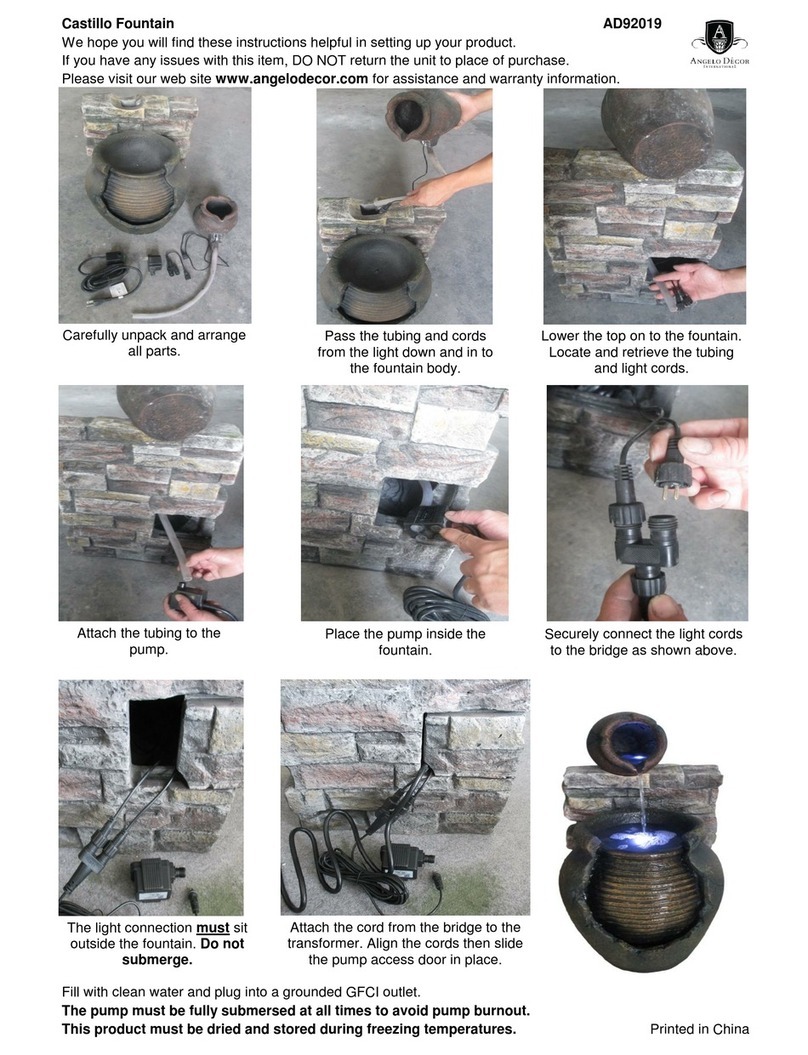
Place the basin with stand pipe (B) in a
convenient place where it will not have
to be moved after assembly but still
within reach of a GFCI electrical outlet.
Very carefully lay the fountain urn (A) on
its side with the bottom facing the basin
with stand pipe (B) and attach the water
feature tube (D) to the top of the pump
with electrical cord (C).
Place the pump’s electrical cord down
through the stand pipe opening. Pull
the cord through and out the bottom of
the basin until there is just enough of
the electrical cord inside the basin to
allow the pump to sit flat on the bottom
of the basin.
Lift the fountain urn (A) upright and be
careful not to kink the water feature tube
(D). Place the fountain urn (A) over the
pump with electrical cord (C) and basin
with stand pipe (B)
Fill the basin 2/3 full of water; plug in
the pump. If you want to change the
water flow, unplug the pump cord from
the electrical outlet and turn the pump's
flow control left or right.
1
2
3
4
6
CARE AND MAINTENANCE
• Clean fountain with mild detergent to avoid spotting.
• A clogged or dirty intake screen will greatly reduce performance. Use a small brush or a stream of
water to remove any debris.
• Do not use fountain in freezing weather.
• In the winter season, it is recommended that the fountain be emptied, cleaned and covered or
moved inside.
• Monthly maintenance will add to your pump’s life.
TROUBLESHOOTING
If you have any questions regarding the product, please call customer service at 1-775-476-8357,
10 a.m. - 6 p.m. (EST), Monday-Friday.
WARRANTY
See enclosed pump instructions for applicable warranty information.
allen + roth is a registered trademark of
LF, LLC. All Rights Reserved.
Questions, problems, missing parts? Before returning to your retailer, call our customer
service department at 1-866-439-9800, 8 a.m. - 8 p.m., EST, Monday - Friday.
PREPARATION
Before beginning assembly of product, make sure all parts are present. Compare parts with package
contents list and hardware contents above. If any part is missing or damaged, do not attempt to
assemble the product. Contact customer service for replacement parts.
Estimated Assembly Time: 30 minutes
No Tools Required for Assembly
Flow Control Adjustment
turn left or right to
adjust water flow
Pump
Note: Always disconnect from electrical outlet before handling the pump.
• Check the circuit breaker and try another outlet to ensure that the pump is getting electrical power.
• Check the pump discharge and water feature tube for kinks and obstructions. Algae buildup can be
flushed out with a garden hose.
• Check intake screen to ensure it is not clogged with debris.
• If the pump has been idle for an extended period it may be necessary to apply a drop of light oil to
the shaft and spin the impeller by hand until it turns free.
TROUBLESHOOTING
B
C
D
A
Fig. 1
Fig. 2
Fig. 3
Fig. 4
Fig. 6
C
Printed in China
REPLACEMENT PARTS LIST
For replacement parts, call our customer service department at 1-866-439-9800,
8 a.m. - 8 p.m., EST, Monday - Friday
PART DESCRIPTION PART #
PART DESCRIPTION PART #
C Pump with Electrical Cord 1
D Water Feature Tube 2
DC


