Allform U-Sectional Series Installation and user guide

ALLFORMHOME.COM
U-Sectional
HOW
to

THE PARTS

As a general rule of thumb, we will work linearly with benches,
connecting pieces from right to left. A bench is a linear string of
consecutive seats excluding corners and arms.
-
ration without a corner), every seat will be in the bench
since you have only one
If you purchased an L sectional (1x Corner), you will
have two benches
If you purchased a U sectional (2x Corners), you will
have three benches
•
•
•

Note that both Corner modules and Chaise modules are each shipped
the Arms box.
Arms
Arm Panels, Hardware (including Legs)
SEAt
Seat Base, Backrest, Seat Cushion, Back Cushion
CHAISE
Seat Base, Backrest, Back Cushion, Chaise Foot Base
CHAISE CUSHION
Chaise Cushion
CORNER BACK
Left Backrest, Right Backrest, Right Back Cushion,
Hardware (including Legs)
Corner seat
Corner Seat Base, Corner Seat Cushion, Left Back Cushion
Hardware
without a Corner
Ottomans and pillows will ship separately.
Unboxing

HARDWARE
Center panel
The Panel that connects Seat Bases and Corner
Seat Bases; every Center Panel also has holes at
the top and bottom for Legs
Connecting Pin
The detachable pin that connects Arms to Backrests
and consecutive Backrests to one another
LEG
Our interchangeable Legs screw directly into the
frame and the Center Panel
LEG WASHER
Every Leg comes with a Leg Washer.
T-BOLT
The hand screw that fastens all of our Seat Bases
to Backrests
WASHER
Every T-Bolt comes with a Washer

BASE PLATE
The Connecting Pin will screw directly into the Base
Plate. Every Backrest will have a Base Plate. The Right
Arm will also have a Base Plate.
opening PLATE
The Opening Plate has recessed teeth lining the
interior of the opening below the top. These teeth
hold the Connecting Pin in place. Every Backrest
will have an Opening Plate. The Left Arm will also
have an Opening Plate.
ADDITIONAL ITEMS

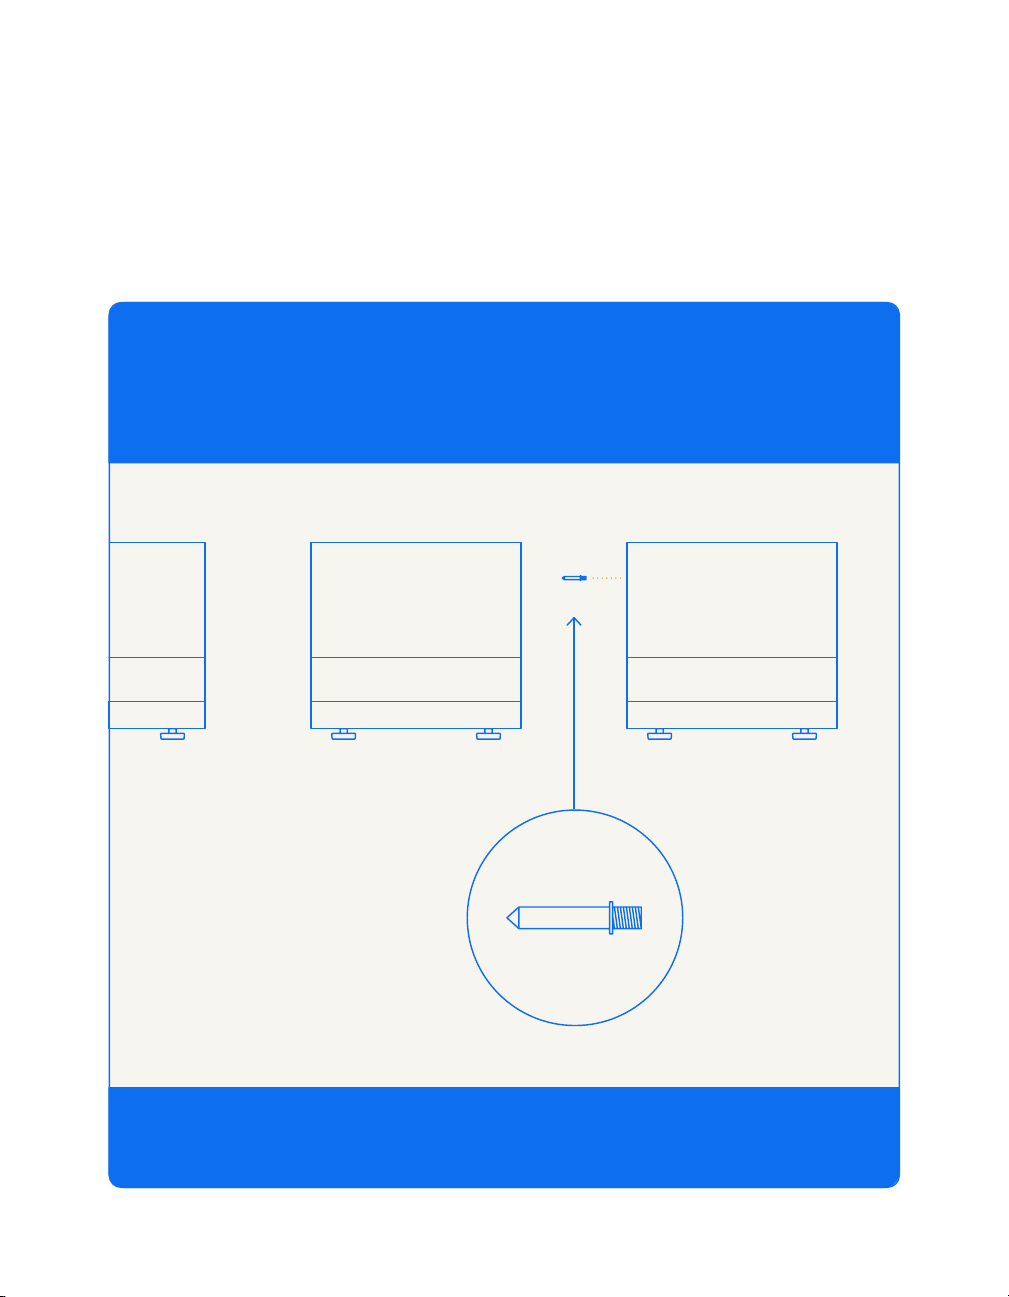
SECURING PIECES WITH THE CONNECTING PIN
You will always connect and secure two pieces via the
Connecting Pin as follows:
Screw the Connecting Pin into the Base Plate
Insert the Connecting Pin fully into the top of the
Opening Plate
Stabilize the pieces being connected and apply
pressure downward on the piece with the Base
Plate/upward on the piece with the Opening Plate
to lock the Connecting Pin into place between
the teeth
Push the pieces you just connected together from
opposite ends to make sure the Connecting Pin is
fully inserted and locked into place
This process is the same whether you choose to connect
the pieces while they are lying down or standing upright,
as indicated in the instructions that follow.
1.
2.

Now, onto the assembly!
Make sure that you are working in an area with enough
avoid catching fabric or scratching leather.
Happy building!

u sectional


Step 1
assemble chairs
Take the Seat Base and arrange the holes in the Seat Base shelf
with the holes in the Backrest cutout.
Flip up
The black denim fabric
should face away from the
Seat Base up

Place a metal washer on the Screw of each T-Bolt and screw in
both T-Bolts, securing the Backrest to the Seat.
Do this for every Seat and Backrest from the Seat and Chaise
boxes. You should now have a series of assembled Seats, each
with the Backrest perpendicular to the Seat Base.
Step 2
assemble BENCHES
Group your Seats into 3 Benches: Right Bench, Left Bench, and
Middle Bench. We’ll begin by connecting the rightmost Seat to
its adjacent Seat for the Right Bench.
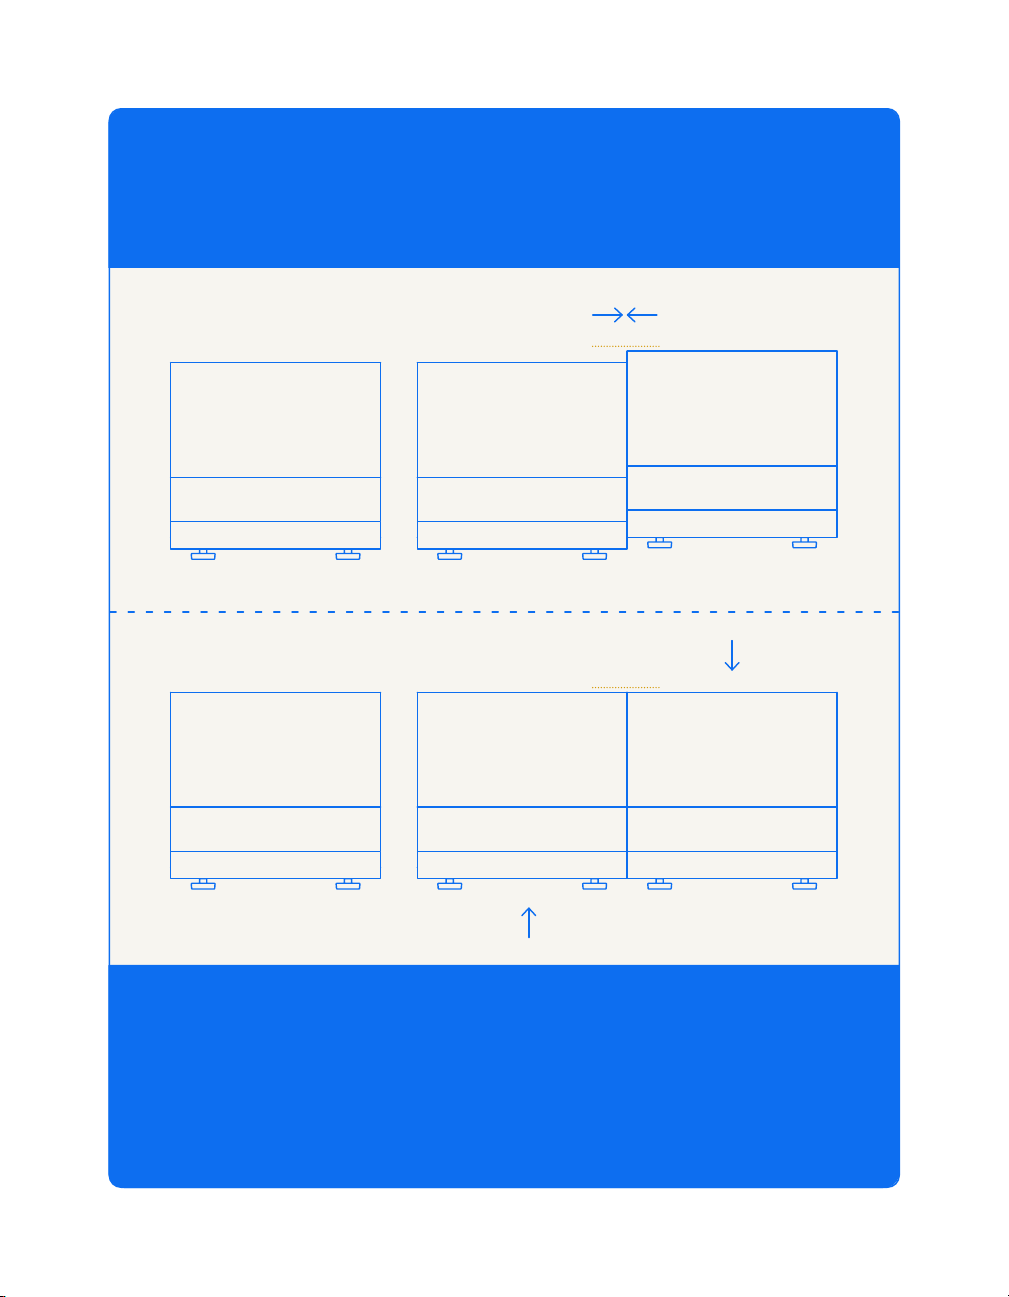
Insert the Connecting Pin into the the Top of the Opening
Plate on the adjacent Seat and push the two Backrests all the
way together so the pin can no longer be seen.
Push down on the Seat on the right relative to the Seat on the left
to lock the Connecting Pin inside the Opening Plate. Make sure to
stabilize one of the Seats as you do this. You can do this while the
standing upright.

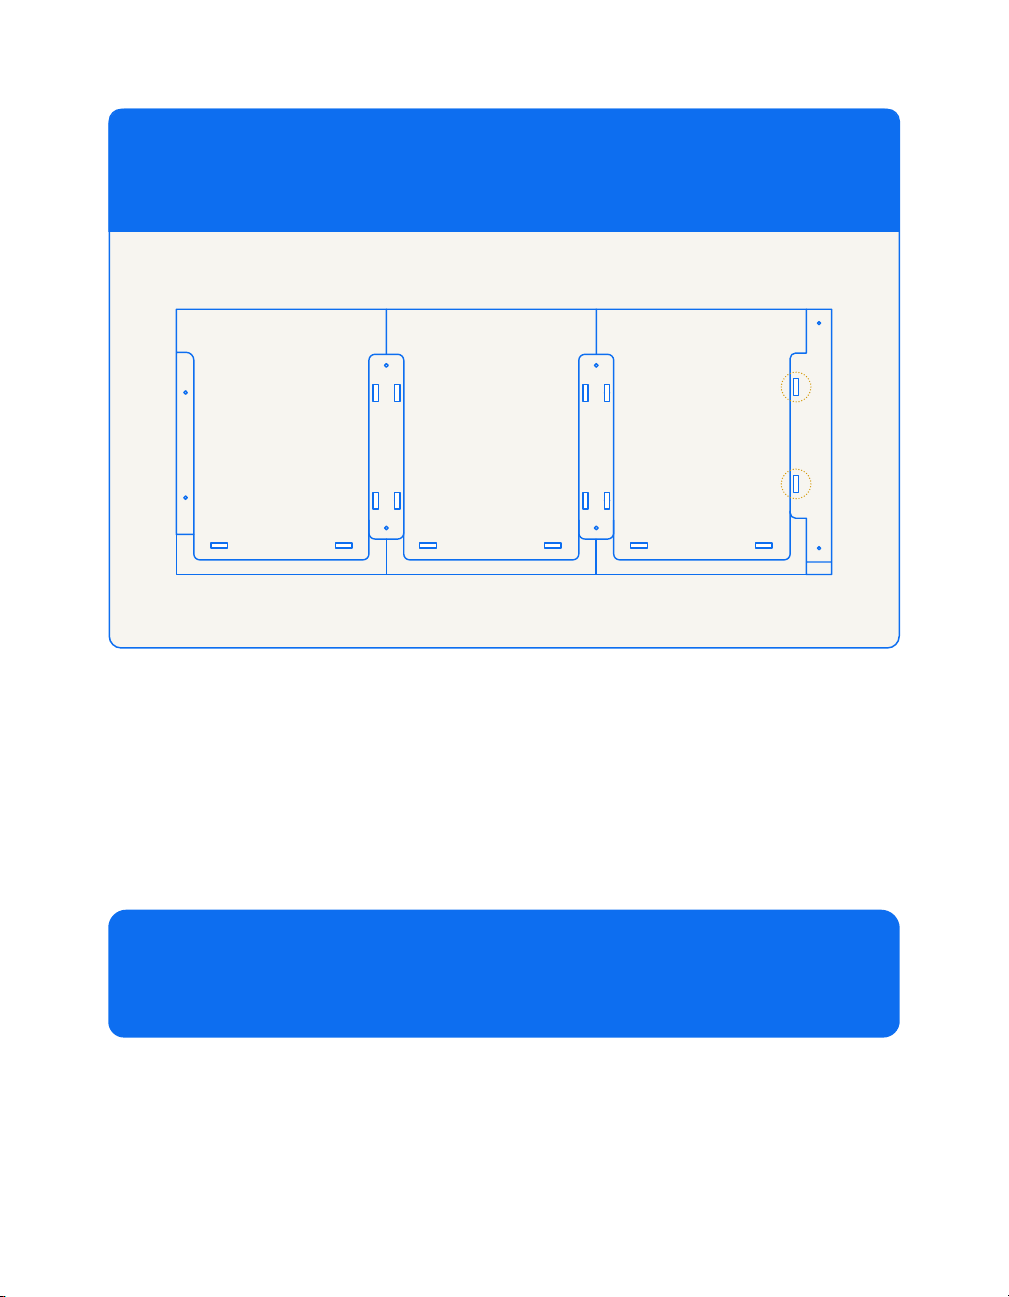
View the underside of the seat. Note the cutout area – this is
where we will place the Center Panel.
Take a T-Bolt, place a metal washer over the screw, and place it in
the top left hole in the Center Panel. Tighten the T-Bolt, but not all
the way.
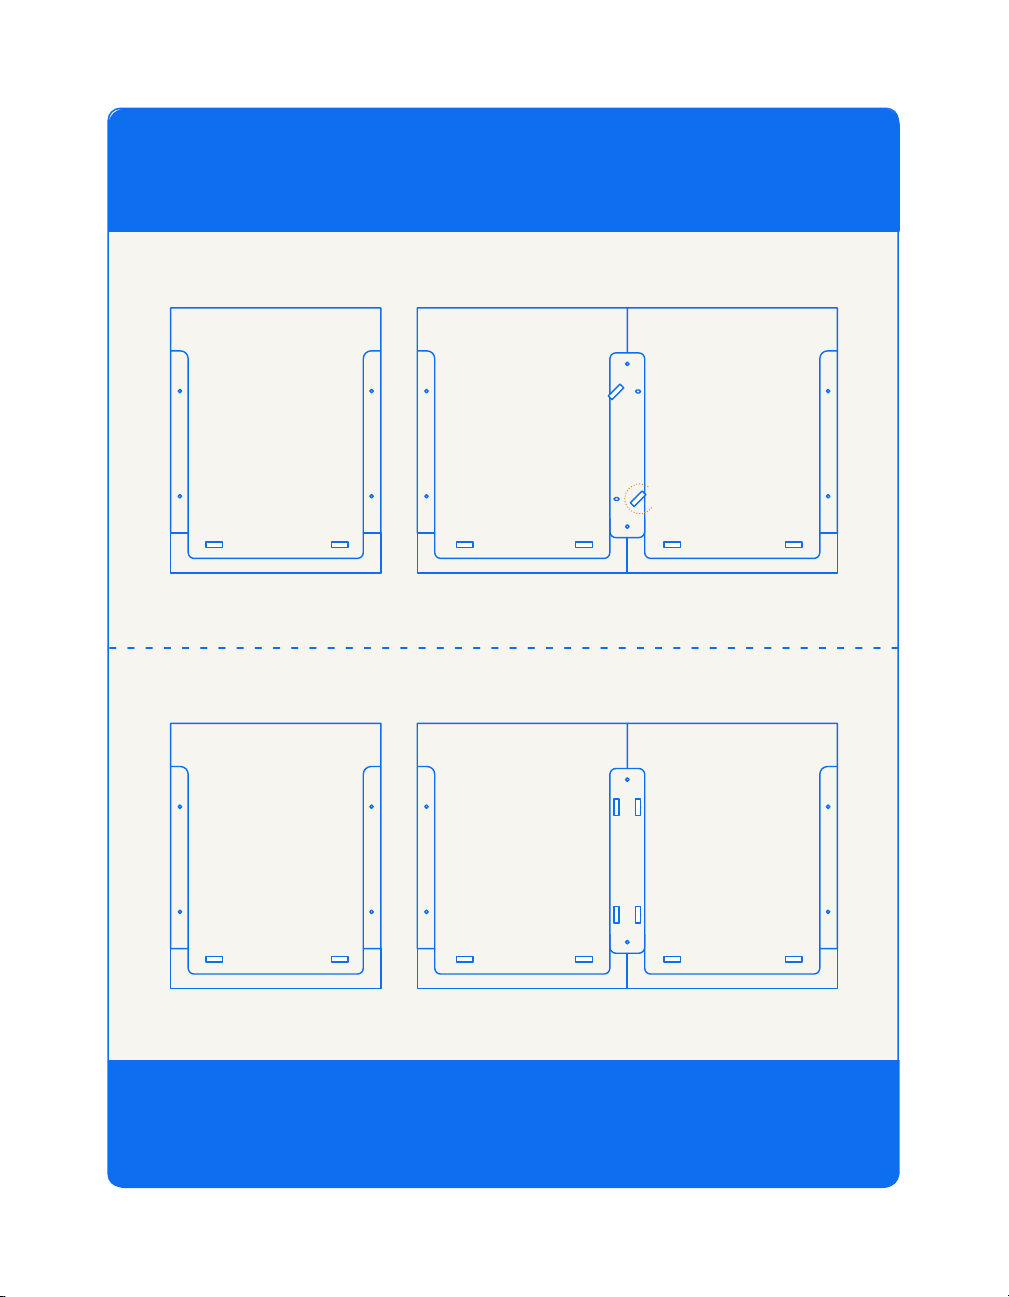
Take another T-Bolt with a metal washer and screw it in the
bottom right hole in the Center Panel. Don’t tighten it all the way.
Screw in the other two T-Bolts with washers. Now tighten all 4
T-Bolts all the way.
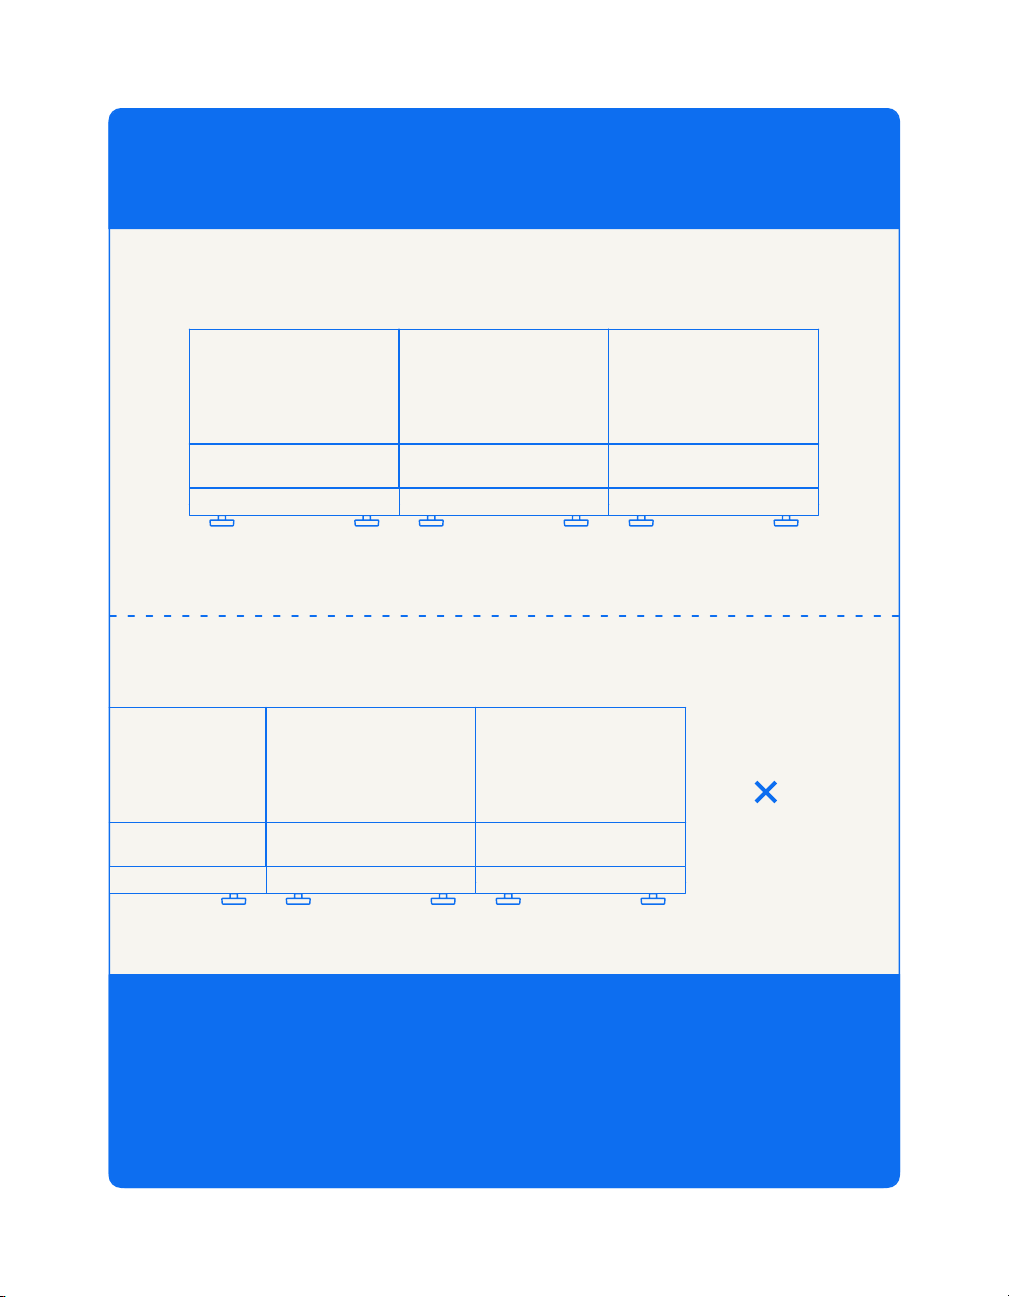
Repeat steps above to attach the remaining seats to the rest
of the Right Bench.
Complete this process for every Seat within each Bench, moving
right to left. Do not attempt to connect the Benches. Make sure
that every T-Bolt is screwed in fully, and that you have pushed all
Right, and Middle.
3

Step 3
attach arms
Align the Connecting Pin with the top of the Opening Plate.
Start with the Right Arm on the Right Bench. Screw in the
Connecting Pin to the Base Plate on the Right Arm.

Push all the way in. Then, push down on the Right Arm until
the Connecting Pin locks into place. You can do this while
is standing upright.
1
2
perfectly in the cutout in the Seat Base.
Take two T-Bolts with washers, put in the holes in the shelf, and
tighten all the way to connect the Right Arm to Right Bench.
Place Right Bench aside and change focus to the Left bench.
Repeat the process to attach the Left Arm to Left Bench
Note 2 dierences in assembly of Left Bench:
1. The Connecting Pin is in the Leftmost Backrest of the Left Bench (as opposed to the Arm).
2. The Shelf in the bottom of the Left Arm will now be below the cutout. Stabilize the Bench, and
shelf perfectly into the cutout in the bottom of the leftmost Seat.
Table of contents
Popular Indoor Furnishing manuals by other brands

Southern Enterprises
Southern Enterprises Chicago EN710300TX Assembly instructions

Notável Móveis
Notável Móveis NT 2005 Assembly instructions

HELD MOBEL
HELD MOBEL Siena 88085.530 Assembly instructions

Jysk
Jysk JUTLANDIA SARPSBORG 3785000 manual

KODU
KODU UH10816 Assembly instructions

Jysk
Jysk Hammel Chair 3644341 manual


