8. Attach rear panel assembly to base frame
Locker Installation & Assembly Instructions
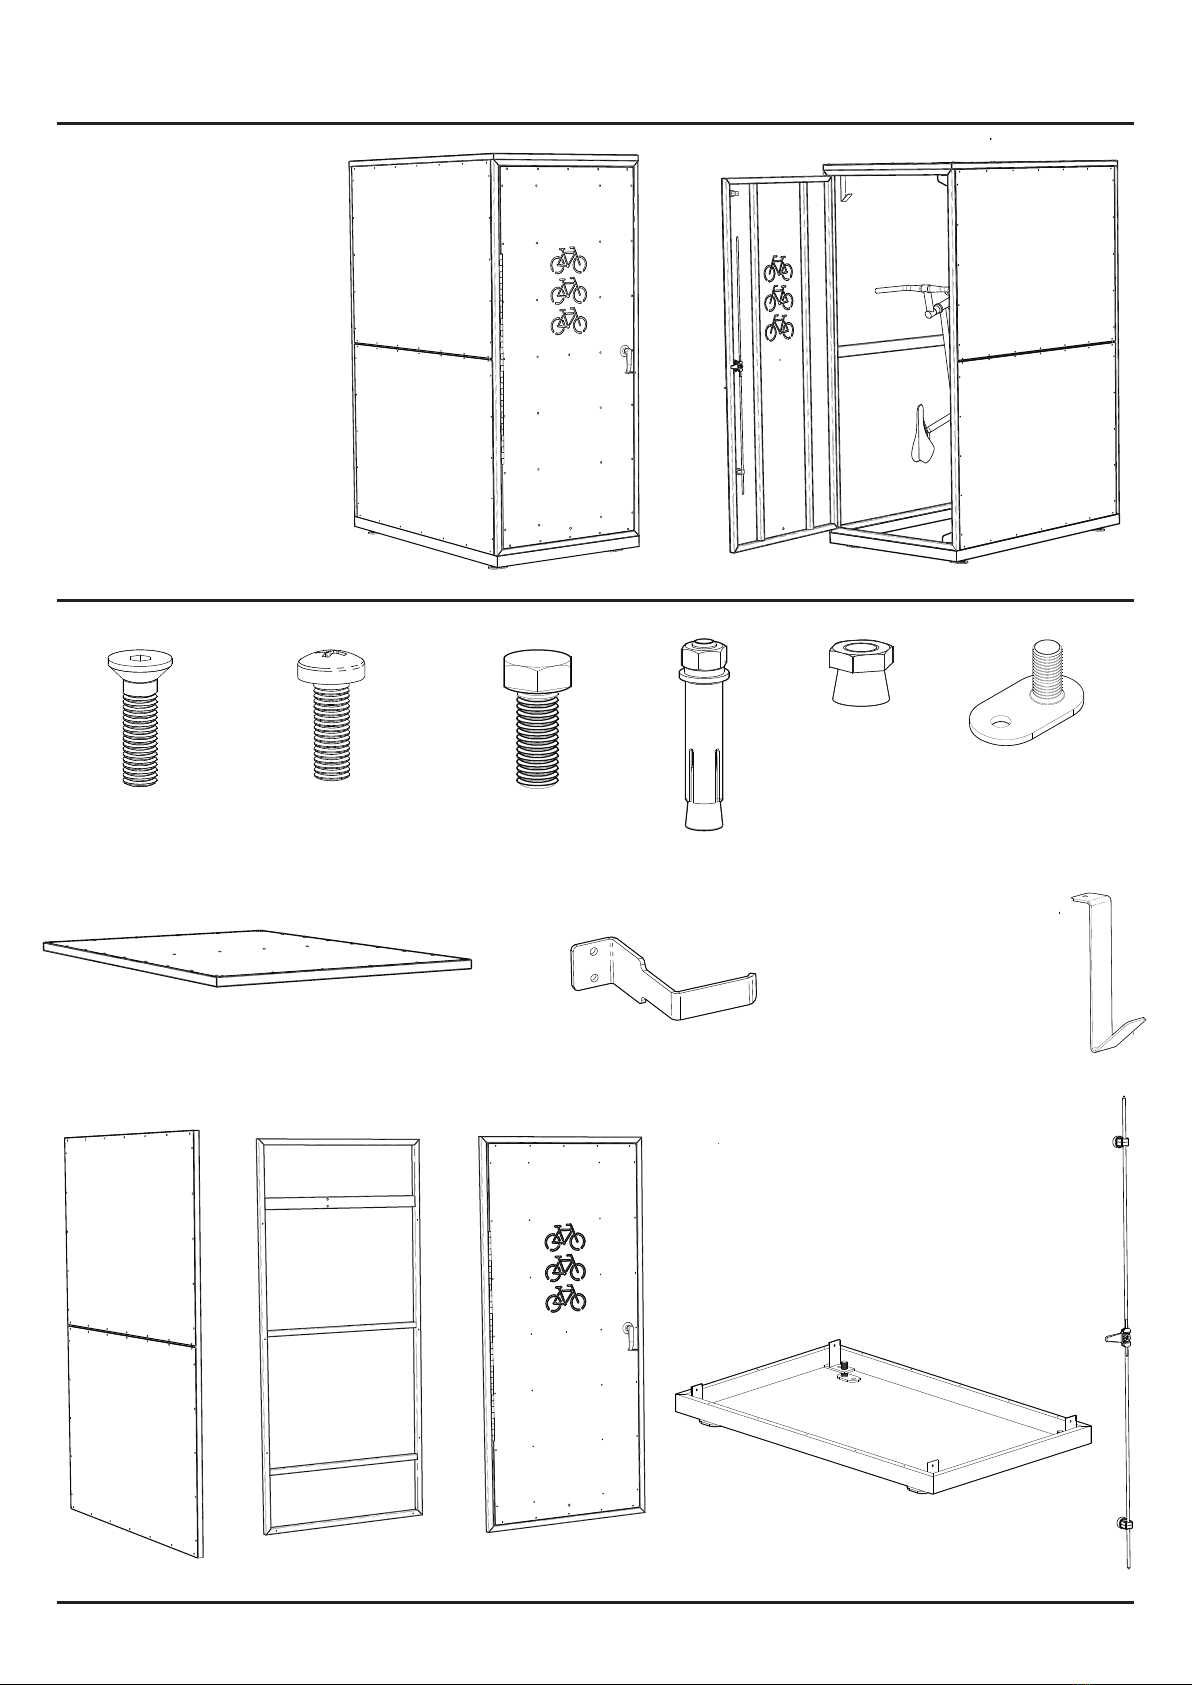
Cora Bike Rack - Vertical Bike Locker (CBLV-LD)
Cora Bike Rack - Australia’s Bike Parking Experts - WWW.CORA.COM.AU - PH 1800 249 878
7. Attach door assembly to base frame
• Screw door assembly to base frame using two (x2) M5x35
Pan head screws.
• Rest door assembly on top of base frame (at end that
the door should be located)
• Door assembly is fixed to one end of base frame, using the
two (x2) screws at bottom of door frame, to
secure door assembly to outside of tabs at end of base
frame
• Door frame should be a supplied pre-assembly and
include door frame, door, hinge, handle and exterior
locking parts
Screw point location to
fix door assembly to base
frame
• Screw rear panel assembly to base frame using two
(x2 ) M5 x 35 pan head screws.
• Rest panel assembly on top of base frame (at end
that the rear panel should be located)
• Rear panel assembly is fixed to one end of base frame,
using the two (x2) screws at bottom of panel frame, to
secure panel assembly to outside of tabs at end of base
frame
• Panel frame assembly should be a supplied pre-
assembly and include rear panel frame, rear panel and
wheel hook mounting support
Screw point location to fix
rear panel assembly to base
frame
Rev 2.00 Feb 2020 ©