ALM ALM035 User manual

ALM035 ’ASQ-1’ Operation Manual
Version 0.1
July 26, 2022
Contents
1 INTRODUCTION 2
2 FEATURES 2
3 TECHNICAL SPECIFICATIONS 2
4 OPERATION 3
4.1 PanelLayout....................................... 3
4.2 UsageOverview ..................................... 3
4.3 Clocking ......................................... 3
4.4 SequenceMode ..................................... 5
4.5 QuantiserMode ..................................... 6
4.6 PatternMode ...................................... 7
4.7 Saving&LoadingPatterns............................... 7
5 GLOBAL OPERATIONS 8
5.1 GlobalTranspose .................................... 8
6 KEY REFERENCE 9
7 LIMITED WARRANTY 10
8 SUPPORT 11
9 APPENDIX 12
9.1 I.FactoryReset ..................................... 12
9.2 II. Firmware Update and Sequence Backup . . . . . . . . . . . . . . . . . . . . . 12
9.3 III.SequenceBackup .................................. 12
1

1 INTRODUCTION
The ASQ-1 is a novel Eurorack sequencer with 3 different ’output modes’ - CV/Gate, Triggers
and a Quantiser. The CV/Gate and Trigger mode have multiple instances or tracks. All run si-
multaneously and synchronised to an internal or external clock. Programming of all modes
is performed using the mechanical computer style keys which represent both note and se-
quence position info.
ASQ-1 is intended to be a simple immediate sequencer ideally suited to quickly jamming out
ideas or performing live. It’s intended to be fun - the antithesis of all the over designed perfor-
mance sequencers out there. Hands on. Happy accident friendly.
2 FEATURES
• 2x ‘step time’ CV / Gate sequencers.
• 4x trigger sequencers.
• External CV quantiser.
• Internal and external clocking.
• Pattern saving and loading.
• Spacious, performance oriented interface.
• All settings remain between power cycles.
• USB-C for quick and easy ‘drag and drop’ rmware updates via computer.
• Skiff friendly with reverse power protection.
• Made in England.
3 TECHNICAL SPECIFICATIONS
• Size: 32HP
• Power: +12v 50ma / -12v 10ma
• Depth: 32mm (approx)
• 0-5V 16 bit DAC outputs
2

4 OPERATION
4.1 Panel Layout
ASQ-1
Octave/Patt Length
Clock
Reset
Hold/Len Rest/Div
Play Store
MODE
Active mode
selection
Gate
CV Trig 2
Trig 1
Gate Out
In
Quantiser TriggersSequencer
Trig 3 Trig 4
CV
Note sequencer
CV / Gate outputs
Quantiser CV
in and out
Pattern sequencer
trigger outputs
Note keys
Clock and
reset inputs
Octave / pattern
length buttons
Play / Store
buttons
Hold / Length
button
Rest / Divide
button
4.2 Usage Overview
ASQ-1 offers 2x step time (aka ’SH-101’) style sequencers, a quantiser and 4 drum machine
style trigger pattern sequencers.
Pressing the Mode button cycles through each of the Sequencer ’modes’ with the associated
LED indicating which mode is currently active. When active, a mode can be interacted with -
i.e sequence event editing, saving, loading, etc.
Pressing the Play button toggles playback of all the sequence modes.
4.3 Clocking
ASQ-1 features an internal clock which will be used if no external clock is patched. You can
change the speed of the internal clock whilst holding Play and clicking the octave up & down
buttons to change the playback tempo by +/- BPM. Pressing Play will reset all sequences back
to the beginning.
It is however STRONGLY recommended an external clock is used. This will give ner control
and the ability to ’pause’ the clock. NOTE: With an external clock patched, the clock needs to
be running for ’Play’ to advance steps.
If you’re using Pamela’s NEW Workout, Patch a channel’s clock output into clock and the ’trig-
3

ger on stop’ output into reset. With this patched, stopping Pam will automatically reset the
ASQ-1 to the beginning of the sequence (otherwise you’d need to press play twice to manually
reset).
4

4.4 Sequence Mode
The sequencer modes work primarily as ’step time’ sequencers where each sequencer step (or
clock tick) advances automatically as note, rest or hold information is input. Sequences can
be any length (up to 128 steps).
To begin inputing a sequence, rst make sure playback is inactive (LED not lit, if so deactivate
by clicking Play), then press the Store button. This will clear any current sequence and prepare
the sequencer for step input (only for the selected mode).
Each note step is entered via the mechanical note keys. The octave buttons can be used to set
the octave offset of the keyboard. Pressing the Hold or Rest buttons will add a hold (extends
the last entered note to the next) or rest step. Holding down a note key whilst pressing another
will add a slide between the notes.
A red LED on the bottom row of 8 white note keys will indicate the current length of the inputted
sequence.
Once the sequence is input, press the Store button again to end input. Pressing Play will now
start playback of the input sequence (note if you have an external clock patched make sure it
is running!)
During playback, the current playback position (within current 8 steps) is shown via a white
key’s red LED. A note key with the green led lit shows the currently playing note.
Whilst playback is happening, the sequence can be transposed by pressing any note key.
Pressing the lowest C will remove the transposition.
The playback speed of each sequence can be divided down by holding Rest and pressing any
black note key with C# being x1, D# /2, etc. (see below for divisions).
The length of the pattern can be changed by holding Hold and using the octave buttons to
increase the number steps by increments of 8. The octave LEDs show the total length with
each octave LED representing 8 steps.
As the number of pages increases, the rightmost LED will light to represent +32 steps and the
5

A# key will light to represent +64 steps.
If the desired step count is not a multiple of 8, continue holding Hold and select the last step
with one of the white note keys. The pattern can be cleared by reducing the length down to 0
steps with the octave buttons.
Examples of different pattern lengths shown with the octave and A# LEDs:
If Store is pressed whilst playing, overdub mode will become active (both store and play LEDs
lit). Anything played in live on the note keys will then be overdubbed onto the sequence. Press
Store again to exit overdub mode.
An inputted pattern can be saved by holding Store and pressing any note key (to save the pat-
tern to any of 13 slots). To recall, hold Play and press the relevant note key. The new sequence
will play when the current nishes. One set of 13 slots is shared between both step time se-
quencers.
4.5 Quantiser Mode
The built in quantiser maps any CV at the quantise input to the nearest selected musical note
at the output. Use the note keys to set which notes to quanitise too (LEDs will light).
6

Quanitsation note changes happen on each clock pulse whilst the sequencer is playing. The
LED of the currently quantised key/note will ash, with the octave LEDs displaying the note’s
octave.
The quantisation speed can be divided down by holding Rest and pressing a black note key,
just like with the sequencer.
Quantisation setups can also be saved and loaded just like sequences by holding Store/Play
and pressing one of the 13 note keys.
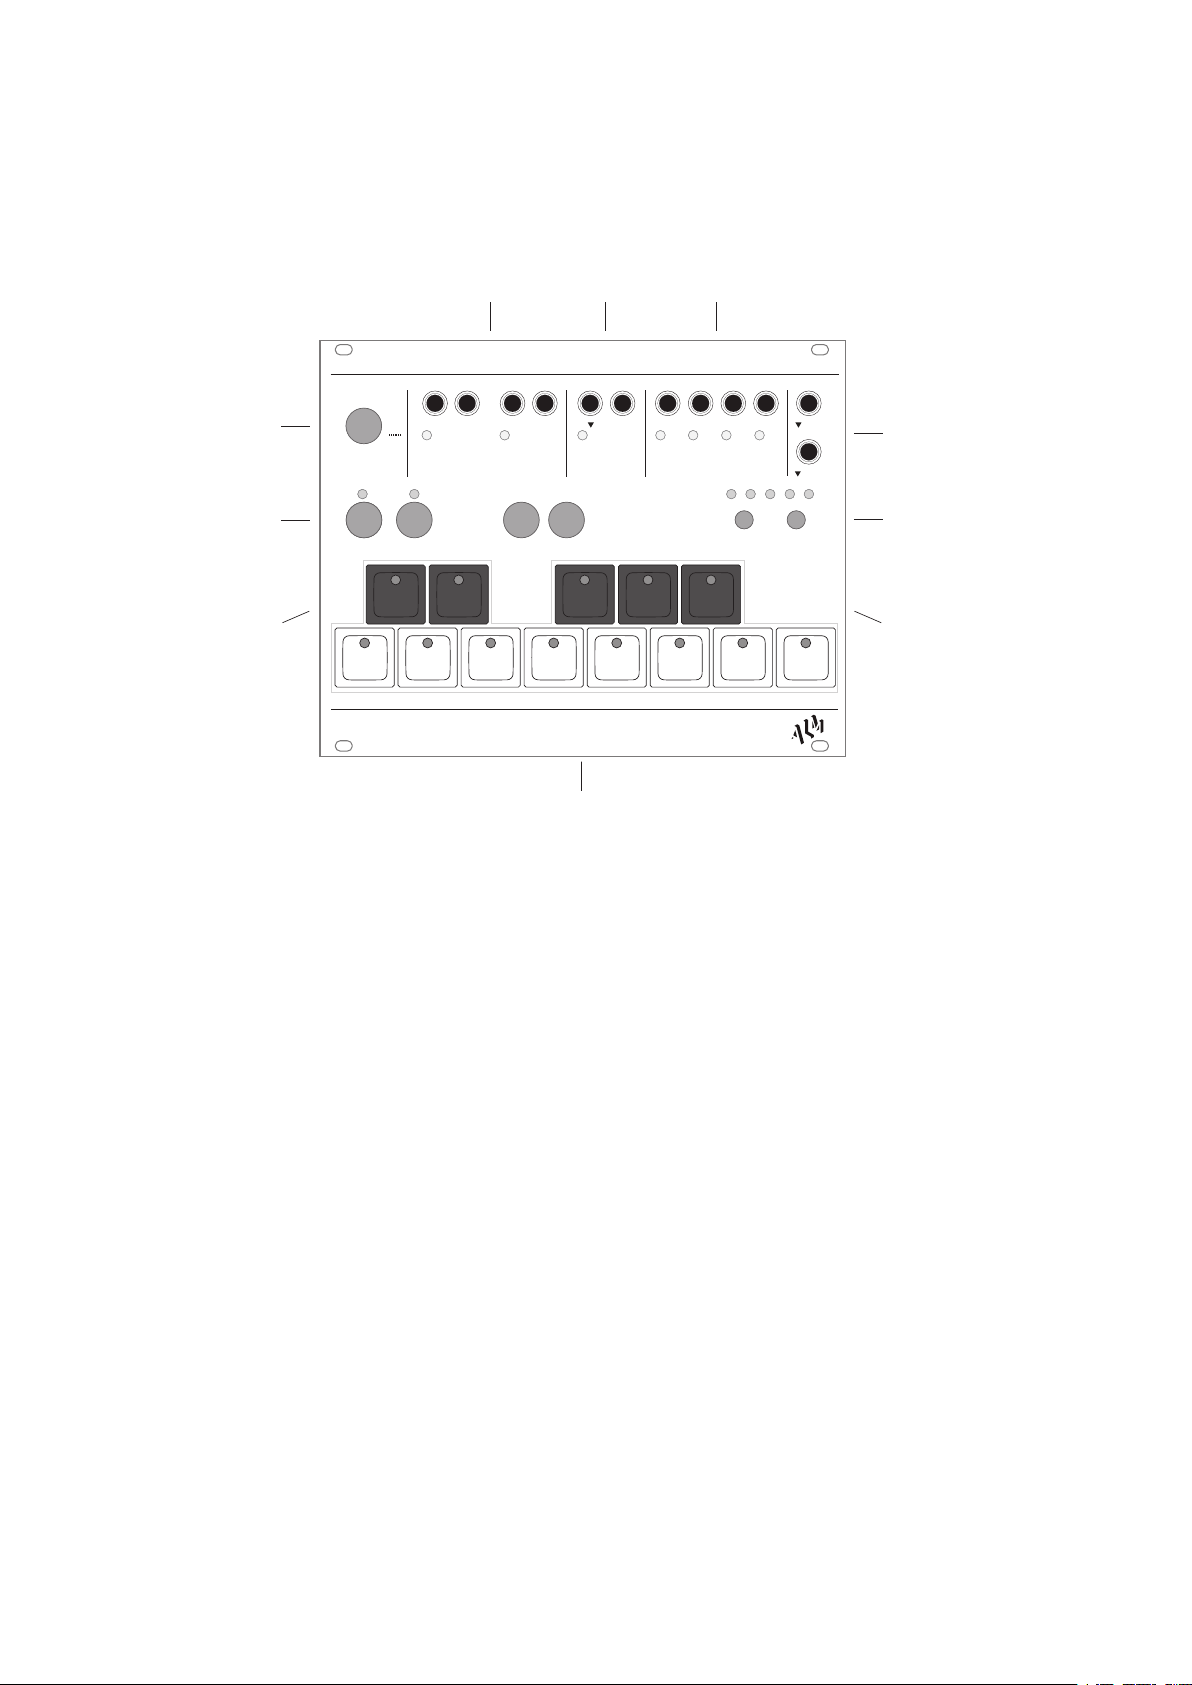
4.6 Pattern Mode
Pattern mode allows for clocked trigger type patterns to be created in a classic drum machine
style. There are 4 trigger pattern sequencers.
Pattern steps are represented by the 8 white keys. A lit LED means an active step. Pressing a
key will toggle a step’s active state.
You can navigate across more than 8 steps with the octave buttons.
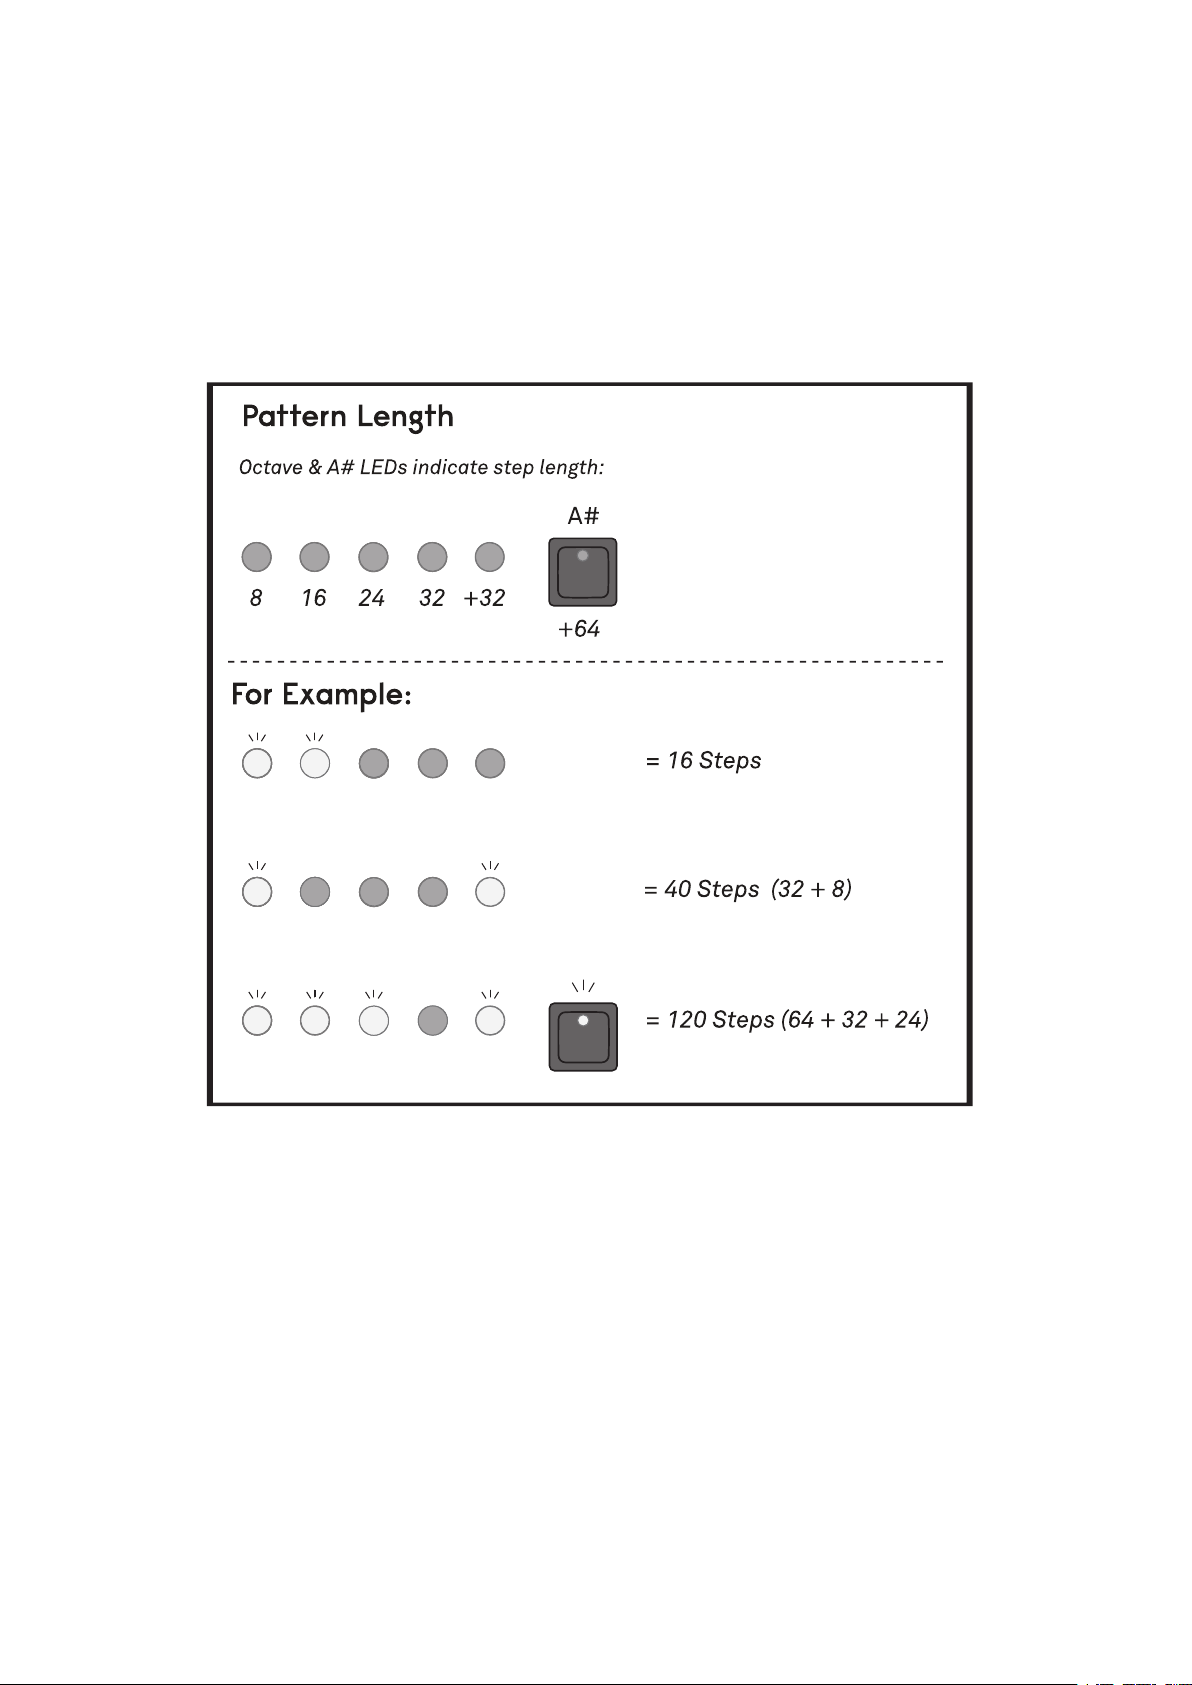
The length of the pattern can be set by holding Hold and pressing an octave button (for steps
of 8) or by pressing a white key (for a non 8 length), just like the note sequencers. When /Hold
is held, The octave LEDs show the total pattern length, with each octave LED representing 8
steps and the end LED representing +32 steps. The maximum length of each trigger pattern
is 64 steps.
Steps can be entered in real time with the sequence playing. By default, page changes follow
playback. The octave LEDs change to represent the current page.
Pressing an octave button once whilst playing disables ’pattern follow’ and you will then be
able to manually navigate through the pattern pages via the octave buttons.
Pressing Store whilst playing activates tap rhythm mode. Tapping any key will then overdub
active trigger steps into the currently playing pattern.
4.7 Saving & Loading Patterns
There are 13 memory banks shared by the 2 pitch sequencers, 13 for quantiser scales, and
another 13 shared by the 4 pattern sequencers. The banks correspond to the keyboard note
keys.
To save the currently selected mode’s pattern to a bank hold Store and press a note key. To
load from a bank to the currently selected mode hold Play and press a key. The new pattern
will begin playing after the currently playing pattern ends.
Patterns saved in the ASQ-1 memory can be easily copied to a computer for backing up or
future use. See Appendix III for details.
7

5 GLOBAL OPERATIONS
5.1 Global Transpose
Both step time sequences and the quantiser can be transposed together by holding Mode and
pressing any note key. Note this is independent of any local transpositions.
8

6 KEY REFERENCE
• ’Mode’ - activate next mode.
• ’Mode+Octave’ - prev/next mode.
• ’Mode+Note’ - ’Global’ transpose of both sequencers and quanitser.
• ’Hold+Octave’ - change pattern length (in steps of 8). Length of zero clears.
• ’Hold+Note’ - change pattern length (non /8 lengths).
• ’Hold+Rest’ - toggles muting the output of the currently active mode.
• ’Rest+Black Key’ - change clock divider (black key LED shows currently set).
• ’Store+Note’ - save current pattern to selected note bank.
• ’Play+Note’ - load a pattern from selected note bank.
• ’Play+Octave’ - change tempo in BPM steps (with no external clock patched).
9

7 LIMITED WARRANTY
From the date of manufacture this device is guaranteed for a period of 2 years against any
manufacturing or material defects. Any such defects will be repaired or replaced at the dis-
cretion of ALM. This does not apply to;
• Physical damage arising for mistreatment (i,e dropping, submerging etc).
• Damage caused by incorrect power connections.
• Overexposure to heat or direct sunlight.
• Damage caused by inappropriate or mis-use including physical ’modding’.
• Use of incorrect or non ofcial rmware
No responsibility is implied or accepted for harm to person or apparatus caused through op-
eration of this product. By using this product you agree to these terms.
10

9 APPENDIX
9.1 I. Factory Reset
When powering, hold the mode key and wait for all octave LEDs to light. This will clear all saved
sequences back to factory state.
9.2 II. Firmware Update and Sequence Backup
With the unit unpowered, connect a USB cable from the port at the left side of the PCB (near
the Mode button) to a computer. The ASQ-1 will appear as a standard removable storage de-
vice. Copy a valid rmware le to the root directory to update. When complete, ASQ-1 will
automatically eject once the update completed and is ready to use powered normally (any
’unmount’ errors from the computer can be safely ignored).
9.3 III. Sequence Backup
To back up saved sequences, connect the ASQ-1 to a computer(the same as performing a
rmware update). Copy the ’ASQ1SEQ.BAK’ le from the ASQ-1 root directory to the desired
back up location on your drive. A previous backup may be copied back to the ASQ-1 to replace
the existing sequences stored in the memory.
12
This manual suits for next models
1
Table of contents
Popular Circuit Breaker manuals by other brands

ABB
ABB SACE Emax E2.2 Installation, operation and maintenance instructions for the installer and the user

Eaton
Eaton PKE12 Series manual

Eaton
Eaton IZM-KLP-SO-RONIS manual

Blue Sea Systems
Blue Sea Systems ELCI manual

Areva
Areva FP 73 Installation, Commisioning, Operation, Maintenenace

Siemens
Siemens 3VT9500-3MF20 operating instructions