Alpha Microsystems AM-6000 User manual

DSM-00213-02
AM-6000
Computer Owner's
Manual

© 1998 ALPHA MICROSYSTEMS
FIRST EDITION: August 1998
To re-order this document, request part number DSO-00213-00
FCC Notice
This equipment has been tested and found to comply with the limits for a Class A digital device, pursuant to Part 15 of the FCC
Rules. These limits are designed to provide reasonable protection against harmful interference when the equipment is operated in a
commercial environment. This equipment generates, uses and can radiate radio frequency energy and, if not installed and used in
accordance with the instruction manual, may cause harmful interference to radio communications. Operation of this equipment in a
residential area is likely to cause harmful interference in which case the user will be required to correct the interference at his own
expense.
Canadian Department of Communications Compliance Statement
This equipment does not exceed Class A limits per radio noise emissions for digital apparatus set out in the Radio Interference
Regulations of the Canadian Department of Communications. Operation in a residential area may cause unacceptable interference
to radio and TV reception requiring the owner or operator to take whatever steps are necessary to correct the interference.
Avis de Conformité aux Normes du Ministère des Communications du Canada
Cet équipment ne deapsse pas les limits de Classe A d'émission de bruits radioélectriques pour les appareils numeriques tels que
prescrites par le Règlement sur le brouillage radioélectrique établi par le ministère des Communications du Canada. L'exploitation
faite en milleu résidential peut entrainer le brouillage des réceptions radio et tele, ce qui obligerait le propriétaire ou l'opératour à
pendre les dispositions nécessaires pour en éliminer les causes.
Battery Warning
CAUTION: Danger of explosion if battery is incorrectly replaced. Replace only with the same or equivalent type recommended by
the manufacturer. Discard used batteries according to the manufacturer's instructions.
ATTENTION: Il y a danger d'explosion s'il y a replacement incorrect de la batterie. Remplacer uniquement avec une batterie du
même type ou d'un type recommandé par le constructeur. Mettre au rébut les batteries usagées conformément aux instructions du
fabricant.
For AM-3500-E100, -E200, -E300, -E400, -E500 and AM-990-01 systems replace battery with Panasonic or Ray-O-Vac BR2325
only. For AM-3500-E550, AM-3500-6000, and AM-990-04 systems, replace batteries with Panasonic or Ray-O-Vac BR1225 only.
Use of other batteries may present a risk of fire or explosion. Replacement batteries may be ordered from your authorized Alpha
Micro reseller.
Safety Warning
This computer contains no user-configurable components that require opening the computer case. Because the power supply in
this computer is capable of outputting high current levels hazardous to your safety, the computer case should only be opened by an
authorized service technician.
Cet ordinateur ne contient aucune pièce configurable par l’utilisateur qui nécessite l’ouverture du boitier. L’alimentation de cet
ordinateur peut preduire des nivaeux de tensions dangereux, le boitier ne devrait donc être ouvert que par un technician autoriaé.
SOFTWARE SECURITY DEVICE IDENTIFICATION NUMBER: _________________
The Alpha Micro Software Security Device (SSD) is a customized integrated circuit that personalizes the computer, providing
identity verification for it. Certain Alpha Micro and non-Alpha Micro software may require that your computer contain an SSD in
order to run software that has been customized to run only on your computer.
Please enter the identification of your SSD above. The SSD identification number should be on your computer ID label under "SSD
Serial No." (Another way of finding the number is to look at the SSD itself. The SSD is located in an integrated circuit location on
the CPU board; its identification number is printed on the SSD itself.) Software vendors may ask you for the SSD number if they are
customizing software to run only on your computer.
This document may contain references to products covered under the following U.S. Patent Number(s): 4,530,048
ALPHA MICROSYSTEMS
2722 Fairview Street
P.O. Box 25059
Santa Ana, CA 92704

AM-6000 Computer Owner's Manual, Rev. 00
Table of Contents
CHAPTER 1 - INTRODUCING THE AM-6000 COMPUTER..................................................... 1-1
ABOUT THIS BOOK.................................................................................................................. 1-3
Graphics Conventions .............................................................................................................. 1-3
HARDWARE FEATURES .......................................................................................................... 1-4
AM-319-20 System Board........................................................................................................ 1-4
AM-176 Board ........................................................................................................................ 1-5
Processor ................................................................................................................................ 1-5
Memory.................................................................................................................................. 1-5
Cache Memory........................................................................................................................ 1-5
CMOS Menu Setup.................................................................................................................. 1-5
SCSI and Wide SCSI Disk Drives............................................................................................. 1-6
External SCSI Port................................................................................................................... 1-6
SCSI Tape Drives.................................................................................................................... 1-7
AM-219 Diskette Controller..................................................................................................... 1-7
Serial I/O Capability................................................................................................................ 1-7
Four High-Speed Parallel Printer Ports ...................................................................................... 1-7
Network Options ..................................................................................................................... 1-7
UPS Monitoring....................................................................................................................... 1-8
Front Panel Status Display ....................................................................................................... 1-8
Real Time Clock ..................................................................................................................... 1-8
Rear I/O Panel......................................................................................................................... 1-9
System Versatility.................................................................................................................... 1-9
Add-On Equipment.................................................................................................................. 1-9
SOFTWARE FEATURES............................................................................................................ 1-9
SERVICE INFORMATION ........................................................................................................1-10
For Further Assistance ............................................................................................................1-10
CHAPTER 2 - INSTALLATION.................................................................................................. 2-1
UNPACKING GUIDELINES ....................................................................................................... 2-1
What You Will Need ............................................................................................................... 2-1
Reporting Shipping Damage...................................................................................................... 2-2
Instructions for Reshipping the Computer................................................................................... 2-2
RECORDING THE SSD IDENTIFICATION NUMBER................................................................ 2-3
OVERVIEW OF INSTALLATION PROCEDURES....................................................................... 2-3
Front Panel Controls and Indicators........................................................................................... 2-3
AM-6000 Rear I/O Panel Configurations ................................................................................... 2-5
PREPARING THE SITE.............................................................................................................. 2-7
Physical Requirements ............................................................................................................. 2-7
Environmental Requirements..................................................................................................... 2-8
Environmental Specifications.................................................................................................... 2-8
Static Electricity and Grounding................................................................................................ 2-8

Page ii Table of Contents
AM-6000 Computer Owner's Manual, Rev. 00
POWER AND CABLE CONNECTIONS..................................................................................... 2-9
Power Supply AC Voltage and Receptacle ...............................................................................2-10
Verifying Voltage Compatibility ..............................................................................................2-10
Turning the Computer On........................................................................................................2-11
INSTALLING THE OPERATOR TERMINAL.............................................................................2-11
Setting the Terminal's Baud Rate and Parameters ......................................................................2-12
Connecting the Cable..............................................................................................................2-12
INITIAL TESTING ....................................................................................................................2-13
BOOTING UP UNDER AMOS...................................................................................................2-13
INSTALLING ALPHA MICRO SOFTWARE ..............................................................................2-13
THE WARM BOOT MONITOR.................................................................................................2-14
TURNING THE COMPUTER OFF.............................................................................................2-14
EXPANDING YOUR COMPUTER ............................................................................................2-15
GETTING ASSISTANCE ..........................................................................................................2-15
CHAPTER 3 - GETTING STARTED........................................................................................... 3-1
BOOTING THE COMPUTER ..................................................................................................... 3-1
AM-6000 CMOS SETUP PROCEDURE ...................................................................................... 3-1
AM-6000 Initialization Routine................................................................................................. 3-2
CMOS Menu Options .............................................................................................................. 3-2
Saving the CMOS Settings........................................................................................................ 3-4
Important Note......................................................................................................................... 3-4
DEVICE NAMES........................................................................................................................ 3-4
The System Disk ..................................................................................................................... 3-5
DISK ACCOUNTS ..................................................................................................................... 3-5
LOGGING ON............................................................................................................................ 3-6
THE TERMINAL KEYBOARD................................................................................................... 3-7
Correcting Typing Mistakes...................................................................................................... 3-8
A WORD ABOUT DISKETTES.................................................................................................. 3-9
Using Diskettes ......................................................................................................................3-10
Mounting Diskettes.................................................................................................................3-12
ABOUT STREAMING TAPE.....................................................................................................3-13
Tape Capacity........................................................................................................................3-13
¼" Tape Drive Read/Write Compatibility.................................................................................3-14
Loading and Unloading Tape Cartridges ...................................................................................3-15
USING A DAT DRIVE ..............................................................................................................3-15
CHAPTER 4 - WHERE DO I GO FROM HERE? ...................................................................... 4-1
INTRODUCTION TO AMOS SOFTWARE................................................................................. 4-1
The Operating System, AMOS.................................................................................................. 4-1
Programming Languages........................................................................................................... 4-1
Networking.............................................................................................................................. 4-1
Text Preparation ...................................................................................................................... 4-2
Utility Programs....................................................................................................................... 4-2
Application Programs............................................................................................................... 4-2
Office Information Products...................................................................................................... 4-2
ADDITIONAL DOCUMENTATION........................................................................................... 4-3

Table of Contents Page iii
AM-6000 Computer Owner's Manual, Rev. 00
"I Want To Start At The Beginning" .......................................................................................... 4-3
"I Want To Learn How To Maintain My Computer" ................................................................... 4-3
"I Want To Do Text Processing"............................................................................................... 4-4
"I Want To Write Computer Programs" ..................................................................................... 4-4
CHAPTER 5 - SYSTEM ADMINISTRATION............................................................................. 5-1
BACKING UP YOUR DATA...................................................................................................... 5-1
DISK ACCOUNTS ..................................................................................................................... 5-2
Passwords............................................................................................................................... 5-2
Organizing the Disk.................................................................................................................. 5-2
Adding New Accounts ............................................................................................................. 5-2
MODIFYING THE SYSTEM INITIALIZATION FILE .................................................................. 5-4
Defining the AM-6000 Parallel Ports......................................................................................... 5-5
Adding Jobs ............................................................................................................................ 5-6
Changing User Memory............................................................................................................ 5-7
ANALYZING THE DISK............................................................................................................ 5-8
The REDALL Command.......................................................................................................... 5-9
The DSKANA Command......................................................................................................... 5-9
DSKANA Options..................................................................................................................5-10
The CHECK Option and Automatic Backups............................................................................5-11
FORMATTING AND INITIALIZING THE HARD DRIVE...........................................................5-11
FORMATTING AND INITIALIZING A DISKETTE....................................................................5-12
CHAPTER 6 - PREVENTIVE MAINTENANCE......................................................................... 6-1
DISKETTES............................................................................................................................... 6-1
CARE OF STREAMING TAPE AND DAT CARTRIDGES ......................................................... 6-1
DISKETTE DRIVE ..................................................................................................................... 6-2
¼" STREAMING TAPE DRIVE CLEANING............................................................................... 6-2
DAT DRIVE CLEANING............................................................................................................ 6-2
MAIN ENCLOSURE................................................................................................................... 6-3
CHAPTER 7 - TROUBLESHOOTING PROCEDURES.............................................................. 7-1
THE SYMPTOMS ...................................................................................................................... 7-1
THE TROUBLESHOOTING PROCEDURES............................................................................... 7-2
Procedure #1: Check Power/Run/Memory Lights........................................................................ 7-2
Procedure #2: Check the Computer Status Codes....................................................................... 7-4
Procedure #3: Powerup/Reset................................................................................................... 7-5
Procedure #4: Check Terminal/Printer....................................................................................... 7-6
Procedure #5: Self Test............................................................................................................ 7-8
Procedure #6: Alternate Boot...................................................................................................7-10
CHAPTER 8 - STATUS DISPLAY CODES................................................................................. 8-1
FRONT PANEL STATUS DISPLAY CODES.............................................................................. 8-1
SELF TEST FEATURE............................................................................................................... 8-6

Page iv Table of Contents
AM-6000 Computer Owner's Manual, Rev. 00
APPENDIX A - CONNECTOR CONFIGURATIONS .................................................................A-1
SERIAL I/O CONNECTORS.......................................................................................................A-1
WHAT IS RS-232?......................................................................................................................A-1
WHAT IS RS-422?......................................................................................................................A-2
IMPORTANT NOTE ..................................................................................................................A-2
CABLE CONSTRUCTION GUIDELINES....................................................................................A-2
Cable Length ...........................................................................................................................A-2
Cable Type.............................................................................................................................A-3
Cable Shielding .......................................................................................................................A-3
RS-232 DB-9 CONNECTOR SIGNALS.......................................................................................A-4
RS-232 DB-9 to DB-25 Terminal Cables...................................................................................A-5
Workstation Connection Cables................................................................................................A-6
RS-232 RJ-45 TO DB-25 CABLES FOR TERMINALS AND PRINTERS......................................A-7
PARALLEL PRINTER PORTS ....................................................................................................A-8
AM-6000 UPS STATUS PORT ...................................................................................................A-9
ETHERNET RJ-45 10BASET CONNECTOR..............................................................................A-9
10BaseT Topology and Cabling................................................................................................A-9
APPENDIX B - THE CONTROL CHARACTERS.......................................................................B-1
APPENDIX C - SUPER I/O..........................................................................................................C-1
DISABLING SUPER I/O..............................................................................................................C-1
Disabling Super I/O on All I/O Boards ......................................................................................C-1
Disabling Super I/O on Individual AM-359 Boards ....................................................................C-2
APPENDIX D - SCSI TERMINATION........................................................................................D-1
SCSI TERMINATION USING EXTERNAL TERMINATOR OPTION..........................................D-1
ATTACHING EXTERNAL DEVICES.........................................................................................D-2
TERMINATOR POWER.............................................................................................................D-2
APPENDIX E - READ-AHEAD AND WRITE BUFFERING.......................................................E-1
INTRODUCTION.......................................................................................................................E-1
READ-AHEAD...........................................................................................................................E-1
Controlling Read-Ahead...........................................................................................................E-2
WRITE BUFFERING ..................................................................................................................E-2
Potential Pitfalls ......................................................................................................................E-3
Setting Up Write Buffering .......................................................................................................E-3
FINAL NOTES...........................................................................................................................E-4

AM-6000 Computer Owner's Manual, Rev. 00
List of Illustrations
Figure 1-1: AM-6000 in Deskside Chassis....................................................................................... 1-1
Figure 1-2: AM-6000 in AM-990 Chassis........................................................................................ 1-2
Figure 1-3: AM-6000 in AM-990 Jumbo Chassis............................................................................. 1-2
Figure 2-1: Front Panel Controls and Indicators (deskside chassis).................................................... 2-4
Figure 2-2: Front Panel Controls and Indicators (AM-990)................................................................ 2-5
Figure 2-3: AM-6000 Rear Panel Configuration (Deskside Chassis).................................................. 2-6
Figure 2-4: AM-6000 Rear Panel Configuration (AM-990 Chassis)................................................... 2-7
Figure 2-5: AM-6000 Boot Port Location........................................................................................2-12
Figure 3-1: 5.25" Diskette ..............................................................................................................3-10
Figure 3-2: 3.5" Diskette................................................................................................................3-10
Figure 3-3: Inserting a 5.25" Diskette..............................................................................................3-12
Figure 3-4: Inserting a 3.5" Diskette ...............................................................................................3-12
Figure 3-5: DAT Tape Drive. .........................................................................................................3-15
Figure A-1: Shielding a Cable .........................................................................................................A-3
Figure D-1: Active External Terminator Installation..........................................................................D-1
List of Tables
Table 1-1: Graphics Conventions..................................................................................................... 1-4
Table 2-1: Environmental Specifications.......................................................................................... 2-8
Table 2-2: Maximum DC Power Requirements ...............................................................................2-10
Table 3-1: Special Function Keys on the Terminal Keyboard ............................................................ 3-8
Table 3-2: Supported ¼" Streamer Data Cartridges..........................................................................3-14
Table 7-1: Self Test Checker (1)...................................................................................................... 7-9
Table 7-2: Self Test Checker (2).....................................................................................................7-10
Table 7-3: Diskette Drive Test (Self Test Checker)..........................................................................7-10
Table 8-1: Front Panel Status Codes ................................................................................................ 8-2
Table A-1: Rear Panel DB-9 Connector Signals ...............................................................................A-4
Table A-2: Pinouts for RS-232 Terminal-to-Computer Cables ...........................................................A-5
Table A-3: Pinouts for Workstation to Computer Cable - IBM PC/AT and Compatibles.....................A-6
Table A-4: Pinouts for Workstation to Computer Cable - IBM PC/XT and Compatibles.....................A-6
Table A-5: RS-232 RJ-45 to DB-25 Connector Signals.....................................................................A-7
Table A-6: Centronics Interface Cabling Signal Pinouts....................................................................A-8
Table A-7: AM-6000 UPS Status Port Signal Pinouts ......................................................................A-9
Table A-8: 10BaseT (RJ-45) Connector Signals .............................................................................A-10

AM-6000 Computer Owner's Manual, Rev. 00
Chapter 1 - Introducing the
AM-6000 Computer
The Alpha Microsystems AM-6000 is a high-performance computer designed for a wide range of
applications in business headquarters, departmental facilities, and professional offices. With power to
support many users simultaneously, in local or networked configurations, the AM-6000 lends itself to
virtually any business data processing environment.
The AM-6000 is constructed in modular fashion. Your organization can start with just the features and
capacity needed, then expand the system as processing demands increase. The system can be field
upgraded to provide more disk storage, memory, and tape backup capacity; to add more local
cable-connected terminals and printers; to exchange data over a local area network with personal
computers and other data processing systems; and to communicate through modems with remote data
centers.
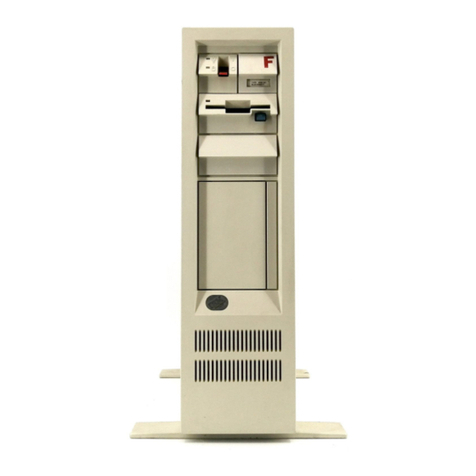
The AM-6000 is offered in three models. The first, shown in Figure 1-1 below, is housed in a compact
enclosure that fits neatly next to a desk.
Figure 1-1: AM-6000 in Deskside Chassis

Page 1-2 Chapter One
AM-6000 Computer Owner's Manual, Rev. 00
For configurations requiring more peripheral devices or more serial input/output connections, the
AM-6000 is available in the AM-990 chassis and the AM-990 Jumbo chassis, shown in Figure 1-2 and
Figure 1-3, respectively.
Figure 1-2: AM-6000 in AM-990 Chassis
Figure 1-3: AM-6000 in AM-990 Jumbo Chassis

Introducing the AM-6000 Computer Page 1-3
AM-6000 Computer Owner's Manual, Rev. 00
ABOUT THIS BOOK
The purpose of this book is to get you started with your computer. After you've followed the instructions
in this book, your computer will be set up and running. And, you will have a good idea of where to go
next for information on the software you want to use.
• This chapter contains a software and hardware overview of your system. It also discusses the
configurations available, as well as warranty and service information.
• Chapter 2 tells you how to unpack and set up your computer. It also contains information on
choosing an installation site.
• Chapter 3 discusses turning on and resetting the computer, using the terminal keyboard,
diskettes, streamer tape, DAT tape, and turning the computer off.
• Chapter 4 is an overview of the various software available for your computer, and lists the Alpha
Micro documentation you can order to learn more about each subject.
• Chapter 5 discusses the use of some computer maintenance utility programs. It shows how to
allocate system resources by entering the system initialization file commands to set up terminals
and jobs for multi-user operation.
• Chapter 6 contains information on the caring for your computer.
• Chapter 7 is a handbook of troubleshooting procedures you can follow to isolate a problem
should something go wrong with your computer.
• Chapter 8 lists the computer status codes you may see on the front panel display.
• Several appendices contain technical information, including instructions for cable construction
and installation.
The AM-6000 Service Manual contains additional information on opening and configuring your
computer. The service manual is intended for authorized technical personnel only.
Graphics Conventions
Like other documents in the Alpha Micro documentation library, this book contains a number of
standard symbols to make our text easier to read and understand.

Page 1-4 Chapter One
AM-6000 Computer Owner's Manual, Rev. 00
Symbol Description
This symbol means STOP!, and signals an important
warning or restriction you must know about before
continuing.
This symbol marks a hint, and identifies a shortcut or an
easier way to do something.
This symbol says "Don't forget!" and signals information to
remember.
Text Text that looks like this in our examples shows the
characters the computer displays on your terminal screen,
such as prompts and information messages.
TEXT Text that looks like this in our examples shows the
characters you type on the computer keyboard.
KEY This symbol tells you when to press the indicated key on
your terminal keyboard. For example: DIR RETURN tells
you to press the RETURN key at the end of the DIR
command.
CTRL /CThis combination of symbols tells you to hold down the
first key and press the second key. For example, to type a
CTRL /C(Control-C), press the CTRL key and, while
holding it down, press the Ckey.
Table 1-1: Graphics Conventions
HARDWARE FEATURES
The AM-6000 uses a two-board combination, the AM-176 and the AM-319-20 boards, to provide new
levels of performance and added versatility. There are a number of physical components that go into the
construction of your AM-6000 computer which provide the ability to process, input, display, and store
data. The following sections highlight some of these components. For technical information on these
devices, refer to the specification sheet supplied with your computer.
AM-319-20 System Board
The AM-319-20 system board provides the AM-6000 with:
• Four on-board serial I/O ports (with modem control)
• Supporting logic for four parallel high-performance FIFO ports
• SSD (Software Security Device) chip
• Ethernet port, with AUI (DB-15) and 10BaseT connectors
• UPS monitoring port for switch-contact type functions, such as power failure and low battery
• Two paddle card buses for connecting up to 32 serial I/O cards

Introducing the AM-6000 Computer Page 1-5
AM-6000 Computer Owner's Manual, Rev. 02
•Battery backed CMOS containing several boot routines that enable you to change the I/O device
the computer boots from
AM-176 Board
The AM-176 board provides the AM-6000 with:
•4GB of direct memory addressability
•64KB external cache memory SIMM
•8KB on-chip processor instruction cache memory and 8KB of data cache
•On-board serial interface
•On-board Ethernet controller with 32-bit DMA transfer capability and AUI (DB-15) connector
•Four on-board single inline memory module (SIMM) expansion slots, which support 60ns
DRAMs for up to 512MB of memory
•SCSI controller with standard and Wide SCSI interfaces
Processor
The heart of your computer is its powerful CPU (Central Processing Unit), a high speed 32-bit
microprocessor. AM-6000 computers have an MC68060 processor running at 66MHz.
Memory
The AM-176 board in the AM-6000 has four sockets in which main memory SIMMs (Single Inline
Memory Modules) are installed. You must always install SIMMs in pairs of equal capacity. The AM-
6000 supports a minimum of 8MB and a maximum of 512MB (AM-176 boards earlier than Rev. B06 or
C04 support only 256MB). Always use PFB-00712-xx 60ns SIMMs.
See the specification sheet included with your computer for more detailed information on memory
capacity, and the AM-6000 Computer Service Manual for instructions on installing it.
Cache Memory
To streamline the use of repetitive instructions within a program and to decrease retrieval time, the AM-
176 board contains an external combined instruction cache. This cache improves the overall system
performance by reducing the number of clock cycles required by the processor to fetch information from
memory. In addition, the CPU has an 8KB instruction cache and an 8KB data cache.
CMOS Menu Setup
The CMOS setup procedure gives you many boot options never before available. Among the CMOS
menu options are:

Page 1-6 Chapter One
AM-6000 Computer Owner's Manual, Rev. 02
•Selection of any hard disk ID number as the primary boot disk (unit #0 - 6). In the case of the
Wide SCSI interface coupled with Wide SCSI peripherals, you can also select unit #8 - 15*.
•Selection of any tape device as an alternate boot device (unit #1 - 6). In the case of the Wide
SCSI interface coupled with Wide SCSI peripherals, you can also select unit #8 - 15*.
•Operator entry to boot the system with any valid monitor and/or initialization file name, located
in [1,4] of the first logical of the selected boot device
•Selection between the AM-319-20 AUI or TPI port for Ethernet connection
* SCSI ID 7 is reserved for the host.
SCSI and Wide SCSI Disk Drives
The SCSI controller in the AM-6000 provides two bus interfaces, each originating at a connector on the
AM-176 board. One is a 50-pin SCSI bus interface, the second is a 68-pin Wide SCSI bus interface. Both
interfaces support Alpha Microsystems SCSI disks, streamer tapes, DAT tapes, CD-ROMs and the AM-
642 SCSI to Pertec Converter for ½" tape drives. However, you cannot attach peripherals to both busses
in the same computer!
For peripheral compatibility and system performance, the significance of the two busses is as follows:
•The "narrow" SCSI bus is one byte wide (8 bits plus parity) and supports a maximum transfer
rate of 10MB per second.
•The Wide SCSI bus is twice as wide: two bytes, or 16 bits plus 2 parity bits. Doubling the width
of the data path doubles the maximum transfer rate to 20MB per second.
The Wide SCSI bus has the following advantages:
•Disk-intensive applications are potentially faster with Wide SCSI disk drives.
•It supports up to 15 devices, where standard SCSI supports only seven, so you can potentially
work with bigger configurations.
These busses are mutually exclusive. That is, all devices must connect to one of the two busses; the other
connector cannot be used. Although not recommended, using the appropriate adapters, you can connect a
mix of SCSI-2 drives and Fast-Wide SCSI-2 disk drives to either SCSI bus.
For optimum performance, use Wide SCSI-2 drives attached to the Wide (68-pin) SCSI
connector. Mixing SCSI-1, SCSI-2, and Wide SCSI-2 disks on the same bus tends to degrade
performance and is not recommended.
External SCSI Port
Your computer includes an external SCSI (Small Computer Standard Interface) port to which you can
attach additional SCSI compatible storage devices. Such as hard disk drives, a CD-ROM drive, or
magnetic tape storage devices. Whether or not you are using an external SCSI device, make sure the
SCSI cable is terminated properly. This normally means plugging an external active terminator into the
external SCSI port.

Introducing the AM-6000 Computer Page 1-7
AM-6000 Computer Owner's Manual, Rev. 00
SCSI Tape Drives
Your computer may contain one or more SCSI compatible ¼" streaming tape or DAT drive, allowing
you to copy and restore files using special tape cartridges. Although your computer does not normally
boot from these tape devices, if something does happen to your computer's hard disk, you can boot your
computer from a special tape. See Chapter 3 for information on tape capacities.
AM-219 Diskette Controller
The AM-319-20 system board provides on-board connection for the AM-219 enhanced diskette
controller board. The AM-219 board can interface with a 5.25" and/or a 3.5" diskette drive. A maximum
of two diskette drives can be used in the system.. A diskette drive offers the convenience of inexpensive,
removable disk media that are easy to transport and store. See Chapter 6 for important information on
taking care of and storing diskettes.
Serial I/O Capability
The AM-319-20 board provides four serial ports, implemented as RJ-45 connectors. These serial ports
provide standard RS-232 serial I/O communication. The RJ-45 ports are pin-for-pin compatible with the
AM-359 serial I/O paddle card ports, so the same type cabling can be used for both. These ports must
use the AM318.IDV interface driver, and are assigned port numbers 0-3. Refer to Appendix A for Serial
I/O cabling information.
The AM-6000 also provides asynchronous serial I/O expansion via the standard Alpha Micro paddle
card bus. We recommend the AM-359 eight-port serial I/O paddle card for I/O expansion. AM-359 cards
provide high port density for eight users on a single card. Higher port density pays off in fewer I/O
boards and fewer configuration constraints, especially important when adding new users.
Four High-Speed Parallel Printer Ports
AM-6000 computers have four on-board, high-speed, parallel printer ports that use the SEP.DVR
interface driver. The ports are Centronics compatible and use 25-pin shielded connectors. See Appendix
A for the 25-pin parallel connector signal pinouts.
To insure the reliability and performance of your parallel ports, avoid using parallel printer
cables longer than six feet.
Network Options
Both the AM-176 and the AM-319-20 boards have Ethernet interfaces:
• The AM-176 board has one high-performance Ethernet port which uses a shielded DB-15 AUI
connector. You do not need to indicate this preference on the CMOS menu. However, to use this
port, you'll need Alpha Micro's networking software, AlphaTCP, which is included with AMOS
2.3A and later. The driver for this port is only TCP compatible; but ITC tunneling is supported.

Page 1-8 Chapter One
AM-6000 Computer Owner's Manual, Rev. 00
By adding a commercially available transceiver, you can convert the 15-pin AUI port to
10BaseT or 10Base2 "thin" Ethernet operation.
• The AM-319-20 board has two connectors: a DB-15 AUI interface and a 10BaseT connector. To
use the Ethernet ports on the AM-319-20, indicate your preference in the CMOS Menu.
The AM-319-20 Ethernet interface is AlphaTCP compatible only, with AlphaNet
supported via tunneling.
We recommend you use the Ethernet port on the AM-176 board. It is more efficient than the AM-319-20
ports because it consumes less CPU overhead. The two ports on the AM-319-20 provide you with built-
in back-up Ethernet connections. You cannot use both Ethernet interfaces at the same time.
UPS Monitoring
The AM-319-20 board has an on-board dedicated DB-9 UPS port. This port is a switch contact status
port, used by the Toshiba UPS products sold by Alpha Micro. This port connects to the UPS and can
control (turn off) the disk write cache during a low battery and AC power fail condition. This function
flushes all pending writes to disk, thereby reducing the chances of large-scale data loss when power is
finally lost. When the power is restored, the UPS flags the system and the disk write caching is
automatically re-enabled. A separate connection from the UPS to an RS-232 serial port is required for
monitoring functions, such as load, voltage, and fault status.
Front Panel Status Display
The two hexadecimal digit status display on the front panel lets you know what is going on inside the
computer even when no messages appear on your terminal. Some normal functions of the machine (e.g.,
clearing memory when the computer boots) cause codes to appear on the display, as do certain system
errors.
In addition, the self test uses the status display to let you know how it is progressing, and if any errors
have occurred. The self test checks the major hardware components in the computer for proper
operation, including memory, disk controllers and drives, the interval timer, and the serial I/O ports.
For information on all meaningful codes that can appear on the front panel display, see Chapter 8,
"Status Display Codes." For information on using the self test, see the Self Test User's Guide, DSO-
00156-00, that came with your computer.
Real Time Clock
The system has a Real Time Clock chip which is part of the CMOS system setup. Both the CMOS boot
settings and the time and date are battery backed-up. The Real Time Clock is more efficient than on
previous systems, and its battery-backup provides a high level of time, date, and CMOS protection
against corruption by a malfunctioning program.

Introducing the AM-6000 Computer Page 1-9
AM-6000 Computer Owner's Manual, Rev. 00
Rear I/O Panel
The AM-6000 rear panel supports a minimum of four DB-25 parallel printer ports and seven paddle
board SIO expansion slots. The main system board provides four on-board RJ-45 serial ports, a 9-pin
UPS port, and Ethernet connectors. The rear panels of the AM-990 and AM-990 Jumbo chassis provide
space for additional peripheral devices or serial I/O connections.
System Versatility
The AM-319-20 system board was designed to work in both the deskside chassis and the AM-990
system chassis with the capability to use either type of front panel status display. The 20-pin connector
is used for the deskside status display, and the 26-pin connector is used for the AM-990 status display.
When system requirements increase beyond the physical capacity of the deskside chassis, you can
expand your system by simply migrating all internal components to the larger AM-990 chassis.
Add-On Equipment
The only thing you need to add is a terminal. It allows you to input and display the data processed and
stored by the components discussed above. You will probably want to also add a printer to provide
printed copies of your data. Your Value Added Reseller (VAR) may have provided these items as part of
your computer purchase.
If you want to expand your computer in the future by adding additional storage and backup devices, see
the AM-6000 Service Manual for a diagram of where additional peripherals should be located in your
cabinet.
SOFTWARE FEATURES
Computer hardware is all potential and no action until the software programs instruct it to do something.
Some of the features of the standard system software are listed below. Your VAR can provide software
packages specifically suited to your needs, such as accounting software, programming languages,
mathematical packages, and so on. Those packages are not included in this list. See your VAR for
information on service and support for such packages.
• The operating system, AMOS, performs many functions, one of which is to manage the
computer's resources so multiple users can run on the computer at the same time. The operating
system also includes all support software for the hardware devices mentioned above.
• AlphaTCP allows your Alpha Micro computer to communicate using the increasingly popular
TCP/IP protocol. This software allows you to connect to the Internet, send and receive mail, and
transfer files.
• Programs called "print spoolers" let you use one or more printers at the same time without tying
up a user terminal.
• The Task Manager lets you schedule multiple background tasks to run without operator control
at preset times and dates.

Page 1-10 Chapter One
AM-6000 Computer Owner's Manual, Rev. 00
• A sophisticated command language allows you to invoke a stream of commands and program
input (predefined by you) by entering a single command.
• The business-oriented AlphaBASIC and AlphaBASIC PLUS programming languages are
uniquely suited to the programming of business applications software packages.
• ISAM (Indexed Sequential Access Method) Plus, a machine language file management system
callable from AlphaBASIC or assembly language programs, provides a method for quick
information organization and retrieval.
• A screen-oriented text editor provides an easy-to-use tool for creating documents.
• A text formatting program aids in document preparation.
• A simple system initialization procedure allows you to quickly change the types of peripheral
devices connected to the computer, change user memory allocations, and customize the
computer to your exact needs.
• Support for many different kinds of printers and terminals gives you the ability to define your
own type of terminal or printer to the computer.
For an introduction to AMOS software, refer to Chapter 4, "Where Do I Go from Here?"
SERVICE INFORMATION
Alpha Micro provides a comprehensive post-sales service and support program for its entire product
line. Our VAR network is structured to provide you with immediate access to support assistance and
information.
Our customer commitment is maintained through the expertise and skills of our competent, professional
staff whose dedication assures all Alpha Micro customers the maximum benefits of quality support.
Alpha Micro warrants its products through our VAR network. Alpha Micro will repair or replace a
defective product under warranty without cost to the purchaser. Should you wish to arrange for factory
warranty service for your equipment, you should obtain a Return Authorization Number from the Alpha
Micro Technical Assistance Center. To arrange for on-site warranty service at your location, contact
your Alpha Micro VAR or AMSO service organization.
In addition to the warranty service provided, support is available through Alpha Microsystems Service
Operations (AMSO), our nationwide field service organization. AMSO provides direct repair services to
Alpha Micro computer owners. Alpha Micro Field Engineers are factory trained to ensure continuity of
product servicing. Should you select hardware service from your servicing Alpha Micro VAR, you can
be assured he or she is backed by, and in close touch with, Alpha Micro for full factory support.
For Further Assistance
If you are unable to contact your VAR, Alpha Micro will be glad to refer you to one. If you relocate and
want to learn the name and address of an Alpha Micro dealer near you, please write or call Alpha Micro.
For information and the location of the Alpha Micro service location nearest you, call our toll free
service number (800) 548-4848.

AM-6000 Computer Owner's Manual, Rev. 00
Chapter 2 - Installation
This chapter gives general installation information for your computer. It discusses the following topics:
• Unpacking the computer
• Instructions for re-shipping the computer
• Recording the SSD identification number
• Preparing the site for your computer
• Verifying AC power requirements
• Turning on the computer
• Installing the operator terminal
• Initially testing the computer
• Booting under AMOS
• Installing Alpha Micro software
• Turning off the computer
• Expanding your computer
Your Alpha Micro VAR can assist you with setting up, expanding, or servicing your computer.
UNPACKING GUIDELINES
Unpack the computer and save all packing material and cartons in case you ever need to transport the
computer. The shipping material was carefully designed to provide optimum cushioning and protection.
When re-shipping or otherwise transporting your computer, you must use the original packaging to
ensure safe shipment.
When moving your computer, handle it gently. The hard disk in the main unit has moving parts and
delicate read/write heads. Rough handling could damage the drive and prevent your system from
operating properly.
If the enclosure contains a 5.25" diskette drive, the drive may contain an insert which protects the
read/write heads. Do not remove this insert until you have installed the computer and are ready to start
using it. The drive may be damaged if you move the computer and it does not contain the protective
insert.
Unpack the terminal which will serve as the operator terminal and set it aside for now.
What You Will Need
When you unpack your computer you should find the following items:

Page 2-2 Chapter Two
AM-6000 Computer Owner's Manual, Rev. 00
• This manual and warranty cards.
• Release Notes.
• The main enclosure.
• One AC power cord.
In addition to the equipment Alpha Micro has provided and the operator terminal, you may need the
following:
1. Properly configured cables for connecting your terminal to the computer.
If you want to construct your own terminal cables, you need various tools and connectors as
well as the actual cable material. See Appendix A for information on constructing terminal
cables.
2. The manufacturer's operator manuals for your terminals and printers.
3. If your computer is set for 230 Volt AC operation, you need a 230 Volt AC power cord with the
correct plug for your geographical area. Your local VAR may already have included this power
cord with your computer; if not, contact your VAR for information on where to get it.
4. If the operating system has not already been installed on your hard disk, you will need a warm
boot tape and a tape containing the operating system. This may be supplied by your VAR.
Reporting Shipping Damage
If there is any damage to the shipping container or the main enclosure, or if you are missing any items
on the unpacking checklist, please call your VAR immediately.
Instructions for Reshipping the Computer
If shipping damage has occurred or the self test indicates a problem with the computer, your VAR may
recommend that you ship it back.
If for some reason you cannot contact the VAR you bought your computer from, please call the Alpha
Micro Sales Department; they will give you the name and address of an Alpha Micro VAR near you
who can help you. See "Service Information" in Chapter 1.
When reshipping or otherwise transporting your computer, you must use the original packaging to ensure
safe shipment.
Please include a note to the person who will receive the computer containing the following
information: your name, address, phone number, the date you shipped the computer back, and the
reason for return.
Be as specific as possible about the problem you experienced—the more information you provide the
easier it will be for the service technician to determine the reasons for any problems. If you performed
any troubleshooting procedures, let the person receiving the computer know exactly what procedures
you have done and what the results were.

Installation Page 2-3
AM-6000 Computer Owner's Manual, Rev. 00
RECORDING THE SSD IDENTIFICATION NUMBER
The Software Security Device (SSD) is a customized integrated circuit located on the main electronics
board inside your AM-6000 computer. The SSD uniquely identifies your computer to customized
software that has been configured to run only on your computer. If you purchase customized software
from your VAR or other software vendors, you need to give them your SSD identification number
(printed on the SSD chip itself) before they can "key" the software to your computer.
The SSD identification number is written on the system ID label on the back of the computer in the
section titled "SSD Serial No." Please note the identification number of your SSD at this time and enter
the number at the front of this book.
OVERVIEW OF INSTALLATION PROCEDURES
Now that you've unpacked your computer and have everything you need to hook it up, you can begin to
physically install it. Installing your computer is a matter of:
1. Choosing and preparing a location for it.
2. Making sure it is configured correctly for your local electrical requirements.
3. Running an initial diagnostic test to make sure the computer is working correctly.
4. Connecting the operator terminal.
5. Installing the Alpha Micro software.
6. Creating a warm boot tape.
7. Connecting additional terminals and printers.
8. Getting assistance.
Some of the sections in this chapter refer to various locations on the front and back panels of the
computer. The next two sections describe the front and rear panel connectors, controls, and indicators.
Front Panel Controls and Indicators
The two different chassis have slightly different front panels. Please look at the front panel features for
your specific chassis.
Deskside Chassis Front Panel
Figure 2-1, below, shows the front panel on the deskside chassis. The panel has the following controls
and indicators:
• The Power Indicator light. is always lit when power is supplied to the computer.
• The CPU Activity light will remain lit whenever the CPU is active. During periods of inactivity,
the light will be off.
• The Disk Indicator light is lit whenever there is hard disk activity.
• The Turbo button is not functional.
Other manuals for AM-6000
1
Table of contents
Other Alpha Microsystems Desktop manuals

Alpha Microsystems
Alpha Microsystems Eagle 250 User manual

Alpha Microsystems
Alpha Microsystems Eagle 100 User manual

Alpha Microsystems
Alpha Microsystems Eagle 250 User manual

Alpha Microsystems
Alpha Microsystems AM-6000 User manual

Alpha Microsystems
Alpha Microsystems AM-6060 User manual

Alpha Microsystems
Alpha Microsystems AM-990 User manual

Alpha Microsystems
Alpha Microsystems AM-1600 Quick start guide

Alpha Microsystems
Alpha Microsystems Eagle TX Series Technical document