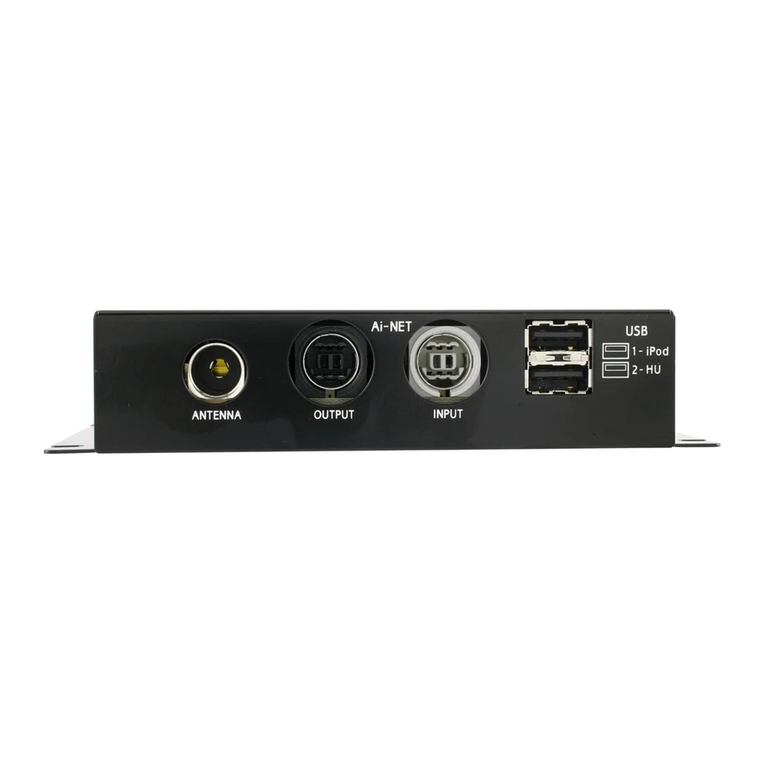
Alpine TUE-DAB1U User manual

EN
FOR CAR USE ONLY / NUR FÜR AUTOMOBILGEBRAUCH / POUR APPLICATION AUTOMOBILE
UNIQUEMENT / PER IL SOLO UTILIZZO IN AUTOMOBILE / KUN TIL BRUG I BILEN / KUN FOR BRUK I BIL
ADD ON DAB/ DAB+ TUNER
TUE-DAB1U
• OWNER’S MANUAL
Please read before using this equipment.
• BEDIENUNGSANLEITUNG
Bitte vor der Verwendung des Produkts lesen.
• MANUEL D’UTILISATION
Veuillez lire ce manuel avant d’utiliser ce matériel.
• MANUALE DELL’UTENTE
Leggere il manuale prima di usare il dispositivo.
• BRUGERMANUAL
Læs venligst denne manual, før produktet tages i brug.
• BRUKERHÅNDBOK
Les før du bruker dette utstyret.
DE
FR
IT
DA
NO
ALPINE ELECTRONICS MARKETING, INC.
1-7, Yukigaya-Otsukamachi, Ota-ku,
Tokyo 145-0067, JAPAN
Phone: 03-5499-4531
ALPINE ELECTRONICS OF AMERICA, INC.
19145 Gramercy Place,Torrance,
California 90501, U.S.A.
Phone 1-800-ALPINE-1 (1-800-257-4631)
ALPINE ELECTRONICS OF CANADA, INC.
777 Supertest Road,Toronto,
Ontario M3J 2M9, Canada
Phone 1-800-ALPINE-1 (1-800-257-4631)
ALPINE ELECTRONICS OF AUSTRALIA PTY. LTD.
161-165 Princes Highway,
Hallam Victoria 3803, Australia
Phone 03-8787-1200
ALPINE ELECTRONICS GmbH
Wilhelm-Wagenfeld-Str. 1-3,
80807 München, Germany
Phone 089-32 42 640
ALPINE ELECTRONICS OF U.K. LTD.
Alpine House
Fletchamstead Highway,
Coventry CV4 9TW, U.K.
Phone 0870-33 33 763
ALPINE ITALIA S.p.A.
Viale C. Colombo 8, 20090 Trezzano
Sul Naviglio (MI), Italy
Phone 02-484781
ALPINE ELECTRONICS DE ESPAÑA, S.A.
Portal de Gamarra 36, Pabellón, 32
01013 Vitoria (Alava)-APDO 133, Spain
Phone 945-283588
ALPINE ELECTRONICS FRANCE S.A.R.L.
(RCS PONTOISE B 338 101 280)
98, Rue de la Belle Etoile, Z.I. Paris Nord Il,
B.P. 50016, 95945 Roissy Charles de Gaulle
Cedex, France
Phone 01-48638989
LP13-0113_Alpine_TUE-DAB1U_ML.indb 1 7/12/2013 6:59:38 PM

LP13-0113_Alpine_TUE-DAB1U_ML.indb 2 7/12/2013 6:59:38 PM

3-EN
EN
Contents
Operating Instructions.......................................................................................................................................4
Unit Description................................................................................................................................................5
DAB Antenna Installation.................................................................................................................................6
Remote Control Operation................................................................................................................................7
Contents ............................................................................................................................................................7
Getting Started ..................................................................................................................................................8
Turn on the unit ...........................................................................................................................................8
Automatic Station Scan ...............................................................................................................................8
Setting Supply for Active Antenna ..............................................................................................................8
Sorting The Station List..................................................................................................................................10
The Info Screen...............................................................................................................................................10
Settings............................................................................................................................................................11
Troubleshooting ..............................................................................................................................................12
Features and Specications.............................................................................................................................13
Compatible Alpine Units.................................................................................................................................13
System Connections........................................................................................................................................14
LP13-0113_Alpine_TUE-DAB1U_ML.indb 3 7/12/2013 6:59:38 PM

4-EN
Operating Instructions
MAKE THE CORRECT CONNECTIONS.
When making connections to the vehicle’s electrical system,
be aware of the factory installed components (e.g. on-board
computer). Do not tap into these leads to provide power for this
unit. When connecting the device to the fuse box, make sure the
fuse for the intended circuit of the device has the appropriate
amperage. Failure to do so may result in re or damage to the unit
and/or the vehicle. When in doubt, consult your Alpine dealer.
BEFORE WIRING, DISCONNECT THE CABLE FROM
THE NEGATIVE BATTERY TERMINAL.
Failure to do so may result in electric shock or injury due to
electrical shorts .
DO NOT ROUTE ELECTRICAL CABLES NEAR HOT OR
MOVING PARTS.
Route the cables and wiring away from hot or moving parts,
and x them securely to avoid heat/mechanical damage to the
cable insulation, which may result in a short circuit, re or
electric shock.
DO NOT SPLICE INTO ELECTRICAL CABLES.
Never cut away cable insulation to supply power to other
equipment. Doing so will exceed the current carrying capacity
of the wire and result in re or electric shock.
DO NOT INSTALL IN LOCATIONS WHICH MIGHT HINDER
VEHICLE OPERATION, SUCH AS THE STEERING WHEEL
ORSHIFT LEVER.
Doing so may obstruct forward vision or hamper movement
etc. and results in serious accident.
WARNING
WARNING
This symbol means important instructions.
Failure to heed them can result in serious
injury or death.
DO NOT DAMAGE PIPE OR WIRING WHEN DRILLING HOLES.
When drilling holes in the chassis for installation, take
precautions so as not to contact, damage or obstruct pipes, fuel
lines, tanks or electrical wiring. Failure to take such precautions
may result in re.
DO NOT USE BOLTS OR NUTS IN THE BRAKE OR
STEERING SYSTEMS TO MAKE GROUND CONNECTIONS.
Bolts or nuts used for the brake or steering systems (or any
other safety-related system), or tanks should NEVER be used
for installations or ground connections. Using such parts could
disable control of the vehicle and cause re etc.
USE ONLY IN CARS WITH A 12 OR 24 VOLT NEGATIVE
GROUND.
(Check with your dealer if you are not sure.) Failure to do so
may result in re, etc.
WHEN USING A DRILL TO MAKE A HOLE, TAKE
PRECAUTIONS SUCH AS WEARING GOGGLES SO
FRAGMENTS DO NOT GET INTO THE EYES.
Failure to do so may result in injury.
HAVE THE WIRING AND INSTALLATION DONE BY EXPERTS.
The wiring and installation of this unit requires special technical
skill and experience. To ensure safety, always contact the dealer
where you purchased this product to have the work done.
ARRANGE THE WIRING SO IT IS NOT CRIMPED OR
PINCHED BY A SHARP METAL EDGE.
Route the cables and wiring away from moving parts (like
the seat rails) or sharp or pointed edges. This will prevent
crimping and damage to the wiring.
HALT USE IMMEDIATELY IF A PROBLEM APPEARS.
Failure to do so may cause personal injury or damage to the
product. Return it to your authorized Alpine dealer or the
nearest Alpine Service Centre for repairing.
CHECK WIRING WHEN ATTACHING.
Double-check your wiring to ensure all connections are
correct and secure. Also, do not apply unnecessary force to the
harness. This can result in battery failure, performance failure,
connector damage, or wire breakage.
LP13-0113_Alpine_TUE-DAB1U_ML.indb 4 7/12/2013 6:59:39 PM

5-EN
EN
Unit Description
Rear Side
Front Side
ASystem Connector: Combination of power input, ACC input, Remote Control, Video and Audio output
BAntenna Connector: Antenna connection port (NOTE: This DAB unit provides +5V antenna power on
these inputs for 5V active antennas)
CPower: The ‘Power’ LED indicates if the 12V or 24V power supply has been successfully applied to the device
DUSB Port: Plug the USB memory stick for updating the software
EReset: System reset button
Reminder: Please connect the antenna before switching the unit on.
If you turn the unit on before connecting the antennas, the receiver may not receive any signal. Please connect the
antenna rst and then turn on the unit.
ASystem Connector
BAntenna Connector
DUSB Port
CPower LED
EReset Button
LP13-0113_Alpine_TUE-DAB1U_ML.indb 5 7/12/2013 6:59:39 PM

6-EN
DAB Antenna Installation
DAB reception will vary from vehicle to vehicle and you may have to try several mounting positions
to determine which position provides the strongest signal in your vehicle.
Please refer to the Diagram below for some of our recommendations:
ANear A Pillar of Front Windscreen
BTop of Front Windscreen
CBottom of Front Windscreen
DBehind the Front Bumper. (providing that it’s not Metal)
Once a suitable position is found, carefully route the antenna cable to the receiver unit and then connect to the
Antenna Input.
A B C D
LP13-0113_Alpine_TUE-DAB1U_ML.indb 6 7/12/2013 6:59:40 PM

7-EN
EN
Remote Control Operation
Contents
Button name Function
ASelect power-on or stand-by
BGo to menu screen
CINFO Display channel information
DSCAN To scan channels automatically
EEXIT Back
FCH ▲ Channel up
GCH ▼ Channel down
HVOL ► Volume up
IVOL ◄ Volume down
JOK List view/OK
KList View ABC sort
LList View 123 sort
MList view page –
NList view page +
Before attempting to operate your remote control, install the supplied battery.
If the battery in remote controller is low on power, please replace the battery as described below.
1. Remove the battery cover on rear of the remote controller.
2. Replace old battery with new one.
3. Replace the cover back based on the indentation.
• System cable
• Remote control
BMenu APower
LList View
123 Sort
KList View
ABC Sort
NList View
Page +
MList View
Page –
CChannel Info
EBack
JList View/OK
HVolume +
DScan
FCH/Navigate +
IVolume –
GCH/Navigate –
LP13-0113_Alpine_TUE-DAB1U_ML.indb 7 7/12/2013 6:59:40 PM

8-EN
Getting Started
Connect the DAB antenna and make sure all other connections are done according to the system connection
chart in the back of this manual.
Turn on the unit
1. Turn on the vehicles ACC or IGN. (Or Start the vehicle)
2. When the unit has power, the POWER LED indicator will
illuminate green.
3. Select the AUX input on your Alpine AV or AVN unit.
Automatic Station Scan
The TUE-DAB1U will automatically start a scan for available stations.
Once the scan is done, playback of the rst station in the list of stations
will start. If there are only few stations found, please check if your
antenna needs 5V phantom feed. The default setting for phantom feed
is ‘OFF’.
Setting Supply for Active Antenna
Push the MENU button on the playback screen.
Select Antenna from the Menu Screen.
Power LED
LP13-0113_Alpine_TUE-DAB1U_ML.indb 8 7/12/2013 6:59:41 PM

9-EN
EN
Select Phantom Supply ‘ON’ only when you are sure that your antenna
needs 5V supply from the receiver. If you are in doubt, please consult
with your dealer.
Conrm the warning message by selecting ‘YES’.
Use the return button to go back to the Menu screen.
Select ‘Search’ to initiate a new scan.
After the Auto Searching process,the broadcasting service will start
automatically if there are stations found.
Press [CH+]/[CH–] buttons to select your preferred DAB/DAB+
channel.
LP13-0113_Alpine_TUE-DAB1U_ML.indb 9 7/12/2013 6:59:41 PM

10-EN
Press the ‘LIST’ button to see a list of all available stations.
After an automatic scan, the stations will appear in the sequence as
they are broadcasted in their ensemble or multiplex. In this mode you
may not have a sorting order that allows easy navigation, but you can
switch fast from station to station.
Should you prefer all stations to be sorted alphabetically, push the
‘ABC’ button. After a short while, you can access stations by their
alphabetic sequence. Switching from one station to another can mean
that the ensemble/ multiplex is also changed. This will cause a short
delay until the playback continues as frequencies change.
Pushing the ‘INFO’ key in the playback screen will allow you to see
additional technical information about the received station.
Sorting The Station List
The Info Screen
LP13-0113_Alpine_TUE-DAB1U_ML.indb 10 7/12/2013 6:59:42 PM

11-EN
EN
Settings
All necessary settings can be accessed from the Menu screen.
The volume setting is intended to adjust the volume to match the
other sources when using an Alpine screen with direct touch controls.
Nevertheless there can be volume differences between the broadcasts.
There are six choices for the OSD language.
System Info lets you see the software version of the product
and start a software upgrade (if applicable).
LP13-0113_Alpine_TUE-DAB1U_ML.indb 11 7/12/2013 6:59:42 PM

12-EN
In case the factory settings should be restored, ‘Reset Default’ will
perform this task after a conrmation.
Troubleshooting
Problem Possible Reason Solution
No picture, no audio. The power cord is not properly inserted into
the unit.
Check the power wire connection.
The TUE-DAB1U is not switched on. Press [POWER] button on the remote
control.
In DAB/DAB+
mode, the number
of radio channels is
not as much as we
expected.
The number of available channels is limited due
to the local broadcasting system. The available
channels can vary depending on the area.
Perform “Scan” rescan all the channels.
The signal quality of some DAB channels is
too low.
Please use active antenna instead of
passive antenna for better reception quality
The signal quality of some DAB channels is
too low.
The Phantom Feed for an active antenna
is not switched on. Select Phantom
Supply ‘ON’ in the Antenna Menu.
In DAB/DAB+ mode,
all of the channels
show low signal
quality
The antennas are not properly connected. Please check the connection of the
antennas and place the antenna at
different location.
No radio service is provided in the area. Check your country DAB radio coverage
map. It is not possible to listen to digital
radio in non-covered areas.
The video is fine but
there is no sound.
The audio is muted. Press [VOL+] button to increase the volume
The Audio is fine,
but the screen is
black
The screen is disabled while driving. Depending on the specifications of your
screen, video image may be disabled
while driving. Contact your authorized
dealer for more information.
LP13-0113_Alpine_TUE-DAB1U_ML.indb 12 7/12/2013 6:59:42 PM

13-EN
EN
Features and Specifications
Compatible Alpine Units
Features
DAB/DAB+ Reception DAB/ DAB+ reception with SLI and VIS support
Control Options Full touch control with compatible Alpine products. Infrared remote control
RF Input
Antenna Passive and active antenna supported (SMB connector, 5 VDC)
Frequency range VHF Band III (170-240 MHz)
RF input impedance 75 Ohm
Radio broadcasting System
Transmission standard ETSI EN 300 401 DAB compliant
ETSI TS 102 563 DAB+ compliant
Video/Audio decoder Video: JPEG
Audio: MPEG Audio Layer II, AAC
S/W Features
OSD Language English, German, French, Italian, Danish, Norwegian
Features DAB slide show, Channel Management, Auto Channel Search
Interface
AV I/O port DC input, ACC input, IR input, wired remote, video and stereo audio output
USB Port Host USB 2.0 supported
Infrared Remote Control Supported through remote sensor of screen or optional remote eye
Power
Input voltage +12 VDC – +24 VDC
Power consumption 2.4 W
Operating Temperature
Operating Temperature -10°C – +70°C
Dimension and Weight
Dimension 115 x 95 x 25 mm
Weight 295 g
The following Alpine products can operate the TUE-DAB1U fully from the touch screen: ICS-X7, ICS-X8,
INA-W910R, INE-W92xR, INE-W97xBT, IVA-D511R/RB, IVA-D800R, IVE-W530BT, IVE-W535BT.
LP13-0113_Alpine_TUE-DAB1U_ML.indb 13 7/12/2013 6:59:43 PM

14-EN
Using an Alpine Screen with direct touch:
Note: See the ‘Setting the AUX mode’ section in the manual of your Alpine Headunit for details on how to enable
the touch controls. The mode should be set to ‘USB Video’.
System Connections
Power/AV/IR
Antenna
Port
Power LED USB Reset
a
TUE-DAB1U
GND
+12V
ACC
Battery
IGNITION KEY
HU CONNECTOR
ALPINE HEAD UNIT
AUX INPUT
IR (TOUCH)
REMOTE OUT
(Sold Separately)
AV EXTENSION
DAB ANTENNA
IR EYE
AUX OUTPUT
LP13-0113_Alpine_TUE-DAB1U_ML.indb 14 7/12/2013 6:59:45 PM

15-DE
DE
Inhaltsverzeichnis
Bedienungsanleitung.......................................................................................................................................16
Gerätebeschreibung.........................................................................................................................................17
Installation der DAB Antenne ........................................................................................................................18
Ferngesteuerter Betrieb...................................................................................................................................19
Inhaltsverzeichnis ...........................................................................................................................................19
Erste Schritte...................................................................................................................................................20
Schalten Sie das Gerät ein .........................................................................................................................20
Automatischer Sendersuchlauf..................................................................................................................20
Einstellen der Versorgung für aktive Antenne ...........................................................................................20
Sortierung der Senderliste...............................................................................................................................22
Der Info-Bildschirm........................................................................................................................................22
Einstellungen...................................................................................................................................................23
Fehlerbehebung...............................................................................................................................................24
Eigenschaften und Spezikationen .................................................................................................................25
Kompatible Alpine-Geräte..............................................................................................................................25
Systemanschlüsse............................................................................................................................................26
LP13-0113_Alpine_TUE-DAB1U_ML.indb 15 7/12/2013 6:59:45 PM

16-DE
Bedienungsanleitung
AUF KORREKTE ANSCHLÜSSE ACHTEN.
Wenn Sie Anschlüsse an das elektrische System des Fahrzeugs
vornehmen, berücksichtigen Sie bitte alle werkseitig bereits
installierten Komponenten (z. B. Bord-Computer). Nutzen Sie
nicht die Leitungen solcher Komponenten, um dieses Gerät mit
Strom zu versorgen. Wenn Sie das Gerät an den Sicherungskasten
anschließen, achten Sie darauf, dass die Sicherung für den
Stromkreis, an den Sie das Gerät anschließen wollen, eine
geeignete Amperezahl aufweist. Andernfalls kann es zu einem
Brand, Schäden am Gerät und/oder am Fahrzeug kommen.
Wenden Sie sich im Zweifelsfall bitte an Ihren Alpine-Händler.
VOR DEM ANSCHLUSS DAS KABEL VOM MINUSPOL DER
BATTERIE TRENNEN.
Andernfalls besteht die Gefahr eines elektrischen Schlages oder
Verletzungsgefahr durch einen Kurzschluss.
ELEKTRISCHE KABEL NICHT IN DER NÄHE VON HEISSEN
ODER BEWEGLICHEN TEILEN VERLEGEN.
Verlegen Sie sämtliche Kabel weg von heißen oder beweglichen
Teilen und xieren Sie sie, um zu vermeiden, dass es zu
einer hitzebedingten bzw. mechanischen Beschädigung der
Kabelisolierung kommt. Dies könnte zu einem Kurzschluss,
einem Brand oder elektrischen Schlag führen.
ELEKTRISCHE KABEL NICHT SPLEISSEN.
Kabel dürfen nicht abisoliert werden, um andere Geräte mit Strom
zu versorgen. Andernfalls wird die Strombelastbarkeit des Gerätes
überschritten und es besteht die Gefahr eines elektrischen Schlages
oder eines Brandes.
DAS GERÄT NICHT AN EINER STELLE EINBAUEN, AN DER ES BEIM
FAHREN HINDERLICH SEIN KÖNNTE, WEIL ES Z. B. DAS LENKRAD
ODER DEN SCHALTHEBEL BLOCKIERT.
Andernfalls ist möglicherweise keine freie Sicht nach vorne
gegeben, oder die Bewegungen des Fahrers sind so eingeschränkt,
dass Unfallgefahr besteht.
WARNUNG
WARNUNG
Dieses Symbol weist auf wichtige Instruktionen
hin, Falls Sie diese missachten, kann dies zu
schweren Verletzungen und zum Tod führen.
BEIM BOHREN VON LÖCHERN LEITUNGEN UND KABEL NICHT
BESCHÄDIGEN.
Wenn Sie beim Einbauen Löcher in das Fahrzeugchassis bohren,
achten Sie unbedingt darauf, die Kraftstofeitungen und andere
Leitungen, den Benzintank und elektrische Kabel nicht zu
berühren, zu beschädigen oder zu blockieren. Werden diese
Vorsichtsmaßnahmen unterlassen, so kann dies zum Brand führen.
SCHRAUBEN UND MUTTERN DER BREMSANLAGE ODER DER
LENKUNG NICHT ALS MASSEPUNKTE VERWENDEN.
Schrauben oder Muttern der Brems- bzw. Lenkanlage (oder einem
anderen sicherheitsrelevanten Systems) oder Tanks dürfen NIEMALS
für den Einbau oder als Masseanschluss verwendet werden.
Andernfalls besteht die Gefahr, dass Sie die Kontrolle über das
Fahrzeug verlieren oder ein Feuer ausbricht.
NUR IN FAHRZEUGEN MIT 12- ODER 24-VOLT-BORDNETZ UND
MINUS AN MASSE VERWENDEN.
(Klären Sie dies im Zweifel mit Ihrem Händler ab.) Nichtbeachtung
kann zu Bränden etc. führen.
DENKEN SIE BEIM BOHREN VON LÖCHERN UNBEDINGT AN DIE
SICHERHEITSMASZNAHMEN, WIE Z. B. DAS TRAGEN EINER
SCHUTZBRILLE, UM DAS EINDRINGEN VON TEILEN IN DIE
AUGENZU VERHINDERN.
Andernfalls besteht Verletzungsgefahr.
VERKABELUNG UND EINBAU VON FACHPERSONAL AUSFÜHREN
LASSEN.
Die Verkabelung und der Einbau dieses Geräts erfordern
technisches Geschick und Erfahrung. Um Sicherheit zu
gewährleisten, wenden Sie sich immer an den Händler, bei dem
Sie dieses Produkt erworben haben, damit er dies erledigt.
DIE KABEL SO VERLEGEN, DASS SIE NICHT GEKNICKT ODER
DURCH SCHARFE KANTEN GEQUETSCHT WERDEN.
Verlegen Sie die Kabel und Verdrahtung abseits beweglicher Teile
(wie den Sitzschienen) oder scharfer Kanten oder spitzer Ecken.
So verhindern Sie Quetschungen und Schäden an der Verkabelung.
DAS GERÄT NICHT WEITERBENUTZEN, WENN EIN PROBLEM AUFTRITT.
Nichtbeachtung kann zu Verletzungen oder Schäden am Produkt
führen. Geben Sie das Gerät zu Reparaturzwecken an einen
autorisierten Alpine-Händler oder den nächsten Alpine-Kundendienst.
KABEL BEIM EINBAU PRÜFEN.
Überprüfen Sie alle Kabel genau, um sicherzustellen, dass sämtliche
Anschlüsse ordnungsgemäß und fest sind. Vermeiden Sie unnötigen
Druck auf den Kabelbaum. Dies kann zu Schäden an der Batterie, zu
Leistungsverlust, Schäden am Stecker oder zu einem Kabelbruch führen.
LP13-0113_Alpine_TUE-DAB1U_ML.indb 16 7/12/2013 6:59:46 PM

17-DE
DE
Gerätebeschreibung
Rückseite
Vorderseite
ASystemanschluss
BAntennenanschluss
DUSB Port
CStrom-LED
EReset-Schalter
ASystemanschluss: Kombination aus Stromzufuhr, ACC-Eingang, Fernsteuerung, Video- und Audio-Ausgang
BAntennenanschluss: Antennenanschluss-Port (HINWEIS: Dieses DAB-Gerät bietet an diesen
Eingängen +5V Antennenstrom für aktive 5V-Antenen)
CStrom: Die „Strom“ LED zeigt an, ob am Gerät eine 12 V- oder 24 V-Stromzufuhr erfolgreich
angeschlossen wurde
DUSB Port: Stecken Sie den USB-Stick ein, um die Software zu aktualisieren
EReset: System-Reset-Schalter
Zur Erinnerung: Bitte schließen Sie die Antenne an, bevor Sie das Gerät anschalten.
Wenn Sie das Gerät vor Anschluss der Antenne anschalten, empfängt der Empfänger möglicherweise kein Signal.
Bitte schließen Sie erst die Antenne an und schalten dann das Gerät ein.
LP13-0113_Alpine_TUE-DAB1U_ML.indb 17 7/12/2013 6:59:46 PM

18-DE
Installation der DAB Antenne
Der DAB-Empfang variiert von Fahrzeug zu Fahrzeug und Sie müssen möglicherweise mehrere Installationsorte
testen, um festzustellen, welche Position das stärkste Signal für Ihr Fahrzeug bietet.
Bitte schauen Sie in die nachfolgende Abbildung, in der Sie einige unserer Empfehlungen nden:
AIn der Nähe einer A-Säule bei der Frontscheibe
BAn der Oberseite der Frontscheibe
CAm Boden der Frontscheibe
DHinter der vorderen Stoßstange. (vorausgesetzt, dass sie nicht aus Metall ist)
Sobald eine passende Stelle gefunden wurde, führen Sie das Antennenkabel sorgfältig zur Empfangseinheit und
verbinden es dann mit dem Antenneneingang.
A B C D
LP13-0113_Alpine_TUE-DAB1U_ML.indb 18 7/12/2013 6:59:46 PM

19-DE
DE
Ferngesteuerter Betrieb
Inhaltsverzeichnis
Name des Schaltfelds Funktion
AWählen sie Anschalten oder Stand-By
BGehen Sie zum Menübildschirm
CINFO Information zum Bildschirmkanal
DSUCHLAUF Um Sender automatisch zu suchen
EBEENDEN Zurück
FCH ▲ Kanal aufwärts
GCH ▼ Kanal abwärts
HVOL ► Lautstärke
IVOL ◄Leiser
JOK Listenansicht/OK
KListenansicht ABC sortiert
LListenansicht 123 sortiert
MListenansichtsseite –
NListenansichtsseite +
Installieren Sie die mitgelieferte Batterie, bevor Sie Ihre Fernbedienung bedienen.
Wenn die Batterie in der Fernbedienung fast leer ist, wechseln Sie die Batterie in nachfolgend beschriebener Weise aus.
1. Entfernen Sie die Batterieabdeckung von der Rückseite der Fernbedienung.
2. Tauschen Sie die alte gegen eine neue Batterie.
3. Setzen Sie die Abdeckung wieder in die Vertiefung ein.
• Systemkabel
• Fernbedienung
BMenü AStrom
LListenansicht
123 Sortiert
KListenansicht
ABC Sortiert
NListenansicht
Seite +
MListenansicht
Seite –
CSender-Info
EZurück
JListenansicht/OK
HLautstärke +
DSuchlauf
FKanal +
ILautstärke –
GKanal –
LP13-0113_Alpine_TUE-DAB1U_ML.indb 19 7/12/2013 6:59:46 PM

20-DE
Erste Schritte
Schließen Sie die DAB-Antenne an und stellen Sie sicher, dass alle anderen Verbindungen laut
Systemanschlusstabelle auf der Rückseite dieses Handbuchs ausgeführt wurden.
Schalten Sie das Gerät ein
1. Schalten Sie Strom oder Zündung des Fahrzeugs ein
(oder starten das Fahrzeug).
2. Wenn das Gerät über Stromzufuhr verfügt, wird die
POWER LED grün aueuchten.
3. Wählen Sie den AUX-Eingang am Alpine AV- oder AVN-Gerät.
Automatischer Sendersuchlauf
Das TUE-DAB1U wird automatisch nach verfügbaren Sendern suchen.
Sobald der Suchlauf abgeschlossen ist, wird die Wiedergabe des ersten
Senders in der Senderliste beginnen. Wenn nur wenige Sender gefunden
werden, überprüfen Sie bitte, ob Ihre Antenne 5V-Phantomspeisung
benötigt. Die Werkseinstellung der Phantomspeisung ist „OFF“.
Einstellen der Versorgung für aktive Antenne
Drücken Sie die MENÜ-Taste auf dem Wiedergabe-Bildschirm.
Wählen Sie die Antenne auf dem Menübildschirm aus
Strom LED
LP13-0113_Alpine_TUE-DAB1U_ML.indb 20 7/12/2013 6:59:47 PM
Table of contents
Languages:
Other Alpine Tuner manuals