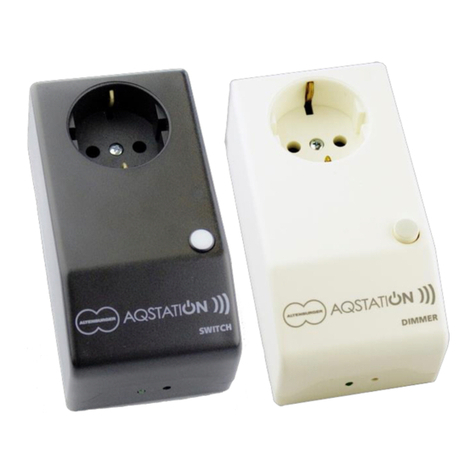
ALTENBURGER ELECTRONIC AQStation Switch User manual

Altenburger Electronic GmbH Manual AQStation Switch 3x 10A V1.0 - 15.07.2015 Page 1/8
AQStation Switch
Typ: AQS Switch 3x 10A
Order-No.: 90.10.000
LAN/Wi-Fi-based-control
Manual

Altenburger Electronic GmbH Manual AQStation Switch 3x 10A V1.0 - 15.07.2015 Page 2/8
1 Safety and installation instructions
Before installation, read the user manual thoroughly and keep it for future reference.
The device may be installed and put into operation by qualified electricians only.
Any maintenance works involving the device, wiring and replacing lamps may be done
only with the power off.
To do the wiring, loosen the seal screw and remove the device from the housing base.
Wire the device terminals according to the wiring diagram and the imprint.
The device must be snap fitted onto the relevant DIN rail.
It may be operated only in a horizontal position (with terminal clamps at the bottom).
The device must be installed through rail mounting or switch cabinets.
Any applicable safety regulations must be complied with.
The device may not be disassembled nor operated without the housing or the housing base. You will
lose your warranty if you improperly handle or disassemble the device.
The device generates heat and must be sufficiently ventilated.
The device may be operated only in dry, closed rooms at a temperature of 0°C to 35°C.
In the "OFF" mode, the load is separated through the µ contact.
You may not connect the outputs of multiple AQStation devices.
Do not rely exclusively on the App's status confirmations as these might differ from the actual status.
2 Function
The AQStation Switch is a LAN/Wi-Fi-based control device with volt-free relays for three circuits.
Each circuit has a 10A volt-free relay output. These outputs are designed to switch electronic
devices of all kinds up to 10A. The three circuits are independently controllable. The home
LAN/Wi-Fi is used as a bus system. This enables the use of off-the-shelf smartphones and tablet
computers running on Android or iOS to control and visualise AQStation devices.
The AQStation Switch 3x 10A can be controlled with its integrated push-button panel, peripheral
push-button panels or the relevant AQStation App. For more information about the visualisation,
scenes, groups and timer functions, see the AQStation App description available from
www.altenburger.de or www.aqstation.de.
3 Switching on/off
In the "OFF" mode, the load is cut off through relays (µ load contact).
4 Connectible loads
At ohmic load, a switching capacity of 10A can be used. Otherwise cos φ is taken into account.

Altenburger Electronic GmbH Manual AQStation Switch 3x 10A V1.0 - 15.07.2015 Page 3/8
5 Overview
6 Casing
Loosen the seal screw, grasp the device with both hands and open it as demonstrated on the picture
below.
7 Wiring diagram
Open
Loosen the seal
screw before
opening

Altenburger Electronic GmbH Manual AQStation Switch 3x 10A V1.0 - 15.07.2015 Page 4/8
8 Technical data
Designation
AQStation Switch 3x10A
Type
AQS Switch 3x10A
Order Number
90.10.000
Supply Voltage
110V-240V AC 50/60HZ, DC not allowed
Protection
external 6A, internal microfuse
Mounting form
DIN rail housing
Dimensions, weight
WxHxD=175 x 83.5 x 58 mm (10 TE), approx. 200 gr.
Internal displays
1x green LED (Wi-Fi mode)
3x green LED (switch mode) at control keys
Internal controls
3x push-buttons for the manual control (on/off)
1x reset push-button (factory settings, including Wi-Fi)
Wi-Fi
2.4 GHz 802.11n
LAN
RJ45, 100-MBit-Ethernet (Fast Ethernet)
Operating temperature
0°C … +35°C
Power input
< 2 W
Protection class
II (protective isolation)
Protection category
IP 20
Degree of contamination
2 (dry non-conductive)
Load contact (µ)
3x max. 10A at 230V ohmic load
Qualification
CE, RoHS, WEEE

Altenburger Electronic GmbH Manual AQStation Switch 3x 10A V1.0 - 15.07.2015 Page 5/8
9 Quick start
1. Download the AQStation App from the store of your choice and install the application.
2. Provide the AQStation devices with power supply through rail mounting. Wait up to one minute until
the control push-buttons light up.
3. Connect your smartphone / tablet computer to the AQStation Wi-Fi. Wi-Fi Name:
„AQStationNewDevice…“.
4. Start the AQStation App.
5. Select type of network (LAN or Wi-Fi).
6. Select your Wi-Fi network and provide the network password (key).
7. The AQ Station device needs about two minutes to load the settings. In the meantime, connect your
smartphone / tablet computer again to the Wi-Fi.
8. After about two minutes, the new AQStation device will appear in the AQStation App.
10 Initialization
Please note that this AQStation device may only be installed and put into operation by
qualified electricians.
1. Download the AQStation App from App Store or Google Play Store. Search term: AQStation
2. Provide the AQStation devices with power supply through rail mounting. (initialise the AQStation
devices one by one, NOT all of them at the same time)
3. Make sure that your router as well as smartphone / tablet computer and the AQStation device
receive the Wi-Fi signal or connect the AQStation devices by cable to the LAN network.
4. The start-up takes up to two minutes. As soon as the Wi-Fi status LED starts to blink, you can
initialise "AQStationNewDevice...".
5. Go to the settings menu of your smartphone / tablet computer, select Wi-Fi settings and connect
your smartphone / tablet computer to the "AQStationNewDevice..." Wi-Fi.
6. Make sure that you are connected to the "AQStationNewDevice..." network.
7. Start the AQStation App.
8. A message window will appear to guide you through the operation of the AQStation device. Read
the instructions carefully. To close the message window, choose "OK".
9. To connect your AQStation device to your network:
- Choose Wi-Fi or LAN (LAN is for rail-mounted devices only).
- Choose the network in which you want to use your AQStation device.
- Provide the password for the Wi-Fi you have selected.
- Confirm entry with the keypad and push the "Save" push-button.
If the Wi-Fi of your choice does not show up, run the network search again.
10. The AQStation device is now establishing connection with your Wi-Fi. This can take up to two
minutes. Do not disconnect the AQStation device from power supply. Do not interrupt the network
connection.
11. Go to the settings menu of your smartphone / tablet computer, select Wi-Fi settings and connect
your smartphone / tablet computer to your Wi-Fi.
12. Start the AQStation App.
13. After a successful initialisation, your AQStation device will appear automatically in the App.
14. If the software does not recognise or show the AQStation device after about two minutes, check
whether your smartphone / tablet computer is connected to the right Wi-Fi. Restart the App, if
necessary. Should these measures fail, restore your AQStation device to factory settings and re-
initialise.

Altenburger Electronic GmbH Manual AQStation Switch 3x 10A V1.0 - 15.07.2015 Page 6/8
11 Create the building structure
1. By pressing the arrow located on the right side of the entry of your AQStation device, you access the
settings.
2. A new window called "Settings" opens. Here you can change the name of the device and assign the
AQStation device symbol. Under the display "building", you can assign the AQStation device a building,
a floor and a room.
3. After saving the settings the window closes and the app returns to the main view. There now, the
building structure is displayed.
12 Navigation in the building structure
Press on the name of the entry to get to the floors. From the floors to access the rooms. At this location
there is the entry of the AQStation device. Use the Back function (Android up arrow, iOS left arrow) to enter
a back level of the building structure.
13 Operation of AQStation devices
On the entries of the AQStation devices there are more controls than the arrow that leads to the settings.
•Left on entry to the AQStation device is the symbol displayed that was previously selected in the
settings of the device. By clicking on this icon the AQStation device is switched on or off. Is the
AQStation device active the symbol is colored blue.
•At the AQStation Switch there is on the right side addition ON or OFF. At AQStation Dimmer the
percentage of the currently set brightness value appears.
•AQStation Dimmer additionally have a slider for setting the brightness value.
14 Groups
Groups are used to collectively control (dimming, turning on and off, activating a scene) multiple devices.
The groups are arranged in a couple of simple steps in the AQStation App. Each group can have its timer
functions. Each device can be assigned to multiple groups.
The following groups are available:
On/Off Group
In the on/off group, multiple devices are turned on and off together. Dimmable (0% - 100%) and switchable
devices can be integrated into an on/off group. As an option, you can set automatic turn-off times for
individual devices in the group.
Dimmable Group
The dimmable group devices are controlled together. Dimmable devices can be assigned to this group.
Scene
In a scene, all values of the devices integrated into the scene can be recorded, accessed and re-
configured. Devices can be integrated into multiple scenes.
Creating a group:
1. Groups are created in device settings. In the settings menu, scroll down until you see "Add group" and
choose this option.
2. A new window with group settings will appear.
3. Create a new group or choose an existing group.
4. Choose "New Group".
5. Assign a name to the group and choose the building, floor and the room in which you want to save it.
6. Next, choose the group type (On/Off, Dimmable or Scene).
7. Depending on the group type, you can, for instance, set brightness values, fade times, etc.
8. Save the settings. Add new devices to the group following the same procedure. However, instead of
creating a "New Group", choose the "Existing Group" option and select an already created group.

Altenburger Electronic GmbH Manual AQStation Switch 3x 10A V1.0 - 15.07.2015 Page 7/8
15 Timer
You can create Timer for every single device or for groups. The procedure is always the same.
1. Open in the settings of the device or the group. Scroll down to "Create Timer" and select.
2. A new window pops up with timer-settings.
3. Designate the timer. Select the time at which the switched device or the group to run.
4. Under setting-mode you can decide if the timer is single, repeated or inactive.
5. Select the weekdays on which the timer is to be active.
6. Depending on the type of device allows you to set an initial value (not groups).
7. Select SAVE to fix the settings.
Timer are displayed in the settings of devices and groups. An overview of all started timer can be found in
"General Settings". Timer operation requires a timer in the system. Each initialized smartphone or tablet
can be used as a timer. In general settings you can share your smartphone / tablet as a device for time
synchronization.
16 App Settings
Use the cogwheel icon (main view, bottom left) to go to General Settings. There, you can manage all the
App's settings. This menu also provides an overview of all existing devices, building structures, applications
and timers. You can also use the menu to manage the software updates of your AQStation devices.
17 Factory settings
To make a factory reset of the AQStation device, press the reset switch for about 10 seconds with a thin
pointed object (e.g. a ball pen refill). Do not disconnect the device; it takes the device 2 minutes to restart.
After the restart, the AQStation device is restored to its factory settings. The previously saved functions
(timers, groups, scenes, etc.) are deleted and cannot be recovered.

Altenburger Electronic GmbH Manual AQStation Switch 3x 10A V1.0 - 15.07.2015 Page 8/8
For more information, visit
www.altenburger.de or www.aqstation.de
ALTENBURGER ELECTRONIC GMBH
Schloßweg 5
77960 Seelbach
Phone: +49 7823 5090
Fax: +49 7823 50997
http://www.altenburger.de
http://www.aqstation.de
All rights reserved. It is possible that this manual has undergone pressure technical defects or typographical errors. The content of this manual are regularly checked and
corrections made in the next issue. For technical or printing error type and its consequences, we assume no liability. Changes in the sense of technical progress can be
made without notice.
This manual suits for next models
2
Table of contents
Other ALTENBURGER ELECTRONIC Switch manuals
Popular Switch manuals by other brands

D-Link
D-Link xStack DES-3800 Series Cli manual

TP-Link
TP-Link TL-SG1218MPE user guide

TRENDnet
TRENDnet TK-200K Specifications

Rittal
Rittal Ri4Power System 185 mm Assembly instructions

Cisco
Cisco Nexus 7718 Hardware installation guide

Whelen Engineering Company
Whelen Engineering Company PCCS9LW installation guide