Altman GENESIS User manual

Lighting Control Console
Operator Manual
VERSION 1.0

Genesis Lighting Control Console
2
PREFACE
ABOUT THESE INSTRUCTIONS
The document provides basic information on installation and operational instructions
for a qualified, trained installer. These instructions provide information for the
following product:
•Genesis Lighting Control Console
•Genesis Lighting Control Wing
•Genesis Dust Cover
Note: Additional product information can be found on our web site at
www.altmanlighting.com or by scanning the QR code to the right.
Please read all instructions before installing or using this product. Retain
these instructions for future reference.
HAVE A QUESTION ABOUT THESE INSTRUCTIONS?
The material in this document is for information purposes only and is subject to change without notice. Altman
Lighting assumes no responsibility for any errors or omissions which may appear in this manual.
Should you find an error, have a suggestion or question regarding your Altman Lighting product, we would love to
hear from you.
You can reach us at:
Altman Lighting
57 Alexander Street
Yonkers, New York 10701
1.914.476.7987 (Main)
1.914.963.7304 (Fax)
www.altmanlighting.com
customerservice@altmanlighting.com
Scan QR code to
go to the Genesis
Lighting Controller
web page.

Genesis Lighting Control Console
3
Note: Information contained in this document may not be duplicated in full or in part by any person without prior
written approval of Altman Lighting. Its sole purpose is to provide the user with conceptual information on the
equipment mentioned. The use of this document for all other purposes is specifically prohibited.
The material in this manual is for information purposes only and is subject to change without notice. Altman
Lighting assumes no responsibility for any errors or omissions which may appear in this manual. For
comments and suggestions regarding corrections and/or updates to this manual, please visit the Altman
Lighting web site at www.altmanlighting.com or contact your nearest Altman Lighting Regional Manager.
El contenido de este manual es solamente para información y está sujeto a cambios sin previo aviso.
Altman Lighting con no asume responsabilidad por errores o omisiones que puedan aparecer. Cualquier
comentario, sugerencia o corrección con respecto a este manual, favor de dirijirlo a la oficina de Altman
Lighting más cercana.
Der Inhalt dieses Handbuches ist nur für Informationszwecke gedacht, Aenderungen sind vorbehalten.
Altman Lighting uebernimmt keine Verantwortung für Fehler oder Irrtuemer, die in diesem Handbuch
auftreten. FürBemerkungen und Verbesserungsvorschlaege oder Vorschlaege in Bezug auf Korrekturen
und/oder Aktualisierungen in diesem Handbuch, moechten wir Sie bitten, Kontakt mit der naechsten
Altman Lighting Niederlassung aufzunehmen
OUR COMMITMENT
Altman Lighting continually engages in research related to product improvement. New materials, production
methods and design refinements are introduced into existing products without notice as a routine expression of
the philosophy. For this reason any current Altman Lighting product may differ in some respect from its published
description, but will always equal or exceed the original design specifications unless otherwise noted.
Version as of: 1 February 2020
Genesis Lighting Controller INSTALLATION INSTRUCTIONS / INSTRUCTIONS D’INSTALLATION
©2020 Altman Lighting. All rights reserved.
CLEANING AND CARE
WARNING! All cleaning should be performed with power completely removed from the Console.
Never remove protective covers when the Console is powered. Wear appropriate protective eye
wear and gloves when cleaning the unit. All service and maintenance, other than described herein,
should be performed by a qualified technician or Authorized Service Center.
Do not allow any liquids or foreign objects to enter the console. If any liquids are spilt on the
console, the inside should be cleaned and dried as soon as possible. Only suitably qualified
personnel should remove the covers and perform any such maintenance.

Genesis Lighting Control Console
4
WARNING! Under no circumstances should ammonia-based cleaners, acetone, or other harsh
solvents be used on or near the Genesis Control Console. Cleaning should be with a damp cloth. Do
not use any powerful solvents.
For all other service and maintenance issues, please contact your local Altman Lighting office or an
Authorized Service Center.
WARNING! Disassembly (other than as described herein), alterations, unauthorized service, etc.
will void the product warranty. Contact your local Altman Lighting office or an Authorized Service
Center for technical support and service.
When connecting any devices to the console, make sure that all connections are correct before
switching on the power. If any doubt exists, obtain the assistance of qualified personnel.
IMPORTANT INFORMATION
PRODUCT SAFETY NOTICES
When using electrical equipment, basic safety precautions should always be followed including the following:
a.
READ AND FOLLOW ALL SAFETY INSTRUCTIONS.
b.
Do not use outdoors unless the product is specified to operate in outdoor environments.
c.
Do not mount near gas or electric heaters.
d.
Equipment should be mounted in locations and at heights where it will not readily be subjected
to tampering by unauthorized personnel.
e.
The use of accessory equipment not recommended by the manufacturer may cause an unsafe
condition.
f.
Do not use this equipment for other than intended use.
g.
Refer service to qualified personnel.
WARNINGS
WARNING: RISK OF ELECTRICAL SHOCK! You must have access to a main circuit breaker or other
power disconnect device before installing any wiring. Be sure that power is disconnected by turning
the main circuit breaker off before installation. Installing the device with power on may expose you
to dangerous voltages and damage the device. It is always recommended that a “lock out tag”
device is installed on the appropriate circuit disconnect prior to beginning electrical work of any
kind. A qualified electrician must perform this installation.
WARNING: Insulation between low-voltage supply and control conductors is provided by basic
insulation.
WARNING: Refer to National Electrical Code® and local codes for cable specifications. Failure to
use proper cable can result in damage to equipment or danger to personnel.

Genesis Lighting Control Console
5
WARNING: This equipment is intended for installation in accordance with the National Electric
Code® and local regulations. It is also intended for installation in indoor applications only. Before
any electrical work is performed, disconnect power at the circuit breaker or remove the fuse to
avoid shock or damage to the control. It is recommended that a qualified electrician perform this
installation.
WARNING: This Control Console is NOT for residential installation or use.
THIS PRODUCT MUST BE INSTALLED IN ACCORDANCE WITH THE APPLICABLE INSTALLATION
CODE BY:
A PERSON FAMILIAR WITH THE CONSTRUCTION AND OPERATION OF THE PRODUCT
AND THE HAZARDS INVOLVED.
CE PRODUIT DOIT ÊTRE INSTALLÉ SELON LE CODE D'INSTALLATION PERTINENT, PAR
UNE PERSONNE.
CONSULT A QUALIFIED ELECTRICIAN TO ENSURE CORRECT BRANCH CIRCUIT
CONDUCTOR.
CONSULTER UN ÉLECTRICIEN QUALIFIÉ POUR VOUS ASSURER QUE LES
CONDUCTEURS DE LA DÉRIVATION SONT ADÉQUATS.
FCC NOTICE
This equipment has been tested and found to comply with the limits for a Class A digital device, pursuant to part
15 of the FCC Rules. These limits are designed to provide reasonable protection against harmful interference when
the equipment is operated in a commercial environment. This equipment generates, uses, and can radiate radio
frequency energy and, if not installed and used in accordance with the instruction manual, may cause harmful
interference to radio communications.
Operation of this equipment in a residential area is likely to cause harmful interference in which case the user will
be required to correct the interference at his own expense.
ALTMAN LIGHTING PRODUCT WARRANTY
WARRANTY TERM
Altman Lighting, Inc., a subsidiary of Altman Stage Lighting Company, Inc., herein referred to as Altman, warrants
each new product (except for spare parts or products Altman does not manufacture) for a period of TWO (2) years
from date of shipment to correct by repair or replacement any part defect due to faulty material or workmanship.
Under these same terms products with an LED light source shall be warranted for a period of THREE (3) years.
Altman warrants for NINETY (90) days any spare part it manufactures. On spare parts or products Altman does not
manufacture, including, but not limited to, lamps, sockets, lenses, roundels, electronics, ignitors, ballasts, etc.;
Altman will grant the same warranty given Altman by its vendors.

Genesis Lighting Control Console
6
Altman assumes no responsibility for damage or faulty performance caused by misuse, improper installation,
careless handling or where repairs have been attempted by others.
This warranty is in lieu of all warranties or guarantees expressed or implied and no representative or person is
authorized to assume Altman any other liability with the sale of Altman’s products.
For complete warranty terms and conditions, please refer to our web site at www.altmanlighting.com.
WARRANTY SERVICE
In order to request warranty service, a Return Material Authorization (RMA) number must be issued prior to return.
Return shipments must be visibly marked with the RMA number; the product must be returned (shipping prepaid)
to the factory at:
Altman Lighting Inc.
Attention: RMA #
57 Alexander Street
Yonkers, NY 10701
Returns must be within THIRTY (30) days of receipt of RMA

1INTRODUCTION 9
1.1 Overview ___________________________________9
1.2 Quick Start Guide ____________________________10
1.3 Latest Features / Fixtures ______________________10
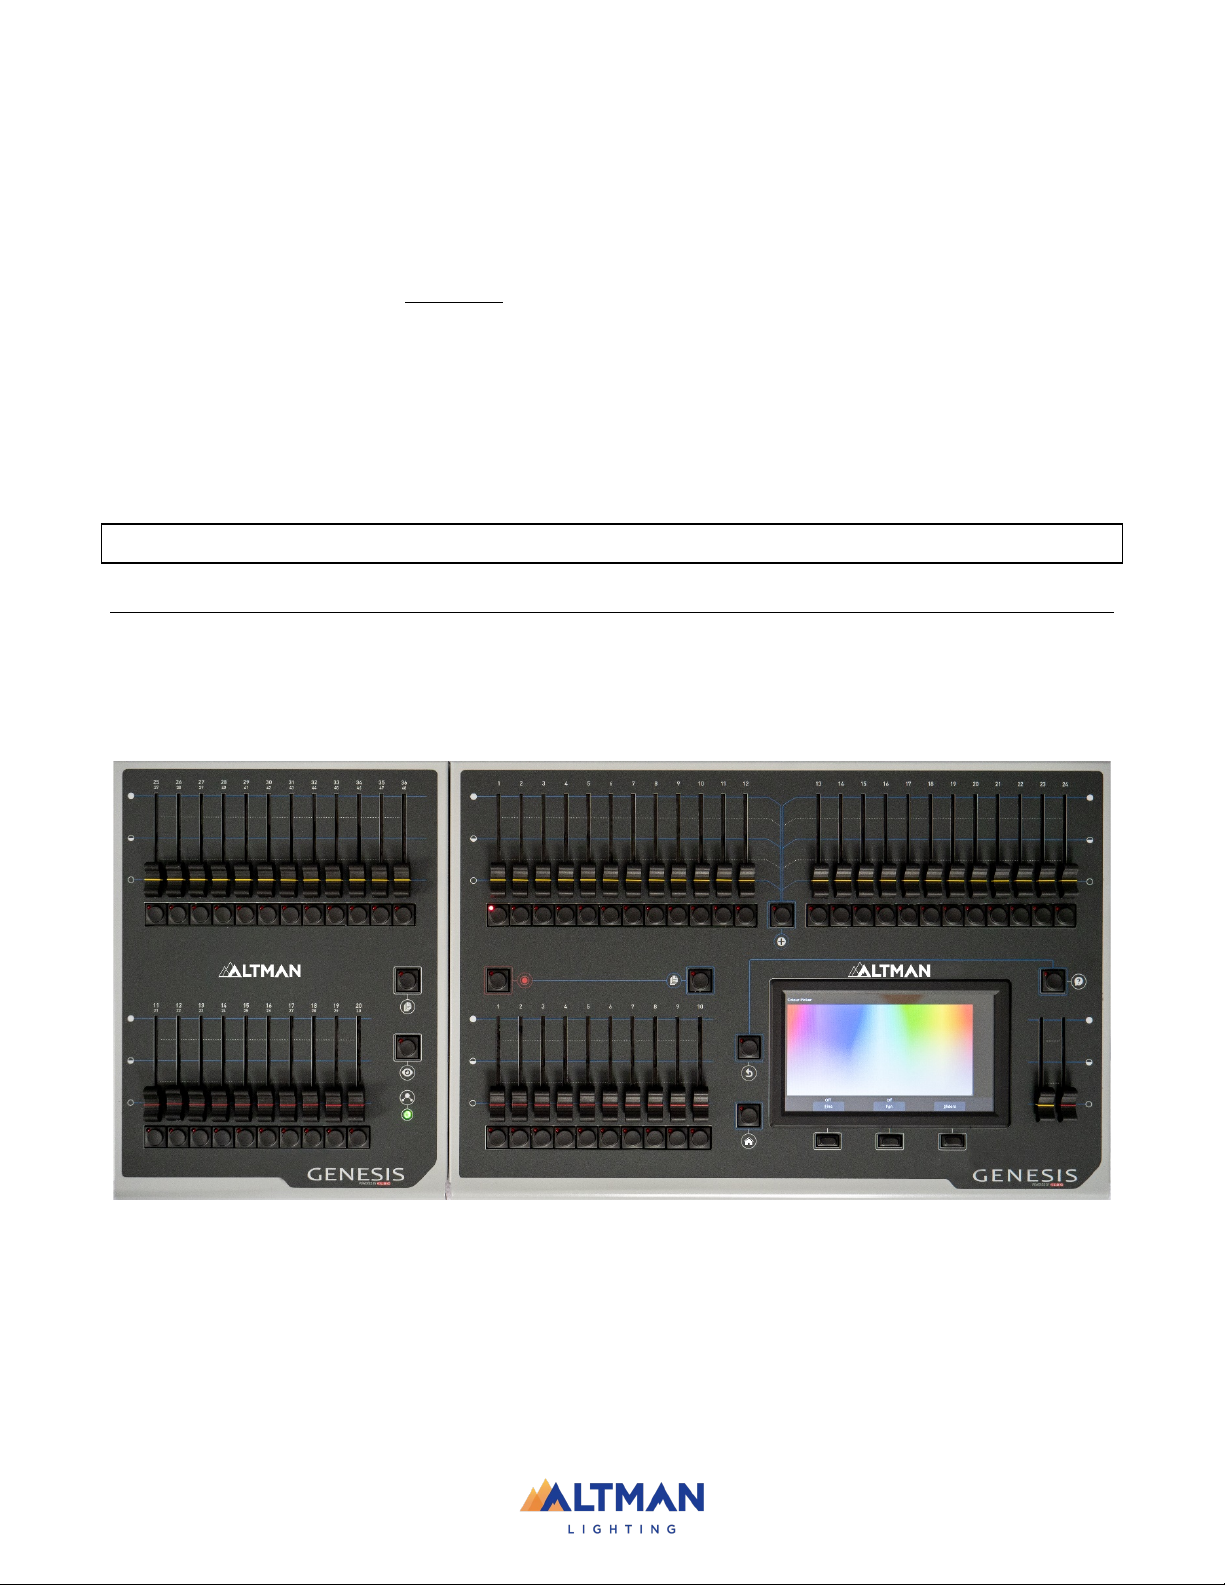
1.4 Expansion Wings ____________________________10
1.5 Sample Show_______________________________11
1.6 Visualizer __________________________________11
1.7 Models and Accessories with Part Numbers _______11
2GETTING CONNECTED 12
2.1 Rear Panel Layout ___________________________12
2.2 Power Input ________________________________12
2.3 Powering Off _______________________________12
2.4 DMX 512 Output Connector____________________12
2.5 USB Connectors_____________________________13
2.6 Ethernet Network Connector ___________________13
2.7 Kensington Lock Slot _________________________13
3HELP AND UNDO 14
3.1 Help ______________________________________14
3.1.1 Languages _________________________________ 14
3.2 Undo _____________________________________14
4PATCHING FIXTURES 15
4.1 Overview __________________________________15
4.2 Patching a fixture ____________________________16
4.3 Patching Multiple Fixtures in one operation ________17
4.4 Patching Multiple Fixtures to the same fader _______17
4.5 Patching Compound Fixtures ___________________18
4.6 Un-Patching a fixture _________________________18
4.7 Save Patch _________________________________18
4.8 Home Values _______________________________18
4.9 Fixture Editor _______________________________19
5FRONT PANEL 20
5.1 Overview __________________________________20
5.2 Basic Operation _____________________________20
6TOUCH SCREEN 21
6.1 Overview __________________________________21
6.2 Fixture Icons _______________________________22
6.3 Playback Icons______________________________22
7RIG VIEW 24
7.1 Overview __________________________________24
7.2 Arranging Icons _____________________________24
8CONTROLLING FIXTURES 25
8.1 Intensity ___________________________________25
8.2 Fixture Attributes ____________________________25
8.2.1 Intensity Column ____________________________ 26
8.2.2 Color Column _______________________________ 26
8.2.3 Position Column_____________________________ 26
8.2.4 Beam / Other Column _________________________ 26
8.3 Selecting Fixtures____________________________26
8.4 Automatic Fixture De-select ___________________ 28
8.5 Controlling Color____________________________ 28
8.5.1 Picker App __________________________________28
8.5.2 Fine _______________________________________28
8.5.3 Fan _______________________________________29
8.5.4 Sliders_____________________________________29
8.5.5 Gels App ___________________________________30
8.6 Controlling Position _________________________ 31
8.6.1 Flip Pan/Flip Tilt______________________________31
8.6.2 Center _____________________________________31
8.6.3 Fine Control_________________________________31
8.6.4 Ortho Control________________________________31
8.6.5 Fan _______________________________________31
8.7 Controlling Beam and Other Attributes ___________ 32
8.8 Clearing Fixtures ____________________________ 33
8.8.1 Selected Fixtures _____________________________34
8.8.2 Animations _________________________________34
8.8.3 All ________________________________________34
9ANIMATE APPS 35
9.1 Overview __________________________________ 35
9.2 Creating An Animation _______________________ 35
9.3 Animation Controls __________________________ 36
9.4 Animation Examples _________________________ 37
9.4.1 Intensity Animation ___________________________37
9.4.2 Color Animations_____________________________38
9.4.3 Pan/Tilt Animations ___________________________39
9.5 Multiple Animations _________________________ 40
9.6 Recording Animations________________________ 40
9.7 Deleting Animations _________________________ 40
9.8 Animations in Chases ________________________ 40
9.9 Animate Speed _____________________________ 40
10 SHAPES APP 41
10.1 Overview __________________________________ 41
10.2 Creating a Shape____________________________ 41
10.3 Recording Shapes___________________________ 42
10.4 Shape Speed_______________________________ 42
11 RECORDING CUES 43
11.1 Overview __________________________________ 43
11.2 Memories / Pages ___________________________ 43
11.3 Record a Cue_______________________________ 43
11.4 Record a Cue-list (or Chase)___________________ 44
11.5 Record Fixtures With No Intensity_______________ 44
11.5.1 Move In Black _______________________________44
11.5.2 Solo Cue ___________________________________44
12 PLAYBACK 46
12.1 Overview __________________________________ 46
12.2 Playback a Cue _____________________________ 46
12.2.1 Cue Fade Times ______________________________46
12.3 Playback a Cue-List__________________________ 47
12.3.1 Cue-List Fade Times __________________________47
12.4 Page Freeze________________________________ 47
12.5 Latest Takes Precidence ______________________ 47
12.6 ICPB Attributes (Filters) ______________________ 48
13 LIVE SPEED 49

Genesis Lighting Control Console
8
13.1 Select _____________________________________50
13.2 Tap To Beat ________________________________50
13.3 Pause/Play _________________________________50
13.4 Override Indicators___________________________51
13.5 Reset Live Speed ____________________________51
14 FLASH 52
14.1 Flash Level _________________________________52
15 EDIT 53
15.1 Edit Memory________________________________53
15.1.1 Change Fade Times___________________________ 53
15.1.2 Change Cue Name ___________________________ 54
15.1.3 Jump To Cue _______________________________ 54
15.1.4 Change Cue Order____________________________ 54
15.1.5 Include ICPB Attributes (Filters) _________________ 54
15.1.6 Duplicate Cue _______________________________ 55
15.1.7 Delete Cue _________________________________ 55
15.1.8 Delete Memory ______________________________ 55
15.1.9 Chase _____________________________________ 55
15.2 Edit Cues __________________________________56
15.3 Edit Animations and Shapes____________________56
16 SHOW FILES 57
16.1 New ______________________________________57
16.2 Save ______________________________________57
16.3 Save As ___________________________________57
16.4 Load______________________________________57
16.5 Export to USB ______________________________57
16.6 Import From USB____________________________57
17 SETUP 58
17.1 Overview __________________________________58
17.1.1 Flash Level _________________________________ 58
17.1.2 Touch Screen Backlight _______________________ 58
17.1.3 Default Fade Time____________________________ 58
17.2 Delete Show________________________________58
17.3 Network ___________________________________58
17.3.1 Network Setup ______________________________ 58
17.3.2 ArtNet _____________________________________ 59
17.3.3 sACN ______________________________________59
17.4 Service ___________________________________ 59
17.5 Import Fixture Library ________________________ 59
17.6 Save Default Show __________________________ 60
17.7 Default Show Emergency PIN __________________ 60
17.8 Delete Default Show _________________________ 60
17.9 About ____________________________________ 60
17.10 Update Firmware (Software) ___________________ 60
18 FIXTURE EDITOR 61
18.1 Overview __________________________________ 61
18.2 Creating a Fixture Template____________________ 61
18.2.1 Home Positions______________________________62
18.3 Edit a Fixture Template _______________________ 63
19 VISUALIZER 64
20 TROUBLESHOOTING 65
20.1 FREQUENTLY ASKED QUESTIONS ______________ 65
20.2 Rescue File ________________________________ 66
21 TECHNICAL SPECIFICATIONS 67
22 TERMINOLOGY 68
22.1 Overview __________________________________ 68
22.2 Fixture____________________________________ 68
22.3 DMX Address ______________________________ 68
22.4 Template __________________________________ 68
22.5 Fixture Library______________________________ 68
22.6 Attribute __________________________________ 68
22.7 LTP. (LATEST TAKES PRECEDENCE) ____________ 68
22.8 Look _____________________________________ 68
22.9 Cue ______________________________________ 68
22.10 DMX512A _________________________________ 68
22.11 DMX Cables _______________________________ 69
22.12 DMX Universes _____________________________ 69
22.13 ArtNet ____________________________________ 69
22.14 sACN_____________________________________ 69

Genesis Lighting Control Console
9
Conventions Used in this Manual
Throughout this manual, certain conventions have been used to make the meaning clearer.
•A word in Bold text represents a virtual button on the touch screen.
•A word in [Bold] text with square brackets represents a physical button.
•Emphasis is indicated by underlining.
All Trademarks referred to in this manual are the registered names of their respective owners.
Every care is taken in the preparation of this manual, ALTMAN takes no responsibility for any errors or omissions.
The Genesis operating software and the contents of this manual are copyrighted.
1INTRODUCTION
1.1 OVERVIEW
Genesis combines the ease of use of a fader-based console, with the power of a touch screen graphical user
interface to make control of LED fixtures easy and intuitive while still allowing control of moving lights and
conventional dimmers. The software shows what to do next, ensuring a very easy learning curve for even the
novice user.
Genesis Wing #GEN-WG-12 Genesis Console #GEN-24
Genesis can control 24 lighting fixtures of any type, dimmer, LED, moving LED and moving lights. Expansion
Wings allow 12 additional fixtures to be controlled per wing. Faders are used to control intensity and the large
touch screen has “Apps” that allow you to easily program color, position or other attributes. The “Home” screen
“rig view” has fixture icons showing intensity, color and position of each fixture. The fixture icons can be
positioned on the screen to emulate their actual position in a rig.
Genesis makes controlling multi-color LED fixtures easy. The different types of attributes (RGB, RGBA, RGBAW or
CMY) are all controlled via a simple touch screen color picker. Position (Pan and Tilt) is also controlled via the

Genesis Lighting Control Console
10
touchscreen and other attributes by virtual faders. This allows Genesis to control not just color, but all the
attributes of modern moving lights.
Where Genesis really shines is in its effects. The unique Animate Apps provides a simple and intuitive way to
quickly create chases and patterns in a single cue, usually within just a few seconds. This feature alone makes the
Genesis the most powerful in its class. The Shapes App provides a quick and simple way of creating continuously
moving positions on fixtures that have Pan and Tilt attributes by constantly varying those attributes.
An Undo command system and context sensitive Help ensures that Genesis is easy to use.
By adjusting the intensity and color of fixtures and creating animations or shapes, the current output can then be
recorded onto any Red Playback fader. Genesis has the capacity to record up to 1,000 cues, across 100 cue-lists
or chases.
Fixture library updates and new software features are easily installed via a USB drive. Show files (that are stored in
the console) can be backed up to a USB drive for off-site storage.
1.2 QUICK START GUIDE
A summary of the information in this “User Manual” can be found in the Genesis “Quick Start Guide” supplied with
your Genesis for download at www.altmanlighting.com
1.3 LATEST FEATURES / FIXTURES
ALTMAN has a corporate policy of continuous improvement covering areas such as product design and
documentation. To achieve this goal, we undertake to release software updates for all products on a regular basis.
Every software release includes the latest version of the Fixture Library.
1.4 EXPANSION WINGS
The Genesis Wing is an accessory for the Genesis lighting console.
Up to 2 wings can be connected to a Genesis console.
Connecting a Genesis Wing provides control of an additional 12 lighting fixtures (25-36) and an extra 10 playbacks
(11-20) (with 10 pages of memory) as well as a second DMX512 universe (U2) output.

Genesis Lighting Control Console
11
Connecting a second Genesis Wing provides control of a further 12 fixtures (37-48) and a further 10 playbacks
(21-30) (with 10 pages of memory) as well as a third DMX512 universe (U3) output.
1.5 SAMPLE SHOW
Genesis comes with a “Sample” show to load so
the controls can become familiar before patching
a show. To load the sample show from the
“Home” screen touch:
Tools/Load/SampleShow.
To skip the sample show and patch fixtures now,
go straight to section: 4.1.
The sample show is patched with the following
fixtures:
•4 SGM Moving lights patched to yellow
faders 1 -4
•8 x Spectra Cyc RGBA LED cyclorama
fixtures patched to yellow faders 6-13
•6 x Dimmers patched to yellow faders 14-19
•6 x AP150 RGBW LED par fixtures patched to
yellow faders 20-25
•Chalice LED Downlight patched to yellow
fader 26
•2 PHX2 RGBA LED Profile fixtures patched to
yellow faders 27-28
Sample memories are recorded on Page 10 for
experimentation. The other 9 pages of memory
are blank.
1.6 VISUALIZER
A simulation of the fixtures is available in the sample show. Working on a virtual stage, a 3D visualizer lighting
program called “Genesis Visualization show” can be downloaded. See section 19 for details.
1.7 MODELS AND ACCESSORIES WITH PART NUMBERS
Model Order Code
Description
GEN-24
Genesis control console and external power supply
GENESIS/LTDC
Dust cover for Genesis control console.
GEN-WG-12
Expansion wing for Genesis console.
.

Genesis Lighting Control Console
12
2GETTING CONNECTED
2.1 REAR PANEL LAYOUT
2.2 POWER INPUT
Genesis has a DC power input. Connect the DC plug to the back of the console. Then plug the AC power cord into a
standard NEMA 5-15 or 5-20 outlet. The console will then boot up.
After briefly displaying the opening message, Genesis will commence operating in the same state that it was in
with all the cues, animations and patches etc. as they were when Genesis was last switched off.
2.3 POWERING OFF
Switching off the console is inverse to the power input section. The Genesis has an inbuilt back up power supply.
When the power is removed. the Genesis will operate on its own power supply for 5 seconds to allow it to
automatically save the current show.
After resetting the system by removing the power, allow 15 seconds before re-starting to ensure
that the system has fully shut down.
2.4 DMX 512 OUTPUT CONNECTOR
The console has a 5 pin DMX512-A output connector. Connect a DMX data cable from the DMX512-A output of the
console to the DMX512 input of your equipment (LED fixtures, dimmers, etc.) and set the required DMX addresses
on your equipment.
Only use specific DMX cable (available from your lighting supply company). Never use audio cable.
The end of the DMX line must be terminated (with a 120 Ωresistor) to prevent the signal reflecting
up the line and causing possible errors.
See section 4.2 “Patching a Fixture” for more details.
See section 22.11 for more information on DMX cables.
External Power
Supply Input
2 x USB
connectors
Ethernet
DMX 512-A
output
Kensington
Lock

Genesis Lighting Control Console
13
2.5 USB CONNECTORS
Two USB connectors are provided. They can be used to connect:
•Amemory stick forshow backup andsoftware upgrades.
•ALED USB desk light (up to 250mA).
•Expansion wing. Upto two wings can be connected.
Note: Use of a USB Splitter is not recommend for use with the Genesis Console
2.6 ETHERNET NETWORK CONNECTOR
An RJ45 Ethernet network connector is provided. It can be used to output Streaming ACN (sACN) and ArtNet.
These are lighting control protocols that send DMX lighting data over a network.
See section 17.3 “Network” for more details.
2.7 KENSINGTON LOCK SLOT
The Kensington Lock slot allows you to secure your Genesis using a commercially available tethering device.

Genesis Lighting Control Console
14
3HELP AND UNDO
3.1 HELP
Context sensitive help is available on the touch screen for most functions. Press the button to open the help
screen. Press or [Back] to close.
3.1.1 Languages
Help pages are available in several languages. To select a language, from the “Home” screen touch
Tools/Setup/Language then touch the language of your choice.
3.2 UNDO
To quickly undo your last action double tap .
Genesis remembers most of your actions in a list. Press once to see the list.
Touch Undo to undo an action and step down the list.
Touch Redo to redo an action and step up the list
Actions that have been undone turn grey.
i
Press [Back] or press when finished.
Note: The undo list is automatically cleared whenever you save your show, start a new show, load
an existing show or switch off the power.
Note: The “Undo” function is not available when editing “Rig View” (section 7), when using the
“Fixture Editor” (section 18) or when deleting a memory (section 15.1.8).
Undo
Redo

Genesis Lighting Control Console
15
4PATCHING FIXTURES
4.1 OVERVIEW
The output control signal from the Genesis is DMX512-A. DMX is an international standard for controlling lighting
equipment. Your lighting fixtures and dimmers have a DMX input and usually a DMX output so that you can
connect multiple devices in a daisy chain fashion. By setting an address on each fixture and using Genesis to
control each fixture based on its address, each fixture will use a quantity of DMX channels to control its different
functions as listed in its specifications. The address chosen for each fixture must allow for the addresses used by
other fixtures so that no overlaps exist. For example, fixture 1 is set to address 001 and the fixture uses 4 DMX
channels. Fixture 2 must be set to address 5 (or higher).
The DMX signal is output on the 5 pin XLR connector on the rear of Genesis. Each optional wing also has a DMX
output. Fixtures can also be controlled via the network connector using either “ArtNet” or “sACN” protocols.
See section 17.3 for details.
Genesis includes a fully integrated fixture library of over 5500 fixtures (most with multiple operating modes)
supplied by Carallon, an independent supplier of fixture libraries.
If you do encounter a fixture that is not in the library, there are two choices:
1. A fixture request service is available via support@altmanalighting.com Please send all fixture details
including the fixtures DMX map and manual. This process takes at least one month from the date of
request.
2. The inbuilt Fixture Editor allows for quick creation of templates for new fixtures. See section
Input of manufacturer/model and DMX address of each of fixture is done in the patch menu of Genesis. By
choosing a fixture number (1 to 24) (yellow fader and button) then patching the fixture to that number, Genesis will
load a “template” for that manufacturer/model of fixture. The template tells Genesis how to control that fixture.
The yellow fader of the fixture number selected now controls the intensity and the touch screen provides the
correct controls for that fixture. For example, if the fixture is a multi-colored LED, Genesis provides a color picker
App to control the color and the yellow fader will control its intensity. If the fixture has pan and tilt capabilities,
Genesis provides a position control App to control the position.

Genesis Lighting Control Console
16
4.2 PATCHING A FIXTURE
Set the DMX address on the fixture to be patched.
On Genesis, from the “Home” screen, touch Tools/Setup/Patch.
e
Select the fixture Manufacturer and Model of the fixture to be patched from the lists. Swipe the screen to scroll the
list. Dimmers and many LED fixtures can be found in the “Generic” manufacturers listing.
You can touch the “Search” icon and type in a manufacturer or model name using the pop-up keyboard. The
symbol (*) can be used as a substitute (wild card) for any string of characters in your search term. You can also
use the symbol (?) as a substitute for one character.
When you select a fixture file, the details of the DMX channels for that fixture are shown on the right.
NOTE: Optional control wings or using ArtNet or sACN will provide access to multiple universes.
Set the universe to which the fixture is connected by touching the “U” box and using the +10, +1, -10 and -1
buttons. The assigned universes are remembered if the wings or nodes are still plugged in when Genesis is
switched on. To change the assigned universes, unplug the wings or nodes and plug them in in the order that you
require. The first plugged in wing or node will be assigned to universe 2, the next to universe 3 etcetera.
Next, set the DMX address (to match the DMX address on the fixture) using the +10, +1, -10 and -1 buttons.
Select a fixture number for the fixture by tapping one of the flashing buttons below the yellow faders. The
button/fader that you choose will be used to control this fixture.
Touch Patch to make the connection.
View Patch
Patch
Unpatch
Manufacturers
Models
DMX Address
Details of
selected
fixture
Touch a fixture to see
its details
DMX Universe
Search

Genesis Lighting Control Console
17
Repeat the above steps for each different fixture. Fixture numbers that have already been patched are lit.
To see all the patched fixtures, touch View Patch.
View Patch
Touching a fixture name will show the details of the channels for that fixture on the right in the “Fixture” pane.
To return, tap [Back].
When finished patching double tap [Back].
4.3 PATCHING MULTIPLE FIXTURES IN ONE OPERATION
If multiple fixtures of the same type exist that are set to contiguous DMX addresses, they can all be patched in one
operation. Select the starting address of the first fixture then select each of the fixture numbers by tapping the
yellow buttons or to select a range of fixture numbers, hold the first number and tap the last number in the range.
Touch Patch, Genesis will patch all the fixtures to their faders and automatically increment the starting DMX
address for each fixture.
4.4 PATCHING MULTIPLE FIXTURES TO THE SAME FADER
Multiple fixtures of the same type and mode but with different DMX addresses can be patched to the same yellow
fader. This frees up yellow faders for other fixtures.
NOTE: these fixtures will be operated together as a group as they are patched together under the same control
fader.
Multi-patching is often done when multiple fixtures have a common purpose (such as a color wash on the stage)
and control them all from the same fader is required. Each fixture could be set to the same DMX address and only
Touch a fixture to see
its details in the
“Fixture” pane
Details of
selected
fixture
DMX address range of
each fixture
“Home” values

Genesis Lighting Control Console
18
make one patch would be needed, but if access the fixtures to change their addresses is not available or
permission to change their addresses is not granted, using their existing addresses will be required.
Therefore, each fixture has a different DMX address but is patched to the same yellow fader.
Remember that each fixture must be the same type and be set to the same mode of operation.
4.5 PATCHING COMPOUND FIXTURES
A “compound” fixture is a fixture that contains multiple fixtures within the one fixture. Compound fixtures are also
known as “Multi-Cell” fixtures.
For example, many RGB LED strips are compound fixtures because they have multiple RGB cells within the one
fixture. The fixture has a menu that allows you to select different “modes” of operation. A simple mode might
provide 3 control channels (RGB) that control the entire fixture. Other modes might allow you to divide the fixture
into 3 sections and use 9 channels to control the RGB of each section. The most complex mode might allow you to
individually control every pixel. Complex modes use a lot of DMX channels and can be difficult to program.
Compound fixtures usually also have modes that allow you to control effects that are built into the fixture such as
pixel mapping effects, color pulsing or chase effects. These modes use some DMX channels to control those
effects.
ALTMAN recommends that when patching compound fixtures you select a mode that uses the least amount of
channels but includes channels that control the built in effects, preset colors, zoom modes, or similar.
4.6 UN-PATCHING A FIXTURE
From the “Home” screen touch Tools/Setup/Patch.
To un-patch a fixture, press its fixture number (1 to 24) then touch Unpatch.
When finished patching double tap [Back].
4.7 SAVE PATCH
When saving a show, the patch is saved as part of that show. See section 16.
If the patch is to be used on a regular basis such as in a permanent installation or in a touring show that always
uses the same lighting rig, it can be saved as the "default show". See section 17.6.
4.8 HOME VALUES
When using the “Clear” a fixture function (see section 8.8), if the fixture has a color mixing function (RGB or CMY)
Genesis will set its color to white and if it has a movement function it will center the pan and tilt. These values are
hard coded in the Genesis software. All other attributes of the fixture will be set to their “home” values that are
listed in their fixture template. These values can be seen in the “View Patch” screen (above). Typically, these values
will set a color wheel to clear, gobo wheel to open, shutter to open etcetera so that the fixture outputs an open
white beam.

Genesis Lighting Control Console
19
4.9 FIXTURE EDITOR
It is possible to create a template for a new fixture if it is not listed in the Genesis fixture library. The Fixture editor
can also be used to edit an existing fixture template.
See section 18.3 for details.

Genesis Lighting Control Console
20
5FRONT PANEL
5.1 OVERVIEW
5.2 BASIC OPERATION
Genesis can control up to 24 lighting fixtures (up to 48 fixtures with optional wings). The 24 Yellow fixture faders
control fixture intensity. Moving a fixture fader automatically selects that fixture allowing its other attributes such
as color or position to be controlled by Apps on the touch screen (see section 9). Moving a fader to zero deselects
the fixture.
The [Select] button provides more fixture selection options.
The Yellow “Fixture Master” has overall intensity control of the yellow fixture faders.
The current output can be recorded into any of the Red playbacks by tapping [Record] then tapping a Red
playback button of your choice [1-10]. Different looks can be recorded on different Red Playback faders or into a
“Cue-list” on a single Red Playback fader so that you can easily change the entire look on stage by using the Red
Playbacks. There are 10 red playback faders and 10 pages of memory giving a total of 100 memories.
Repeated taps of the [Page] button will step through the 10 pages of memory.
To switch directly to a page number HOLD [Page] and tap a Red playback button [1-10]. The Red "Playback
Master" fader has overall intensity control of the Red playbacks.
24 Fixture
Faders and
Buttons
(Yellow)
10 Playback
Faders and
Buttons
(Red)
Playback
Master
(Red)
Fixture
Master
(Yellow)
Touchscreen
Record
Output
Select
Help
Back
Undo
Playback
Page
select
Table of contents
Other Altman Music Mixer manuals