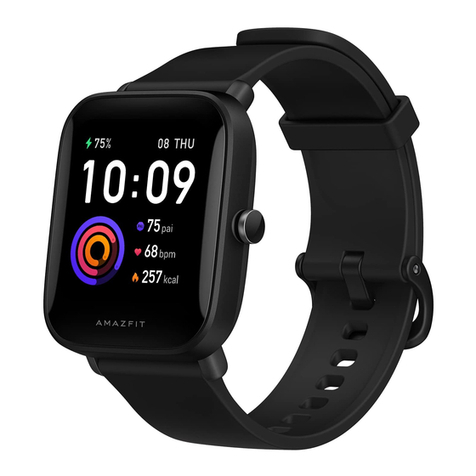
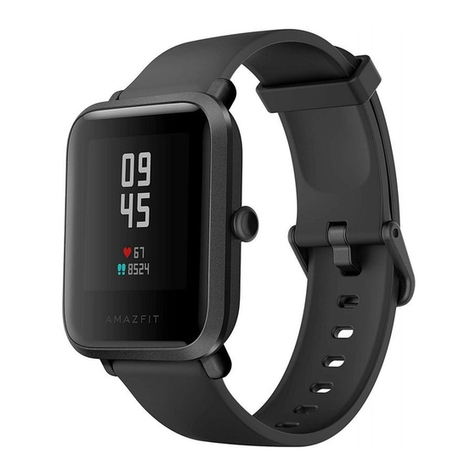
Amazfit Bip U Pro User manual

01 Package Contents
02 About the Watch
Smartwatch with
band × 1
Charging base × 1 Instruction Manual × 1
Power button
Charging
plates
Heart rate
sensor
Note:
Press and hold the power button to power on the watch. If the watch
cannot be turned on, please charge it first.
1

03 Pairing the Watch
04 Charging the Watch
2
1.
2.
3.
4.
Scan the QR code on the Instruction Manual with your mobile phone
to download the app to your mobile phone. You can also download the
latest version of App from the Google Play Store or Apple App store.
Open the APP, register an account and log in.
Follow the steps in the app to pair your watch correctly. Once pairing
is complete, the watch will display the correct time.
You can set the other watch functions as needed.
Download Zepp App
Note:
1.
2.
3.
For a better user experience, please use the
most recent version of the app.
The operating system needs to be Android
5.0, iOS 10.0, or above.
Do not pair the watch directly using your
mobile phone’s Bluetooth. Follow the steps
in the app to pair your watch correctly.
1.
2.
3.
Note:
1.
2.
Please use the charging base that comes
with the watch. Make sure that the
charging base is dry before charging.
Please use a 1A or above power adapter.
Connect the USB port of the watch charging cable to a mobile phone
charger or a computer USB port.
Put the watch into the charging base. Pay attention to the direction
and position of the watch, and make sure that the metal contacts on
the back of the watch fit closely with the charging base.
When charging starts, the watch screen displays the charging progress.

05 Disassembly and Assembly of the Watch Strap
06 Wearing the Watch
3
Please refer to the illustrations to disassemble or assemble the
watch strap.
Note:
Once the strap is assembled, pull the strap properly to ensure it is
installed successfully.
1.
2.
3.
Wear the watch strap not too tightly or too loosely, and leave enough
space for the skin to breathe. This makes you feel comfortable and
allows the sensor to function.
When measuring blood oxygen saturation, wear the watch correctly.
Avoid wearing the watch on the wrist joint, keep your arm flat, maintain
comfortable (appropriately tight) fitting between the watch and
the skin of your wrist, and keep your arm still throughout the
measurement process. When affected by external factors (arm sag,
arm sway, arm hair, tattoo, etc.), the measurement result may be
inaccurate or the measurement may fail and provide no output.
We recommend that you tighten the watch strap during exercise
and loosen it afterwards.

07 Basic Parameters
08 Regulatory Notice
4
Product model: A2008
Input: 5V d.c. 500mA MAX
Bluetooth version: BLE V5.0
BLE output power: <5 dBm
Operating temperature: 0°C to 45°C
View product certification information on the watch's Settings >
System > Supervision page.
Water resistance rating: 5 ATM
Bluetooth frequency: 2400–2483.5 MHz
Device requirements: Devices installed with Android 5.0 or iOS 10.0
or above OS versions
This device complies with part 15 of the FCC Rules. Operation is
subject to the following two conditions:
(1) This device may not cause harmful interference, and
(2) this device must accept any interference received, including
interference that may cause undesired operation.
Any changes or modifications that are not expressly approved by the
party responsible for the compliance may void the user’s authority
to operate the device.
The Bluetooth® word mark and logos are registered trademarks owned by Bluetooth
SIG, Inc. and any use of such marks by Anhui Huami Information Technology Co., Ltd.
is under license. Other trademarks and trade names are those of their respective owners.
FCC ID: 2AC8UA2008

5
Note: This equipment has been tested and found to comply with the
limits for a Class B digital device, pursuant to part 15 of the FCC Rules.
These limits are designed to provide reasonable protection against
harmful interference in a residential installation. This equipment generates,
uses and can radiate radio frequency energy and, if not installed and used
in accordance with the instructions, may cause harmful interference to
radio communications. However, there is no guarantee that interference
will not occur in a particular installation. If this equipment does cause
harmful interference to radio or television reception, which can be
determined by turning the equipment off and on, the user is encouraged
to try to correct the interference by one or more of the following measures:
—Reorient or relocate the receiving antenna.
—Increase the separation between the equipment and receiver.
—Connect the equipment into an outlet on a circuit different from that
to which the receiver is connected.
—Consult the dealer or an experienced radio/TV technician for help.
The device has been evaluated to meet general RF exposure
requirement. The device can be used in portable exposure condition
without restriction.
This device contains licence-exempt transmitter(s)/receiver(s) that comply
with Innovation, Science and Economic Development Canada’s
licence-exempt RSS(s). Operation is subject to the following two
conditions:
(1) This device may not cause interference.
(2) This device must accept any interference, including interference
that may cause undesired operation of the device.
IC: 21806-A2008
CAN ICES-3(B)/NMB-3(B)
Le présent appareil est conforme aux CNR d'Industrie Canada applicables
aux appareils radioexempts de licence. L'exploitation est autorisée aux
deux conditions suivantes :
(1) l'appareil ne doit pas produire de brouillage, et
(2) l'utilisateur de l'appareil doit accepter tout brouillage radioélectrique
subi, même si le brouillage est susceptible d'en compromettre le
fonctionnement.

09 Disposal and Recycling Information
6
Under Industry Canada regulations, this radio transmitter may only
operate using an antenna of a type and maximum (or lesser) gain
approved for the transmitter by Industry Canada. To reduce potential
radio interference to other users, the antenna type and its gain should
be so chosen that the equivalent isotropically radiated power (e.i.r.p.)
is not more than that necessary for successful communication.
Conformément à la réglementation d'Industrie Canada, le présent
émetteur radio peut fonctionner avec une antenne d'un type et d'un
gain maximal (ou inférieur) approuvé pour l'émetteur par Industrie
Canada. Dans le but de réduire les risques de brouillage radioélectrique
à l'intention des autres utilisateurs, il faut choisir le type d'antenne et son
gain de sorte que la puissance isotrope rayonnée équivalente (p.i.r.e.) ne
dépasse pas l'intensité nécessaire à l'établissement d'une
communication satisfaisante.
All products bearing this symbol are waste electrical and
electronic equipment (WEEE as in directive 2012/19/EU)
which should not be mixed with unsorted household
waste. Instead, you should protect human health and the
environment by handing over your waste equipment to a
designated collection point for the recycling of waste
electrical and electronic equipment, appointed by the
government or local authorities. Correct disposal and
recycling will help prevent potential negative consequences
to the environment and human health. Please contact the
installer or local authorities for more information about the
location as well as terms and conditions of such
collection points.
IS 13252(Part 1)/
IEC 60950-1
R-41140821
www.bis.gov.in HIDF19000259

10 Certifications and Safety Approvals
11 Battery Safety
1.
2.
3.
Disposal of a battery into fire or a hot oven, or mechanically crushing
or cutting of a battery, that can result in an explosion.
Leaving a battery in an extremely high temperature surrounding
environment that can result in an explosion or the leakage of flammable
liquid or gas.
A battery subjected to extremely low air pressure that may result in an
explosion or the leakage of flammable liquid or gas.
7
Hereby, Anhui Huami Information Technology Co., Ltd. declares
that the radio device type A2008 is in compliance with
Directive 2014/53/EU. The full text of the EU declaration of
conformity is available at the following internet address:
https://support.amazfit.com/en/
For more regulatory information and product
certification/compliance logos related to Amazfit Bip U Pro,
please go to Regulatory on your Amazfit Bip U Pro.
12 Safety Notice
1.
2.
3.
Do not allow children or pets to bite or swallow the product or its
accessories, as this may cause injury.
Do not place this product under excessively high or low temperatures,
which may cause the product to catch fire or explode.
Do not place this product near heat sources or open flame, such as
ovens and electric heaters.

4.
5.
6.
7.
Some people may experience allergic skin reactions to plastics,
leathers, fibers, and other materials, and symptoms such as redness,
swelling, and inflammation will occur after long-term contact with
this product's components. If you experience such symptoms, please
discontinue use and consult your doctor.
Do not use unauthorized or incompatible power adapters or data
cables, which may damage the watch and accessories, or cause fire,
explosion, or other hazards.
The radio waves generated by this product may affect the normal
operation of implanted medical devices or personal medical devices,
such as pacemakers and hearing aids. If you use any such medical
devices, consult the manufacturer for relevant usage restrictions.
Do not dispose of this device or its accessories as ordinary household
waste. Please comply with local regulations for the disposal of this
device and its accessories, and support recycling.
13 Repair and Maintenance
1.
2.
3.
4.
Avoid using detergents such as soap, hand sanitizer, bath foam, or lotion
for cleaning to prevent chemical residues from irritating the skin, corroding
the device, or degrading the water resistance of the device.
After wearing the device while bathing (for devices that support bathing),
swimming (for devices that support swimming), or sweating, please
promptly clean and dry the device.
The leather strap is not waterproof. Avoid getting the strap wet, as this
may shorten its service life.
When using light-colored watch straps, avoid contact with dark clothing
to prevent staining.
8

14 Troubleshooting
9
Please check the FAQ on the website: https://support.amazfit.com/en.
15 Warranty and Return Policy
The Amazfit Limited Warranty covers Amazfit products against
manufacturing defects beginning on the original purchase date. The warranty
period is 12 months or another specified period as the applicable consumer
laws in the consumer’s country of purchase require. Our warranty is in
addition to rights provided by applicable consumer laws.
Official website: en.amazfit.com
Support: support.amazfit.com
5.
6.
7.
Do not wear your watch during snorkeling, hot showers, hot springs,
saunas (steam rooms), diving, underwater diving, water skiing, and
other activities involving high-speed water currents.
Do not place the device in direct sunlight for long periods. Excessively
high or low ambient temperature may cause device failure.
Handle with care during transportation. Keep the device dry and away
from humidity.

Amazfit Bip U Pro User Guide
Content
Amazfit Bip U Pro User Guide .................................................................................................1
Preparations ..................................................................................................................................3
Device pairing and unpairing ..................................................................................................4
Feature navigation on the watch face screen and button usage.................................4
Feature navigation ....................................................................................................5
Physical button operations.....................................................................................7
How to wear and charge the watch ......................................................................................8
Wearing and replacing the watch strap.............................................................8
Charging.......................................................................................................................9
Watch face...................................................................................................................................10
Control center ............................................................................................................................11
Notifications................................................................................................................................12
Shortcut apps .............................................................................................................................13
App settings on the watch .....................................................................................................14
Activities and health .................................................................................................................15
PAI................................................................................................................................15
Activity goal ..............................................................................................................16
Standing alerts.........................................................................................................16

Heart rate ..................................................................................................................17
Sleep ...........................................................................................................................20
Assisted sleep monitoring....................................................................................20
SpO2 ...........................................................................................................................21
Precautions for SpO2 measurement ................................................................21
Stress monitoring....................................................................................................22
Respiratory training................................................................................................23
Cycle tracking...........................................................................................................24
Watch Apps.................................................................................................................................25
To-Do-List ................................................................................................................26
Alarm...........................................................................................................................26
World Clock ..............................................................................................................27
Pomodoro Tracker..................................................................................................27
Countdown ...............................................................................................................28
Stopwatch..................................................................................................................28
Compass ....................................................................................................................29
Music...........................................................................................................................29
Camera Remote.......................................................................................................30
Find Phone ................................................................................................................31
Alexa............................................................................................................................31
Workout ..............................................................................................................................32
How to enable the workout feature..................................................................32

Activity alerts ............................................................................................................33
Operations while working out ............................................................................36
Pause, continue, and end working out ............................................................36
View workout results..............................................................................................37
Workout settings.....................................................................................................37
Workout goal ...........................................................................................................38
GPS and AGPS .........................................................................................................38
Heart rate range for workouts............................................................................39
Watch status alerts ...................................................................................................................40
Incoming call alert ..................................................................................................40
Nudge alert...............................................................................................................41
Activity goal achieved alert..................................................................................41
Red envelope alert .................................................................................................42
Settings.........................................................................................................................................42
Daily maintenance ....................................................................................................................44
Precautions.........................................................................................................................45
Preparations
Before you use the Amazfit Bip U Pro, download the Zepp app to your mobile
phone. Then, pair the watch so that you can use all of its features and save
data generated on the watch to your cloud account.

Device pairing and unpairing
Download the Zepp app from the app store or by scanning the QR code in the
instruction manual. Then, register an account or log in to your account.
Open the Zepp app and go to Profile > Add Device > Watch > Watch with a
QR Code.
Scan the QR code on the watch by using the phone's scanner to pair the
phone to the watch.
Upgrade the watch after pairing is complete. To do so, keep the phone's
network connected and Bluetooth on, and keep the watch close to the phone.
You can use features provided by the watch after pairing and upgrade. You
can use and configure the watch features by using the Zepp app.
To unpair the watch, tap Unpair on the Device page of the Zepp app.
Feature navigation on the watch face screen and button usage
The Amazfit Bip U Pro is equipped with a TFT touch screen and a physical
button.

Feature navigation
Swipe up, down, left, and right to navigate features on the watch screen.

The watch face screen appears by default.
1. Swipe up on the watch face screen to view historical notifications. You can
view up to 10 recent notifications.
2. Swipe down on the watch face screen to go to the control center, where
you can set Do-Not-Disturb, Brightness, and Alarms, and view the watch
battery level and phone connection status.
3. Swipe left and right on the watch face screen to open shortcut apps such
as Activity Goal, Heart Rate, PAI, Weather, Cards, Music, and Alexa. To
modify shortcut apps settings, go to Watch settings > Preferences >
Shortcut apps. You can set up to 10 shortcut apps.
4. On the watch face screen, press the physical button on the right to go to
the app list.

Physical button operations
Press the physical button once:
①When the screen is locked, press the physical button to unlock the screen.
②On the watch face screen, press the physical button to go to the app list.
③On screens other than the watch face screen, press the physical button to
return to the previous screen.
④On the Workout screen, press the physical button to swipe up and down
between screens.
Press and hold the physical button:
①When the watch is shut down, press and hold the physical button for 2
seconds to power on the watch.
②On the watch face screen, press and hold the physical button to quickly
start the Workout app.
To set quick start-up items, go to Watch settings > Preferences > Press
and hold the button.
③On the Workout screen, press and hold the physical button to end the
workout.

④Press and hold the physical button for 8 seconds to restart the watch.
How to wear and charge the watch
Wearing and replacing the watch strap
Put the strap on with comfortable looseness to allow the skin to breathe and
the sensor to function.
When measuring SpO2, avoid wearing the watch on the wrist joint, keep your
arm flat, maintain a comfortable (appropriately tight) fit between the watch and
the skin of your wrist, and keep your arm still throughout the measurement
process. When affected by external factors (such as arm sag, arm sway, arm
hair, and tattoo), measurement results may be inaccurate or the measurement
may fail with no output.
You can tighten the watch strap during workout and loosen it afterwards.
Tighten the strap appropriately if your watch sways on your wrist or fails to
output data.

Charging
1. Connect the USB port of the watch charging base to a phone charger or a
PC's USB interface.
2. Put the watch onto the magnetic charging base and keep the metal
contact on the back of the watch aligned with the gold pin of the charging
base. Ensure that the watch is firmly attached to the charging base.
3. After the watch is correctly placed onto the charging base, the charging
icon will appear on the watch screen, indicating that charging is in
progress.
When the watch is being charged, you can view the current time and receive
incoming call alerts and app notifications.
We recommend that you charge the watch using a PC's USB interface or a
branded phone's charger with a rated output voltage of 5 V and an output
current more than 1 AH.

Watch face
To change the watch face, tap and hold the watch face screen, or go to
Settings > Watch Face and swipe left and right to select the desired watch
face.
Go to the Watch face settings screen. The watch faces for which thumbnails
are marked with the Edit icon below are editable. The selected watch face is
highlighted. You can tap or swipe on the screen to select different watch
faces. The watch faces in gray are available to choose. Tap to select one.
The watch provides several watch faces by default. You can also go to the
store in the Zepp app to synchronize online watch faces to the watch, or set a
picture on the phone as the watch face picture by using the Zepp app.
To add online watch faces, keep the watch connected to the phone, open the
Zepp app, go to Profile > My Device > Amazfit Bip U Pro > Store, and select
your desired online watch faces to synchronize them to the watch.
Table of contents
Other Amazfit Watch manuals

Amazfit
Amazfit Neo User manual

Amazfit
Amazfit BIP 5 User manual

Amazfit
Amazfit Verge User manual

Amazfit
Amazfit GTS 4 mini A2176 User manual

Amazfit
Amazfit Verge User manual

Amazfit
Amazfit Verge Lite User manual

Amazfit
Amazfit T-Rex Pro A2013 User manual
Amazfit
Amazfit GTS 2 mini User manual

Amazfit
Amazfit T-Rex Ultra User manual
Amazfit
Amazfit Verge Lite User manual

Amazfit
Amazfit GTR3 pro User manual

Amazfit
Amazfit Stratos 3 User manual

Amazfit
Amazfit GTS 2e User manual
Amazfit
Amazfit Band 7 User manual

Amazfit
Amazfit GTR Mini User manual

Amazfit
Amazfit GTR 2 User manual

Amazfit
Amazfit GTS 4 User manual

Amazfit
Amazfit GTS 2 User manual

Amazfit
Amazfit T-Rex Specification sheet

Amazfit
Amazfit Bip S User manual