AmazonBasics Air Bike User manual

- 1 -

1. Part Idenficaon Chart _____________________________________________
2. Posion of Nuts & Bolts _____________________________________________
3. Important Safety Instrucons _________________________________________
4. Warnings _________________________________________________________
6. Cleaning & Maintenance ____________________________________________
7. Warranty & Service _________________________________________________
8. Step by Step Assembly Instrucons ____________________________________
9. Product Dimension _________________________________________________
11. Oponal Aachements ____________________________________________
3
4
5
6
6
7
7
8-9
10
11
P. No.
- 2 -
Table of Contents
5. Before You Begin __________________________________________________
6.1 Cleaning ______________________________________________________
7
6.2 Maintenance ___________________________________________________
7
10. E-Waste Management ______________________________________________ 10
12. Using The Display _________________________________________________
12

Part No. Component Name Qty.
A
B
C
D
E
E-2
F
G
H
I
J
Main Frame
Front Leg
Rear Leg
Center Rod
Le Handle
Right Handle
Seat
Seat Piller
Degital Meter
Seat Knob
Pedals
1 piece
1 piece
1 piece
1 piece
1 piece
1 piece
1 piece
1 piece
1 piece
1 piece
2 piece
- 3 -
1. Part Idenficaon Chart

- 4 -
2. Posion of Nuts and Bolts

Read these instrucon carefully and retain them for future use. If this product is
passed to a third party, then these instrucons must be included.
When using the equipment, basic safety precauons should always be followed toreduce the risk of
injury including the following
CAUTION
!Risk of injury!
Before starng any exercise program, consult your doctor to determine if you have any medical
or physical condions that could put your health and safety at risk, or prevent your form using
the equipment property. Your Doctor's advice is essenal if you are taking medicaon that
affects your heart rate, blood pressure or cholesterol level.
Incorrect or excessive exercise can damage your health. Stop exercising if you experience any
of the following symptoms: pain, ghtness in your chest, irregular heartbeat, and extreme
shortness of breath, lightheaded, dizziness or feeling of nausea. If you do experience any of
these condions you should consult your doctor before connuing with your exercise program
Equipment can p over. Do not let children climb on or play with the equipment.
Keep children and pets away from the equipment. The equipment is designed for adult use
only.
Do not overghten the fasteners.
No more than one person can use the equipment at a me.
The Maximum permissible weight of a person using the equipment is 100kg.
This staonery training equipment is not suitable for high accuracy purpose.
- 5 -
3. Important Safety Instrucon

WARNING! Heart rate monitoring systems may be inaccurate. Over exercise may result in serious
injury or death. If you feel faint, stop exercising immediately.
Not suitable for therapeuc purposes.
Remove all the packaging materials.
Check the equipment for transport damages
Check the delivery content for completeness.
Before First Use
Risk of suffocaon
DANGER
!
Keep any packaging material away from children and pets - these materials are a potenal
source of danger, e.g. suffocaon.
- 6 -
4. Warnings
5. Before you Begin

6.1 Cleaning
NOTICE For hygienic purposes we recommend to clean the equipment aer every use.
To clean the equipment, wipe with a so, slightly damp cloth.
Never use corrosive detergents, wire brushes, abrasive scourers, metals or sharp utensils to clean
the equipment.
6.2 Maintenance
WARNING
!
Check the components regularly to make sure all screws and bolts are ghtened.
Store in a cool and dry place away from children and pets.
Replace defecve components immediately and/or keep the equipment out of use unl repair.
Pay special aenon to components most suscepble to wear.
We grant 1 year warranty on the product
commencing from the date of purchase against
defects in manufacturing.
Within the warranty period, we will correct any
defect in materials of workmanship, either by
repairing or replacing the complete equipment,
as we may choose, free of charge This warranty
is valid to the original purchaser only.
Free Warranty - 1 year on product for
malfuncon arising from manufacturing
defects. Get Brand Authorized service, genuine
parts and a paperless warranty claim
experience through your Amazon account
Click Warranty support, on Amazon for
malfuncon arising from manufacturing
defects
Get Brand Authorized service, genuine parts
and a paperless warranty claim experience
through your Amazon account. Hassle free
process with complete visibility to every step of
your warranty claim.
For claiming warranty, A) Go to Your orders
secon,
B) Select the product, C) Click on Get product
support and
D) Schedule an appointment.
1.
2.
3.
Damage is caused by improper use, abuse or
excessive use outside the intended purpose.
Normal wear or use as well as defects that have
a negligible effects on the value or operaon of
the equipment.
Repairs or product modificaons have been
carried out by unauthorized organizaon or
persons and if original parts are not used.
Consequenal damages (Including but not
limited to loss of data or loss of income), nor
compensaon for acvies done by yourself.
The proof-of-purchase has been altered in any
way or its made illegible
The model number, serial number or
producon date code on the product has been
altered, removed or made illegible.
The defect is caused by connecng peripherals,
addional equipment or accessories other that
those recommended in the user mannual.
This Warranty excludes, or does not apply or
becomes void if:
1.
2.
3.
4.
5.
.
6
7.
- 7 -
6. Cleaning and Maintenance
7. Warranty & Service
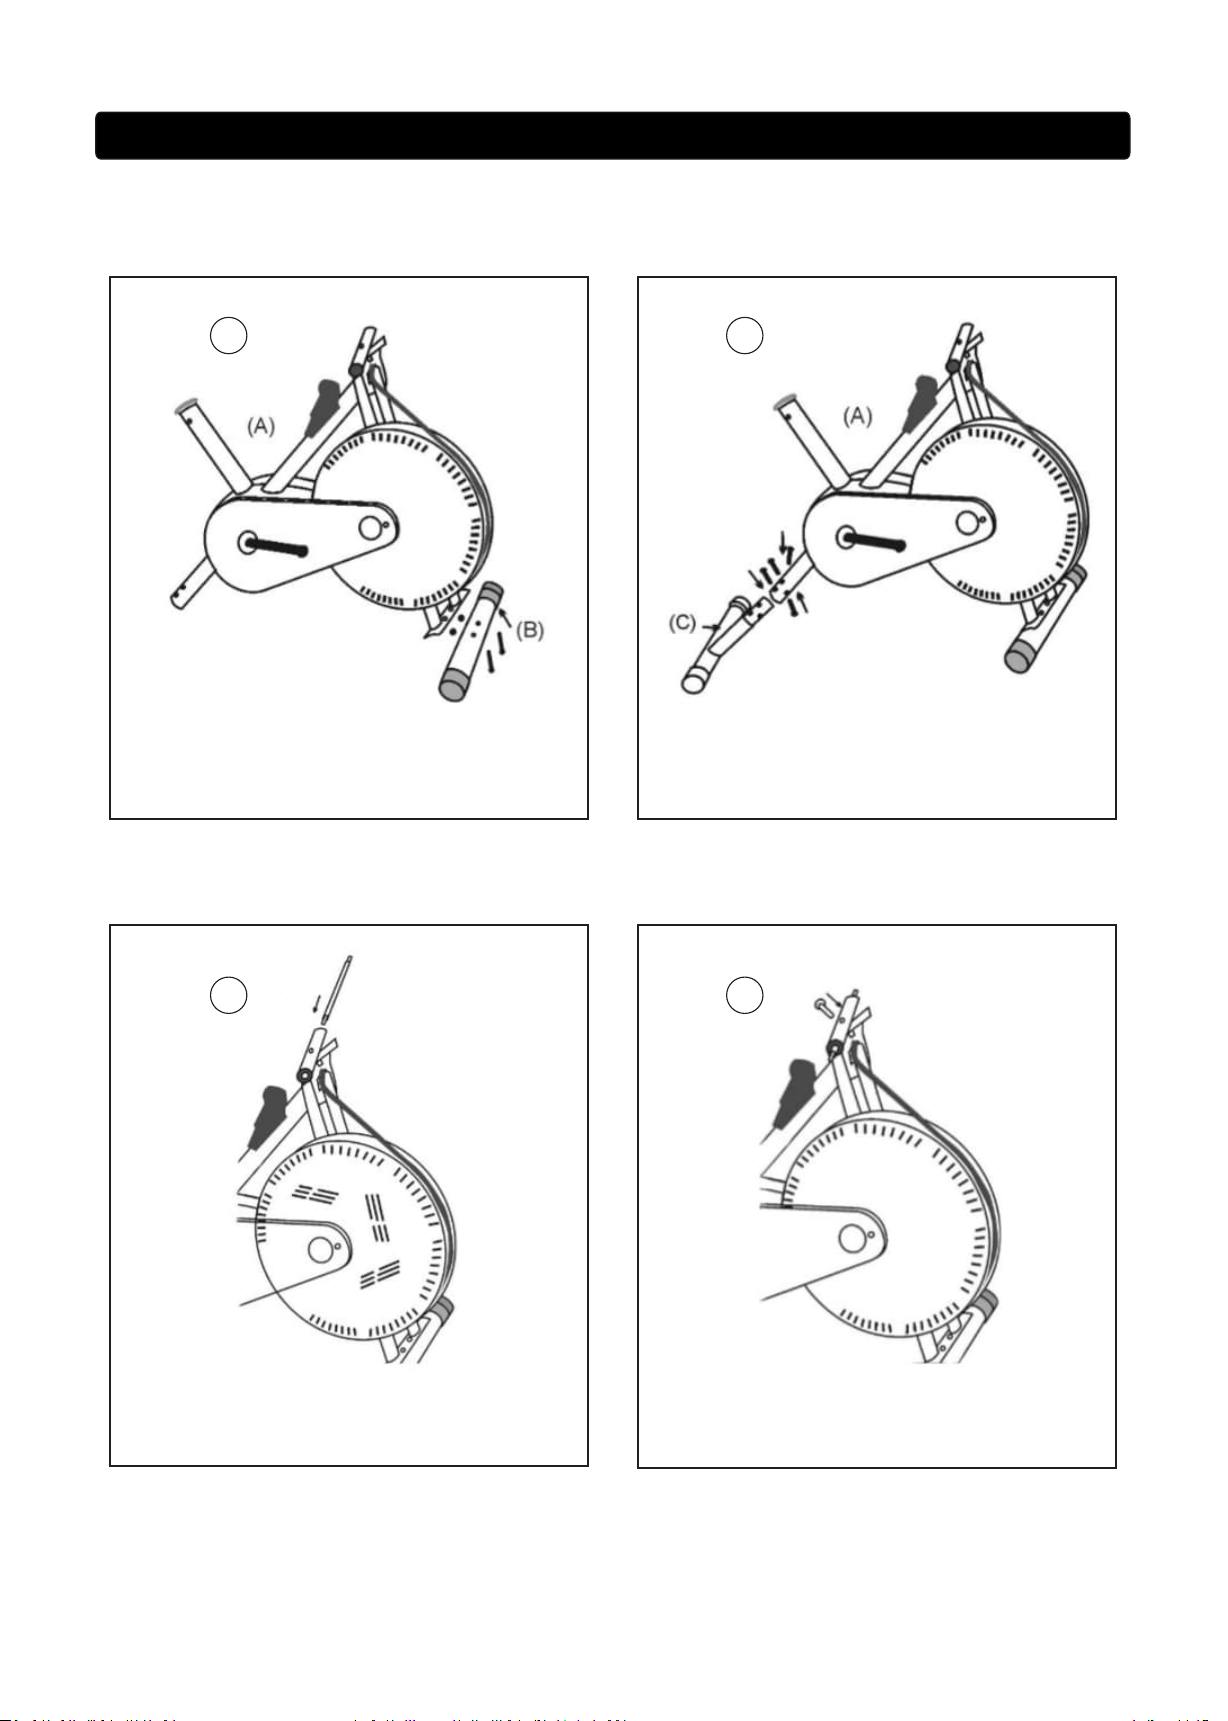
Safety level of the equipment can be maintained only if it is examined regularly for damage and wear.

- 8 -
8. Step by Step Assembly Instrucons
STEP 1 STEP 2
STEP 3 STEP 4
Aach the ‘Front Leg’ (B) to the ‘Main Frame’
(A), as shown in the picture with the help of
nuts and bolts provided
Aach the ‘Rear Leg’ (C) to the ‘Main Frame’
(A), as shown in the picture with the help of
Allen bolts provided
Insert the ‘Center Rod’ (D) into the ‘Main
Frame’ (A) at the given posion as shown
in the picture.
Screw the ‘Center Rod’ (D) with the
help of screw provided.

STEP 5 STEP 6
STEP 7 STEP 8
Aach the ‘Le Handle’ (E1) and ‘Right Handle’
(E2) with the ‘Center Rod’ (D), as shown, then
ghten the handles with the help of nuts provided.
Connect the ‘Pedals’ (J) with the strip
connected to the handles at the given posion and in
the similar manner as shown in the picture.
Connect the ‘Digital Meter’ (H) with the
‘Main Frame’ (A) as shown in the picture.
Connect the ‘Seat’ (F) with the ‘Sear Pillar’ (G) and
insert it in the ‘Main Frame’ (A), as shown in the picture.
Tighten the ‘Seat Pillar’ (G) with the help of ‘Seat Knob’
(I) at the suitable posion.
- 9 -

Be a Responsible User. Recycle or refurbish your old Amazon brand products to help protect the environment
The crossed-out bin symbol on this product or Its packaging signifies that this product should be discarded
separately from ordinary household waste aer the end of its life, Be aware that it is your responsibility to
dispose-off e-waste in such a mamer that no damage to human heath and environment occur.
E-waste is generated from electronic and electrical appliances components which have reached their end-of-
lifeperiod or are no longer fit for their original intended use and are designed for recovery, recycling or disposal.
E-wastewhen disposed or recycled improperly, can cause severe environmental polluon adversely affect the
human body as they contain toxic chemicals Please ensure that the Electronic products that are unwanted, not
working, and nearing or at the end of the life deposed-of only through authorised recycling or refurbishing
Points. Please contact your municipal waste management authority or your household waste disposal service
for addional details.
The product and the components thereof conform to the provisions of hazardous substances specified under
Rule16(1)and Rule 16(4)of E-waste(Management) Rule, 2022 [Chapter VII tled the Reducon in the Use of
Hazardous Substances in the manufacturer of electrical and electronic equipment and their components or
consumables of parts or spares]
- 10 -
9. Product Dimension
10. E-Waste Management

The twister. in models with the twister, the front boom tube has a receiving metal receptacle scking outwards.
Align the holes on the receptacle and the holes on the twister pipe. Insert the metal pin into the holes to fasten the
twister to the front boom sand.
- 11 -
11. Oponal Aachements
Aer inserng the seat rod into the seat tube (step 7), before ghtening the seat, adjust the back support pipe
by matching the holes in the pipe to the bolts aached in the seat and ghten it with the nuts provided with
the seat. Aer fixing the back support pipe, aach the back cushion by matching the holes. Tighten the bolts
with the nuts provided with the seat.
The Back Support

The display has different models to be able to track your workout details effecvely. The details that you can access
using the display are :
1. Current speed of workout.
2. Time (Duraon of workout)
3. Distance covered &
4. Calories burnt.
When you first switch the display on, it is set by default to show speed and me. Pressing the MODE buon
repeatedly switches the display to show speed and distance, speed and calories burnt, and The Scan Mode
respecvely.
When you use the Scan Mode opon, you can see several details simultaneously.
At the end of your workout or the start of your next, if you need to reset the readings on your meter simply hold the
MODE buon down for 5 seconds.
- 12 -
12. Using The Display
Table of contents
Popular Exercise Bike manuals by other brands

Trojan
Trojan DNETIK CONCEPT 510 Care instructions and assembly manual

Domyos
Domyos VM FOLD 6 manual

Cascade
Cascade AIR UNLIMITED 402007 instruction manual

Christopeit Sport
Christopeit Sport AC 1 Assembly and exercise instructions

Spirit
Spirit CU800 ENT owner's manual

LeMond Fitness
LeMond Fitness Revolution owner's manual