C139V1.1
F R
U K
ROXI
NOTICE D’INSTALLATION
RECOMMANDATIONS PAGE
1
POSE MEUBLE PAGE 2 A
4
ITTING INSTRUCTIONS
IMPORTANT PAGE
1
CABINET
INSTALLATION
PAGE
2 A
4
Recommandations importantes:
•Déballer les meubles soigneusement en prenant garde de ne pas les rayer avec un cutter.
Inspecter chaque meuble avant l’installation. En cas de problème, le signaler immédiatement à
votre revendeur, aucune réclamation ne sera prise en compte après installation.
•Nous vous conseillons d’utiliser une protection sur le sol de type couverture pour ne pas
risquer de rayer les meubles. Les miroirs et les plans de toilette sont des objets fragiles, il est
recommandé de les poser au sol sur des tasseaux entre chaque manipulation.
•Veiller à réaliser l’étanchéité des plans de toilette à l’aide de silicone sanitaire comme indiqué
dans les notices respectives. Les infiltrations d’eau à l’arrière des surfaces et plans de toilette
peuvent dégrader irrémédiablement les meubles, ce type de dommage n’est pas couvert par
la garantie.
•Les surfaces des meubles ne doivent pas être exposées longtemps à de l’eau stagnante ou
à une humidité persistante. Elles doivent donc être essuyées rapidement. Aucune réclamation
ne sera prise en compte si le problème provient d’un contact prolongé avec de l’eau (gonfle-
ment).
•Tous nos meubles bénéficient d’une garantie 2 ans* sur les pièces (1 an sur les miroirs, com-
posants électriques, structures de WC et tous les accessoires) aucune réclamation ne pourra
être formulée en cas de non respect des précautions d’usage et d’entretien citées sur ce docu-
ment.
•Nos produits sont vendus pour un usage résidentiel, aucune réclamation ne sera prise en
compte pour une détérioration constatée suite à un usage excessif en collectivité ou lieu
public.
•La garantie 2 ans* n’est valable que dans le cas d’une pose respectant les normes en vigueur,
les recommandations et précautions d’usage fournies pour chaque produit.
•La garantie ne concerne que nos produits et ne couvre en aucun cas les dommages, pertes
et travaux consécutifs, ces derniers restant à la charge du consommateur.
•Nous rappelons à nos usagés que la pose des meubles de salles de bains doit être réalisée
par un professionnel qualifié. Aucune garantie ne pourra être appliquée en cas de défaut aux
règles de pose indiquées sur chaque notice de meuble.
*Se référer aux conditions générales de ventes
ENTRETIEN :
•Nettoyer la surface du meuble immédiatement après un contact avec un produit chimique :
teintures, solvants, produits pour les ongles, laque...
•Ne pas utiliser de crème abrasive, de paille de fer, d’éponge rugueuse, de solvant ou d’acide.
• Penser à sécher les surfaces avec un chiffon doux après nettoyage.
• Pour les miroirs utiliser une peau de chamois humide et penser à essuyer les arêtes.
•Le nettoyage des parties électriques doit se faire avec un chiffon sec, appareil électrique
hors tension.
LA PRÉSENCE D’UNE VENTILATION EFFICACE DANS LA SALLE DE BAINS EST IMPÉRATIVE
POUR ÉVITER TOUTE HUMIDITÉ PERSISTANTE ET PRÉSERVER LA QUALITÉ DES MEUBLES ET
DES MIROIRS
NORMES ÉLECTRIQUES :
Les meubles équipés de composants électriques (miroirs, armoires de toilette, prises de cou-
rant...) doivent être installés impérativement en ZONE 3 selon VDE 0100, alinéa 701. Le mon-
tage et les interventions éventuelles sur les appareils électriques doivent être réalisées par un
électricien professionnel agréé.
Toutes les infos sont téléchargables sur
www.ambiancebain.com
Important :
•Unpack the units carefully ensuring not to scratch them with the knife blade. Inspect every
item carefully before installation as no claim for faults or damages will be accepted once the
item is installed.
•We recommend that you use protection (for example a blanket) to cover the working area.
Mirrors and worktops are very fragile, we recommend that you put them on battens (and
never directly onto the floor).
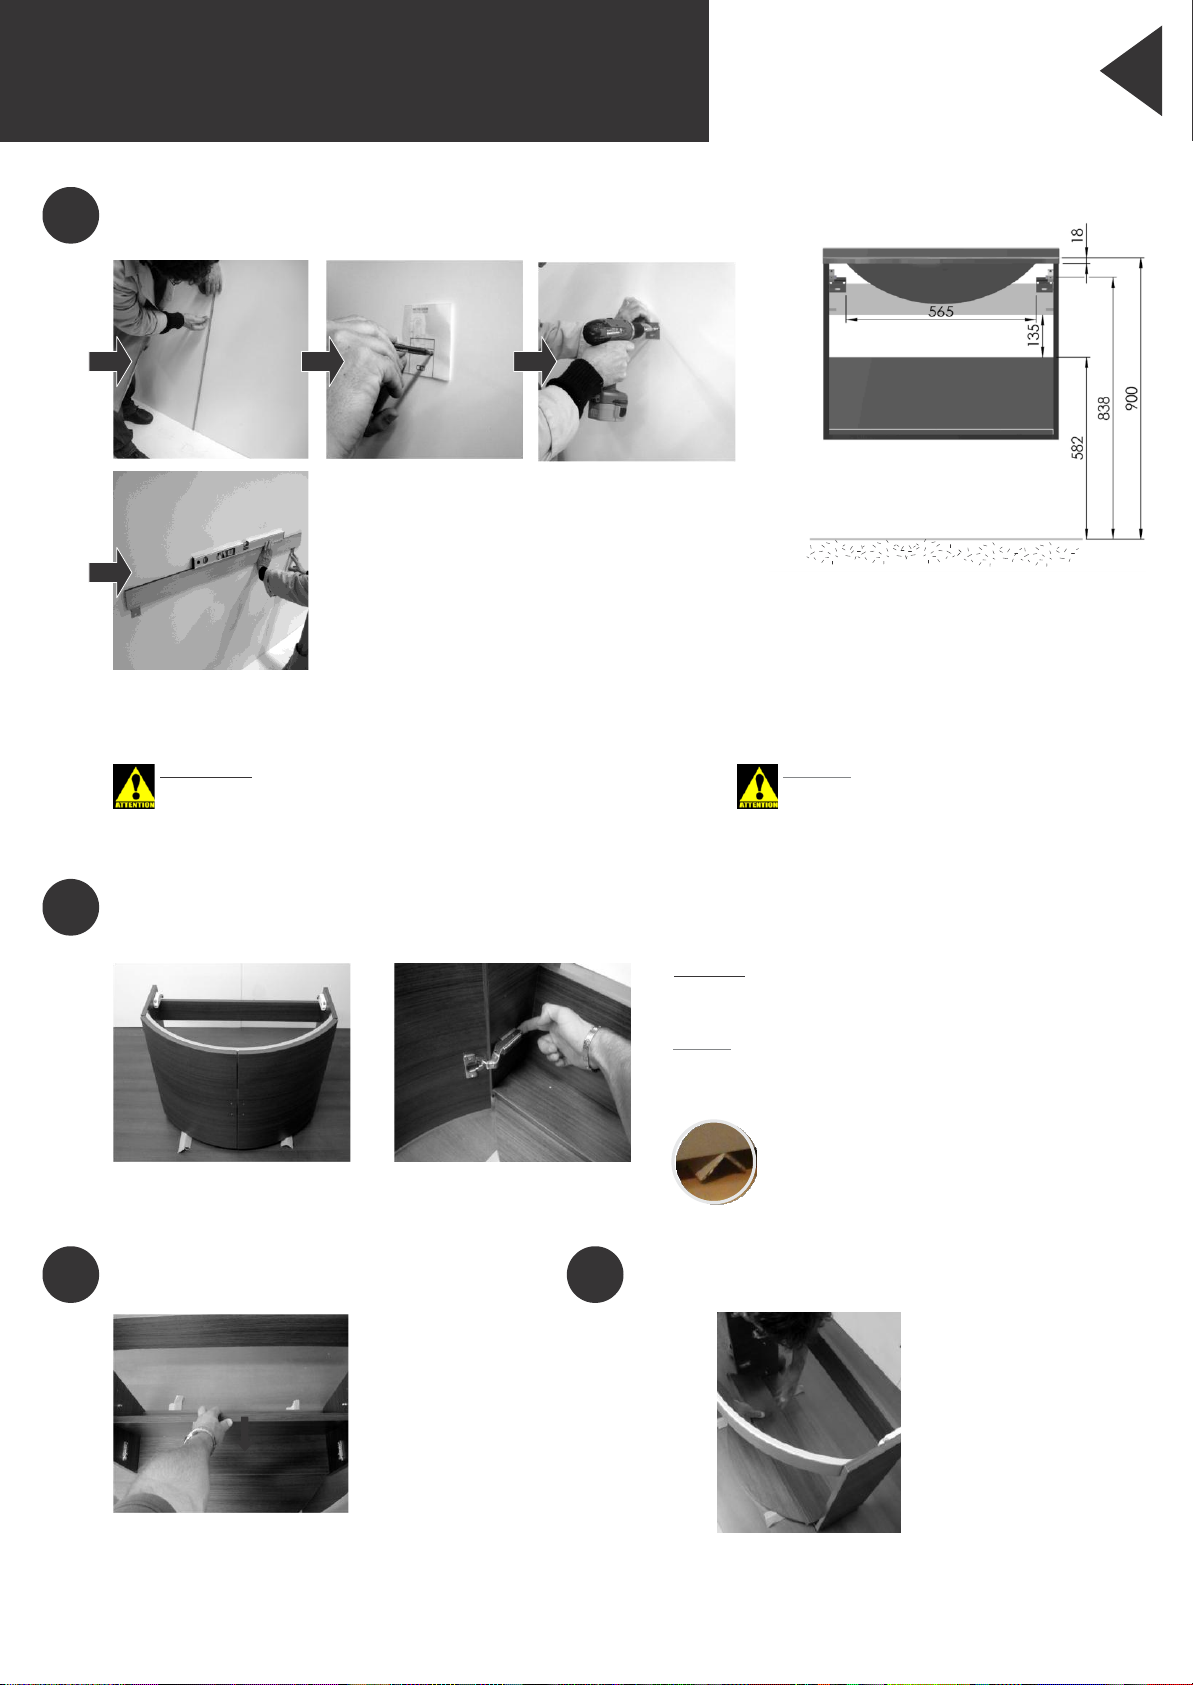
• Our furniture is designed to be fitted on a level, flat finished wall.
•It is imperative that you use a sanitary grade silicone sealant at the back and sides of every
worktop as water infiltrations will damage your unit and this is not covered under our product
guarantee.
•All surfaces of all units should not be exposed to standing water or persistent humidity. They
must be wiped and dried off immediately after use. If your unit is not cared for correctly it will
deteriorate and this will not be covered under our product guarantee.
•All our units are guaranteed for 5 years* from date of invoice (1 year for mirrors, electri-
cal items, cisterns, WC frames, sanitary ware, taps and accessories) against all manufacturing
defects acknowledged by our company, limited to domestic users.
•The guarantee does not apply to any products that have been misused or abused in any way.
The products must be installed and cared for in line with our fitting instructions, local water
byelaws, IEE electrical directives and any other applicable regulations.
•In the unlikely event that the product fails within 5 years* (1 year for mirrors, electrical items,
cisterns, WC frames, sanitary ware, taps and accessories), we offer a free of charge replace-
ment part (or nearest equivalent). Liability is limited to individual products and does not cover
consequential loss/damage or any further unfitting/refitting costs or financial compensation.
The customer will be required to pay for the installation cost of the replacement part.
* Refer to general terms of sale
MAINTENANCE:
• Wipe and rinse the surface of the furniture after contact with any chemical product.
• Do not use abrasive cream (cif, etc…), wire wool, scouring pad, solvent, acid, etc…
• Dry the surface off with a soft cloth after cleaning
• For mirrors, use a chamois leather, and dry the edges with a suitable soft cloth.
• Use a dry cloth to clean any electric components, they must be switched off.
OUR FURNITURE WILL DETERIORATE THROUGH EXCESSIVE WATER SPILLAGE OR HEAVY
CONDENSATION. IT IS ADVISED THAT EVERY BATHROOM SHOULD BE WELL VENTILATED AND
FITTED WITH A SUITABLE EXTRACTOR FAN TO AVOID ANY PERSISTENT HUMIDITY AND ALL
FURNITURE SHOULD BE PROTECTED WITH BATH/SHOWER SCREEN ENCLOSURES TO PRE-
SERVE THEIR QUALITY.
ELECTRICAL INSTALLATION:
All Ambiance Bain units fitted with electrical components (mirrors, mirrored cabinets, sockets,
etc...) must only be installed in ZONE 3. Installation and fitting of all electrical items must be
completed by a qualified electrician. Any final decisions regarding the installation should also
be made by the electrician. All electrical items must be tested prior to installation, as liability is
limited to replacement items only.
All information is downloadable from the website
www.ambiancebain.co.uk
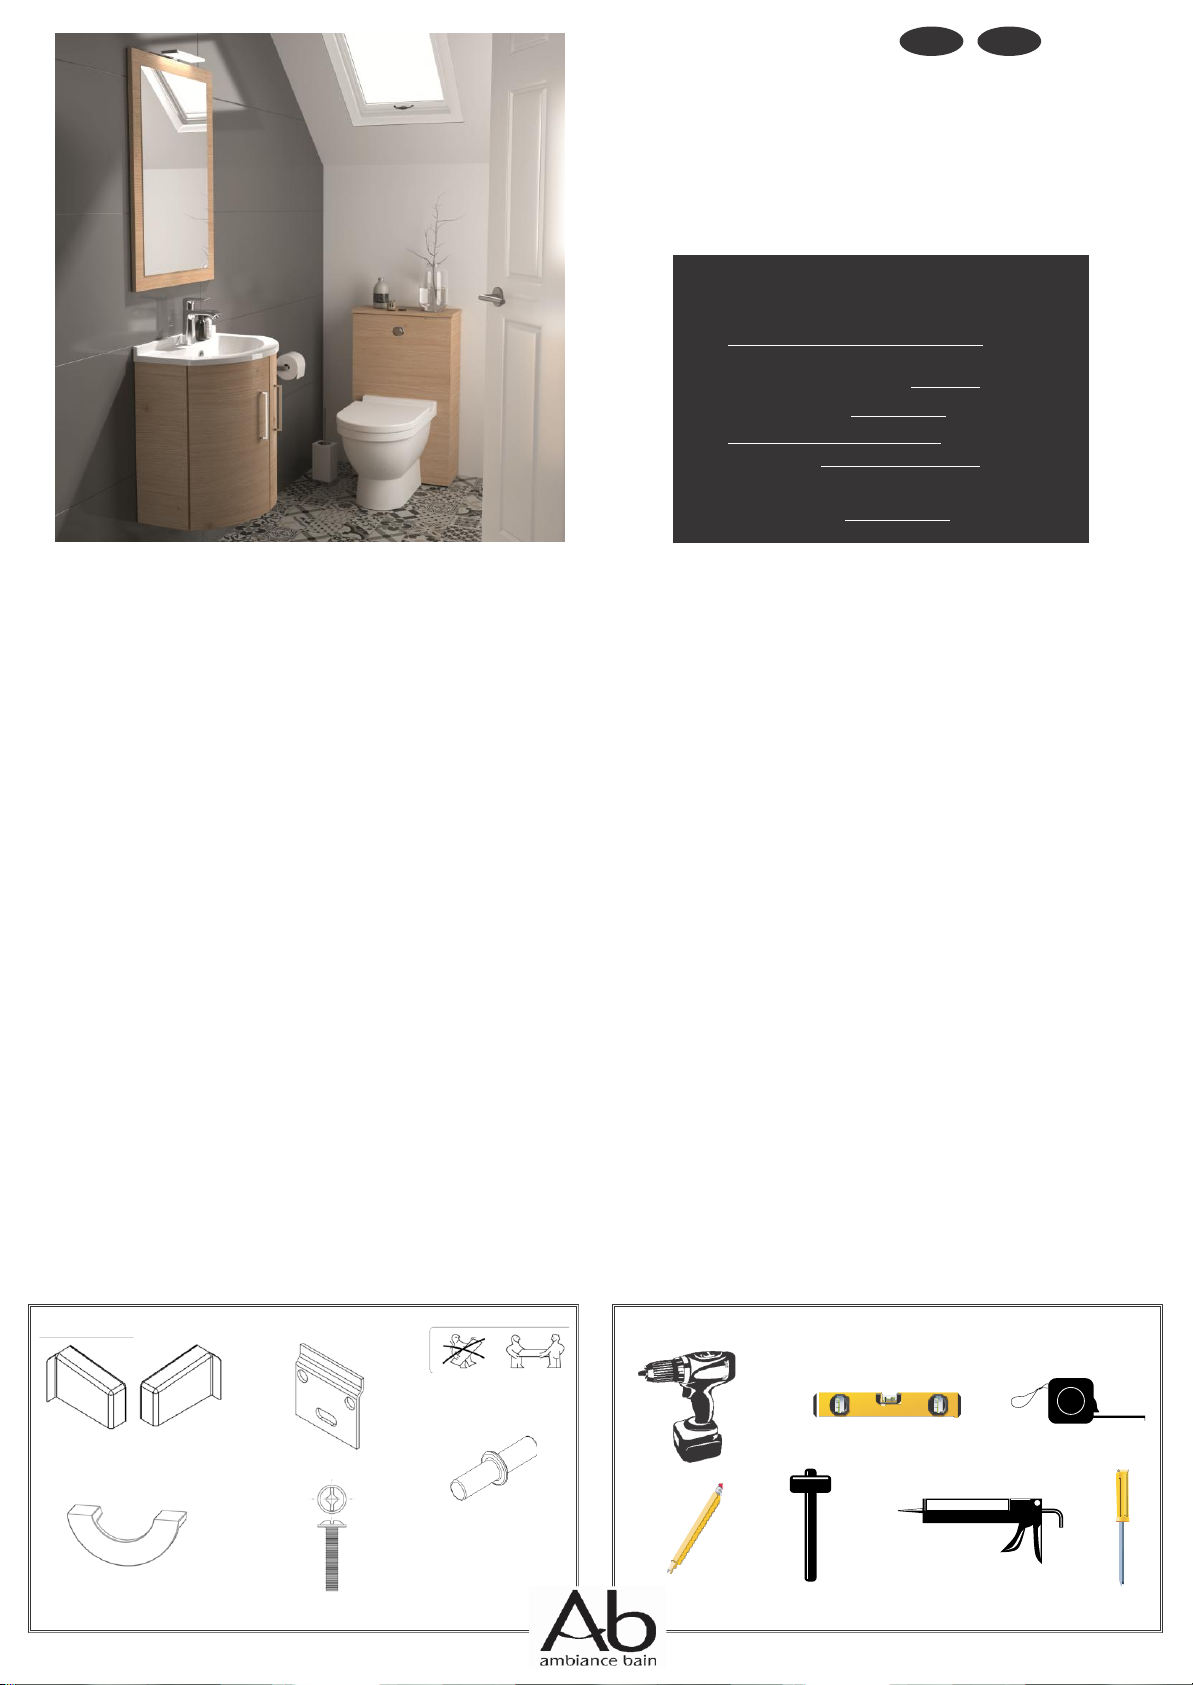
CONTENU DU COLIS DE QUINCAILLERIE / SPARE PART BOX CONTENT
MATÉRIEL NÉCESSAIRE / TOOLS REQUIRED
0004 0003
*VÉRIFIER LA QUANTITÉ DANS LE COLIS AVEC LA LISTE
*CHECK SPARE PARTS BOX QUANTITY