manuals.online logo
Brands
  1. Home
  2. •
  3. Brands
  4. •
  5. American DJ
  6. •
  7. Dj Equipment
  8. •
  9. American DJ Snow Flurry Installation instructions

American DJ Snow Flurry Installation instructions

American DJ
4295 Charter Street
Los Angeles Ca. 90058
www.americandj.com
Introduction: Congratulations, you have just purchased the Snow
Flurry snow machine. The Snow Flurry snow machine has been
designed to perform reliably for years when the guidelines in this
booklet are followed. Please read and understand the instructions in
this manual carefully and thoroughly before attempting to operate this
unit. These instructions contain important information regarding safety
during use and maintenance.
Customer Support: American DJ® provides a toll free customer sup-
port line, to provide set up help and to answer any question should
you encounter problems during your set up or initial operation. You
may also visit us on the web at www.americandj.com for any com-
ments or suggestions. For service related issue please contact Ameri-
can DJ®. Service Hours are Monday through Friday 9:00 a.m. to 5:00
p.m. Pacific Standard Time.
Voice: (800) 322-6337
Fax: (323) 582-2610
E-mail: [email protected]
To purchase parts online visit http://parts.americandj.com
Warning! To prevent or reduce the risk of electrical shock or fire, do
not expose this unit to rain or moisture.
Caution! There are no user serviceable parts inside this unit. Do not
attempt any repairs yourself, doing so will void your manufactures war-
ranty. In the unlikely event your unit may require service please contact
American DJ.
Do not discard the shipping cartoon in the trash. Please recycle when
ever possible.
Snow Flurry™ Introduction
©American DJ Supply® - Snow Flurry - Instruction Manual Page 2
User Instructions
2/06
Please Note: Specifications and improvements in the design of
this unit and this manual are subject to change without any prior
written notice.
• Be sure to save the packing carton in the unlikely event the unit
may have to be returned for service
• Do not spill water or other liquids into or on to your snow machine.
Be sure that all the snow fluid is kept inside the fluid reservoir
• Be sure that the local power outlet match that or the required
voltage for your snow machine
• Do not remove the top cover under any conditions. There are no
user serviceable parts inside
• Disconnect the unit’s main power when left unused for long peri-
ods of time
• Never connect this unit to a dimmer pack
• Do not attempt to operate this unit, if it becomes damaged in anyway
• Never operate this unit when it’s cover is removed
• To reduce the risk of electrical shock or fire, do not expose this
unit rain or moisture
• Do not attempt to operate this unit if the power cord has been fray-
ed or broken. Do not attempt to remove or break off the ground
prong from the electrical cord. This prong is used to reduce the
risk of electrical shock and fire in case of an internal short
• Disconnect from main power before making any type of connection
• Never block the ventilation holes. Always be sure to mount this
unit in an area that will allow proper ventilation. Allow about 6”
(15cm) between this device and a wall
• This unit is intended for indoor use only, use of this product out-
doors voids all warranties
• Always mount this unit in a safe and stable matter
• Please route your power cord out of the way of foot traffic. Power
cords should be routed so they are not likely to be walked on,
pinched by items placed upon or against them
• The unit should only be serviced by qualified service personnel
when:
A. The power-supply cord or the plug has been damaged.
B. Objects have fallen, or liquid has been spilled into the unit.
C. The unit has been exposed to rain or water.
D. The appliance does not appear to operate normally or
exhibits a marked change in performance.
Snow Flurry™ Safety Precautions
©American DJ Supply® - Snow Flurry Instruction Manual Page 3 ©American DJ Supply® - Snow Flurry Instruction Manual Page 4
Snow Flurry™ Set-Up
1. Open the shipping carton and carefully remove the unit from the
shipping carton.
2. Be sure to remove all the packing material especially around the
nozzle.
3. Set the snow machine on a flat dry surface. Locate the included
bracket from the package and install it using the supplied hard-
ware to the side casing. Note: The bracket is an optional accesso-
ry and may not be used if desired, however if you intend to sus-
pend the unit from truss the bracket must be used.
4. Remove the fluid reservoir and fill it with American DJ® branded
snow juice only and replace the reservoir.
5. Place the feeder tube with the filter deep inside the reservoir and
tighten the cap.
6. Firmly attach the timer remote control unit to the rear remote con-
trol socket on the unit.
7. Plug the unit in to a matching power supply.
8. Follow the operating instructions on the next page for proper
operation.
Snow Flurry™ Description
The new Snow Flurry snow machine features a snow juice level sen-
sor. When the snow juice level reaches a low level, a bult-in sensor
inside the reservoir will automatically shut off the pump. This will
greatly expand the life of the pump. The Snow Flurry also includes a
timer remote control, that may be removed for periods of non-use.
Snow Flurry™ Operating Instructions
Always be sure to maintain an adequate supply of American DJ®
Brand Snow Juice™ in the fluid reservoir. The pump will shut
off automatically when the snow juice reaches a certain level.
Running the snow machine dry will cause pump failure and or
clogging. This is the largest cause of failure in snow machines.
Only American DJ® Snow Juice is recommended because not all
snow juice is created equal.
Manual Remote Operation: Once the machine is plugged in and
turned on, press the red button on the timer remote control to turn on
the remote. A red power L.E.D. and a green L.E.D. on the remote will
glow indicating the unit is receiving power and set to emit snow. To
emit snow, simply press the green button on the remote for desired
length of time. If the green L.E.D. is on and snow does not come out
after holding the button down for 30 seconds, check the fluid tank
and hose to make sure there is fluid going through the hose.
Timer Function: The timer function allows snow to be emitted at
designated intervals. The remote has three (3) buttons serving three
different functions.
- The RED button located in the middle will activate the controller.
- The GREEN button is for manual snow output.
- The YELLOW button is for the timer function. Press the YELLOW
button to activate the timer function, and adjust the rotary knobs to
your liking.
The remote also contains two rotary knobs.
- The Duration knob serves two functions 1) Turns the timer on and
off. 2) Sets the timers duration (Length of snow output).
- The Interval knob sets the amount of time in between snow output
from 30 seconds to 10 minutes.
Turing these knobs in a clockwise direction will increase there val-
ues, turning them in a counter-clockwise direction will decrease
their values.
Caution: Before removing or replacing the remote control
unit disconnect the power cord.
If you experience low snow output, pump noise, or no snow
output at all, disconnect and discontinue use immediately. Do
not attempt to continue pushing the remote control’s activa-
tion button as this may damage the snow machine. Check fluid
level, the external fuse, remote connection, and be sure the wall
outlet is sending power. If all of the above appear to be okay,
and the unit fails to operate correctly, the unit will require ser-
vice. Please contact American DJ®.
©American DJ Supply® - Snow Flurry Instruction Manual Page 5 ©American DJ Supply® - Snow Flurry Instruction Manual Page 6
Snow Flurry™ Trouble Shooting
The Snow Flurry snow machine carries a one year (365 days)
limited warranty. Please fill out the enclosed warranty card
to validate your purchase. All returned service items whether
under warranty or not, must be freight pre-paid and accompany
a return authorization (R.A.) number. The R.A. number must
be clearly written on the outside of the return package. A brief
description of the problem as well as the R.A. number must also
be written down on a piece of paper and included in the ship-
ping container. If the unit is under warranty, you must provide a
copy of your proof of purchase invoice. You may obtain a R.A.
number by contacting customer support at (800) 322-6337.
Snow Flurry™ Warranty Registration
©American DJ Supply® - Snow Flurry - Instruction Manual Page 7
©American DJ Supply®
American DJ World Headquarters:
4295 Charter Street Los Angeles, CA 90058 USA
Tel: 323-582-2650 / Fax: 323-582-2610
Web: www.americandj.com / E-mail: [email protected]
1 YEAR LIMITED WARRANTY
A. American DJ® hereby warrants, to the original purchaser, American DJ® products to be
free of manufacturing defects in material and workmanship for a period of one year (365
days) from the date of purchase. This warranty shall be valid only if the product is pur-
chased within the United States of America, including possessions and territories. It is the
owner’s responsibility to establish the date and place of purchase by acceptable evidence,
at the time service is sought.
B. For warranty service, send the product only to the American DJ® factory. All shipping
charges must be pre-paid. If the requested repairs or service (including parts replacement)
are within the terms of this warranty, American DJ® will pay return shipping charges only
to a designated point within the United States. If the entire instrument is sent, it must be
shipped in its original package. No accessories should be shipped with the product. If any
accessories are shipped with the product, American DJ® shall have no liability whatsoever
for loss of or damage to any such accessories, nor for the safe return thereof.
C. This warranty is void if the serial number has been altered or removed; if the product is
modified in any manner which American DJ® concludes, after inspection, affects the reli-
ability of the product; if the product has been repaired or serviced by anyone other than
the American DJ® factory unless prior written authorization was issued to purchaser by
American DJ®; if the product is damaged because not properly maintained as set forth in
the instruction manual.
D. This is not a service contract, and this warranty does not include maintenance, cleaning
or periodic check-up. During the period specified above, American DJ® will replace defec-
tive parts at its expense, and will absorb all expenses for warranty service and repair labor
by reason of defects in material or workmanship. The sole responsibility of American DJ®
under this warranty shall be limited to the repair of the product, or replacement thereof,
including parts, at the sole discretion of American DJ®. All products covered by this war-
ranty were manufactured after January 1, 1990, and bear identifying marks to that effect.
E. American DJ® reserves the right to make changes in design and/or improvements upon
its products without any obligation to include these changes in any products theretofore
manufactured.
F. No warranty, whether expressed or implied, is given or made with respect to any acces-
sory supplied with products described above. Except to the extent prohibited by applicable
law, all implied warranties made by American DJ® in connection with this product, includ-
ing warranties of merchantability or fitness, are limited in duration to the warranty period
set forth above. And no warranties, whether expressed or implied, including warranties of
merchantability or fitness, shall apply to this product after said period has expired. The
consumer’s and or Dealer’s sole remedy shall be such repair or replacement as is expressly
provided above; and under no circumstances shall American DJ® be liable for any loss or
damage, direct or consequential, arising out of the use of, or inability to use, this product.
G. This warranty is the only written warranty applicable to American DJ® Products and
supersedes all prior warranties and written descriptions of warranty terms and conditions
heretofore published.
H. Lamps are not covered under this warranty.
Snow Flurry™ Warranty Snow Flurry™ Specifications
MODEL - Snow Flurry™
VOLTAGE*: 125v~50/60Hz or 230v~50Hz
WEIGHT: 11 Lbs. / 5.0 Kgs
DIMENSIONS: 15.25"(L) x 7(W) x 6.25”(H)
FUSE: 10A or 5A
TANK CAPACITY: 2.2 Liter Removable
FLUID TYPE: American DJ Snow Juice™
WARM UP TIME: No Warm Up Time
DUTY CYCLE: Not to exceed 6 hours turned on.
*Voltage is preset at the factory and may not be changed
Other American DJ Dj Equipment manuals

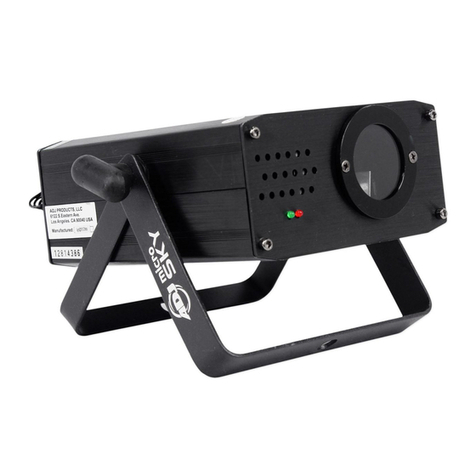
American DJ Micro Star User manual

American DJ

American DJ Micro Star User manual

American DJ Mine II User manual

American DJ

American DJ Mine II User manual

American DJ Color Burst LED User manual

American DJ

American DJ Color Burst LED User manual

American DJ Deco 250 User manual

American DJ

American DJ Deco 250 User manual

American DJ Flash Tube Buffer User manual

American DJ

American DJ Flash Tube Buffer User manual

American DJ 1.4 User manual

American DJ

American DJ 1.4 User manual

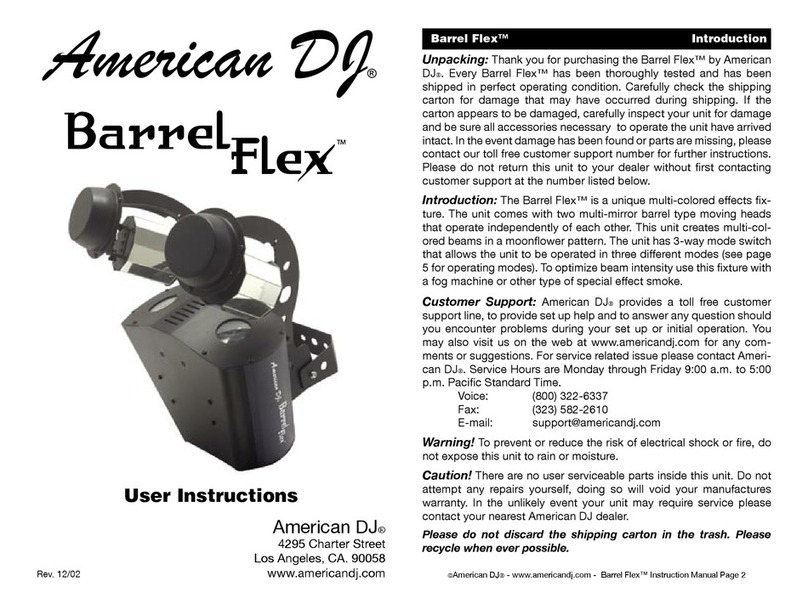
American DJ Barrel Flex User manual

American DJ

American DJ Barrel Flex User manual

American DJ Razz Mataz User manual

American DJ

American DJ Razz Mataz User manual

American DJ Fan-1000 User manual

American DJ

American DJ Fan-1000 User manual

American DJ M-103HD User manual

American DJ

American DJ M-103HD User manual

American DJ MINI-Gressor II User manual

American DJ

American DJ MINI-Gressor II User manual

American DJ Micro Image RGB User manual

American DJ

American DJ Micro Image RGB User manual

American DJ Ruby Royal User manual

American DJ

American DJ Ruby Royal User manual

American DJ Rover 250 User manual

American DJ

American DJ Rover 250 User manual

American DJ Fire Bowl User manual

American DJ

American DJ Fire Bowl User manual

American DJ Double Feature User manual

American DJ

American DJ Double Feature User manual

American DJ Progressor 2 User manual

American DJ

American DJ Progressor 2 User manual

American DJ Roto-Balls VS MKII User manual

American DJ

American DJ Roto-Balls VS MKII User manual

American DJ Super Jewel User manual

American DJ

American DJ Super Jewel User manual

American DJ UV Panel HP User manual

American DJ

American DJ UV Panel HP User manual

American DJ Utopia 250S User manual

American DJ

American DJ Utopia 250S User manual

American DJ Penta Beam User manual

American DJ

American DJ Penta Beam User manual

American DJ H2O 250 EX User manual

American DJ

American DJ H2O 250 EX User manual

American DJ DJ Scan/RG User manual

American DJ

American DJ DJ Scan/RG User manual

Popular Dj Equipment manuals by other brands

Omnitronic PM-444Pi user manual

Omnitronic

Omnitronic PM-444Pi user manual

Ibiza COMBI-LAS user manual

Ibiza

Ibiza COMBI-LAS user manual

Reloop RP2000M instruction manual

Reloop

Reloop RP2000M instruction manual

Show Tec SC-2412 manual

Show Tec

Show Tec SC-2412 manual

Velleman HQ POWER VDL660LON manual

Velleman

Velleman HQ POWER VDL660LON manual

Eagletone DISCO BOWL user manual

Eagletone

Eagletone DISCO BOWL user manual

ALLEN & HEATH ML4000 Quick Start Sheet

ALLEN & HEATH

ALLEN & HEATH ML4000 Quick Start Sheet

Ignition Pico 2 Wireless manual

Ignition

Ignition Pico 2 Wireless manual

EuroLite LED KLS-40 COMPACT LIGHT SET user manual

EuroLite

EuroLite LED KLS-40 COMPACT LIGHT SET user manual

ProLights ECLIPSE FRESNEL TU user manual

ProLights

ProLights ECLIPSE FRESNEL TU user manual

Numark DIGITAL DIAMOND THED2 Brochure & specs

Numark

Numark DIGITAL DIAMOND THED2 Brochure & specs

PIONEER DJ Serato DDJ-1000SRT operating instructions

PIONEER DJ

PIONEER DJ Serato DDJ-1000SRT operating instructions

Native Instruments Traktor 2 user manual

Native Instruments

Native Instruments Traktor 2 user manual

Botex DC-136 User instructions

Botex

Botex DC-136 User instructions

Ibiza FXBAR140 manual

Ibiza

Ibiza FXBAR140 manual

Show Tec Compact Par 60 COB RGBW V1 manual

Show Tec

Show Tec Compact Par 60 COB RGBW V1 manual

Velleman HQ Power VDL100MLD user manual

Velleman

Velleman HQ Power VDL100MLD user manual

Chauvet Ovation FD-165WW Quick reference guide

Chauvet

Chauvet Ovation FD-165WW Quick reference guide

manuals.online logo
manuals.online logoBrands
  • About & Mission
  • Contact us
  • Privacy Policy
  • Terms and Conditions

Copyright 2025 Manuals.Online. All Rights Reserved.